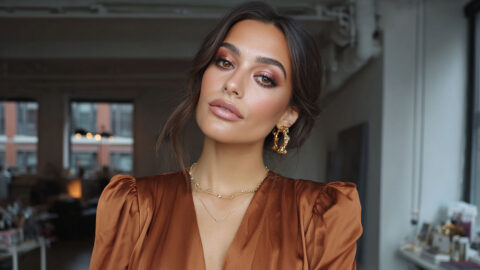
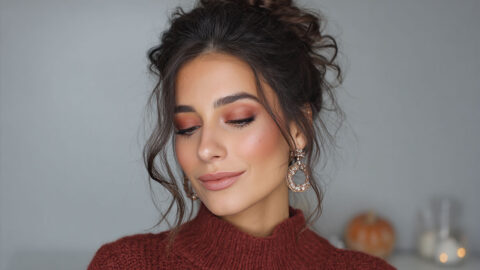
Most natural makeup looks rely on sheer, skin-matched products that bring out the skin, brows, eyes and lips instead of covering them. Coverage runs from sheer to light, the finish lands somewhere between dewy and soft matte, and shades stay within a tone or two of your own coloring.
“Natural” here describes how the face looks, not what’s in the jar. Worth knowing: the FDA says some “all natural” cosmetics are likely to have an unusually short shelf life, since certain plant-derived substances support microbial growth.
You judge the result by what’s still visible. Texture and freckles stay, along with whatever flush you naturally have, and the work shifts from hiding to placing.
What Makes a Makeup Look Natural?

Start with coverage. It stays sheer to light, so freckles, pores and real skin texture are still visible when you’re done. The finish is dewy or a soft matte, never flat or chalky. Color-wise, peach, pink, berry and brown work best when they sit within a tone or two of your own skin and lips.
Natural doesn’t mean fewer products. Max Factor’s Caroline Barnes told Woman and Home that the look still depends on tidy brows and pigmented lashes, with a little extra lip color on top.
You’ll also hear it called no-makeup makeup, which is the same look named for its goal that nobody notices you’re wearing any. Clean girl makeup is one styled version, with dewy skin, brushed-up brows and a glossy lip.
Soft glam sits a step above, with contour, shadow and lash definition that people do register as makeup. If that’s the finish you’re after, these soft glam looks show how the extra definition is built.
My own test is arm’s length. If skin still looks like skin from there, it’s working.
Skin Prep and SPF Before a Sheer Base
Sheer products show every dry patch, so prep decides the result. Cleanse and moisturize first, then put on a broad-spectrum SPF 30 sunscreen and give it time to settle before any tint touches your face.
Moisturizer, then sunscreen, then a short wait
Hydrated skin holds a thin layer of tint evenly. Sunscreen goes on as the last skincare step, and Moffitt Cancer Center dermatologists advise leaving 10 to 15 minutes before makeup so the sunscreen is not disturbed.
Dry or uneven skin gains the most from a proper routine, which this guide to prepping skin before makeup walks through.
What SPF 30 means and how much to use
The American Academy of Dermatology recommends a sunscreen labeled SPF 30 or higher, broad spectrum and water resistant. For the face, that works out to a nickel-sized dollop, which is the Skin Cancer Foundation’s translation of the 2 mg per square centimeter used in SPF testing (updated June 2026).
The catch is that most people apply only 25 to 50 percent of the recommended amount (Skin Cancer Foundation, 2026). A nickel looks like far too much the first time you measure it, and that’s usually where the under-applying starts.
Powders suit layering over makeup for touch-ups, and sticks suit on-the-go reapplication, according to the Skin Cancer Foundation. For the order of steps, see this walkthrough on topping up sunscreen over a finished face.
Does the SPF in a skin tint count?
Think of it as a bonus layer rather than the main one. Dermatologist Michelle Henry points out that sunscreen is tested in a much thicker layer than anyone wears makeup (L’Oréal Paris).
Layers also don’t stack. An SPF 15 foundation over an SPF 30 sunscreen still gives SPF 30, not 45, per Moffitt Cancer Center.
Treat a tint such as Ilia’s Super Serum Skin Tint SPF 40 (mineral SPF, light coverage, radiant finish, per its Sephora listing) as the second layer over a dedicated sunscreen.
When primer helps
Dry or normal skin can skip it, since moisturizer already does that job. A lightweight primer earns its place on oily skin and visible pores.
Skin Tint, Tinted Moisturizer or Concealer Only: Which Base Fits?
For most people chasing a natural look, a skin tint is the right call. Concealer alone is enough when skin tone is already even, and a light foundation is the fallback when redness or breakouts need more cover.
| Option | Coverage and finish | Best for | Drawback |
|---|---|---|---|
| Skin tint | Sheer, buildable, dewy to radiant | Even tone with mild redness | Dewy finish shows shine on oily skin |
| Tinted moisturizer | Light, hydrating, satin | Dry or normal skin | Little cover for dark spots |
| Light foundation | Light to medium, satin to soft matte | Breakouts, uneven tone | Easy to over-apply into a mask |
| Concealer only | Spot cover, skin left bare | Even skin with dark circles | Overall tone stays uneven |
Skin tint
Glossier Perfecting Skin Tint is very sheer. According to the brand’s directions, one layer gives sheer coverage and two give light-medium. Ilia Super Serum Skin Tint SPF 40 lands at light coverage with a radiant finish, applied with fingers for light coverage or a brush for medium.
Skin tints sit between skincare and foundation. They even out tone without an opaque layer, which is the whole point of the look.
Tinted moisturizer and tinted sunscreen
Makeup.com’s dermatologist Q&A names Rare Beauty’s Positive Light Tinted Moisturizer (SPF 20) as a lightweight pick. It also lists CeraVe’s Hydrating Mineral Sunscreen SPF 30 Face Sheer Tint as protection and light coverage in one step.
Check the label if hyperpigmentation or melasma is a concern. A 2026 Journal of Drugs in Dermatology literature review and product analysis of 37 tinted sunscreens found several brands claiming visible-light protection but only one publicly describing how it was tested. The authors point to iron oxides as the key visible-light blocker and call for brands to disclose their concentrations.
Light foundation
Use it as a spot product, not an all-over layer. Tap it on the cheeks and around the nose and leave the rest to the tint.
A simple decision rule
Shade matters more than formula, so read this guide on choosing a concealer before you buy one.
If your tone is even and the only issue is dark circles, concealer alone does it. Dullness or mild redness calls for a skin tint, and skin that drinks up product does better with a tinted moisturizer. Breakouts or scarring get a skin tint plus targeted concealer, not a heavier foundation.
The cheaper, simpler option usually wins. Move up to foundation only after spot cover has failed.
How to Apply a Sheer Base and Concealer

Dot the base on the center of the face, blend outward, then add concealer only where color needs correcting. Fingers keep coverage lightest, and a damp sponge builds it evenly.
Fingers, sponge or brush

Fingers warm the product and give the sheerest result. A damp sponge works by pressing and bouncing, never swiping, while a brush buffs the same tint up to medium coverage.
Beautyblender’s own guide says dragging the sponge across skin only moves product around and leaves streaks. A damp sponge also soaks up less product, which keeps the layer thin.
The bounce motion is broken down in this guide to using a sponge to apply makeup.
Concealer where it counts
Conceal after the base, and only on spots.
The inner corners of the eyes and the sides of the nostrils are the usual places, along with any individual blemish. Glossier’s directions pair its skin tint with Stretch Concealer for dark spots, dark circles, redness and blemishes, which is the right scale for a natural look.
Keep the layer thin under the eyes, since a thick layer creases within hours.
Setting powder, only where shine shows
Press a little translucent powder into the T-zone and leave dry cheeks alone. The steps for applying setting powder cover the pressing motion in detail.
Ilia suggests its Soft Focus Finishing Powder when a dewy tint needs a less glossy finish. Powder over the whole face flattens it again.
I’d say the most common slip is dragging the sponge. Powdering everywhere is close behind, and so is putting on a second full layer when one dab of concealer would do.
How to Place Cream Blush and Highlighter Naturally
Dot cream blush on the apples of the cheeks, blend up toward the temples, and tap highlighter only on the tops of the cheekbones. The goal is a flush that looks like it came from the skin.
Cream and liquid formulas on a skin-like finish
L’Oréal Paris notes that natural looks work best with cream or liquid formulas rather than powder or overly matte ones. Cream and liquid formulas melt into the base instead of sitting on top of it.
Smile to find the apples of the cheeks, dot the color there, then blend up and out toward the temples. Build in thin layers and stop at a flush.
Pigment strength decides how much you use. Rare Beauty’s Soft Pinch Liquid Blush is ultra-pigmented, and the brand’s directions say to pat it in with fingertips or a brush, so one tiny dot per cheek is plenty.
For a fingertip method, the technique for applying cream blush shows how to press color in without lifting the base.
Highlighter
Subtle beats shimmery. A cream or stick formula tapped on the tops of the cheekbones, the way Covergirl demonstrates with its Clean Fresh Cooling Glowstick, reads as healthy skin.
The tapping method for cream highlighter is worth a look if you usually reach for powder.
Skip highlighter on textured or very oily skin, where it emphasizes pores and shine.
Bronzer is optional
Use it only when the face looks flat after blush. One light sweep across the cheekbones and forehead is the limit.
Brows, Lashes and Eyeshadow for a Natural Eye

A natural eye comes down to set brows and curled lashes with one or two coats of mascara, plus a single neutral shadow close to the lid color. Eyeliner is optional, and so is mascara when the lashes are already dark.
Brows
Brows do the most work in this look. Set the hairs first, then fill only the gaps.
Gel goes on first, since it tints the hairs and holds them in their own direction. A pencil comes second, used in short, hair-like flicks and only in sparse spots. Keep the edges soft, never a drawn outline.
A tinted brow gel with microfibers, such as Benefit’s Gimme Brow+, is built for this. Benefit’s directions call for short pressing strokes, then a comb-through, starting at the inner edge and moving outward.
Daily Vanity Singapore makes the same point from the other side. Harsh, defined edges are what give a filled brow away, so follow the natural shape.
Lashes
Curl first, then mascara.
Curling over mascara glues lashes together and leaves a sharp edge, according to makeup artists quoted by SheerLuxe. Shu Uemura’s curler directions also put the curl before the mascara.
Then sweep the wand from root to tip and do not let it dry between coats, which is how Maybelline words the directions for Great Lash. One coat reads as natural, and two is the ceiling.
On shelf life, the FDA notes that some industry experts recommend replacing mascara 3 months after purchase. A dry tube gets thrown out, not thinned with water or saliva.
Tube lifespan gets more detail in this guide to how long a mascara lasts.
Eyeshadow and liner
One shade is enough. Pick a matte or satin neutral within a tone of your lid color and sweep it across the lid with a fingertip or a fluffy brush.
Skip winged liner. If you want definition, tightline with brown or soft gray, because black reads as makeup from across the room.
Choosing a Natural Lip Color
Choose a sheer formula a touch deeper than your own lip color, apply it with a fingertip, and blot. Tinted balm, lip stain and sheer lipstick all pass the test.
Lip formulas that read as natural
Tinted lip balm is the easiest way in, giving hydration with a wash of color. Stains wear longer, sinking into the lips instead of sitting on top of them. Sheer lipstick has balm-like color and a bit of shine, and it builds in layers if you want more.
Milk Makeup’s Cooling Water Jelly Tint works as both a lip and a cheek stain. Its directions say it dries fast, so work one cheek at a time, and an oil-based cleanser is what removes it fully.
A sheer berry that adjusts to the wearer
Clinique’s Almost Lipstick in Black Honey looks nearly black in the tube and goes on as a sheer berry. Clinique says a blend of blue, red and yellow pigments in a creamy base melts into the lips and plays up their natural color.
That is what sheer lipstick does best. The color adapts to your lips instead of covering them.
Nude shades and the undertone catch
Charlotte Tilbury’s Pillow Talk comes in 4 versions (Fair, Original, Medium and Intense), which tells you a single nude cannot suit every skin tone.
The brand’s own guidance is that pink-toned nudes tend to flatter fair skin, while yellow, orange or peach nudes often do not. The wider logic of picking a nude lipstick comes down to matching its undertone to yours.
Blot with a tissue after applying. The edges soften and the color looks like it came from the lips.
Natural Makeup Routine in 5 and 10 Minutes

The order doesn’t change. Sunscreen, base, concealer, cheeks, brows, eyeshadow, lashes, lips. A 5 minute version keeps the base, cheeks, brows, mascara and lips, and a 10 minute version adds concealer, highlighter and a neutral shadow.
Sunscreen and moisturizer happen before the clock starts, so the timings below begin at the base. They are a working budget, not a standard.
The 10 minute routine
- Skin tint, blended outward: 2 minutes
- Concealer on spots only: 1 minute
- Cream blush and a dab of highlighter: 2 minutes
- Brow gel, then fill gaps: 1 minute
- One neutral shadow: 1 minute
- Curl lashes and add mascara: 2 minutes
- Lip color, blotted: 1 minute
Step back from the mirror at the end and check the result in natural light, which is what makeup artist Christina Flach recommends.
What the 5 minute version drops
Concealer, highlighter and shadow go. Tint, blush, brows, mascara and lips stay at 1 minute each.
The sequence follows one rule. Creams and liquids go on before powders, and wet products before dry ones. This guide to layering makeup explains why the order matters.
Treat the 5 minute set as the weekday default and the 10 minute set as the upgrade. More variations on the same idea sit in this guide to makeup for everyday wear.
Adjusting Natural Makeup for Skin Type, Undertone, Eye Shape and Occasion

Match the base finish to skin type, the blush and lip shades to undertone, and the eye placement to eye shape. The table gives a starting point for each.
| Face factor | Base finish | Cheeks and lips | Watch for |
|---|---|---|---|
| Oily skin | Satin to soft matte tint | Cream blush, light powder blush over it | Shimmer on the cheekbones |
| Dry skin | Tinted moisturizer or dewy tint | Cream or liquid blush, balm-based lips | Powder clinging to dry patches |
| Cool undertone | Tint with a pink or neutral cast | Rose, pink, berry | Orange-leaning corals |
| Warm undertone | Tint with a golden or peach cast | Peach, coral, warm brown | Very cool pinks that turn ashy |
| Mature skin | Thin layer of hydrating tint | Cream blush only | Powder settling into fine lines |
Skin type

Oily skin does best with the satin or soft matte tint, plus blotting papers, which lift shine without disturbing the color underneath. Dry skin needs hydration first and cream products throughout, because powder is where dry skin shows its patches.
Undertone and skin tone

Sources disagree on how to find an undertone. Maybelline UK lists the vein test beside the jewelry, white cloth and cream tests, while Sterling Style Academy argues that vein color shifts with skin thickness and transparency and is only a starting point.
Run two tests, then swipe a base shade along the jaw and check it against the neck. The guide to matching makeup to skin tone goes deeper on shade selection.
On deep skin, choose a base that matches the neck, since a too-light tint turns ashy, and lean on plum, berry and warm brown. Mature skin wants every layer thin and no loose powder on lines. A neutral undertone is the easy case, because most rose and peach shades work.
Eye shape and age
Hooded eyes bury shadow placed in the true crease the moment the eye opens. Makeup artist Patrick Ta advises placing shadow with the eyes open so you can see where it will sit. Blending a matte shade just above the fold keeps the color visible once the eye opens.
Makeup artist Vincent Oquendo, speaking to Marie Claire, adds a waterproof or smudge-proof mascara to the list, since lashes press against the hood and transfer. A deeper walkthrough is in this guide to makeup for hooded eyes.
Brown eyes take warm neutrals well. Taupe and bronze are safe, and soft copper works if you want more warmth.
Work and wedding

For an office, stay with satin skin and a neutral lip, because shine and bright color are what draw attention under overhead light.
For a wedding, run a full trial with the exact products and photograph it. The look has to survive hours of flash, and a sheer base has no backup layer.
Why Natural Makeup Goes Wrong and When the Look Stops Working

Sheer coverage runs out of staying power or definition before the day does. It shows most in flash photography, at long events in heat or humidity, on oily skin by midday, and under stage or video lighting.
| Situation | What fails | Adjustment |
|---|---|---|
| Flash photography | White cast on the face or under the eyes | Test the products under a phone flash first |
| Long event, heat or humidity | Tint and cream blush slide | Blot, then add a second thin layer of cheek color |
| Oily skin by midday | Shine breaks up the finish | Blot first, powder second |
| Video or stage lighting | Sheer color washes out | Deepen blush a shade and define brows and lips |
Flash photography and what the sources say
Sources conflict on the cause of flashback. L’Oréal Paris names zinc oxide and titanium dioxide in SPF makeup as the source of the white cast under the eyes and advises avoiding them.
Lab Muffin Beauty Science photographed a range of SPF products with flash and found most did not flash back, including It Cosmetics’ CC cream at SPF 50 with 9% titanium dioxide and 6.3% zinc oxide. Flash alone bounces off any reflective surface, oily patches included.
Keep the sunscreen anyway. Test your exact products under a phone flash, and if a cast shows, blend it out with a damp sponge, as L’Oréal Paris suggests, or swap the product responsible.
If the photos matter, this guide to makeup for a photoshoot covers the rest.
Shine and wear time
Sheer products carry less pigment and film, so they fade faster than full coverage. That is the real trade-off of this style.
Carry blotting papers and reapply only lip and cheek color. For a longer list of tactics, see this guide to keeping makeup on all day.
Pilling and wrong shade
Pilling is products rolling over each other, so pat instead of rubbing. A wrong shade shows up as a visible line at the jaw, and blending down the neck fixes it. A heavy hand, meaning a second full layer of tint, is better handled with concealer on the spot instead.
Natural Makeup Looks FAQ
Does natural makeup mean the products need natural ingredients?
No. “Natural” describes the finish, not the ingredient list, so read labels separately.
The FDA also notes that expiration dates are rules of thumb, and products stored in heat or sunlight can deteriorate well before the printed date.
How much does a natural makeup kit cost?
Less than most people expect. Retailer listings in 2026 show Maybelline’s Great Lash mascara at about $6.82 at Walmart (marked down from $8.49), against $25 for Rare Beauty’s Soft Pinch Liquid Blush and $28 for Benefit’s Gimme Brow+.
Put the bigger budget into the base and the blush, where the finish shows most.
Can natural makeup cover acne and dark circles?
Yes, to a degree. Dab a concealer that matches the surrounding skin onto the spot, pat the edges out, and leave the rest of the face sheer.
Heavy cover on one blemish usually draws more attention than the blemish itself.
Is a natural look right for school?
Yes. Concealer on spots, a touch of cream blush, brow gel and a tinted lip balm keep the look light.
Dress codes differ between schools, so check the handbook before the first day.
Which natural look works for prom?
One with a little more definition than daytime wear. Curl the lashes, add a single neutral shadow, and swap tinted balm for a lip stain that holds through hours of photos.
Do a trial run a few days ahead, not the morning of.
Adapting Natural Makeup Looks to Skin, Season and Light
Natural makeup looks stay natural only while the base matches the skin underneath, and skin changes with sun exposure and humidity, and with age too. When the weather turns, recheck the base shade first, then the finish, then cheek and lip color.
The base comes first because it covers the most skin and exposes a mismatch before anything else does.
Moving from a dewy tint to a satin one in humid months buys staying power and costs some glow. That trade is worth accepting, since a shiny T-zone reads as makeup faster than a calm finish does.
Warm-weather palettes get their own treatment in these lighter summer makeup looks.
Verified October 2026. A new skincare prescription or a change in sunscreen resets both base shade and finish, so recheck them after either.

She started writing on the site after fielding the same questions from clients and friends often enough to just write the answers down: which red won't turn orange on a warm undertone, how to keep lipstick from feathering into fine lines, why a "12-hour" formula rarely survives dinner.
Every review on the site follows the same rule she uses with paying clients: wear it first, then decide if it's worth recommending.
- How to Make Eyeliner Last Longer Without Smudging - August 31, 2026
- How to Make Eyeshadow Last Longer All Day - August 29, 2026
- How to Find Your Undertone in 5 Easy Steps - August 27, 2026