

Summarize this article with:
A brush can do a lot of things. But for a streak-free, skin-like finish, nothing beats knowing how to apply makeup with a sponge correctly.
The damp sponge technique changes how foundation sits on skin. It presses product in rather than dragging it across, which means better coverage, less waste, and a more natural result.
This guide covers everything from sponge types and prep to application by skin type, common mistakes, and how to keep your tools clean and effective.
What Is Makeup Sponge Application

Makeup sponge application is a pressing and stippling technique where product is bounced into the skin rather than dragged across it. The result is a blended, skin-like finish that brushes and fingers rarely replicate.
The key difference comes down to contact. A brush pulls product horizontally across the surface. A damp sponge compresses it vertically into skin, distributing pigment more evenly and leaving fewer visible lines.
Sponge vs. brush vs. fingers – each delivers a distinct finish:
- Sponge: diffused, natural-looking coverage with minimal streaking
- Brush: more precise, can leave brush marks if technique is off
- Fingers: good for sheering out product, but adds warmth that can affect formula
The damp sponge technique specifically changes how foundation sits on skin. Water-saturated foam pushes product onto the surface instead of absorbing it into the sponge itself, which cuts product waste and gives a more even finish.
According to Global Growth Insights, over 68% of consumers now prefer beauty sponges for blending because of the finish quality they deliver.
Fenty Beauty leaned into this preference hard when they developed their own applicator alongside the Pro Filt’r Foundation, specifically designed around stippling motion for buildable coverage.
Types of Makeup Sponges
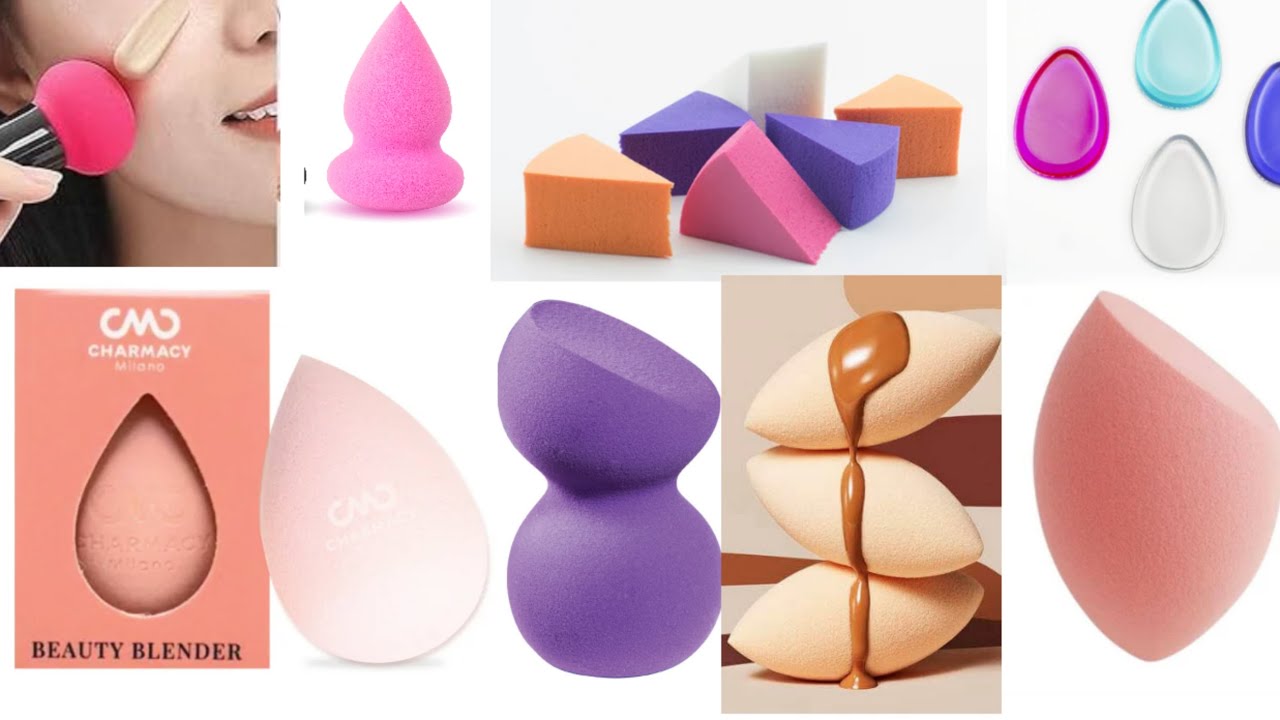
Not all sponges work the same way. Shape, density, and porosity change everything about how product transfers to skin.
| Sponge Type | Best For | Key Trait |
|---|---|---|
| Teardrop / egg (e.g., Beautyblender) | Foundation, concealer, all-over blending | Pointed tip for tight areas; round base for large zones |
| Flat-edge sponge | Full-coverage application, precision work | More control over product placement |
| Wedge sponge | Powder, setting, travel use | Disposable, low absorption |
| Dual-sided sponge | Liquid on one side, powder on the other | Multi-step application in one tool |
Density matters more than most people expect. A denser sponge uses less product per application, which is good for full-coverage looks. A softer, more porous sponge blends more aggressively but eats through product faster.
CNN Underscored testing found the Beautyblender to be the most versatile option, with a flexible form that allows for multi-product use across foundation, concealer, and cream blush in a single session.
For latex sensitivities, both the NYX Teardrop and EcoTools sponges are latex-free options that hold up well against prestige competitors on finish quality.
How to Prep a Makeup Sponge Before Use

Skipping prep is the most common reason sponge application looks patchy. A dry sponge absorbs product directly into its foam, which wastes foundation and leaves uneven coverage on skin.
The wetting process:
- Run the sponge under warm water until it starts to expand
- Keep squeezing and releasing under the tap until it roughly doubles in size
- Squeeze out excess water firmly
- Pat dry with a clean towel until it’s damp, not dripping
A fully prepped sponge should feel cool and slightly heavy. If it’s still dripping, it’ll dilute your product. If it feels almost dry, it’ll absorb too much.
How much water you leave in the sponge also affects finish. More water = dewier, sheerer result. Less water gives a slightly more matte, buildable effect. Worth adjusting based on your foundation formula.
Real Techniques recommends wetting their Miracle Complexion Sponge before every single use, not just occasionally. The same principle applies across most foam-based applicators.
Step-by-Step: Applying Foundation with a Sponge

The bouncing motion is everything here. Swiping moves product around. Bouncing presses it in.
Straits Research data shows the makeup sponge market hit $1.16 billion in 2024, driven largely by demand for this kind of precise, diffused foundation application.
Applying Liquid Foundation
Less product than you think. Start with a pea-sized amount, dot it across the center of your face, then blend outward with a bouncing motion.
- Dot foundation on forehead, both cheeks, nose, and chin before blending
- Use the round base of the sponge for cheeks and forehead
- Switch to the pointed tip for under-eye area, sides of the nose, and corners of the mouth
- Blend into the hairline and jawline last so there’s no visible line
Build coverage in thin layers. One dot at a time, re-bounce over areas that need more. Going heavy in one pass usually looks cakey by midday.
For NARS Natural Radiant Longwear or MAC Studio Fix Fluid, this layered sponge approach gives noticeably cleaner results than a brush on most skin types.
Applying Cream Foundation
Cream formulas need a slightly wetter sponge than liquids. The extra moisture keeps the product from dragging and gives a smoother, more even spread.
Warm the product first by dotting it onto the back of your hand before picking it up with the sponge. This softens the texture and makes it easier to blend without pilling.
- Pick up product with the flat side of the sponge, not the tip
- Press and roll rather than just bouncing straight up and down
- Work quickly since cream formulas set faster than liquid ones
Bobbi Brown Skin Longwear Weightless Foundation in cream form responds especially well to this method, giving a natural finish without the heaviness that sometimes comes from brush application.
Using a Sponge for Concealer and Spot Coverage

Concealer technique with a sponge is different from foundation. The motion needs to be lighter and more controlled.
Research from Aston University found that 70-90% of tested beauty products were contaminated with bacteria, with blenders being the worst offenders when not cleaned regularly. Worth keeping in mind anytime you’re pressing product under your eyes with a damp sponge that hasn’t been washed.
Under-eye application:
- Use the pointed tip of a teardrop sponge only
- Tap gently instead of pressing hard, the skin there is thin
- Blend edges by feathering outward, not inward
Spot coverage: pick up a tiny amount of concealer on the tip, press directly onto the spot, and blend only the edges. Don’t blend the center or you’ll move the product off where you need it.
For layering, NARS Radiant Creamy Concealer or Tarte Shape Tape both sit well under or over foundation when applied with a damp sponge. The key is patting rather than wiping, which keeps layers intact instead of disturbing what’s already been applied.
When using concealer as a base before foundation, let it sit for 30 seconds before going in with the sponge so it has time to grip the skin.
Setting Powder Application with a Sponge
This is one area where a dry sponge is actually correct. Pressing powder with a dry wedge or flat sponge locks in foundation and extends wear far better than dusting it on with a brush.
Baking technique (popularized by drag performers, now mainstream):
- Apply a heavy layer of translucent powder under the eyes and on the T-zone
- Leave it to sit for 5-10 minutes while you do the rest of your makeup
- Dust away the excess with a fluffy brush
The result is a crease-resistant, long-wear finish. Laura Mercier Translucent Setting Powder is the go-to for this, though RCMA No-Color Powder works just as well and doesn’t add any white cast.
For regular setting (no baking), press the sponge lightly over powder-applied areas. Don’t swipe. The pressing motion packs powder into foundation rather than sitting on top of it.
A damp sponge with powder creates a different result entirely. It gives a slightly more airbrushed, skin-tight finish because the moisture activates the powder differently. Worth trying if you find dry-pressed powder looks too matte.
When applying setting powder over cream products, wait at least 60 seconds after blending your base before pressing powder, or you risk disrupting the finish you just built.
Sponge Application by Skin Type

The damp sponge technique stays the same across skin types. What changes is how wet you keep the sponge, what products you pair it with, and how much pressure you apply in different zones.
| Skin Type | Sponge Dampness | Best Foundation Match | Key Tip |
|---|---|---|---|
| Oily | Lightly damp | Matte or oil-free liquid | Less bounce pressure on T-zone |
| Dry | Well saturated | Dewy or hydrating liquid | Extra passes on cheeks and around nose |
| Combination | Medium damp | Soft matte or satin finish | Adjust pressure by zone |
Oily Skin
Less water, lighter touch. Oily skin already has surface moisture working against foundation grip. A wetter sponge adds even more, which breaks down coverage faster.
Celebrity makeup artist Andrew Sotomayor has noted that oily skin pushes oil through pores and lifts makeup off the surface, so pairing a slightly damp sponge with a long-wearing, oil-free formula is the most practical approach to combat this.
- Use a mattifying primer before the sponge application
- Bounce with less force on the forehead, nose, and chin
- Skip heavy powder on oily zones and use blotting paper for midday touch-ups instead
Fenty Beauty Pro Filt’r Soft Matte Foundation applied with a lightly damp sponge is a combination that holds well for oily skin throughout the day.
Dry Skin
L’Oreal Paris specialists note that a damp makeup sponge is specifically recommended for dry skin, since the moisture helps products apply smoothly and reduces the chance of foundation clinging to dry patches.
Wetter sponge, slower build. Dry skin needs that extra moisture in the sponge to stop foundation from grabbing onto flaky areas.
- Fully saturate the sponge, then squeeze out less water than usual
- Allow moisturizer to absorb for 2-3 minutes before starting
- Avoid powder over dry areas – only set where you need it
Combination Skin
Adjust as you go. Most people with combination skin use a medium-damp sponge and work zone by zone rather than applying one even layer across the whole face.
Key adjustment: more bounce pressure on drier cheeks, lighter in the T-zone. This variation alone makes a significant difference in how even the finish looks by end of day.
When applying makeup for oily skin in combination zones, pressing (rather than dragging) with the sponge keeps product in place without disturbing already-set areas.
Common Sponge Application Mistakes

Most foundation problems trace back to a small number of repeatable errors. Good news: all of them are fixable.
A 2025 study published in the International Journal of Microbiology found that 44.3% of participants rarely cleaned their makeup tools, and 27.8% reported skin problems they linked to contaminated applicators. The sponge hygiene issue is more common than most people admit.
Technique Errors
Swiping instead of bouncing is the most common one. Beautyblender’s own testing shows that dragging the sponge moves product unevenly across the surface, leaving streaks and patchy areas that bouncing avoids entirely.
Other technique problems that show up regularly:
- Using a dry sponge (absorbs product, wastes foundation, and causes uneven coverage)
- Applying too much product at once instead of building in thin layers
- Skipping the jawline and hairline blend, which leaves a visible foundation line
- Rushing through concealer under the eyes by pressing too hard on delicate skin
Product and Prep Errors
Cakey foundation is rarely about the foundation itself. Revlon’s makeup advisory team points out that the main causes are skipping skin prep, over-layering powder, and using products that don’t work together on the same skin type.
Wait 2-3 minutes after moisturizer and primer before touching the sponge to your skin. Products applied too quickly over each other pill up and create texture that no sponge can fix once it’s set.
Mixing water-based and silicone-based products in the same routine also causes separation, which a sponge will drag rather than blend. When fixing patchy makeup, pressing a damp sponge gently over affected areas, rather than adding more product, is usually the faster fix.
Sponge Condition Errors
An old, product-saturated sponge stops blending well.
GoodRx health guidelines recommend replacing beauty blenders and similar sponges every 1-3 months, since they hold onto bacteria and debris more than any other type of makeup applicator.
- Stiff texture when squeezed means old product buildup inside
- Permanent discoloration that won’t clean out
- Tearing or pulling apart at edges
Never store a damp sponge in a closed bag or case. Darkness plus moisture is exactly the environment mold grows in. Dermatologist Dr. Kellie Reed has noted that a damp storage environment provides the right trifecta for mold development inside beauty sponges.
How to Clean and Store a Makeup Sponge

Cleaning is not optional. A 2019 Aston University study found that only 6.4% of beauty products had ever been cleaned by the people using them, and beauty blenders showed the highest fungal contamination rate at 56.96% among all tested applicators. Those numbers are hard to ignore.
Cleaning Methods
Deep clean (weekly):
- Wet sponge under lukewarm running water until it expands
- Apply Beautyblender Solid Blendercleanser, baby shampoo, or dish soap directly to the sponge
- Work into a lather by squeezing and pressing against a clean surface
- Rinse under running water, squeezing repeatedly until water runs completely clear
- Press into a clean towel to remove excess water, then air dry in a ventilated space
Dermatologist Dr. Geeta Yadav of Skin Science Dermatology recommends making brush and sponge cleaning a weekly routine, though ideally after every use, to keep bacteria from building up between sessions.
Quick Clean vs. Deep Clean
Not every use needs a full wash.
Quick clean: spritz with a sponge cleaning spray, press into a dry towel, and let air dry briefly. Good for switching between shades or products during a session.
Deep clean: the full soap-and-rinse method above. Non-negotiable at least once a week. The Beautyblender Liquid Blendercleanser is specifically pH-balanced to break down makeup pigment without degrading the foam over time.
When cleaning makeup sponges, avoid using a hairdryer to speed up drying. Heat damages the internal foam structure, which reduces bounce and shortens the sponge’s usable life.
Storage and Replacement
BeautyBlender and most dermatologists align on replacement timing: every 3 months for daily users. GoodRx medical guidance goes as short as 1-3 months for sponges specifically, since their porous structure holds bacteria more readily than brushes.
Signs it’s time to replace, not clean:
- Texture feels hard or resistant when squeezed (product buildup inside)
- Staining that won’t lift after a proper deep clean
- Visible tearing or changes in shape
- Unexplained breakouts that started around the time you began using the sponge
Store in an open, well-ventilated container, never sealed. A mesh bag or the original vented case works well. Closed storage while damp is the fastest route to mold inside the sponge, which makes the whole applicator unusable regardless of when you last bought it.
FAQ on How To Apply Makeup With A Sponge
Should a makeup sponge be wet or dry?
Always damp. A dry sponge absorbs product straight into the foam instead of depositing it on your skin.
Wet the sponge, squeeze out excess water until it’s damp but not dripping, then use it. This is the foundation of the entire damp sponge technique.
What is the correct motion when using a makeup sponge?
Bounce, never swipe. Press the sponge straight down and lift up in a stippling motion.
Dragging moves product unevenly and leaves streaks. Bouncing presses foundation into skin for a natural, skin-like finish.
How much foundation should I put on the sponge?
Less than you think. Start with a pea-sized amount, dot it across the face, then blend.
Building in thin layers avoids the cakey finish that comes from applying too much product in one pass.
Can I use a makeup sponge for powder products?
Yes. Use a dry sponge for pressing setting powder into skin. This locks in foundation and extends wear better than dusting with a brush.
Wedge sponges work well here. Teardrop sponges do too.
How do I apply concealer with a sponge?
Use the pointed tip of a teardrop sponge. Tap gently under the eyes rather than pressing hard.
Blend only the edges of the concealer outward. Moving product away from the center keeps spot coverage exactly where you need it.
Can I use the same sponge for all my base products?
You can, but it affects color accuracy. Using one sponge across foundation, concealer, and contour muddies shades quickly.
A quick press on a clean towel between products helps. Separate sponges per product is cleaner, especially for cream blush or highlighter.
How do I avoid a patchy finish with a sponge?
Most patchiness comes from dry skin, skipped primer, or rushing after moisturizer. Wait 2-3 minutes after skincare before applying foundation.
If patching happens after application, press a damp sponge lightly over the area instead of adding more product.
How often should I clean my makeup sponge?
Ideally after every use. Realistically, deep clean at least once a week with mild soap or a dedicated sponge cleanser.
Dermatologist Dr. Geeta Yadav recommends making it a weekly routine at minimum to prevent bacteria buildup.
When should I replace my makeup sponge?
Every 1-3 months, according to GoodRx health guidelines. Replace sooner if the texture goes stiff, the sponge tears, or breakouts start appearing without another clear cause.
Never ignore permanent staining or mold spots. Those mean replace immediately.
Does sponge application work for all skin types?
Yes, with small adjustments. Oily skin benefits from a lightly damp sponge and a matte formula. Dry skin needs more water in the sponge and a dewy foundation.
Combination skin works best when you adjust pressure and dampness zone by zone.
Conclusion
This conclusion is for an article presenting how to apply makeup with a sponge, and the core takeaway is simple: technique matters more than the tool itself.
A damp Beautyblender or teardrop sponge gives you a buildable coverage finish that brushes rarely match, but only when you bounce instead of swipe, prep the sponge correctly, and work in thin layers.
Skin type adjustments, clean tools, and timely replacements all play into consistent results.
Whether you’re blending liquid foundation, pressing translucent setting powder, or tapping concealer under the eyes, the stippling motion stays the same.
Get that right, and the rest follows naturally.

- What Is Skin Tint and Why Everyone Is Obsessed - July 11, 2026
- What Is Foundation and How Do You Choose One? - July 6, 2026
- How to Make Blush Last Longer - July 3, 2026


