Most people think contouring is complicated. It is not.
Contour is a face sculpting technique that uses darker shades to mimic shadow, making certain areas of the face recede visually. The result is more defined cheekbones, a sharper jawline, and better overall facial structure.
Getting it wrong, though, is easy. Wrong shade, wrong placement, wrong product type and the whole thing falls apart.
This guide covers everything you need to know:
- How contouring actually works
- Which contour products suit which skin types
- Placement by face shape
- Nose contouring and common mistakes to avoid
What Is Contour
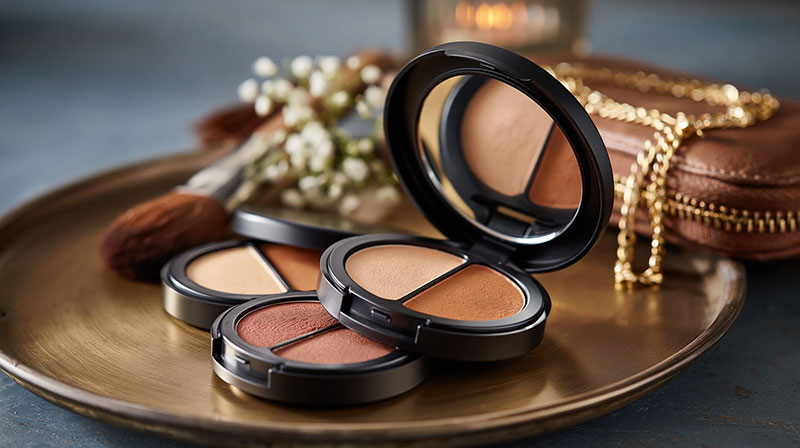
Contour is a makeup technique that uses darker shades to create the appearance of shadow on the face. It works by making certain areas recede visually, which changes how your bone structure reads.
The result is more defined cheekbones, a sharper jawline, or a slimmer-looking nose, without any actual change to your face.
Contouring is not the same as bronzing. Bronzer adds warmth. Contour adds depth. That distinction matters a lot when you are picking products, because using the wrong one gives you a muddy finish instead of a sculpted one.
When done right, contour makes your face look like it already has great bone structure. When done wrong, it just looks dirty. The difference usually comes down to shade selection and blending.
How Contouring Works
The whole technique is built on how the human eye reads light and shadow. Lighter areas come forward. Darker areas recede. Contour uses that perception to reshape how the face looks in two dimensions.
Your face already has natural shadows, under the cheekbones, along the sides of the nose, near the temples. Contour products deepen those shadows so they read more clearly, especially under artificial lighting or in photos.
Key principle: matte shades mimic shadow. Shimmer does not. A lot of beginners make the mistake of using a bronzer with shimmer particles for contouring, and it catches light instead of absorbing it. That is the opposite of what you want.
Blending is the other half. A contour line that is not blended properly just looks like a stripe. The product needs to be worked into the skin until there is no visible edge, only a gradual shift from lighter to darker.
Fenty Beauty built its entire product lineup around this idea, with extensive shade ranges that let people match contour depth to their actual skin tone rather than guessing.
Contour Products
The global contouring products market was valued at around $8.5 billion in 2023 and is projected to reach $14.3 billion by 2032, according to Dataintelo research. That growth reflects how mainstream face sculpting has become.
There are four main formats to know.
| Product Type | Best Skin Type | Finish | Application Tool |
| Powder contour | Oily, combination | Soft-focus matte | Angled fluff brush |
| Cream contour | Dry, sensitive | Second-skin satin | Damping sponge or warmth of fingers |
| Stick contour | All (versatile) | Buildable, dry-touch | Dual-ended precision brush |
| Liquid / Serum | Mature, dehydrated | Luminous, dewy | Precision wand or stippling brush |
| Palette / Hybrid | Professional use | Variable (Matte to Glow) | Multiple technical brushes |
Powder contour is the easiest to blend and the most forgiving. It is also harder to over-apply, which makes it a good starting point if you are new to face sculpting.
Cream contour gives a more skin-like finish and works better over dewy or moisturized skin. The Anastasia Beverly Hills Cream Contour Kit and Charlotte Tilbury’s Filmstar Bronze and Glow are two of the most referenced products in this category.
Stick contour is fast. You swipe it on, blend it out, done. Great for touch-ups. Not always the best for precise placement along the cheekbone.
E-commerce accounted for 30% of total contour kit sales in 2023, according to Virtue Market Research, which shows how much of this category has moved online.
Contour vs. Bronzer

Bronzer warms the skin. Contour creates shadow. These are different jobs, and they need different products.
Bronzer shades typically pull orange, golden, or peachy. Those warm tones look great on cheeks, forehead, and anywhere the sun would naturally hit. But when you apply a warm shade under the cheekbone to fake a shadow, it reads as orange, not depth.
Contour shades should be cool-toned or neutral. Think taupe, cool brown, or grey-brown depending on your skin tone. When those shades sit in a shadow area, they actually look like a shadow.
You can use both in the same routine. Bronzer goes where sun hits. Contour goes where shadow falls. The difference between bronzer and contour is one of the most common points of confusion in makeup, and getting it right changes everything about the finished look.
Where to Apply Contour Based on Face Shape

Placement is everything. Contouring in the wrong spot for your face shape does not help you, it just adds dark marks in places that do not make sense structurally.
The goal is always the same: use shadow to make areas recede, so the parts you want to highlight come forward more by contrast.
| Face Shape | Contour Placement | Goal |
| Oval | Temples and outer jawline | Maintain balance, add “chisel” |
| Round | Temples, under cheekbones (to ear), chin | Add vertical length and structure |
| Square | Four corners: temples and jaw corners | Soften angles, create roundness |
| Heart | Temples and under cheekbones (skip jaw) | Narrow forehead, accentuate cheeks |
| Long/Oblong | Top of hairline and under the chin | Shorten appearance vertically |
| Diamond | Center of hairline and under cheekbones | Narrow mid-face, soften prominence |
Round Face Contour Placement
Round faces benefit most from contouring. The sides of the face, starting at the temples and sweeping down toward the jaw, create an illusion of length.
Apply product under the cheekbones, not on them. The cheekbone itself is where highlight goes. Contour sits in the hollow below it.
Bringing contour along the jawline tightens the overall shape. Blend well into the hairline so there is no hard edge.
Square Face Contour Placement
Square faces have strong, sharp jaw angles. The goal with contouring is to soften those corners so the jaw reads as less boxy.
Apply at the outer corners of the jaw and blend upward. A small amount at the temples helps balance the width at the top of the face too.
Do not over-contour the cheeks on a square face. The jaw adjustment is usually enough.
Heart Face Contour Placement
Heart-shaped faces are wider at the forehead and narrower at the chin. Contour on the sides of the forehead brings the width in.
Keep the chin free of contour. A small amount under the cheekbones adds structure without making the lower half of the face look smaller than it already is.
How to Contour Step by Step

Start with a finished base. Foundation and concealer should already be set before contour goes on, especially if you are working with powder.
Applying contour on bare skin or an uneven base makes blending harder and the finish patchier.
Step-by-step process:
- Map placement with light strokes before committing to full product
- Use an angled brush for powder or fingers for cream to place product
- Blend upward and outward, never drag downward
- Build gradually, starting lighter than you think you need
- Check in natural light before adding more product
- Set cream contour with a light dusting of translucent powder if needed
The biggest mistake at this stage is going too heavy too fast. You can always add more contour. Removing it means starting over.
How you use cream contour differs slightly from powder because it needs to be blended before it sets. Work quickly and use a damp sponge for the smoothest finish.
BeautyMatter research from 2023 found that 49% of Gen Z and millennial consumers have bought a beauty product based on social media recommendations. For contouring specifically, tutorials that show the step-by-step process in real time drive most of the purchase decisions.
Contour for Different Skin Tones
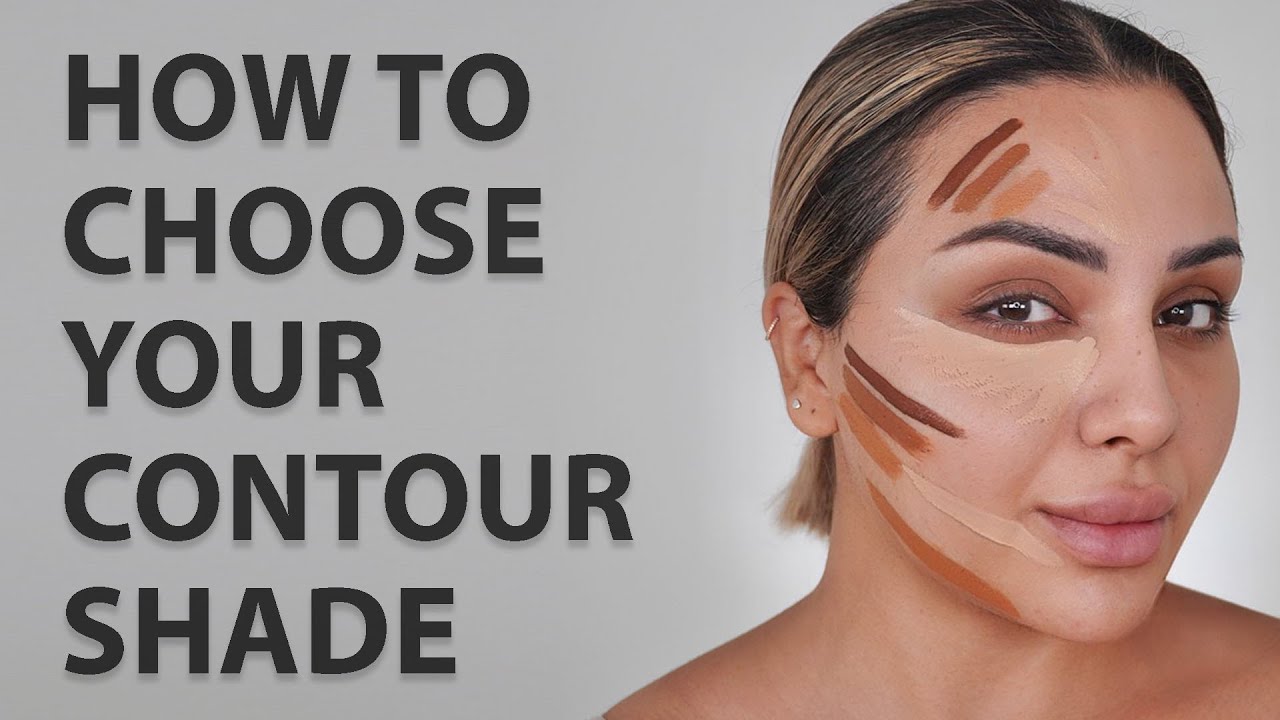
This is where a lot of people run into real trouble. The contour shade options that work on fair skin look completely wrong on medium and deep skin tones, and vice versa.
The contour product market has started catching up. Brands expanding shade ranges contributed to a 20% increase in inclusive contour product launches in major markets, according to Virtue Market Research data from 2023.
Fair Skin
Cool taupe shades work best. Anything too dark reads as bruising rather than shadow on fair skin tones.
Light-handed application matters more here than anywhere else. Build up slowly.
Products like the NYX Professional Makeup Wonder Stick in lighter shades give good control over intensity without going too dark too fast.
Medium Skin
Medium skin tones have the widest range of workable contour shades. Cool browns and neutral taupes both work.
Most major contour kits are built for medium skin, which is both useful and limiting. It means there are more options, but also more generic shades that sit at the middle of the spectrum.
The Anastasia Beverly Hills Contour Kit covers medium tones well, with both cool and neutral options in the same palette.
Deep Skin
Deep skin tones need highly pigmented, cool-brown or mahogany shades. Grey-toned contours go ashy and look muddy. Orange-brown shades blend into the skin and disappear.
Fenty Beauty Match Stix in Espresso is one of the few widely available products that actually works on deep skin. The pigmentation is there, the undertone is right.
Avoid contour products that are not specifically designed for deeper skin. Most are not pigmented enough to show up, and the ones that are often pull in the wrong direction tonally.
Nose Contour

Nose contouring has its own set of rules. It is a smaller, more precise application area than the cheeks or jawline, and the margin for error is tighter.
Google Trends data shows search interest for “nose contour makeup” peaked at index 99 in March 2025, making it one of the most searched face sculpting sub-topics of the year.
What nose contour can do:
- Slim the appearance of a wider nose bridge
- Shorten a long nose by adding shadow under the tip
- Define a flat nose bridge with strategic shadow placement
- Add dimension without dramatically changing proportions
Victoria Beckham publicly credited contouring rather than surgery for her nose’s changed appearance in 2024, demonstrating in videos exactly how placement and blending alter facial perception.
Nose Contour Placement
Placement rule: contour goes on the sides of the nose bridge, not the sides of the entire nose.
Running product all the way down to the nostrils makes the nose look wider, not slimmer. The shadow should sit only along the bridge, blended upward toward the inner corner of the eye socket.
MAC Senior Artist Fatima Thomas recommends using cool-toned neutral brown shades, following the natural bone structure rather than drawing arbitrary lines. The MAC Studio Fix Sculpt and Shape Contour Palette is built around this principle.
Nose Shortening Technique
Apply a small amount of contour under the tip of the nose, across the bottom edge. Blend softly.
This creates shadow below the tip, which reads visually as the nose ending higher up than it actually does.
Use a small sponge tip or a fine brush. A large contour brush is too wide for this area and will spread product where it should not go.
Contour Mistakes

Most contour problems fall into the same handful of categories. Knowing what they are saves a lot of frustration.
Celebrity makeup artist Mary Wiles notes that overdoing contour can actually age the face. As natural facial fullness decreases over time, heavy contouring can hollow out areas that do not need to look more sunken.
| Mistake | What It Looks Like | Fix |
| Shade too dark | Dirty, “muddy,” or bruised finish | Use a shade only 0.5 to 1 tone deeper than skin |
| Placement too low | Face looks droopy or “heavy” | Apply on the bone and blend upward toward temples |
| Warm-toned shade | Orange stripe or “ruddy” look | Switch to a cool-toned taupe or “shadow” grey |
| No blending | Visible harsh lines or “racing stripes” | Use a damp sponge with a “press and roll” motion |
| Mixed textures | Patchy, “lifting,” or cakey finish | Stick to the 2026 “Liquid-on-Liquid” layering rule |
Shade Selection Errors
Going too dark is the most common beginner mistake in face sculpting. A shade more than two steps darker than your skin tone reads as dirt, not depth.
Cool or neutral undertones only. Warm shades pull orange in shadow areas and look unnatural regardless of how well they are blended.
L’Oreal Paris makeup guides confirm that matching contour formula to your other base products, cream on cream and powder on powder, prevents the patchy, cakey finish that shows up when textures mix.
Placement Errors
Contouring too low under the cheekbone is the second most common issue. Instead of lifting the face, it drags features downward and creates an unintentional hollow effect in the wrong place.
Key fix: trace the actual cheekbone with your finger before applying any product. Most people place contour an inch lower than the real bone sits.
Blending downward instead of upward compounds the issue. Upward strokes lift. Downward strokes drag. Always work the product up and out toward the hairline.
Over-Contouring
Contour that reads well in a photograph often looks heavy in person and in natural daylight.
Heavy contouring comes from theatrical and stage makeup traditions, specifically designed to work under dramatic performance lighting. On a regular face in regular light, the same intensity looks harsh.
Soft sculpting is the current standard. Build contour gradually, check in natural light after every layer, and stop before it feels like enough. It will look right once you step away from the mirror.
How you apply bronzer alongside contour matters too. Placing bronzer where the sun naturally hits, forehead, nose bridge, cheeks, after contour is set keeps the warmth separate from the shadow and prevents the two from merging into one muddy tone.
When the full look is done, applying setting spray over a finished contour keeps it in place and blends the layers together for a more skin-like finish.
FAQ on What Is Contour
What is contour in makeup?
Contour is a makeup technique that uses darker shades to create shadow on the face. It makes certain areas recede visually, giving the appearance of more defined cheekbones, a sharper jawline, and better facial structure overall.
What is the difference between contour and bronzer?
Bronzer adds warmth and a sun-kissed color. Contour creates shadow. Bronzer shades pull warm and golden. Contour shades should be cool or neutral-toned so they actually read as shadow instead of an orange stripe.
Where do you apply contour?
Apply contour under the cheekbones, along the jawline, at the temples, and on the sides of the nose bridge. Placement changes based on face shape. Round faces need more side contouring. Square faces need softening at the jaw corners.
What contour product is best for beginners?
Powder contour is the most beginner-friendly format. It is easier to blend, harder to over-apply, and more forgiving than cream. The Anastasia Beverly Hills Contour Kit and NYX Wonder Stick are widely recommended starting points.
Can you use bronzer as contour?
Technically yes, but results are usually muddy. Most bronzers pull warm or orange, which does not mimic shadow. A cool-toned matte powder used specifically for face sculpting will always give cleaner, more natural-looking results.
What shade of contour should I use?
Stay one to two shades darker than your natural skin tone. The undertone matters as much as the depth. Cool or neutral shades mimic shadow. Warm shades look orange. Fair skin needs taupe. Deep skin needs pigmented cool-brown or mahogany.
Is contour powder or cream better?
Depends on your skin type. Cream contour suits dry and mature skin, giving a natural finish. Powder contour works better on oily or combination skin. Mixing a cream contour with a powder product on top often causes patchiness.
How do you contour a nose?
Apply a thin line of contour along each side of the nose bridge only, not down to the nostrils. Blend upward toward the inner eye corner. Use a small brush or sponge tip. Keep it soft. Heavy nose contour reads wider, not slimmer.
What are the most common contouring mistakes?
Using a shade that is too dark or too warm. Placing contour too low on the cheeks. Blending downward instead of upward. Mixing cream and powder textures. Skipping a natural light check. All of these are fixable with the right shade and blending technique.
Does contour look different in photos vs. real life?
Yes, significantly. Heavy contouring designed for photos looks harsh in natural daylight. Soft, blended face sculpting with a matte finish works better for everyday wear. Always check your contour in natural light before leaving the house.
Conclusion
This conclusion is for an article presenting what is contour as both a technique and a practical skill anyone can learn with the right information.
Shade selection, placement, and blending are the three things that separate a clean face sculpting result from a muddy one.
Match your contour product to your skin type. Use powder on oily skin, cream on dry. Keep undertones cool or neutral. Build gradually.
Face shape determines where product goes. Jawline definition, cheekbone depth, nose bridge shadow, each area has its own logic.
Fenty Beauty, Anastasia Beverly Hills, and NYX Professional Makeup have made inclusive shade ranges more accessible across all skin tones.
Start soft. Check in natural light. Adjust from there.

She started writing on the site after fielding the same questions from clients and friends often enough to just write the answers down: which red won't turn orange on a warm undertone, how to keep lipstick from feathering into fine lines, why a "12-hour" formula rarely survives dinner.
Every review on the site follows the same rule she uses with paying clients: wear it first, then decide if it's worth recommending.
- How to Make Eyeliner Last Longer Without Smudging - August 31, 2026
- How to Make Eyeshadow Last Longer All Day - August 29, 2026
- How to Find Your Undertone in 5 Easy Steps - August 27, 2026