

Summarize this article with:
Most makeup mismatches come down to one thing: confusing skin tone with undertone.
They’re not the same. And until you know the difference, even expensive products can look off.
Knowing how to match makeup to skin tone changes how every product sits on your face, from foundation and concealer to blush, bronzer, and lip color. This guide covers undertone identification, shade selection across every complexion category, and the most common color-matching mistakes with direct fixes for each.
What Skin Tone Matching Means in Makeup

Skin tone and undertone are not the same thing. Most matching mistakes happen right here, before a single product is purchased.
Skin tone is the surface color of your skin: fair, light, medium, tan, or deep. Undertone is the underlying hue that stays constant regardless of how much sun you get. It runs warm, cool, or neutral.
Choosing a foundation based only on surface color is one of the most common shade-matching errors. A product can look right in the pan and completely wrong on your face because the undertones clash.
Lighting makes this even trickier. Fluorescent store lighting pushes everything toward yellow or green. Natural daylight, ideally by a window, is the only reliable light for reading your own complexion accurately.
According to Beauty Buddy research, 41% of consumers say shade matching is their top concern when buying foundation, and 35% call it their single biggest challenge.
Every product decision in your routine, from foundation to picking the right nude lipstick, gets easier once you understand the difference between tone and undertone.
| Concept | What It Is | Changes With Sun? | Affects Product Choice? |
|---|---|---|---|
| Skin tone | Surface depth of skin (fair to deep) | Yes | Shade depth, coverage level |
| Undertone | Underlying hue (warm, cool, neutral) | No | Color family and finish choice |
How to Identify Your Undertone
Four reliable tests. You don’t need all of them, but running two or three will give you a clear answer when the result feels uncertain.
Warm Undertones
Signs to look for:
- Veins appear green or olive at the wrist
- Gold jewelry sits more naturally than silver
- Skin tans rather than burns in the sun
- Off-white and cream shades look better on you than stark white
Warm undertones typically carry yellow, peachy, or golden tones in the skin. Common across a wide range of skin depths, from fair to very deep.
Cool Undertones
Your veins read blue or purple. Silver jewelry flatters more than gold. In the sun, you burn before you tan, or you don’t tan much at all.
Key indicator: A true white shirt makes your complexion look clear and fresh. Cream or yellow-white pulls your skin toward sallow or dull.
Cool undertones lean pink, red, or blueish. They show up across every skin tone category, including very deep skin that can be both richly pigmented and distinctly cool-toned.
Neutral Undertones
Neutral is not a cop-out. It means you genuinely carry both warm and cool signals in roughly equal amounts.
- Veins look blue-green, not clearly one or the other
- Both gold and silver jewelry work well
- Both white and off-white are flattering
Neutral undertones give the widest range of workable makeup shades. The tradeoff is that “universal” products are rarely truly universal, so testing still matters.
Matching Foundation to Skin Tone and Undertone

Foundation is where undertone knowledge pays off most. Get this wrong and no amount of blending fixes it.
Reading Shade Codes
Most major brands use letter codes to indicate undertone within their foundation ranges.
| Code | Undertone | Brands Using It |
|---|---|---|
| N | Neutral | MAC, NARS, Fenty |
| W / Y | Warm / Yellow | MAC, Maybelline, Bobbi Brown |
| C / R / P | Cool / Rose / Pink | NARS, Fenty, Bobbi Brown |
Where and How to Swatch
The jawline is the correct placement. Not your wrist, not the back of your hand. The jaw needs to match both your face and neck so there’s no visible line.
Check in natural light after five minutes. Oxidation, the shift that happens as foundation reacts with your skin’s oils and pH, can pull a shade warmer or darker once it settles. A shade that looks right in-store can turn noticeably orange or ashy within 20 minutes.
The global foundation shade finder market was valued at $1.2 billion in 2023, driven by consumer demand for accurate shade matching tools (Dataintelo). That growth reflects just how common and frustrating shade mismatches are.
When Your Shade Doesn’t Exist
Shade gaps are real, especially at the edges of a brand’s range.
- Mixing two foundations from the same formula is a reliable fix
- Go one shade lighter and one shade darker, then blend to your ratio
- Tools like Findation and Temptalia’s Foundation Matrix help cross-match shades between brands
According to Mintel, 53% of Black consumers report difficulty finding beauty products that match their skin tone. Fenty Beauty directly addressed this gap with its 40-plus shade launch, which reached $100 million in sales within 40 days.
Concealer Matching Rules
Concealer does not follow the same rules as foundation. The right shade depends entirely on what you’re using it for.
Under-Eye Concealer
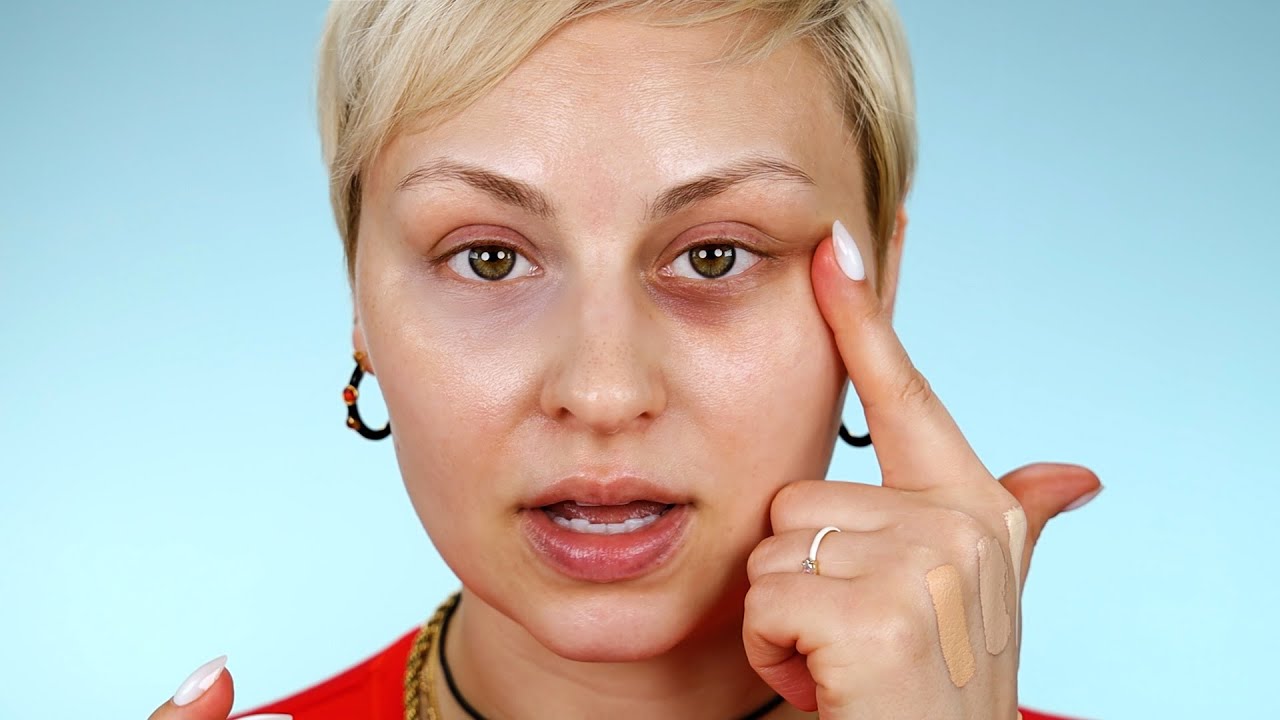
Go 1 to 2 shades lighter than your foundation. The goal is to brighten, not just cover.
For medium, tan, and deep skin, dark under-eye circles often have a blue, purple, or grey cast. A peach or orange color corrector applied before concealer neutralizes that cast. Without the corrector, a light concealer sits on top of the darkness and turns chalky or ashy.
Cool-toned concealers look grey under the eyes on deeper skin tones. This is one of the most predictable mismatches and still one of the most common.
Spot Concealing
For blemishes, redness, or hyperpigmentation, match your foundation shade exactly or go slightly lighter. Going too light draws attention rather than concealing.
Color correcting by concern:
- Redness / acne: green corrector underneath
- Dark spots / hyperpigmentation on medium-deep skin: orange or peach corrector
- Dark circles on fair skin: lavender or peach, depending on the cast
- Sallowness: lavender or lilac corrector to cut yellow
Learning how to apply color corrector properly makes the rest of your concealer work far easier.
Choosing Blush for Your Skin Tone

Blush shade is tone-dependent in a way that foundation is not. The wrong blush for your skin tone reads muddy, dirty, or completely invisible.
According to McKinsey and Company, Black consumers are 5.7 times more dissatisfied with makeup offerings than non-Black consumers, partly because blush and complexion ranges historically skewed toward lighter skin tones.
| Skin Tone | Best Blush Shades | Shades to Avoid |
|---|---|---|
| Fair | Soft pinks, light peach, muted mauve | Deep berries, saturated reds |
| Medium | Coral, dusty rose, warm berry | Pale bubblegum pink |
| Tan / Olive | Terracotta, brick, deep peach | Frosty or icy pink shades |
| Deep | Rich berry, burnt orange, deep plum | Light peach, sheer pink |
Undertone matters here too. Warm-toned skin benefits from blush shades with orange, peach, or golden bases. Cool-toned skin looks better with blush that leans toward rose, berry, or raspberry.
Nick Lujan, director of artistry at Kevyn Aucoin Beauty, has noted that peach and orange-toned blushes work across nearly all skin tones because they contain both red and yellow in their base, making them a reliable starting point.
For a detailed look at how to place blush for your specific face structure, this guide on applying blush on different face shapes covers placement by shape.
Bronzer and Contour Shade Selection

Bronzer and contour serve different purposes, and they require different shade logic. Using the wrong one in the wrong way is where most people end up with orange-tinged or muddy results.
Bronzer: Warmth, Not Shadow
Bronzer adds warmth back into the complexion. It mimics where the sun would naturally hit your face. It should be 2 to 3 shades deeper than your skin tone, and the undertone matters.
- Warm skin: golden, caramel, or soft copper bronzers
- Cool skin: avoid orange bronzers, lean toward cooler bronze or soft brown
- Deep skin: rich chocolate brown with bronze undertones, not orange
Bobbi Brown’s consistent advice: bronzer should enhance your skin, not change it. A light hand and buildable layers are far more forgiving than going in heavy.
Contour: Shape and Shadow
Contour creates the illusion of shadow. For it to read as shadow, not as a stripe of brown product, it needs a cool or grey-based tone.
A warm bronzer used as contour pulls orange or muddy on most skin tones because warm tones read as color, not shadow. L’Oreal Paris recommends ashy beige or taupe for fair skin, cool greige for medium, and cool dark brown or espresso for deep skin tones when contouring.
For a deeper look at the application process, using cream contour gives a different finish than powder and works especially well on drier skin.
Inclusive beauty brands that get these shade ranges right are growing 1.5 times faster than less inclusive competitors, according to Circana 2024 data. Getting bronzer and contour shade ranges accurate across complexion types is part of that gap.
Eyeshadow Colors That Work With Your Undertone

Eyeshadow color selection is usually taught around eye color. Undertone matters just as much, and often more, for how a finished look actually reads on your face.
Warm Undertones and Eye Makeup
Best color families: gold, copper, terracotta, warm brown, bronze, cinnamon, rust.
These shades mirror the warmth already in your skin, creating color harmony rather than contrast. Matte warm browns work well for everyday wear. Layering a gold or copper metallic over a matte warm base adds depth without clashing.
L’Oreal Paris recommends avoiding icy pinks, blue-based reds, and cool blues on warm skin, as these can read harsh or ashy against golden undertones.
Cool Undertones and Eye Makeup
Cool skin tones have the widest range of eye color options. Shades with blue or pink bases naturally complement the undertone rather than fight it.
Strong options:
- Icy silvers and grey-toned taupe
- Mauve, dusty rose, cool plum
- Blue-based purple and burgundy
- Cool brown, not bronze
Urban Decay’s Head of Artistry Steve Kassajikian has noted that cool skin tones work well with rosy and pink tones in particular, while warm skin works better with purple and grey variations.
When to Go Against Your Undertone
Contrast is a valid choice. A blue eyeshadow on warm skin creates a bold, intentional contrast that can look striking when the rest of the look is kept simple.
Makeup artist Razanno has pointed out that deep skin tones with warm undertones look particularly strong with silvery and cool-toned eye looks, and that the contrast actually enhances the complexion rather than fighting it.
The rule is not “always match.” The rule is: know what you’re doing and do it deliberately.
Lip Color by Skin Tone and Undertone
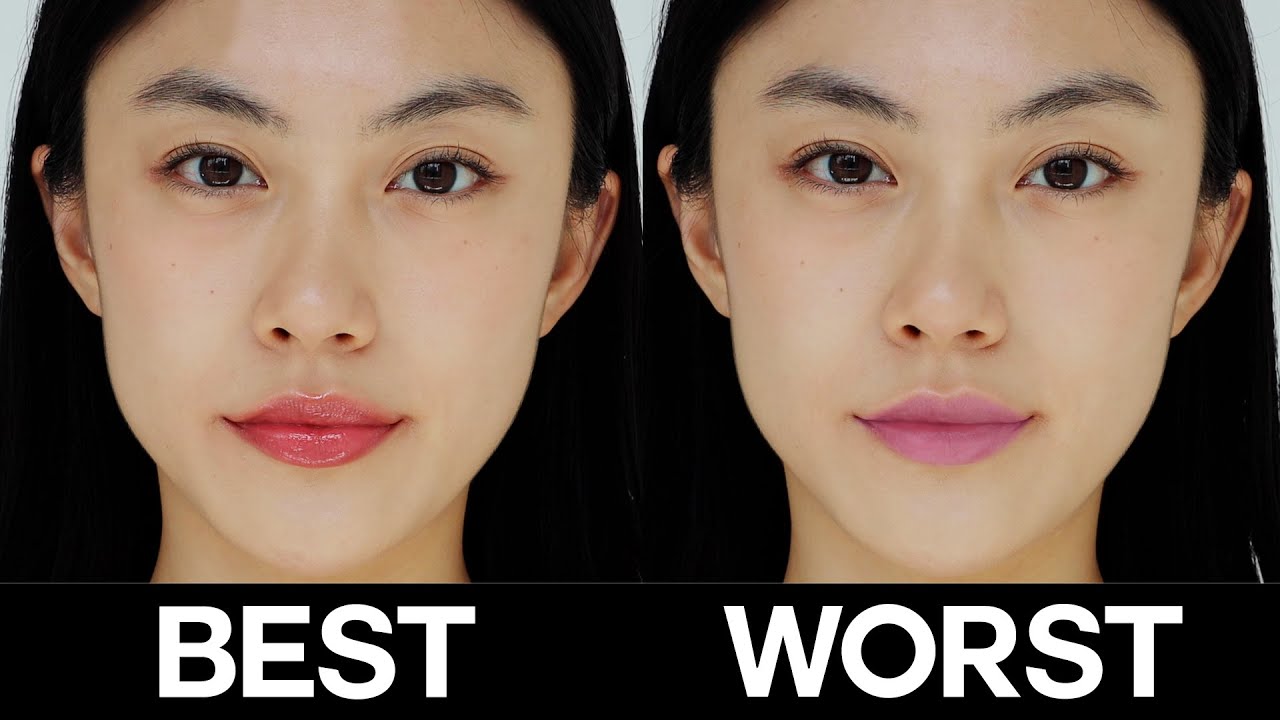
Lip color is where skin tone and undertone interact most visibly. A shade that looks beautiful on one complexion can look washed out, ashy, or muddy on another with a different undertone, even at the same depth level.
The global lip color market reached $21.16 billion in 2023, growing at a projected CAGR of 4.66% through 2028, according to Alibaba research. The demand for undertone-specific nude shades has driven much of that product development.
| Skin Tone | Flattering Lip Shades | Common Pitfall |
|---|---|---|
| Fair | Soft pinks, berry, true red, rosy nude | Too-light nudes wash out the face |
| Medium | Coral, brick red, warm mauve, cranberry | Very pale or pastel shades disappear |
| Tan / Olive | Deep nude, warm red, terracotta, rust | Beige nudes can look grey or muddy |
| Deep | Berry, deep plum, rich red, chocolate nude | Light nudes look chalky or ashy |
Finding Your Nude Shade
A true nude should be one to two shades deeper than your natural lip color, not your skin tone. Your lip color and your skin tone are different, and most nude shopping mistakes happen because people compare the lipstick to their hand, not their actual lip.
A 2024 study from LVMH Research and Christian Dior measured lip color across 410 women spanning Caucasian, African American, and Hispanic groups, finding significant variation in both lightness and hue within every ethnic group. This confirms that “nude” is not a single shade category but a spectrum that needs to be matched individually.
For warm undertones: lean toward peachy-brown and caramel nudes. For cool undertones: rose-brown and pink-taupe. For dark skin, shades that look “nude” in the tube are often far too light to read as natural on the lips.
Red Lipstick and Undertone
Red is not one color. There are hundreds of reds, and undertone determines which one flatters.
- Warm undertones: orangey reds, brick reds, tomato red
- Cool undertones: blue-based reds, cherry, berry red
- Neutral undertones: classic true red, cranberry
Understanding the difference between cool and warm red lipstick makes a noticeable difference in how finished a look reads, especially on camera or in photos.
There’s also the formula question. Matte lipstick intensifies color and can make undertone mismatches more obvious, while satin and gloss finishes are more forgiving.
Common Matching Mistakes and How to Fix Them
Most shade mismatches follow predictable patterns. Knowing them makes the fix straightforward.
Foundation Line at the Jaw
The cause is almost always an undertone mismatch, not just depth. A foundation that looks right in terms of darkness but has the wrong undertone will always show a visible line where face meets neck.
Match My Makeup notes that oxidation can shift a foundation color by up to two or three shades after application. That’s significant enough to turn a correct in-store match into an obvious mismatch by midday.
Fix it:
- Test on your jaw and check in daylight after 10 to 15 minutes
- Use an oil-free primer to slow oxidation if your skin is oily
- If stuck between two shades, mix them rather than committing to either
Blush That Reads Dirty
Blush that looks muddy or like skin discoloration instead of a flush is nearly always an undertone problem. Not the wrong depth. The wrong color family.
Warm-undertoned skin reacts poorly to cool-toned pinks with a blue base. The result looks bruised rather than flushed. Conversely, a warm coral on very cool skin can pull orange or overwhelming. Stay within your undertone’s color family first, then experiment from there.
Concealer That Looks Grey or Chalky
This is the most predictable misread in makeup. It almost always signals two things: the undertone is too cool, or the shade is too light without a color corrector underneath.
For deeper skin tones, under-eye darkness is frequently blue-grey or purple in cast. Applying a peach or orange color corrector first, then a warm or neutral concealer, removes the grey completely. A cool-toned concealer placed directly over that darkness will amplify the grey instead of neutralizing it.
Prepping skin correctly before any of this matters too. Prepping skin before makeup makes concealer blend more evenly and prevents the chalky texture that sets into dry under-eye skin.
Bronzer That Pulls Orange
Orange bronzer on cool-toned skin is one of the most common complexion mismatches. There’s a direct reason: cool skin has pink or blue in its undertone, and orange sits directly opposite on the color wheel.
The fix is simple: choose bronzers with a soft brown or neutral base rather than a strongly orange or golden base if you have cool undertones. Satin or matte finishes also read more naturally than shimmer-heavy formulas on cooler skin.
Tools and Techniques for Accurate Shade Matching

Finding the right shade is a process, not a single moment of decision. The tools available now, both in-store and online, make that process much more reliable than it was even five years ago.
In-Store Shade Testing
The jaw is the correct swatch location. Not the hand, not the wrist. The jaw needs to blend with both your face and your neck to avoid a visible line of demarcation.
Test protocol that actually works:
- Apply the swatch to your jaw in a store with natural light access
- Walk to a window or step outside before making a judgment
- Wait 10 to 15 minutes to account for oxidation
- Request samples when available, especially from Sephora, which provides them on request
Fluorescent store lighting distorts color significantly. A shade that looks perfect under those lights can read completely wrong outdoors.
Online Shade Matching Tools
Several reliable tools exist for cross-referencing shades between brands without buying blind.
Findation.com is powered by over 147 million users and covers more than 104,000 shades across 11,000 products. It’s the best starting point for switching brands.
Temptalia’s Foundation Matrix offers curated shade crosswalks with community-tested photo evidence, which is more useful for verifying undertone accuracy than Findation’s purely algorithmic approach.
Both Sephora and Ulta offer AI-driven shade finder tools on their sites. They work reasonably well for narrowing down options but should be confirmed with a physical swatch before committing to a full size.
Seasonal Skin Tone Shifts
Skin tone changes with sun exposure, which means a single foundation shade rarely works year-round. Most people need at least two shades and blend between them in transitional months.
A practical approach: in summer, go one shade deeper. In winter, return to your base shade or go slightly lighter. Stopping foundation from oxidizing year-round also helps keep the shade you chose consistent throughout the day, regardless of season.
Lip color shifts seasonally too. Fall lipstick colors and winter lipstick colors tend to run deeper and more saturated, which generally flatters the slightly deeper, less sun-touched skin tone of those cooler months.
FAQ on How To Match Makeup To Skin Tone
What is the difference between skin tone and undertone?
Skin tone is your surface color depth: fair, light, medium, tan, or deep. Undertone is the underlying hue, warm, cool, or neutral, that stays constant regardless of sun exposure. Most shade-matching mistakes happen because people focus on tone and ignore undertone entirely.
How do I find my undertone at home?
Check your wrist veins in natural light. Green veins signal warm undertones. Blue or purple signals cool. Can’t tell? You’re likely neutral. The jewelry test also works: gold flatters warm, silver flatters cool.
How do I match foundation to my skin tone?
Swatch on your jawline, not your hand. Check in natural daylight after 10 to 15 minutes to account for oxidation. Match your face and neck together. Read the shade code letters: W and Y mean warm, C and R mean cool, N means neutral.
What blush shade suits my skin tone?
Fair skin: soft pinks and light peach. Medium skin: coral and dusty rose. Tan skin: terracotta and brick. Deep skin: rich berry and burnt orange. Always factor in undertone too. Warm undertones need blush with orange or peach bases, cool undertones need rose or raspberry.
What is the best bronzer for my complexion?
Pick a bronzer 2 to 3 shades deeper than your natural skin tone. Cool undertones should avoid orange-based bronzers. Deep skin tones look best with chocolate brown shades. Applying bronzer to areas where the sun naturally hits gives the most realistic result.
How do I choose a nude lipstick for my skin tone?
Go one to two shades deeper than your natural lip color. Fair skin: rosy beige. Medium skin: warm mauve. Tan skin: peachy brown. Deep skin: caramel or chocolate. Shades that look nude in the tube are often too light for deeper complexions.
Which eyeshadow colors work for warm undertones?
Warm undertones suit golds, coppers, terracotta, warm brown, and bronze. These mirror your skin’s natural warmth and create harmony rather than contrast. Avoid icy blues and cool silvers, which can read harsh against golden or yellow-based skin.
Can I wear cool-toned makeup if I have warm undertones?
Yes. Contrast is a valid choice. A cool blue eyeshadow on warm skin creates a bold, intentional effect. Deep warm skin tones in particular look striking with silvery cool-toned eyes. Know what you’re doing and commit to it fully.
Why does my foundation look orange or ashy after I apply it?
Oxidation and undertone mismatch are the two main causes. Orange results usually mean the foundation is too warm for your undertone. Ashy results mean it’s too cool. Test on your jaw in daylight and wait 15 minutes before deciding on a shade.
How do lipstick colors change by skin tone?
Fair skin suits berry, true red, and soft pink. Medium skin works well with coral and brick red. Tan skin flatters warm red and terracotta. Deep skin looks best in rich berry, deep plum, and bold red. Lipstick colors for cool undertones and warm undertones differ even within the same skin tone category.
Conclusion
Knowing how to match makeup to skin tone comes down to one consistent principle: undertone drives color selection across every product category.
Get that right and foundation shade matching, blush selection, bronzer depth, and lip color all follow a clear logic.
Fair, medium, tan, and deep complexions each have their own color rules. But warm, cool, and neutral undertones cut across all of them.
A concealer that goes grey, a bronzer that pulls orange, a nude lipstick that washes you out. These are undertone mismatches, not bad products.
Brands like Fenty Beauty and NARS have expanded shade ranges for dark skin and fairer complexions alike, making accurate color matching more accessible than ever.
Use what you now know. Test in natural light, check your undertone first, and match deliberately.

- What Is Skin Tint and Why Everyone Is Obsessed - July 11, 2026
- What Is Foundation and How Do You Choose One? - July 6, 2026
- How to Make Blush Last Longer - July 3, 2026


