

Summarize this article with:
Concealer alone can’t fix everything. If dark circles, redness, or hyperpigmentation keep showing through no matter how much you layer on, the problem isn’t your concealer. It’s that you’re skipping a step.
Knowing how to apply color corrector changes the entire base routine. It’s a targeted technique built on basic color theory: the right pigment cancels out the right discoloration before foundation even goes on.
This guide covers everything from shade selection by skin tone to application method, layering order, and the mistakes that make color correction go wrong.
What Is Color Corrector

A color corrector is a pigmented makeup product used to neutralize specific skin discolorations before foundation goes on. It works on a basic color theory principle: opposite colors on the color wheel cancel each other out.
That’s actually it. Green cancels red. Orange cancels blue. Peach cancels purple. The color corrector handles the discoloration so your foundation doesn’t have to.
This makes it fundamentally different from concealer. Concealer covers. Color corrector neutralizes. You need both for serious discoloration, and they do two completely separate jobs.
The global color cosmetic market was valued at $73.73 billion in 2024 (Precedence Research), with facial products holding the single largest share. Color correctors sit squarely in this segment.
| Product | What It Does | When to Use It |
|---|---|---|
| Color corrector | Neutralizes discoloration using opposing pigments | Before foundation, directly on the concern |
| Concealer | Covers and matches skin tone | After foundation, on top of corrector |
| Foundation | Evens overall skin tone | Over corrector, before concealer |
Available in cream, liquid, and stick formulas. Cream is the most common and works well across most skin types. Liquid tends to be lighter and better for dry skin. Stick is the most portable and precise for targeted spot correction.
What Each Color Corrector Does
Knowing which shade to pick is the whole game. Use the wrong color and you’ll end up with a muddy, gray mess under your foundation. Here’s what actually works for each concern.
Green Corrector
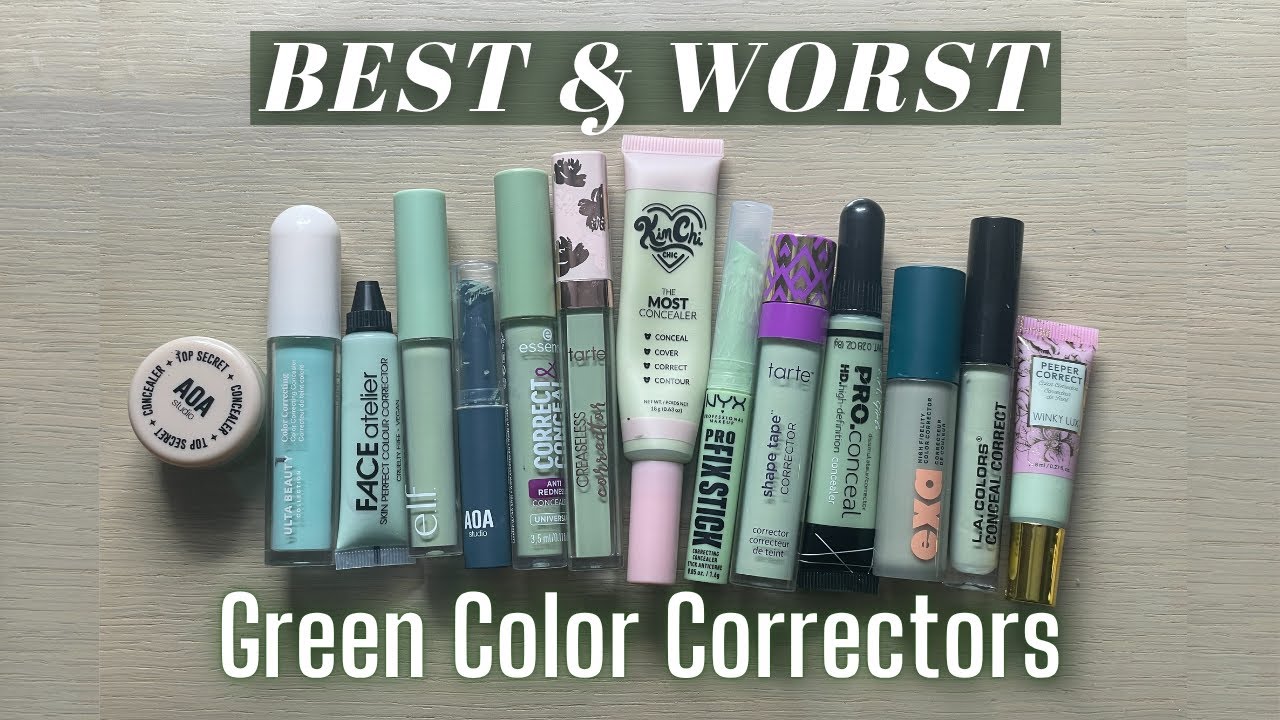
Target: Redness from acne, rosacea, and broken capillaries.
Green sits directly opposite red on the color wheel. Apply it on active blemishes, red patches, or rosacea-prone areas around the nose and cheeks. A small amount goes a long way here. Too much and your skin looks gray under foundation.
Dr. Jart’s Cicapair Tiger Grass Color Correcting Treatment is one of the most recognized green correctors on the market, and it actually replaces foundation for mild redness on no-makeup days.
Peach and Orange Correctors
These two do similar jobs at different intensities. Peach works for fair to light skin tones dealing with mild dark circles or bluish discoloration. Orange goes deeper, canceling out the blue, gray, and brown tones common in hyperpigmentation on medium to deep skin tones.
Celebrity makeup artist Katie Mellinger puts it simply: those dark circles are actually blue. Peach or orange neutralizes them completely before you layer anything else on top.
That viral hack of using red lipstick under the eyes? Same principle. The deep red-orange pigment neutralizes dark blue tones.
Lavender and Yellow Correctors
Lavender: Brightens sallow, yellow-toned skin. Works well on fair skin that looks dull or tired.
Yellow: Neutralizes purple bruising and mild dark circles on fair skin. Also useful across the cheekbones and nose bridge to even out uneven pigmentation after foundation, as makeup artist Sotomayor notes in his clients’ routines.
One warning: avoid lavender on deeper skin tones. It reads ashy and makes the skin look flat rather than brightened.
Red Corrector
The most misunderstood shade. Red corrects deep hyperpigmentation and dark spots on deeper skin tones specifically. It’s more pigment-dense than orange, so it handles stubborn, dark discolorations that peach or orange alone can’t fully neutralize.
Use it sparingly, blended well, only on the darkest areas. It’s not a full-face product.
Tools Needed Before You Start
The right tools change how color corrector performs. The wrong ones either move too much product or distribute it unevenly.
What you actually need:
- Flat concealer brush – best for precise placement on small areas like spots or under-eye circles
- Fingertips – body heat warms cream correctors and helps them melt into skin naturally; good for larger areas
- Damp beauty sponge – for blending edges, not picking up and applying product directly
- Translucent or setting powder – locks corrector in place before foundation goes on top
- Foundation or concealer – always goes over the corrector, not instead of it
Primer is optional but worth it on oily skin. It gives the corrector something to grip rather than sliding around under foundation.
Skip the fluffy powder brush for application. It picks up too little product and spreads it too wide. Save that for setting powder only.
How to Prep the Skin

Color corrector sits better, blends cleaner, and lasts longer on properly prepped skin. Skip this step and you’ll fight the product the whole time.
Moisturize first, and let it absorb fully. Dry patches grab pigment unevenly, which makes color corrector look patchy instead of blended. Give moisturizer at least two to three minutes before moving on.
Apply primer if you’re using one. On oily skin especially, primer stops the corrector from moving around under foundation and shifting by midday.
Then identify your target areas. Look at your face in natural light, not bathroom lighting. Bathroom lighting hides things. Natural light shows redness, discoloration, and dark circles exactly as they appear to other people.
According to a 2024 Allure survey, 62% of respondents prioritize non-invasive treatments for hyperpigmentation. Color correction during makeup application is one of the most accessible non-invasive options available.
Start with a clean, dry base. Any excess oil or moisture on the skin will prevent corrector from gripping and setting properly.
How to Apply Color Corrector Step by Step

Less product, more precision. That’s the whole method. Most people over-apply and then wonder why their foundation looks muddy or gray.
Applying Under-Eye Color Corrector
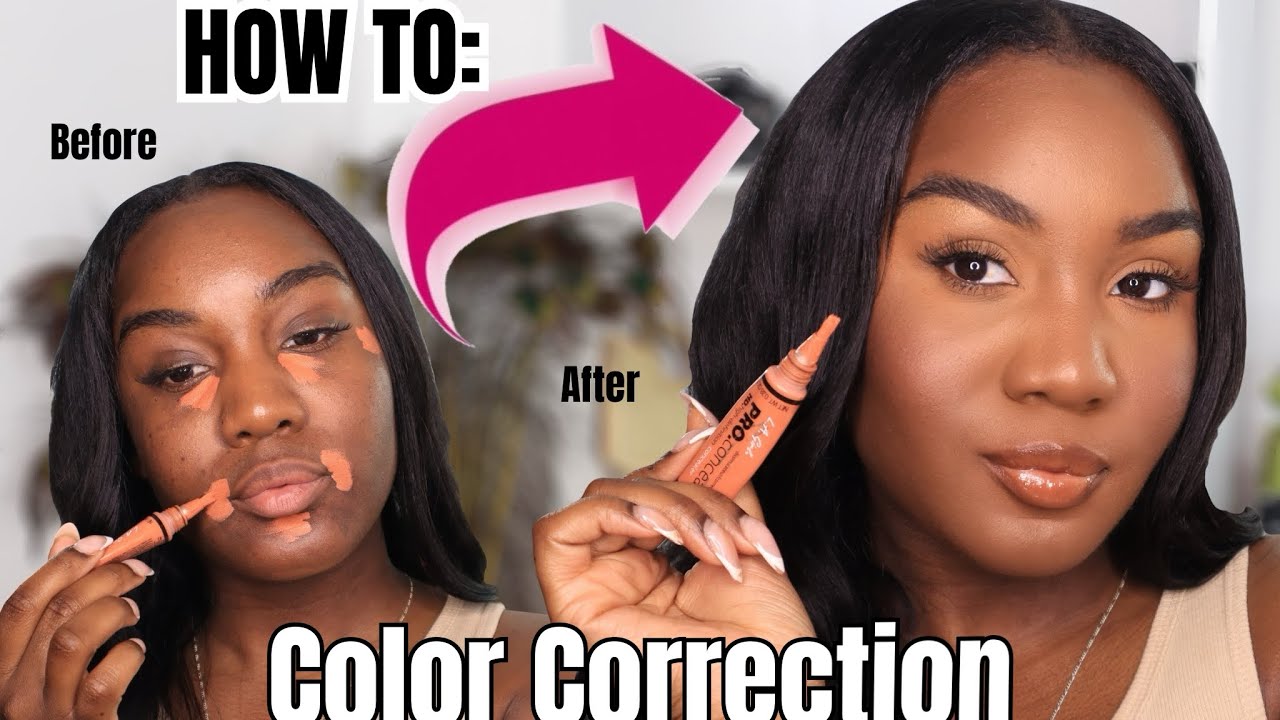
Pick up a small amount of peach or orange corrector on a flat brush or fingertip. Apply directly on the darkest part of the under-eye area, usually the inner corner where discoloration tends to be most concentrated.
Pat gently, don’t rub. The skin under the eye is thin and pulling it causes irritation and also moves the product off the area you’re trying to correct.
Blend outward toward the outer corner, feathering the edges so there’s no obvious line. Let it sit for 30 to 60 seconds before layering anything on top.
Applying Color Corrector on Acne and Redness
Green corrector for active blemishes goes directly on the red or inflamed area, applied with a flat brush for precision.
The key here is keeping it localized. Apply only on the actual red or irritated skin, not on the surrounding area. Use a tiny amount, blend the edges, and move on. Covering too large an area with green corrector creates a visible gray cast under foundation.
For rosacea-prone areas across the cheeks or nose, a slightly larger flat brush works well for even distribution without over-applying.
Applying Color Corrector on Hyperpigmentation
Hyperpigmentation patches often need more product than dark circles, but the method stays the same: build in thin layers rather than applying one thick coat.
Apply peach or orange (depending on skin tone) directly on the dark spot, pat to blend, let it set, then assess. If it’s still showing through, add a second thin layer rather than adding more on the first pass. Two thin layers always blend better than one heavy one.
| Skin Concern | Corrector Shade | Application Method |
|---|---|---|
| Dark circles (fair skin) | Peach or yellow | Pat with fingertip or flat brush |
| Dark circles (deep skin) | Orange or red-orange | Pat with flat brush, blend edges |
| Redness, acne, rosacea | Green | Precise flat brush, keep localized |
| Hyperpigmentation (medium-deep) | Orange or red | Thin layers, build coverage |
| Sallow, dull skin | Lavender or pink | Light all-over application |
How to Layer Foundation or Concealer Over Color Corrector

This is where most color correction goes wrong. The corrector is set and looking good, then one swipe of foundation disrupts everything.
Let the corrector sit for 30 to 60 seconds before touching it again. If you used a cream formula, dust a light layer of translucent powder over it first. This sets the corrector and stops it from moving when foundation goes on top.
Use a damp beauty sponge to press foundation over the corrected areas. Never drag. Pressing deposits product without disturbing what’s underneath. A brush or dry sponge drags and shifts everything you just set.
Mintel’s 2024 US color cosmetics report notes that consumers with a greater product repertoire report higher frustration with layering, largely because they’re using the wrong tools or application techniques rather than incompatible products.
Apply concealer after foundation, not before. Foundation brings the skin tone to a more even base, and concealer then handles any remaining spots or darkness that foundation alone didn’t fully cover. This order uses less total product and avoids the cakey look that comes from layering both under and over foundation.
Set with translucent or color-matched powder immediately after concealer. Don’t wait. Cream products continue to move until they’re locked in place with powder.
For a full guide on layering makeup products in the right order, the sequencing matters more than most people realize.
Common Mistakes When Using Color Corrector
Most color correction failures come down to one thing: using too much product. Color correctors are highly pigmented concentrates. They’re built to do a specific job with a small amount. When you apply them like concealer, everything goes wrong.
The second most common problem is skipping the setting step. Kryolan’s professional makeup team notes that not setting each layer is the most common mistake in color correction, causing the colors to mix and leave skin looking muddy rather than corrected.
Wrong Shade or Too Much Product

The wrong shade turns discoloration gray instead of neutralizing it. The corrector should disappear into the skin, not create a new visible color problem.
Too much product is the second issue. Apply only to the darkest part of the area, not the entire surrounding zone. Under the eye, that means the innermost part of the circle, not the whole under-eye.
- Start with an amount smaller than you think you need
- Build coverage in thin layers, not one heavy pass
- If the corrector is still visible after blending, you’ve used too much
Rubbing Instead of Patting
Rubbing spreads product into areas that don’t need it and dilutes coverage where you actually need it. This is especially damaging under the eye where the skin is only 0.5mm thick compared to 2mm elsewhere on the face (Dermatology and Cosmetics, 2023).
Pat everything. Fingertip, brush, sponge. All of it. Every time.
Skipping Setting Powder
Cream correctors stay active and moveable until powder locks them down. Apply foundation over an unset corrector and the two products blend together, creating a muddy, off-tone base.
Fix: dust translucent powder lightly over the corrector, wait 10 seconds, then proceed with foundation using a pressing motion.
Wrong Formula for Skin Type
Dry skin and cream correctors work well together. Oily skin and cream correctors are a different story.
Dry skin: cream formula, melts into skin, doesn’t pull or drag on dry patches.
Oily or combination skin: liquid formula, matte finish, holds better through the day without sliding.
NYX makeup artist Emma Kirk specifically recommends liquid correctors for oily skin because they have a more matte feel and wear more reliably under foundation.
Color Corrector Tips for Different Skin Tones
Skin tone changes everything. The same green corrector that works perfectly on fair skin can look too stark on medium skin. And the peach that handles dark circles beautifully on a fair complexion does basically nothing on deep skin tones.
| Skin Tone | Dark Circles | Redness | Dullness |
|---|---|---|---|
| Fair | Peach or pale yellow | Green | Lavender or pink |
| Medium | Peach or light orange | Green or yellow | Light peach |
| Deep | Orange or red-orange | Orange or deep yellow | Peach or warm gold |
Fair Skin Tones
Pink and peach correctors work well for dark circles. Green handles redness from acne and rosacea. Lavender brightens sallow or yellow-toned areas.
One caution: avoid heavy orange on fair skin. Even a small amount reads as a visible color rather than a neutralizer. Peach is almost always the safer choice.
Medium Skin Tones
Peach correctors for dark circles work on most medium skin tones, but the intensity of the circles determines whether to step up to orange. Yellow-toned green correctors work better for redness on medium-warm complexions than pure green, which can sit too cool against warmer skin.
As celebrity makeup artist Katie Mellinger explains, medium skin with warm undertones often responds better to yellow-green over pure green for redness around the nose and blemish-prone areas. Olive undertones specifically can benefit from mustard-toned correctors for dark spots.
Deep Skin Tones
Orange and red-orange correctors are the standard for dark circles and hyperpigmentation on deeper skin tones. The melanin-rich skin has more pigment in the discolored areas, so a more intense corrector is required to cancel it out.
Avoid lavender entirely on deep skin tones. It reads ashy, creates a flat finish, and does nothing useful for the complexion at this depth.
For redness, deep yellow or orange correctors work better than green, which can look too stark against deeper complexions. The goal is always for the corrector to visually disappear, not sit on top of the skin as a visible layer.
Best Color Correctors by Skin Concern
Product choice matters nearly as much as technique. A good color corrector blends without dragging, builds coverage without caking, and doesn’t shift once foundation goes over it.
The face makeup segment held 34.8% of the color cosmetics market share in 2025 (Coherent Market Insights), driven by demand for products that correct and enhance the base. Color correctors sit at the center of this growth, with more brands now offering correctors in expanded shade ranges to serve diverse skin tones.
For Redness and Rosacea
Top pick: Dr. Jart+ Cicapair Tiger Grass Color Correcting Treatment.
It’s one of the few correctors that can replace foundation on no-makeup days for mild redness. The centella asiatica formula treats while it corrects. At under $30, it’s also one of the most accessible green correctors with genuine skincare benefits.
MAC Pro Longwear Concealer contains chamomile extract that soothes rosacea-prone skin alongside medium to high coverage. Good for days when correction and concealment need to happen in one step.
For Dark Circles
NARS Radiant Creamy Liquid Color Corrector comes in four shades: light peach, peach, orange, and red. Each targets blue or purple undertones while adding luminosity. It’s the #1 selling prestige concealer in the U.S. according to NPD Group data through October 2024, partly because it works well both as a corrector and standalone concealer in warmer undertones.
For a palette option, the NYX Color Correcting Concealer palette offers six shades including peach, brownish-orange, green, yellow, lavender, and pink. You can mix shades for a custom corrector matched to your specific undertone, which is particularly useful for olive skin tones that don’t fit neatly into standard categories.
For Hyperpigmentation
Bobbi Brown Skin Long-Wearing Color Corrector Stick is a reliable option for targeted spot correction. The stick format gives precise application on specific dark spots without picking up surrounding product.
Charlotte Tilbury Magic Vanish Color Corrector is the choice for fair skin with under-eye pigmentation. The creamy formula brightens without looking chalky. For those covering hyperpigmentation with makeup, pairing a corrector with a medium-coverage foundation gives more natural results than stacking full-coverage products.
Formula by Skin Type
Not every corrector works for every skin type, even if the shade is right.
- Dry skin: cream or stick formulas, look for squalane or jojoba in the ingredient list
- Oily skin: liquid formulas with matte finish, set more aggressively with powder
- Sensitive skin: water-based formulas, avoid heavy fragrance, look for calming ingredients like aloe or centella
- Mature skin: lightweight cream, avoid thick formulas that settle into fine lines around the eye
The e.l.f. Camo Color Corrector and L.A. Girl Pro Conceal are solid drugstore options. Neither breaks the bank, and both perform comparably to mid-range products for everyday correction on mild to moderate discoloration.
FAQ on How To Apply Color Corrector
Does color corrector go on before or after foundation?
Color corrector goes on before foundation. Apply it directly on the discoloration, let it set with translucent powder, then press foundation over the top using a damp sponge. This order keeps the corrector in place.
How much color corrector should I use?
Less than you think. Color correctors are highly pigmented, so a small amount covers a lot. Start with a tiny dot, pat it in, and build a second thin layer only if the discoloration is still visible underneath.
What color corrector cancels dark circles?
Peach for fair to medium skin. Orange or red-orange for medium to deep skin tones. Dark circles have blue or purple undertones, and these warmer shades sit opposite them on the color wheel, neutralizing the discoloration completely.
Can I use color corrector without foundation?
Yes, with lighter shades like lavender, yellow, or pink. More pigmented correctors like orange or green need foundation over them. Without it, the color stays visible on the skin and looks unnatural rather than corrected.
How do I blend color corrector without moving it?
Pat, never rub. Use a flat concealer brush or fingertip and press the product into the skin with light tapping motions. Set with powder immediately after. A damp sponge works well for blending foundation over the corrector without disturbing it.
What is the difference between color corrector and concealer?
Color corrector neutralizes discoloration using opposing pigments. Concealer covers using skin-toned pigment. They do separate jobs. For stubborn dark circles or hyperpigmentation, you use color corrector first, then concealer on top for full coverage.
Which color corrector works for redness and acne?
Green corrector cancels red. Apply it directly on blemishes, rosacea patches, or redness around the nose using a flat brush. Keep it localized. Too much green spread across a large area creates a gray cast under foundation.
Do I need to set color corrector with powder?
Yes, especially cream formulas. Without powder, the corrector stays active and mixes into foundation as you apply it, creating a muddy, off-tone base. A light dusting of translucent powder locks it in place before anything goes on top.
What color corrector should I use for hyperpigmentation?
Peach or orange, depending on skin tone. Fair skin needs peach for mild dark spots. Deeper skin tones need orange or red-orange for pronounced hyperpigmentation. Apply in thin layers directly on the spot, not the surrounding skin.
Can color corrector cause a cakey finish?
Yes, if you over-apply. Too much product under foundation creates visible buildup. The fix is using less corrector, setting it with a light powder, and applying foundation with a pressing motion rather than dragging it across the skin.
Conclusion
This conclusion is for an article presenting how to apply color corrector as a practical skill, not a complicated extra step. Get the shade right for your skin tone, use less product than feels natural, and always set before layering.
Green handles redness. Peach and orange neutralize dark circles and hyperpigmentation. Skin tone determines which corrector shade actually works for you.
Patting technique, correct layering order, and setting powder do most of the heavy lifting. Skip any one of those and the whole base routine suffers.
Whether you’re working with a cream corrector palette or a single-shade stick, the method stays the same. Small amounts, thin layers, and the right color for the job.

- What Is Skin Tint and Why Everyone Is Obsessed - July 11, 2026
- What Is Foundation and How Do You Choose One? - July 6, 2026
- How to Make Blush Last Longer - July 3, 2026


