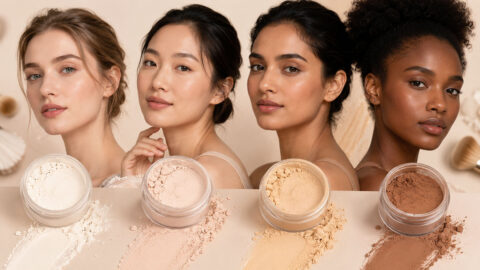
Color correcting before concealer is the step most people skip, and it’s usually why a covered spot still shows a faint gray or ashy tint by noon. The idea itself isn’t complicated: neutralize the discoloration with a corrector first, then let concealer and foundation do their normal job over a base that’s already been canceled out.
Estheticians use this on melasma, sun spots, post-inflammatory marks, and acne scars pretty much interchangeably, though the shade always comes down to skin tone and how deep the pigment sits, not just what color the mark looks like on the surface.
Post-inflammatory hyperpigmentation turns out to be the biggest driver behind this whole routine. A 2024 international survey in the Journal of the American Academy of Dermatology found that 15 percent of respondents reported it, which tracks with how often people reach for a corrector before anything else.
What Is Covering Hyperpigmentation With Makeup
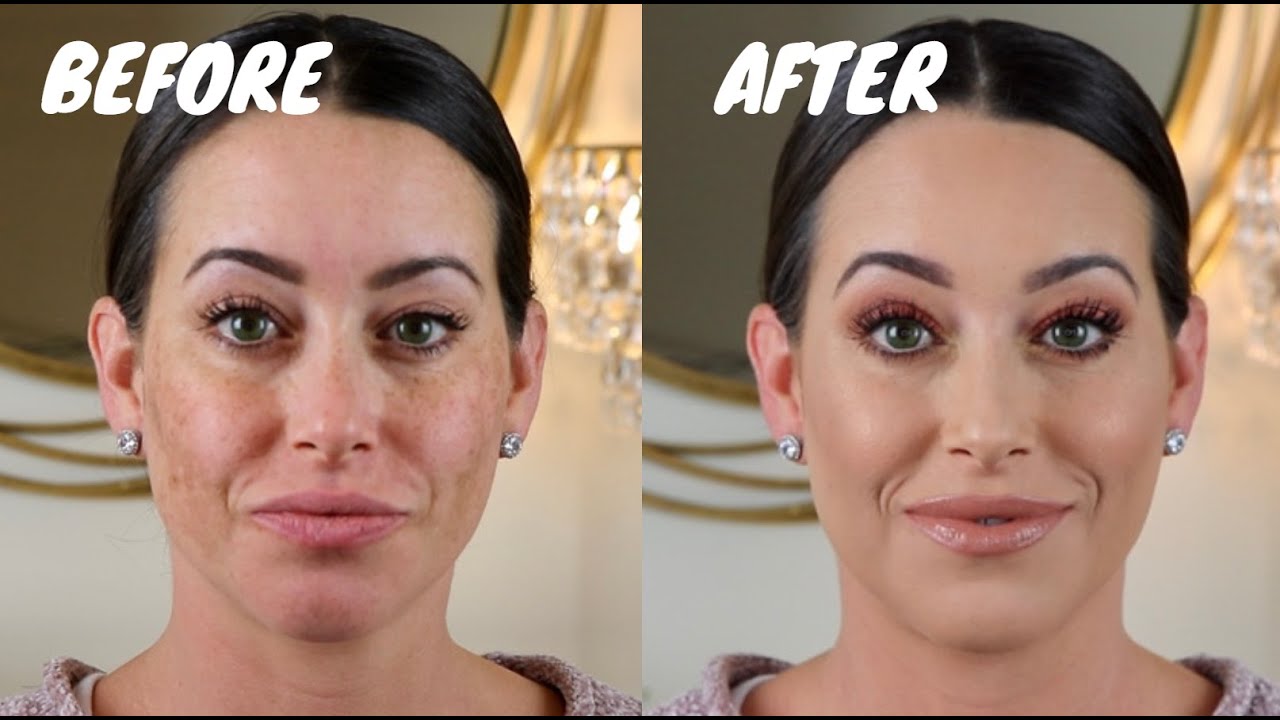
Skip the definition for a second. What actually happens is a color corrector goes on first, canceling out whatever hue the discoloration is showing, and then concealer or foundation goes over the top to match actual skin tone once that neutralizing has already happened.
That’s a different job than skincare. Foundation and concealer hide a dark spot’s appearance for the length of a school day or work shift. Neither one fades the pigment sitting underneath, no matter how expensive the formula.
Corrector cancels a specific hue using its opposite on the color wheel. Concealer builds heavier, more pigmented coverage directly over a spot that’s already neutral. Foundation comes last and evens everything out across the whole face, and it helps to know what foundation actually is versus what a concealer is built to do, since expectations get unrealistic fast when people blur the two.
Most of the ashy, gray look people complain about traces back to one thing: skipping the corrector and going straight to concealer. Understanding what a color corrector actually does (it cancels color, it doesn’t physically hide anything) changes how much product actually gets used and exactly where it goes.
Types of Hyperpigmentation Makeup Can Cover
Melasma, sun spots, post-inflammatory marks and acne scars behave differently enough that no single corrector shade covers all of them. Color, depth and pattern all shift from one type to the next, so what works on a fading acne mark can look completely wrong smeared across melasma.
Melasma
A 2024 international survey published in the Journal of the American Academy of Dermatology found that 11 percent of the surveyed population reported melasma, and 68 percent of those cases were women.
The patches show up symmetrical and blotchy, usually across the cheeks, forehead and upper lip, and they tend to darken with sun exposure or hormonal shifts (pregnancy, birth control, that kind of thing). It’s also more common in Fitzpatrick skin types III through V. Full coverage foundation tends to hold up better here than concealer working alone, mostly because melasma rarely stays contained to one small dot the way a sun spot does.
Post-Inflammatory Hyperpigmentation
Post-inflammatory hyperpigmentation is what’s left behind after acne, a cut, or some other injury finishes healing, a flat mark rather than raised scarring. The color ranges anywhere from pink-brown to a much deeper brown depending on skin tone, and the corrector shade should be picked by matching that depth (orange or red) rather than trying to match undertone.
The same 2024 JAAD survey found that 71 percent of people dealing with post-inflammatory hyperpigmentation had gone through acne breakouts beforehand, which tracks with how often this shows up on people already managing active or recent breakouts.
Sun Spots
Solar lentigines (the clinical name for sun spots) show up flat and sharply outlined, nothing like melasma’s blotchy edges. They land wherever skin catches the most light over years, so cheekbones and the bridge of the nose are the usual spots. They’re generally smaller than melasma patches, don’t shift with hormones the way melasma does, and a single dot of corrector usually covers one without needing a full sweep across the cheek.
Acne Scars
Acne scars are mostly flat discoloration, though some overlap into slightly raised or pitted texture exists too. Orange corrector tends to work for lighter skin, red for deeper skin, and it should go only on the mark itself, not blended out across clear skin nearby. Concealer by itself often looks patchy in this spot specifically, since the skin around an acne scar usually has its own texture to blend into, unlike a smooth sun spot.
How Color Correcting Neutralizes Hyperpigmentation
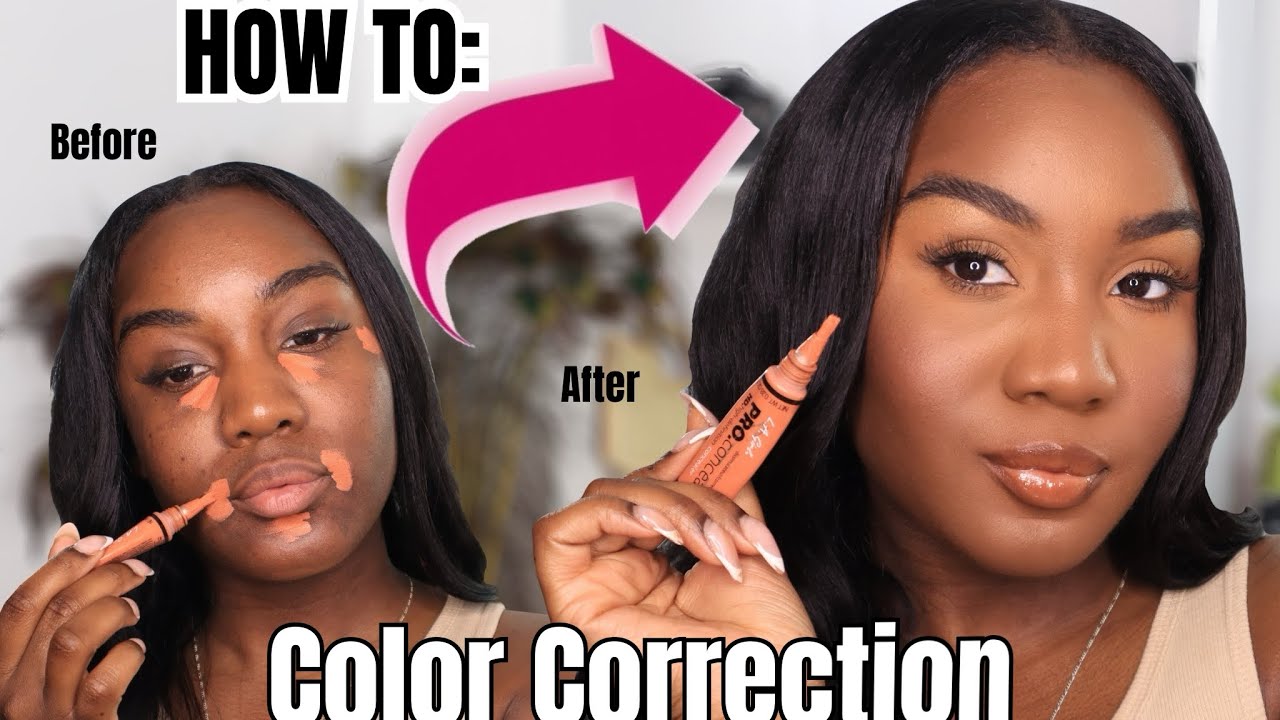
Placing an opposite hue directly over the discoloration, before any concealer touches the skin, is the entire trick. Complementary colors cancel each other out on sight. That’s just how color theory works, nothing makeup-specific about it.
Go straight to concealer without that step and a lot of spots keep bleeding through no matter how much product gets piled on. Make Up For Ever and Huda Beauty both built whole palettes around this exact idea, bundling several corrector shades together since almost nobody needs just one.
Why Complementary Colors Cancel Out Discoloration
Green, orange and red do different jobs depending on what’s actually causing the discoloration, and grabbing the wrong one is a common mixup:
- Green cancels red, which helps with redness, not brown spots
- Orange cancels blue-toned darkness that shows up in some acne marks
- Red cancels deep brown to black-brown pigment on darker skin
The pairing only works when the corrector sits directly on the spot and gets blended just at the edges. Smearing it across the whole face defeats the point.
Once the color’s actually canceled, the area reads close to a neutral base tone, so whatever concealer or foundation goes on after has a lot less work left to do.
Which Corrector Shade Matches Your Hyperpigmentation
Orange handles brown spots on fair to light-medium skin. Peach sits in the middle for softer, less intense discoloration. Deep brown to black-brown marks on tan to deep skin need red, which people underuse more often than any other shade in the palette. Green isn’t for pigmentation at all, it’s strictly a redness fix.
| Corrector Shade | Neutralizes | Best Skin Tone | Example |
|---|---|---|---|
| Orange | Brown and dark spots | Fair to light-medium | Huda Beauty Correct and Conceal Palette |
| Peach | Mild discoloration, blue undertones | Fair to medium | Make Up For Ever color correcting palette |
| Red | Deep brown to black-brown marks | Tan to deep | Anastasia Beverly Hills corrector |
| Green | Redness, not brown pigmentation | All tones with active redness | Included in most correct-and-conceal palettes |
Matching by Pigmentation Color
Brown or tan spots need orange or peach, picked by how deep the mark actually sits. Reddish or purplish marks call for green, used sparingly since piling it on can push the skin toward gray instead of neutral. The very dark, almost black-brown marks need red, and that’s the shade people skip most often by mistake, even though it’s the only one strong enough to cancel that depth of pigment.
Testing a small dot directly on the spot beats guessing off the pan or a swatch on the back of a hand, every time.
Matching by Skin Tone Depth

Skin tone depth matters as much as the color of the spot itself. Fair to light-medium tones generally need orange, tan to deep tones need red, and peach works as the transitional shade between the two.
Go too light and a chalky ring shows up around the edges of the corrected area. Go too dark and the spot can actually get more visible once foundation goes on top of it. Depth ends up mattering more than undertone when deciding between orange and red specifically.
Choosing the Right Coverage Level for Your Hyperpigmentation

Faint, recent marks do fine with something light. Moderate spots need medium coverage. Melasma or sun damage that’s been sitting for years usually calls for full coverage, and reaching for that heavy stuff everywhere on the face, even the parts with nothing to hide, is exactly what makes makeup start looking like makeup instead of skin.
Light coverage, something like NARS Radiant Creamy Concealer, blends fast and feels close to weightless, which is nice, but it’s not going to touch anything beyond the faintest post-acne mark.
Medium coverage (Tarte Shape Tape is the one most people reach for) builds without looking obviously stacked on top of skin, though deeper spots usually need a second pass, which eats into time most people don’t want to spend on concealer alone.
Full coverage is the only category that hides melasma or serious sun damage in a single pass. Dermablend is the usual example here. The tradeoff shows up fast if it’s applied past just the marks though; cakey is the word most people use once that happens.
There’s a broader approach to choosing the right concealer that applies here too, since coverage level and shade both need settling before corrector and foundation go on top.
Matching Foundation to Your Neck and Jawline

Test foundation shade against the neck and jawline, not just center-face. That’s where mismatches actually show up once you’re standing in daylight instead of bathroom lighting.
Corrector shifts the base tone slightly underneath, so a shade that looked right in the mirror at home can read completely differently once it’s sitting over an orange or red corrector. Swipe two or three close shades along the jaw, give them a few minutes to oxidize, then check the result outside rather than trusting store lighting or a ring light.
Fenty Beauty’s Pro Filt’r line launched with 40 shades back in 2017 and later expanded to 50, built specifically to close the gaps that left deeper and olive skin tones without a real match on the wall.
More shades on a wall at Sephora or Ulta Beauty makes finding something close easier, sure, but the actual testing step still matters more than the number printed on the display. The same logic behind matching makeup to your actual skin tone across the whole face applies here, just with sharper focus on the jaw and neck instead of the cheeks.
Prepping Skin Before You Color Correct

Moisturizer goes on first, then primer, then sunscreen, and that order isn’t optional. Going straight for corrector on dry, unprepped skin is why coverage can turn patchy by midday no matter how good the products are.
The same logic behind prepping skin before makeup in general applies here too, just with more attention paid to the exact areas that’ll actually carry corrector and concealer later.
Primer
Primer smooths texture so corrector sits evenly instead of grabbing onto dry patches or pooling into open pores. Silicone-based formulas blur texture and help everything grip better, oil-free versions suit oily or acne-prone skin more, and a hydrating formula helps around the nose and mouth specifically, wherever dry patches tend to show up.
Knowing using makeup primer correctly (a thin, even layer, not a thick one) keeps corrector from sliding around later in the day.
Sunscreen
The American Academy of Dermatology recommends broad-spectrum SPF 30 or higher every day, which blocks about 97 percent of UVB rays. Sun exposure is one of the main triggers behind both melasma and post-inflammatory hyperpigmentation, so skipping sunscreen under makeup actively works against whatever the makeup is trying to cover in the first place.
Mineral formulas built around zinc oxide (La Roche-Posay and EltaMD both make solid ones) tend to layer more smoothly under corrector than heavier chemical sunscreens do. For actually fading pigment rather than just blocking future damage, that’s a separate track entirely: vitamin C serum, niacinamide, or a retinoid worked in earlier in the routine over a matter of weeks, and for stubborn cases, prescription options like hydroquinone under a dermatologist’s guidance go further still.
Step by Step: Applying Corrector, Concealer and Foundation

Order beats product quality here. Primer, corrector, concealer, foundation, then powder, and skipping a step or doing them out of sequence is exactly what lets the corrected spot peek back through by midday.
- Smooth on primer, focusing on the areas that will carry corrector later
- Dot the corrector directly onto the spot with a small brush or a clean fingertip
- Blend only the edges using a stippling motion, not a dragging one
- Pat concealer over the corrected area with a damp sponge or brush
- Apply foundation across the whole face to blend the corrected zone into the rest of the skin
- Set with a light dusting of powder before moving on to the rest of the routine
A stippling brush, or something like the Beautyblender, presses product into skin instead of smearing it around, which keeps corrector from shifting once concealer lands on top.
Getting how to apply color corrector right at step two decides whether steps three through six even work the way they’re supposed to. The same care applies to using concealer at step four; patting it on holds the correction in place in a way rubbing just doesn’t.
KVD Beauty’s Lock-It Concealer gets used this way often, a small amount pressed right over the corrected spot instead of swept across the whole under-eye area.
Setting Hyperpigmentation Coverage So It Lasts
Oil, sweat, and the sunscreen you reapply later in the day are what actually move corrector and concealer out of place, not time alone. The American Academy of Dermatology recommends reapplying sunscreen every two hours outdoors, regardless of SPF number, since UV exposure is the exact trigger that undoes the color-correcting work happening underneath.
Water-resistant sunscreen formulas hold up for 40 minutes in water, and very water-resistant ones for 80 minutes, per FDA labeling rules the AAD cites. A light dusting of translucent powder (light, not heavy) keeps the corrected area from turning dry or gray as the day wears on.
None of this replaces the sunscreen step from earlier. It just accounts for the fact that a full day outdoors outlasts one morning application, no matter how good that first layer was.
Setting Powder
Powder only needs to go where corrector and concealer actually sit, not across the whole face. Over-powder everywhere else and there’s suddenly a visible texture difference between the corrected zone and everything around it.
Laura Mercier’s Translucent Powder shows up in this routine constantly, mostly because it doesn’t add color, so it locks the correction in without shifting the shade underneath. Learning how to apply setting powder with a puff and a light press, rather than a brush swept across the whole face, keeps that layer thin enough to stay invisible.
Setting Spray
Setting spray is the last step, fusing powder and everything underneath into one surface instead of a stack of separate products sitting on top of each other. It holds up better in humidity and heat than powder does alone, and a light mist from arm’s length (not sprayed close to skin) works better than people expect for a midday touch-up that doesn’t disturb the corrector underneath.
How to apply setting spray correctly matters more on heavy sweat or humid days, since that’s exactly when corrector tends to break down first.
Mistakes That Make Hyperpigmentation Coverage Look Worse

Coverage that looks off almost always comes down to a handful of repeat offenders, and none of them are about the products themselves.
- Going straight to concealer without a corrector first leaves a gray or ashy cast sitting right over the spot
- Matching shade only at the center of the face, which can look fine on the cheek and still create a visible line at the jaw
- Piling on corrector, concealer and foundation heavily across the whole face instead of just the marks that actually need it
- Rubbing instead of patting, since dragging a sponge or brush across a corrected spot moves the pigment before it’s had a chance to set
Heavy layering usually turns into makeup that looks cakey by midday, especially once oil starts breaking down whatever extra product got piled onto the corrected area.
Shade mismatches tend to show up hours after application rather than at the mirror, and knowing how to stop foundation from oxidizing matters just as much for hyperpigmentation coverage as picking the right shade to begin with.
Charlotte Tilbury’s Magic Away concealer is full coverage enough that a little genuinely goes a long way, and it’s one people over-apply out of habit more than actual need.
When Makeup Cannot Fully Cover Hyperpigmentation
Makeup has limits. Very deep, long-standing, or textured discoloration can be softened but not fully erased with corrector and concealer alone.
When Pigmentation Is Too Deep to Fully Cover
Melasma in particular tends to come back no matter how careful the routine is, since it’s a recurring pigment condition rather than a single mark that gets neutralized once and stays gone. A widely cited meta-analysis in Acta Dermato-Venereologica found that 72 percent of patients relapsed within two months of stopping oral tranexamic acid, one of the standard medical treatments for melasma. That kind of recurrence is a big part of why makeup alone can start to feel like an endless task with melasma instead of a one-time fix.
There’s a mental toll to this too. A 2024 meta-analysis in Frontiers in Psychiatry found a 43.4 percent pooled prevalence of depression among melasma patients, which says something about how much ongoing pigmentation can weigh on a person beyond just how it looks.
Even a well-matched routine still shows shadowing on very dark or very deep spots, needs touch-ups more than most people want to deal with across a full day, and the pattern tends to return in the exact same place within weeks of fading, which usually points to something hormonal or chronic worth bringing up with a dermatologist rather than something makeup alone is going to solve.
When Texture, Not Color, Is the Problem
Pitted or raised acne scars are a texture problem, not a color one, and color correcting was never built to fix depth. Pitted scars catch light differently than the surrounding skin because of the indentation itself, so even a perfectly matched corrector still reads as a faint shadow. Raised or hypertrophic scars work the same way in reverse: the slight elevation casts its own small shadow that concealer just sits on top of rather than corrects.
A silicone-based, pore-filling primer softens how obvious that texture looks under makeup, though it doesn’t remove the shadow that color correcting alone was never going to reach anyway.
FAQ on How To Cover Hyperpigmentation With Makeup
What is the difference between a color corrector and a concealer
Corrector cancels a specific hue on the color wheel before anything else touches the skin. Concealer’s job is different: it adds opacity and coverage on top, once that canceling has already happened. Skip the corrector step and concealer alone usually ends up looking gray sitting directly over a dark spot, which is the single most common complaint people have with this routine.
Does concealer or foundation treat hyperpigmentation or only hide it
Neither one treats the pigment underneath. Concealer and foundation sit on top of skin, hide the discoloration for the day, then wash off along with the rest of the makeup at night. Actually fading pigment over the long run needs something else entirely: vitamin C, niacinamide, retinoids, or hydroquinone worked into a separate skincare routine.
Is color correcting necessary or can you skip straight to concealer
Skipping it works fine for faint, recent marks where concealer alone covers evenly without help. Deeper melasma, sun spots or acne scars are a different story. Concealer without a corrector underneath often ends up gray or muddy on those, since it’s missing the opposite hue needed to cancel the discoloration first.
Does drugstore concealer perform as well as high end for hyperpigmentation
Pigment load and formula stability matter more than the price tag does. Budget correctors and concealers often run on similar base technology to prestige options, though wider shade ranges and steadier oxidation control tend to show up more consistently in higher-priced lines like Fenty Beauty or NARS.
Should color correcting be a daily step or an occasion only step
Daily use is common for melasma or long-standing marks needing full coverage every time makeup goes on. Lighter, fading post-acne marks usually only need a corrector for special occasions, since that discoloration is already fading on its own without any help.
Can wearing makeup make hyperpigmentation worse over time
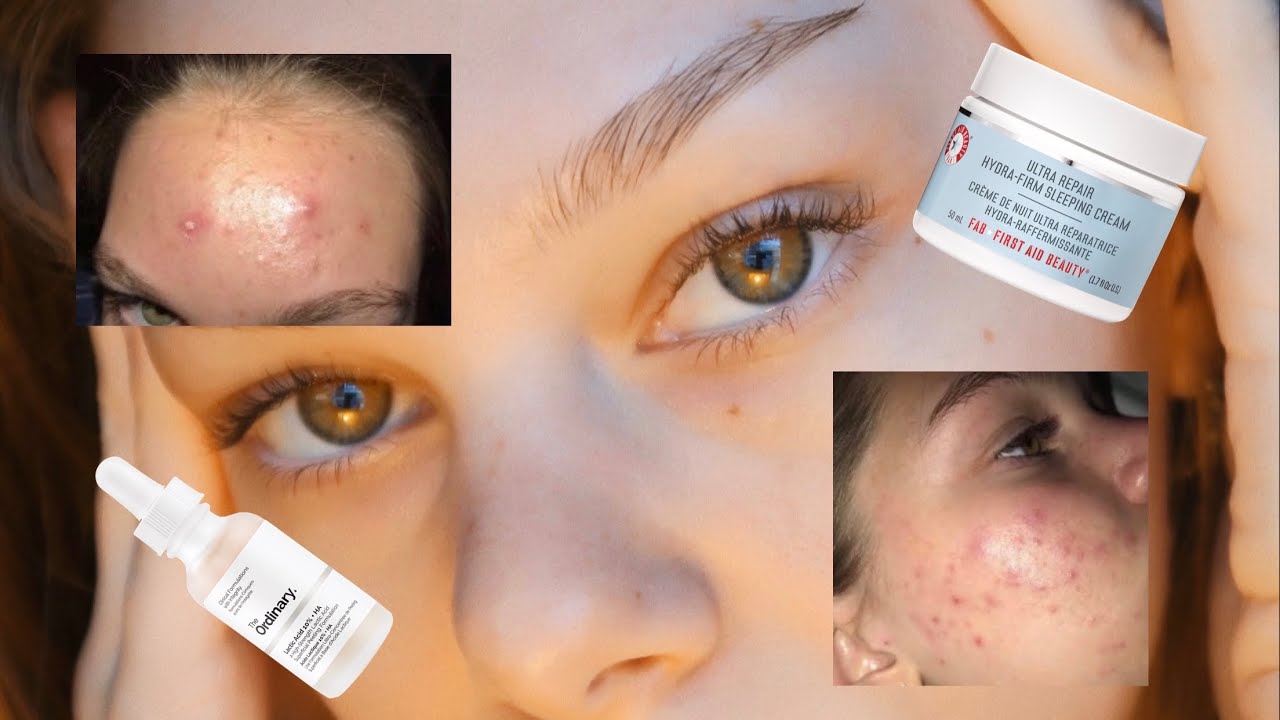
Makeup itself doesn’t darken pigment that’s already there. The actual risk comes from skipping sunscreen underneath it, since UV exposure is the main trigger for melasma and post-inflammatory hyperpigmentation, and separately, heavy pore-clogging formulas can trigger fresh breakouts that leave brand new marks behind.
What Should You Buy First for How To Cover Hyperpigmentation With Makeup?
One purchase actually matters starting out, not three: a single color corrector in the shade that matches the specific discoloration on your face. Concealer and foundation choices genuinely don’t matter until that first neutralizing step gets settled.
Buying order matters just as much as application order here. Getting foundation before locking in a corrector wastes whatever shade-matching effort went into it, since the corrector shifts the base tone underneath and changes what foundation shade will actually look right. Corrector matched to the discoloration comes first, then concealer at whatever coverage level the spot needs, then foundation matched well past the jaw and neck.
The tradeoff shows up immediately: a corrector by itself changes nothing visible until concealer and foundation follow it, so that first purchase shows zero payoff on its own. Once that sequence is locked in, the same shade and coverage logic carries straight into a full foundation application routine for the rest of the face.

She started writing on the site after fielding the same questions from clients and friends often enough to just write the answers down: which red won't turn orange on a warm undertone, how to keep lipstick from feathering into fine lines, why a "12-hour" formula rarely survives dinner.
Every review on the site follows the same rule she uses with paying clients: wear it first, then decide if it's worth recommending.
- How to Make Eyeliner Last Longer Without Smudging - August 31, 2026
- How to Make Eyeshadow Last Longer All Day - August 29, 2026
- How to Find Your Undertone in 5 Easy Steps - August 27, 2026