

You spent five minutes perfecting your lip line. Two hours later, it’s gone.
Learning how to make lip liner last comes down to prep work, application technique, and setting methods that most people skip.
Lip pencil fades because lips move constantly. Talking, eating, drinking. Your mouth never stops.
The right approach extends wear time from 2 hours to 8+ hours without touch-ups.
This guide covers everything: lip exfoliation, primer application, the powder-through-tissue trick, and layering methods that lock color in place.
Seven steps. Five to ten minutes. All-day lip definition that survives coffee, lunch, and whatever else your day throws at you.
How to Make Lip Liner Last
Making lip liner last is the process of preparing lips and applying lip pencil with specific techniques to extend wear time from 2 hours to 8+ hours.
You need this when attending events, working long shifts, or wanting defined lips without constant reapplication.
This guide covers 7 steps requiring 5-10 minutes and basic makeup application skills.
Prerequisites
Gather these items before starting:
- Lip scrub or soft toothbrush
- Lip primer or concealer
- Lip liner pencil (firm-textured formula)
- Pencil sharpener
- Translucent setting powder
- Tissue
- Fluffy powder brush
- Setting spray (optional)
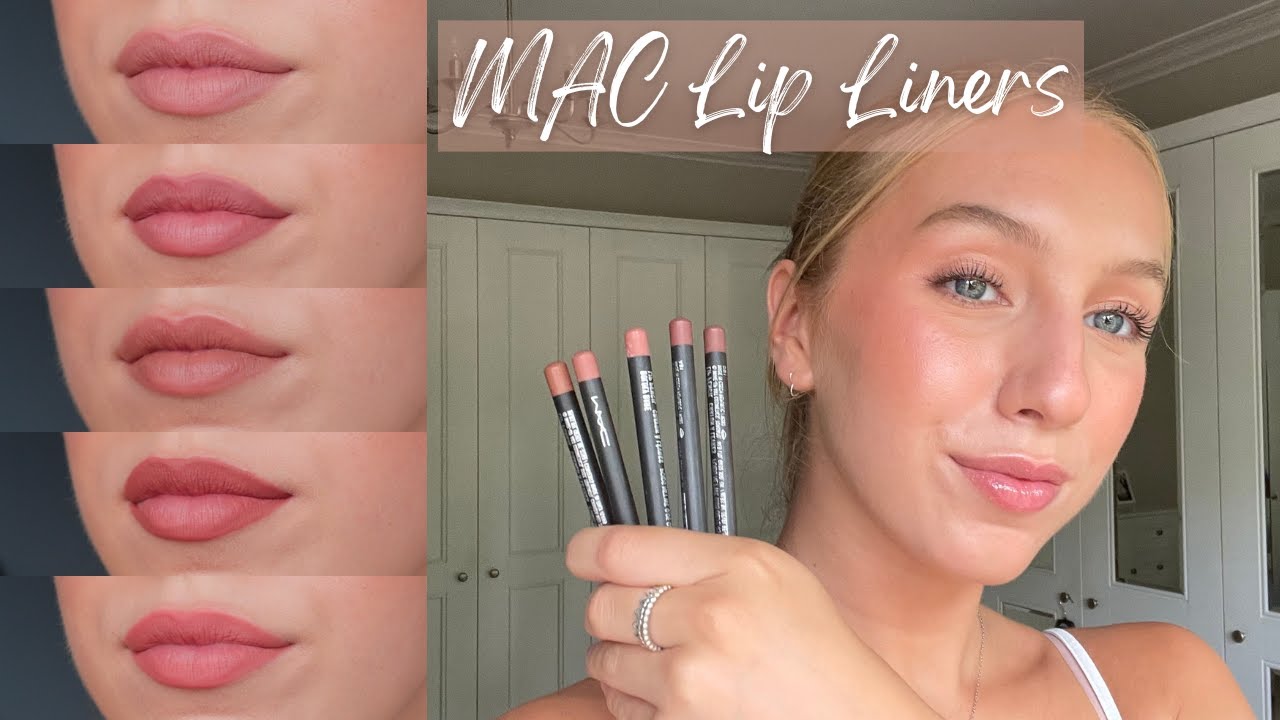
A long lasting lip liner with a wax-based formula works best for all-day wear.
Transfer-proof and waterproof formulas contain film-forming polymers that dry completely on lips.
Step One: How Do You Prepare Your Lips Before Applying Liner?
Smooth lip surface allows liner to adhere evenly and prevents patchy application throughout the day.
Skip this step and your lip pencil will grab onto dead skin, creating uneven color distribution that fades within hours.
What You Need to Do
Exfoliate your lips naturally using a lip scrub or soft toothbrush in circular motions for 30 seconds.
Remove dead skin with a damp cloth.
Apply thin layer of lip balm, wait 2 minutes, blot excess with tissue.
Why This Step Matters
Dead skin cells create barriers between lip liner pigment and your actual lip surface.
The balm adds just enough moisture without creating slip that causes feathering later.
Proper lip care for dry lips before makeup extends wear time significantly.
Step Two: Where Do You Apply Lip Primer?

Lip primer creates a base layer that fills fine lines around your mouth and gives lip liner something to grip.
Without this step, your lip color slides around and migrates into those tiny lines around your lips (you know the ones).
What You Need to Do
Apply pea-sized amount of lip primer or concealer to fingertip.
Pat product across entire lip surface, including corners.
Wait 60 seconds for product to set before proceeding.
Why This Step Matters
Understanding how to use makeup primer on lips transforms your lip color longevity.
The primer neutralizes natural lip color too, so your chosen shade appears true to tone.
Concealer works as a budget-friendly alternative; same grip, similar results.
Step Three: How Do You Sharpen Lip Liner for Precision?

Sharp tips create thin, precise lines that stay defined longer than thick, blurry lines from dull pencils.
Took me forever to figure out why my lip edges always looked messy by noon. Dull pencil tip. Every single time.
What You Need to Do
Insert pencil into sharpener, rotate 3-4 times.
Check tip creates a fine point (not flat or rounded).
Test on back of hand to confirm smooth application.
Why This Step Matters
Knowing how to sharpen lip liner properly prevents product waste and improves precision.
Sharp points let you correct mistakes and redefine edges after meals.
A dull tip deposits too much product, creating thick lines that smudge faster and look uneven.
Step Four: How Do You Apply Lip Liner for Maximum Wear?
Filling lips completely (not just outlining) creates a base layer that shows through when lipstick wears off.
Most people only trace the edges. Big mistake.
What You Need to Do
Start at Cupid’s bow, draw downward strokes following natural lip line.
Connect corners of mouth to complete outer border.
Fill entire lip surface using side of pencil tip with medium pressure.
Why This Step Matters
Learning how to apply lip liner across the full lip gives your lipstick something to grip.
The wax-based formula creates a barrier that prevents lip color from sliding into fine lines.
When your top layer fades after lunch, you still have defined color underneath instead of that weird outline-only look.
Step Five: How Do You Set Lip Liner with Powder?

Translucent powder locks pigment without direct contact, preventing cakiness while absorbing oils.
This trick alone can add 3-4 hours to your wear time.
What You Need to Do
Separate one tissue into two thin layers.
Hold single layer against lips.
Dust translucent powder over tissue using fluffy brush, press gently, then remove tissue.
Why This Step Matters
Understanding how to set lipstick with powder applies to lip liner too.
The tissue acts as a filter; only fine powder particles reach the lip surface.
Direct powder application creates a cakey, dry mess. The tissue method keeps things smooth.
Step Six: How Do You Layer Lipstick Over Liner?
Multiple thin layers bond together, lasting longer than single thick application.
Sounds counterintuitive but trust this process.
What You Need to Do
Apply thin coat of matte lipstick in matching shade.
Blot with tissue, removing top layer of product.
Apply second thin coat, then trace over outer lip edge with liner to reinforce definition.
Why This Step Matters
Knowing how to apply matte lipstick properly doubles your wear time.
Blotting removes the surface layer that transfers onto cups and napkins.
The final liner trace creates a crisp lip edge definition that stays sharp for hours.
Step Seven: How Do You Seal Lip Products with Setting Spray?
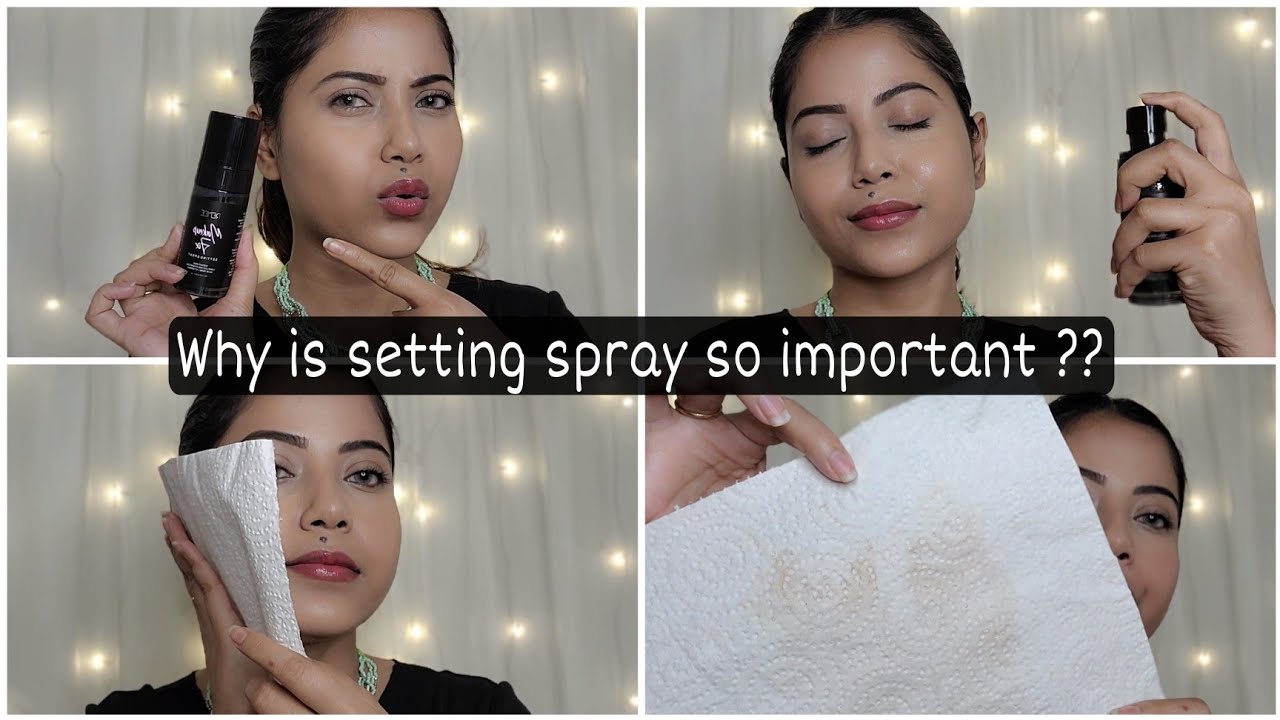
Setting spray creates protective film that prevents transfer and moisture breakdown.
Optional step but worth the extra 10 seconds for events or long days.
What You Need to Do
Hold setting spray 8-10 inches from face.
Spray one light mist across lips.
Keep mouth slightly open until product dries (10-15 seconds).
Why This Step Matters
The spray adds an invisible barrier that resists saliva, drinks, and friction.
This final seal helps make lipstick transfer proof for kiss-proof results.
One light mist. Heavy application causes product to crack and flake.
Verification
Your lip liner application is successful when:
- Color appears even without streaks or patches
- Edges look crisp and defined along the vermilion border
- Product does not transfer when pressing lips to back of hand
- Lips feel comfortable, not heavy or cakey
Test the transfer by pressing lips firmly on a white tissue. Minimal color transfer means you nailed it.
Troubleshooting
Lip Liner Looks Patchy After 2 Hours
Apply more product during the fill-in step; thin application wears faster than thorough coverage.
Choosing the right lip liner formula also matters. Creamy formulas fade faster than firm, wax-based options.
Liner Feathers Into Fine Lines Around Mouth
Apply concealer around outer lip edges before starting; creates barrier preventing migration.
Learning how to stop lipstick from feathering starts with proper lip primer application in step two.
Color Transfers to Cups and Food
Use a transfer-proof or waterproof lip formula; these contain film-forming polymers that dry completely.
The blotting and powder steps are non-negotiable for smudge-proof results.
Lips Feel Dry and Uncomfortable
Choose creamy formula lip liners; apply lip oil to center of lips only (avoid edges).
For glossy finish without sacrificing wear time, learn how to apply lip gloss over lipstick at the center only.
Alternative Method: Matte Eyeshadow Setting
Standard powder method takes 30 seconds using translucent powder; best for natural finish on all skin tones.
Eyeshadow method takes 45 seconds using matte eyeshadow matching liner shade; best for intensifying pigment and extending wear to 10+ hours.
Choose eyeshadow method when wearing dark lipstick to events lasting 8+ hours.
Related Processes
- How to make lipstick last longer
- How to do ombre lips
- What is lip stain (alternative to traditional lip liner)
- Lip care routine for healthier lips
- How to apply lipstick on dry lips
FAQ on How To Make Lip Liner Last
Why Does My Lip Liner Fade So Quickly?
Lip liner fades due to moisture, oils, and constant lip movement from talking and eating.
Skipping lip primer and using creamy formulas instead of wax-based formulas accelerates fading. Setting with translucent powder extends wear significantly.
Should I Fill My Entire Lips with Lip Liner?
Yes. Filling the entire lip surface creates a grip layer for lipstick and prevents the harsh outline effect when top color wears off.
Use the side of your pencil tip for faster coverage.
What Type of Lip Liner Lasts the Longest?
Transfer-proof formulas with film-forming polymers last longest, typically 8-10 hours.
Waterproof lip liners resist moisture but may need oil-based remover. Retractable pencils tend to be creamier and fade faster than wooden lip pencils.
Can I Use Lip Liner Without Lipstick?
Absolutely. Lip liner alone creates a matte finish that often outlasts traditional lipstick.
Fill lips completely, set with powder, and apply clear lip gloss to the center for dimension.
Does Lip Primer Really Make a Difference?
Lip primer adds 2-4 hours of wear time by creating a smooth base that fills fine lines and prevents feathering.
Concealer works as an alternative. Both neutralize natural lip color for truer shade payoff.
How Do I Stop Lip Liner from Bleeding?
Apply concealer or foundation around lip edges to create a barrier.
Use firm-textured liner formulas and avoid over-moisturizing before application. Lip balm residue creates slip that encourages migration into perioral lines.
Can I Use Setting Spray on My Lips?
Yes. One light mist from 8-10 inches away seals lip products without affecting texture.
Heavy application causes cracking. Keep mouth slightly open while drying. This step adds 1-2 hours of smudge-proof wear.
What Is the Powder-Through-Tissue Trick?
Split a tissue into thin layers, hold against lips, dust translucent powder through it.
The tissue filters powder for even distribution without cakiness. This locks pigment and absorbs oils that break down lip color.
How Often Should I Sharpen My Lip Liner?
Sharpen before each use for maximum precision.
Dull tips create thick, imprecise lines that look sloppy and fade faster. Sharp points let you follow your natural lip line accurately and correct mistakes easily.
Will Eating Ruin My Lip Liner?
Proper application survives most meals. Avoid oily foods that break down formulas.
Use straws positioned at center of bottom lip. After eating, blot residue with tissue and lightly retrace edges rather than full reapplication.
Conclusion
Knowing how to make lip liner last transforms your entire lip makeup routine.
The difference between 2-hour wear and 8-hour wear comes down to seven simple steps.
Prep your lips properly. Use a sharp pencil tip. Fill the entire lip surface instead of just outlining.
Set with the tissue-and-powder method. Layer your lipstick in thin coats.
These techniques create smudge-proof lip makeup that survives meals, drinks, and conversations.
Transfer-resistant lip color isn’t about expensive products. It’s about application method.
Wax-based formulas help. Waterproof options add extra protection. But technique matters most.
Your lip liner staying power depends on what you do before and after application. Now you have the steps to keep your lip definition intact from morning to night.

She started writing on the site after fielding the same questions from clients and friends often enough to just write the answers down: which red won't turn orange on a warm undertone, how to keep lipstick from feathering into fine lines, why a "12-hour" formula rarely survives dinner.
Every review on the site follows the same rule she uses with paying clients: wear it first, then decide if it's worth recommending.
- What Is Lash Glue and How Do You Use It? - July 20, 2026
- What Is CC Cream and How Is It Different? - July 16, 2026
- What Is Skin Tint and Why Everyone Is Obsessed - July 11, 2026


