

Most people learn how to apply makeup by trial and error. A few good habits early on would have saved a lot of patchy foundation and creased concealer.
This guide covers the full makeup application process from start to finish: skin prep, base products, eye makeup, brows, lips, and setting. Each step builds on the one before it.
You’ll learn the correct product order, which tools actually matter, and the specific techniques that separate a look that lasts all day from one that fades by noon.
No guesswork. Just a clear, practical sequence that works for beginners and anyone who wants to refine what they already know.
What Makeup Application Is

Makeup application is the process of layering cosmetic products on the face in a specific order to even skin tone, correct imperfections, add color, and set everything in place.
The sequence matters as much as the products themselves. Base products go first, then color, then setting. Skip the order and you’ll notice it immediately – creasing, pilling, uneven coverage.
Results depend on three things: skin type, tools used, and technique. The most expensive foundation still looks patchy on dehydrated skin. A $10 sponge can outperform a $40 brush if you know how to use it.
The global makeup market was valued at $45.95 billion in 2025, projected to hit $81.55 billion by 2034 (Fortune Business Insights). That growth reflects how central color cosmetics have become to daily routines worldwide.
This guide covers the full step-by-step makeup application process, from prepping skin before makeup all the way through setting and finishing. Whether you’re doing a quick everyday look or building something more polished, the same fundamentals apply.
Everyday Makeup vs. Full-Face Makeup
Everyday makeup focuses on speed and skin. Think tinted moisturizer, a single eyeshadow shade, mascara, and a lip tint. Five to ten minutes, maximum.
Full-face makeup involves foundation, concealer, contour, blush, highlight, full eye makeup, and lips. Takes 20 to 45 minutes depending on skill level and complexity.
| Look Type | Core Products | Time | Best For |
|---|---|---|---|
| Everyday | Tinted base, mascara, lip color | 5–10 min | Work, school, errands |
| Natural glam | Foundation, soft eye, blush, gloss | 15–20 min | Casual events, dates |
| Full face | All base + color + eye + lip products | 30–45 min | Weddings, photoshoots, nights out |
Most people land somewhere in the middle. A solid everyday routine that takes 15 minutes consistently beats an elaborate look done in a rush.
Skin Prep Before Makeup

Skin prep is the most skipped step in a makeup routine. It’s also the one that makes the biggest difference. Foundation applied to dry, unprepped skin creases within hours. The same foundation on clean, moisturized, primed skin can last all day.
The global lip and face primer market was valued at $6.8 billion in 2023, growing at a CAGR of 6.4% through 2032 (GMInsights). The demand is driven by one thing: people who prep their skin want to keep doing it because they see the results.
The Correct Skin Prep Order
Order matters here. Every product needs to absorb or set before you layer the next one.
- Cleanser: Start on a clean face. Leftover oil and SPF from the day before cause foundation to pill.
- Moisturizer: Hydrated skin gives a smooth surface. Dry patches under foundation are almost impossible to blend out.
- SPF: Apply sunscreen before makeup, not mixed into it. Let it dry fully.
- Primer: The final step before foundation. Extends wear, minimizes pores, and locks in moisture.
Wait time between skincare and primer: at least 60 seconds per layer. Rushing this causes pilling under foundation.
How Skin Type Changes Your Prep Routine
Oily skin holds the largest share of the primer market at 36% (GMInsights, 2023). Oil-control primers specifically reduce shine and stop foundation from breaking down mid-day.
Dry skin needs a different approach entirely. A hydrating primer with hyaluronic acid fills fine lines and prevents foundation from clinging to dry patches throughout the day.
Combination skin, the trickiest to work with, benefits from zone-specific application: mattifying primer on the T-zone, hydrating primer on the cheeks. Takes an extra 30 seconds and saves two touch-up sessions.
Choosing the Right Primer
Primer type should match skin concern, not just skin type.
| Primer Type | Best For | Key Benefit |
|---|---|---|
| Mattifying | Oily, combination skin | Controls shine, extends wear |
| Hydrating | Dry, mature skin | Plumps skin, prevents creasing |
| Color-correcting | Redness, sallowness | Neutralizes undertone issues before foundation |
| Pore-minimizing | Enlarged pores, textured skin | Blurs surface, smooths base |
| Blurring/silicone | Fine lines, uneven texture | Fills imperfections, soft-focus finish |
If you want to know how to use makeup primer effectively, start by identifying your main skin concern, then work backward to the formula.
Charlotte Tilbury’s Flawless Filter is a good example of a hybrid primer that doubles as a luminizing skin prep product. It works particularly well on normal-to-dry skin that needs a glow boost before foundation.
How to Apply Foundation
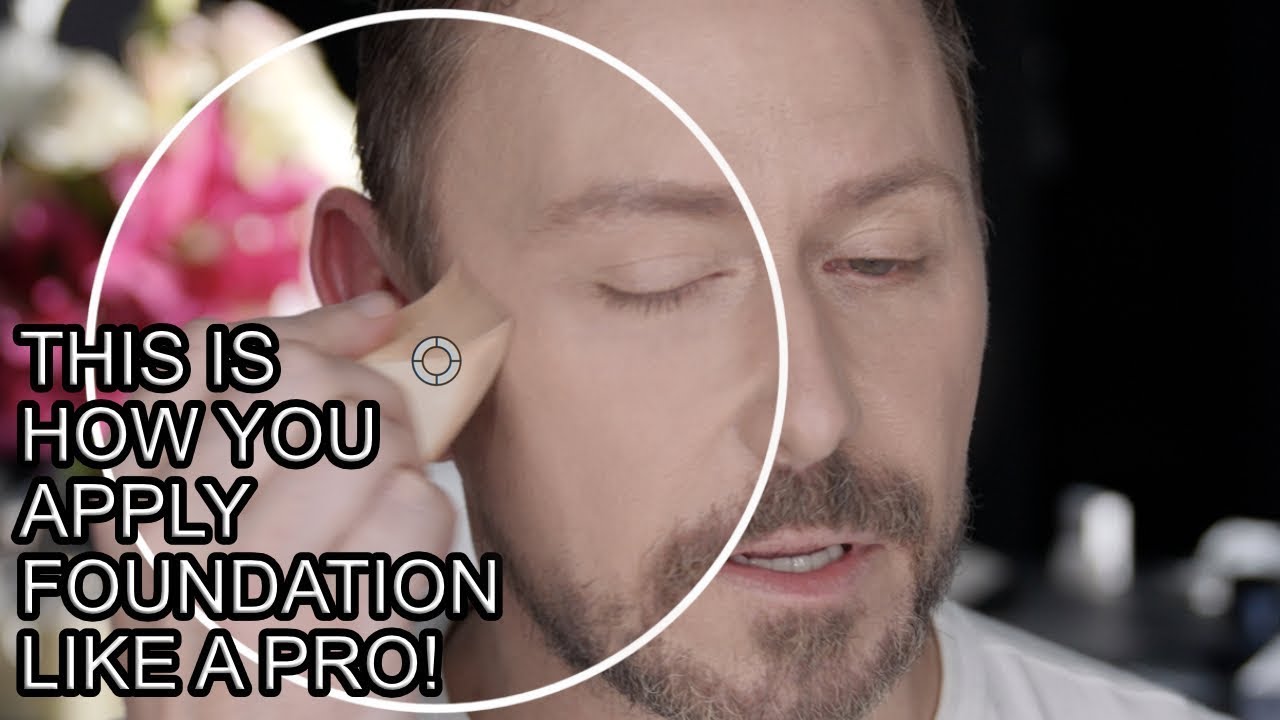
Foundation is the base everything else builds on. Get this wrong and nothing on top of it will look right. Get it right and you’ll need less of everything else.
The global foundation market was valued at $10.7 billion in 2024, projected to reach $17.9 billion by 2033 (Dataintelo). Liquid foundations lead the segment by a wide margin due to versatility and blendability.
Foundation Formulas and When to Use Each
Not every formula works for every skin type or occasion.
- Liquid: Most versatile. Works for all skin types. Ranges from sheer to full coverage. Best for everyday and full-face looks.
- Serum foundation: Thin consistency, skin-loving ingredients, lighter coverage. Ideal for dry or mature skin.
- Stick: Easy to travel with, good for on-the-go application. Tends to be drying, so best for oily skin.
- Powder: Best for oily skin wanting light coverage and a matte finish. Doubles as a setting step.
- Cream: Rich coverage, good for dry or mature skin. Can feel heavy in humid weather.
Over 70% of beauty consumers prefer liquid formulas over powder alternatives, citing hydration and lasting effects as primary reasons (Market Growth Reports, 2024).
Foundation Application Tools Compared
Sponge (damp Beautyblender): Pushes product into skin rather than sitting on top. Gives the most natural, skin-like finish. Use a bouncing motion, not a dragging one.
Flat foundation brush: More product deposit, better for medium to full coverage. Streak-prone if you’re not careful with blending. Works well with thicker, cream-based formulas.
Fingers: The warmth of your fingers melts foundation into skin. Surprisingly effective for lightweight formulas. Not ideal for full-coverage products.
For a full breakdown of each approach, this guide on applying makeup with a sponge and this one on applying makeup with a brush cover the technique differences in detail.
How to Blend Foundation Without Streaks
Streaks almost always come from one of three things: too much product at once, blending in one direction only, or applying to dry skin.
Start with a small amount, dot across the face (forehead, cheeks, nose, chin), then blend outward from the center. Work fast while the product is still wet. Let it dry and you’ll fight it the entire time.
Shade matching: always test at the jawline in natural light, not under store lighting. The goal is for the foundation to disappear into your neck, not sit visibly on your face.
For powder foundation specifically, the technique and application process is different. This guide on applying powder foundation walks through the exact steps.
Fenty Beauty’s 40-shade range, launched in 2017, pushed the entire industry toward more inclusive shade matching. Most major brands followed within two years. If you’re struggling with undertone matching, Fenty’s Pro Filt’r is still one of the most thorough for testing undertone range before committing.
Concealer Placement and Blending

Concealer does different jobs in different parts of the face. Under the eyes, it brightens. On blemishes, it covers. Along the lid and brow bone, it defines. Most people use it in only one spot and leave a lot of its usefulness untapped.
A practical guide on how to use concealer properly covers placement, formula differences, and when to apply it relative to foundation.
Under-Eye Concealer: Inverted Triangle vs. Spot Coverage
The inverted triangle method draws concealer down the nose and across the under-eye in a V shape. This brightens more area and creates a lifted effect. Spot coverage under the eye is faster but misses the shadow in the inner corner, which is usually the darkest point.
Color-correct first if you have deep purple or blue under-eye circles. A peach or salmon corrector (depending on skin depth) cancels out the discoloration before concealer goes on top. Without this step, full-coverage concealer alone often still looks gray or ashy under certain lighting.
Blemish Coverage and Color Correction
Green color corrector: cancels redness from active breakouts or rosacea.
Peach/orange corrector: works on dark spots and post-acne marks, particularly on medium and deep skin tones.
Yellow corrector: tones down purple and blue discoloration on fair to medium skin.
Apply color corrector with a small brush or fingertip. Blend only slightly – it needs to sit in place for concealer to cover it effectively. If you over-blend the corrector into the skin, it loses its neutralizing effect entirely.
Setting Concealer to Prevent Creasing
Under-eye concealer moves constantly because you blink, squint, and smile. Without setting it, creasing begins within an hour or two.
Apply a small amount of loose translucent powder with a damp beauty sponge pressed gently underneath the eye. This is the “baking” technique. Leave it for 30 to 60 seconds, then dust off the excess with a fluffy brush. More reliable than powder alone in high-movement areas.
Creasing is also a prep issue. Dry under-eye skin folds regardless of how well you set your concealer. A hydrating eye cream applied 5 to 10 minutes before concealer makes a visible difference. Here’s a guide specifically on preventing creasing under eyes that’s worth reading through.
Contouring, Bronzing, and Blush
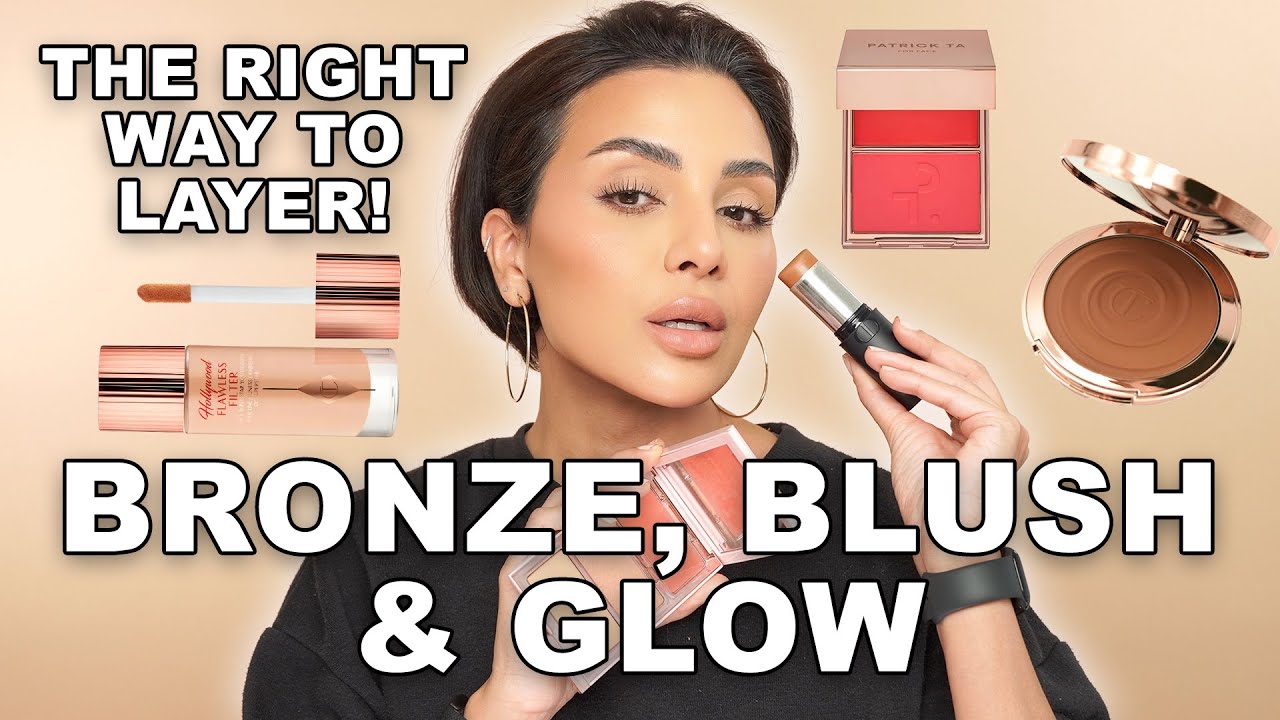
These three products do different things and are often confused with each other. Using bronzer where contour should go, or blush where highlight belongs, changes the entire effect of the face.
McKinsey’s 2025 State of Beauty report notes that the beauty industry grew at 7% annually from 2022 to 2024, with color cosmetics seeing a notable resurgence as consumers moved away from the minimal pandemic-era approach. Face sculpting products were a key part of that rebound.
Bronzer vs. Contour: The Difference That Actually Matters
Contour is cool-toned. It mimics shadow, which is naturally gray-brown, not warm. Applying a warm bronzer where contour should go looks dirty rather than defined.
Bronzer is warm. It gives sun-kissed color to the areas where sun would naturally hit: the forehead, bridge of the nose, and tops of the cheekbones. Not the hollows.
For a full comparison, the guide on bronzer vs. contour is helpful for understanding the color and placement differences clearly.
Contour Placement by Face Shape
Contour works by creating depth, which means placement changes depending on where you want to recede features.
- Oval face: Light contouring under the cheekbones. Most shapes work.
- Round face: Emphasize the temples, jawline, and sides of the nose to create length.
- Square face: Soften the jaw corners and temples.
- Heart face: Focus on the jawline and lower cheeks to balance a wider forehead.
- Long face: Contour the hairline and chin, add blush horizontally to add width.
For cream contour specifically, technique differs from powder. This guide on using cream contour covers how to apply and blend it for a natural result.
Blush Application and Placement Techniques
Makeup sales grew 8% in 2024 (Allure data via Cropink), and blush saw a major part of that – driven largely by the “blush draping” trend that started gaining traction across BeautyTok in 2023 and 2024.
Standard blush placement: smile, apply to the apples of the cheeks, blend upward toward the temples.
Draping technique: apply blush high on the cheekbones and under the lower lash line for a flushed, glowy effect. Works especially well with cream formulas.
Applying blush correctly changes by face shape. This guide on applying blush on different face shapes breaks it down by specific face structure. And if you prefer liquid formulas, this one on applying liquid blush covers the different application approach for that texture.
Cream before powder, always. If you’re using cream blush and powder contour in the same look, cream products go on first, then powder on top. Reversing this order breaks down the cream and makes blending nearly impossible.
Eye Makeup Application Order

Eye makeup is the most technique-dependent part of any routine. It’s also where most beginners make the most fixable mistakes: no primer, eyeshadow applied in the wrong order, liner applied before shadow is fully blended.
Eye cosmetics generated around $3.6 billion in U.S. revenue in 2024, making it the second most profitable color cosmetics category after facial cosmetics (Statista).
Eye Primer: Why It Changes Everything
Eyeshadow without primer fades within a few hours on most skin types, especially on oily lids. Eye primer creates the grip that makes color stay true and prevents creasing in the crease.
Apply a thin layer from the lash line to the brow bone. Blend it in fully. Let it set for 30 seconds before any shadow goes on. This one step is the difference between a look that lasts all day and one that disappears by noon.
Urban Decay’s Eyeshadow Primer Potion remains one of the most widely used options. The guide on using Urban Decay eyeshadow primer covers exact application technique for best results.
Eyeshadow Application Order
This is where most people get it wrong. Starting with the darkest shade first makes blending almost impossible to control.
Step 1: Transition shade (light, matte, close to your skin tone) – blended into the crease. This builds the base for darker shades to blend into.
Step 2: Lid color – applied to the center and inner lid.
Step 3: Crease definition – a mid-tone or darker matte shade, windshield-wiper motion in the crease.
Step 4: Outer corner deepening – darkest shade, V-shape into the outer corner.
Step 5: Highlight – a light, shimmer shade on the inner corner and brow bone.
This guide on applying eyeshadow covers technique in detail, including brush sizes and blending direction for each step.
Eyeliner Types and When to Use Each
| Liner Type | Best Use | Skill Level |
|---|---|---|
| Pencil | Smudged liner, waterline, beginner use | Beginner |
| Gel (pot) | Precise lines, tightlining, lasting wear | Intermediate |
| Liquid (felt tip) | Sharp cat eye, graphic liner | Intermediate–Advanced |
| Kohl | Soft, smoky, diffused effect | Beginner–Intermediate |
A step-by-step on applying eyeliner covers all liner types, and this guide on doing winged eyeliner walks through the cat eye specifically – including the tape trick for clean edges.
Mascara Application Without Clumping
Curl lashes first, always. An eyelash curler used before mascara opens up the eye significantly more than mascara alone. Curl at the root, hold for five seconds, then move the curler halfway up the lash and hold again.
Wipe excess product off the wand before applying. The biggest cause of clumping is too much product on the brush. Wiggle the wand at the base of the lashes and pull upward. Let the first coat dry for 30 seconds before adding a second.
If mascara clumps anyway, here’s a guide on fixing clumpy mascara that covers both mid-application fixes and formula choices that minimize the problem. And for a full mascara application technique, this one on applying mascara is thorough.
Tightlining, which means applying liner to the upper waterline between the lashes, makes lashes look denser without adding obvious liner. It’s one of those techniques that looks like nothing when done well but makes a noticeable difference. This guide on how to tightline eyes walks through the technique precisely.
Brow Shaping and Filling

Brows do more for face structure than almost any other makeup step. A well-shaped brow lifts the eye, defines the bone, and brings the whole face into proportion. An overdrawn or blocked-in brow does the opposite.
The global eyebrow makeup product market was valued at $6.5 billion in 2024, projected to reach $11.6 billion by 2033 (Straits Research). Much of that growth is driven by a sustained consumer shift toward natural-looking, full brows as the dominant style.
Finding Your Brow Shape
Three anchor points define every brow, regardless of face shape.
- Start point: Hold a brush vertically from the outer nostril up. Where it meets the brow bone is where your brow should begin.
- Arch: Angle the brush from the nostril to the outer edge of the iris. The arch falls roughly there.
- Tail: Angle the brush from the nostril to the outer corner of the eye. The brow tail should end at or just before that point.
Mapping these points before filling prevents the two most common brow mistakes: starting too far in or ending the tail too short.
Brow Product Types and When to Use Each
Anastasia Beverly Hills launched its Brow Freeze Gel in January 2024, responding directly to demand for a laminated-look hold product that required no professional treatment. Pencil still leads the brow market with 47% of total market share in 2023 (Verified Market Research), but gel is the fastest-growing segment, driven by the soap brows and lamination trends.
| Product | Finish | Best For |
|---|---|---|
| Pencil | Hair-like strokes | Sparse brows, precise definition |
| Powder | Soft, diffused fill | Full brows needing subtle shape |
| Pomade | Bold, structured | Editorial looks, architectural brows |
| Tinted gel | Natural, groomed | Everyday wear, laminated effect |
How to Avoid Blocky, Drawn-On Brows
The most common brow mistake is filling with too much pressure and too little feathering.
Use short, upward hair-like strokes with a fine pencil. Work with the direction of natural brow growth, not against it. Fill in gaps only, not the whole brow as a solid block.
Always set filled brows with a clear or tinted gel as the final step. This holds the shape, combs hairs into alignment, and keeps the fill from smudging throughout the day. The Anastasia Beverly Hills Brow Wiz remains one of the best-selling precision tools globally due to its ultra-fine tip, which makes the hair-stroke method much easier to control.
Lip Makeup Application

The global lipstick market was valued at $10.63 billion in 2024 and is projected to reach $17.21 billion by 2033 (SkyQuest). Matte lipstick holds the largest product share at around 40% of that total (Business Research Insights, 2024), though liquid formats are growing fastest at a projected 8.34% CAGR through 2030 (Mordor Intelligence).
Lip application has more room for technique variation than almost any other step. The right order and prep make the difference between a color that wears for hours and one that bleeds and fades within the first drink.
Prepping Lips Before Color
Exfoliate first. Rough, dry lips make any formula look patchy. A gentle scrub or a soft toothbrush with a dab of petroleum jelly removes dead skin in about 30 seconds.
Moisturize, then wait. Apply a thin layer of lip balm and let it absorb for a few minutes before any color product. Applying liner or lipstick directly on fresh, slick balm causes the color to slide. A solid guide on lip care for dry lips is worth bookmarking if chapping and peeling are recurring issues before makeup.
Matte and liquid formulas are particularly unforgiving on dry lips. Prep is non-negotiable for those finishes.
Lip Liner: Why It Matters and How to Use It
Lip liner does three things. It defines the edge, prevents feathering, and extends wear by giving pigment something to grip.
Match the liner to your lipstick shade, or go one shade deeper for more definition. Overline slightly at the cupid’s bow and center of the lower lip for more volume. Don’t draw a harsh outline around the outer edge only – this is where the “drawn-on” lip look comes from.
More on technique here: applying lip liner step by step, and this guide on choosing lip liner to match both shade and formula to your lipstick.
Applying Lipstick by Formula
Each formula needs a slightly different approach.
Matte lipstick: Apply in thin layers, building up. Press your lips together, blot with a tissue, then apply a second layer for longer wear. Matte formulas cling to dry patches, so prep is everything. A full walkthrough is at applying matte lipstick.
Liquid lipstick: Apply from the center of the lips outward. Let it dry fully before pressing lips together. Don’t eat, drink, or talk while it’s setting. This guide on applying liquid lipstick covers dry time, touch-up tips, and removal technique.
Lip gloss: Works best over liner or a lipstick base. Apply to the center of the lips and let it spread naturally. Pressing lips together with gloss on tends to create uneven distribution. Full technique at applying lip gloss.
Making Lip Color Last
The single most reliable long-wear technique: liner all over the lip as a base, lipstick on top, blot, light translucent powder pressed through a single-ply tissue over the lips, second coat of lipstick.
68% of American women aged 18-34 say lipstick is important for self-expression, up from 52% in 2019 (Verified Market Research). That kind of investment in the product deserves a technique that makes it last.
More on longevity specifically: making lipstick last longer, and for transfer-proofing, this guide on making lipstick transfer proof covers the full layering method.
One specific fix: if lipstick keeps ending up on your teeth, the simple solution is to put your index finger in your mouth after applying, close your lips around it, and pull out. Any excess pigment transfers to your finger instead of your teeth. More on this at keeping lipstick off teeth.
Setting and Finishing Makeup

Setting is the last step and the most skipped. Without it, everything you’ve built can start creasing, fading, or transferring within a few hours.
Makeup setting products (powders and sprays combined) represent a significant portion of U.S. prestige beauty spending. Laura Mercier holds the number one setting powder position in the U.S. by dollar and unit sales as of 2024 (Circana data). Urban Decay’s All Nighter spray remains one of the most recognized setting sprays in the category.
Setting Powder: How and Where to Apply It
Setting powder is not a product to dust all over the face indiscriminately. Overuse leads to a cakey, dull finish, especially on mature skin.
Apply translucent powder only where the skin produces oil or where products tend to crease: the T-zone, under the eyes, and along the sides of the nose. Use a fluffy brush and dust lightly.
For under-eye setting specifically, the baking technique works well. Press powder with a damp sponge, wait 30 to 60 seconds, sweep away excess. This guide on applying setting powder covers both methods with tips on avoiding flashback in photos.
Pressed versus loose powder is a personal preference more than a hard rule. Loose powders give a more natural, skin-like finish and last longer on oily skin. Pressed is faster and more travel-friendly. A full comparison at pressed powder vs. loose powder.
Setting Spray: Technique and Finish Types
Research from Typsy Beauty shows 68% of consumers now prioritize longevity in their makeup setting products, which explains the surge in setting spray innovation since 2022.
Setting spray goes on last, always. Hold the bottle 6 to 10 inches from the face and spray in an X and T pattern across the whole face. Eyes closed. Let it dry naturally.
Matte formula: best for oily skin. Controls shine, extends wear without adding texture.
Dewy formula: best for dry or mature skin. Melts powder products into the skin, removes any cakey look, adds a soft glow.
The full application technique, including how to layer spray between steps for maximum hold, is at applying setting spray.
Final Checks Before You Go
Always check your finished look in natural light. Indoor lighting is forgiving. Natural light shows harsh lines, unblended edges, and foundation that doesn’t match your neck.
Three things to check: any visible harsh lines at the hairline or jaw, blush that’s been applied too heavily or sits in a stripe rather than blended, and concealer that has creased under the eyes.
A blotting paper pressed once gently over the T-zone removes excess oil without disturbing the rest of the makeup. Far less disruptive than re-applying powder mid-day.
Tools and Brushes for Makeup Application

The makeup brush and tools market was valued at $7 billion in 2024 and is projected to reach $12.9 billion by 2034 (GMInsights). Most of that growth is consumer-led, driven by people investing in at-home application tools that were previously only used professionally.
Sigma Beauty, Real Techniques, and e.l.f. Cosmetics dominate the accessible-to-mid-range brush segment. Charlotte Tilbury and Cle de Peau represent the premium end, with individual brushes retailing between $55 and $150 (Business of Fashion, 2024).
Essential Brushes by Category
Face brushes:
- Flat or kabuki foundation brush: dense and flat for medium-to-full coverage
- Powder brush: large and fluffy, for setting and bronzer
- Contour brush: angled, firm bristles for shadow placement
- Blush brush: dome-shaped, softer bristles for diffused color
- Fan brush: for highlight across the cheekbones and nose
Eye brushes:
- Flat shader: packs color onto the lid
- Fluffy blending brush: windshield-wiper motion for transition shades
- Pencil brush: precise crease work and inner corner detail
Synthetic vs. Natural Bristles
Synthetic bristles now dominate the market, driven by cruelty-free demand and improved performance for liquid and cream products. Natural hair bristles still outperform for loose powders and blush, picking up and distributing product more evenly.
Practically: use synthetic brushes for anything wet (foundation, cream blush, concealer). Use natural or mixed bristle brushes for setting powder, eyeshadow, and blush.
Real Techniques is the most widely recommended entry-level brush brand for this reason: their synthetic range performs comparably to brushes costing three to four times more for liquid and cream applications.
How Often to Clean Brushes (And How)
Dirty brushes carry bacteria, break down product formulas, and cause streaky application. Nothing ruins blending faster than a brush full of old product residue.
Weekly: Wash foundation, concealer, and cream brushes with a gentle brush cleanser or mild shampoo. Rinse until the water runs clear. Reshape bristles and lay flat to dry. Upright drying causes water to loosen the ferrule.
Between uses: A quick spray of brush cleaner and a wipe on a clean cloth removes most residue from powder brushes and lets you switch between shades during application.
The full cleaning method is at cleaning makeup brushes, with a separate guide for sponge tools at cleaning makeup sponges.
Common Makeup Application Mistakes
Most makeup problems come down to five repeatable errors. Not bad products, not bad technique overall. Specific, fixable things that happen in a predictable sequence.
Wrong Foundation Shade or Undertone
Shade matching at the jaw in natural light is the only reliable method. Store lighting, wrist testing, and matching to the face without checking the neck all lead to the same result: foundation that looks like a mask.
Undertone mismatches are just as common. Pink-toned foundations on yellow-olive skin, or neutral foundations on very warm skin, look off even when the depth is correct. Here’s a guide specifically on matching makeup to skin tone that covers both depth and undertone identification.
Skipping Primer on Oily Skin
On oily skin, foundation without primer breaks down in the T-zone within two to three hours. The sebum lifts the foundation from the skin’s surface. Primer creates a grip layer that holds foundation in place through the natural oil cycle.
This is especially relevant for the nose, forehead, and chin. Even applying primer only in those zones is enough to significantly extend wear. A mattifying formula applied selectively takes less than 30 seconds. The payoff is hours of wear time.
Applying Too Much Product at Once
Buildable coverage only works when built in thin layers. A large amount of foundation applied at once sits on the skin rather than blending into it, and sets into every texture and line. Same applies to concealer, bronzer, and blush.
Start with less than you think you need. Add a second layer only where coverage is actually required. This approach uses less product, looks more natural, and lasts longer than heavy single-layer application.
Unblended Contour and Eyeshadow Edges
Harsh lines on contour and eyeshadow are the most visible sign of rushed or unfinished blending. Both are almost entirely a brush problem, not a product or skill problem.
A fluffy brush with light pressure and back-and-forth circular motion at the edges of any color deposit is all it takes. Contour that blends upward toward the temple looks natural. Eyeshadow that fades gradually into the crease looks intentional. Neither requires advanced skill, just the right brush and an extra 30 seconds.
Applying Powder Before Cream Products
Cream products blend into skin. Powder products sit on top of skin. The instant you apply powder first, any cream applied on top of it has nowhere to blend into – it just sits and streaks.
The correct order, always: all cream products first (foundation, concealer, cream blush, cream contour, cream highlight), then set with powder, then apply powder products (powder blush, powder bronzer, eyeshadow) on top.
Reversing any part of this sequence is the most common cause of patchy, caked, or streaky makeup. The full guide on layering makeup covers the complete correct order, including where highlighter and setting spray fit relative to powder products.
FAQ on How To Apply Makeup
What order should you apply makeup products?
Start with skincare, then primer, foundation, concealer, contour, bronzer, blush, highlight, eye makeup, brows, and lips. Set everything with powder and finish with setting spray. Cream products always go before powder products.
How do you apply foundation for a natural look?
Use a damp beauty sponge and a lightweight formula. Apply with a bouncing motion from the center of the face outward. Build coverage only where needed. Less product applied in thin layers looks far more natural than one heavy application.
Do you apply concealer before or after foundation?
Either works. Applying concealer after foundation means you use less product overall since foundation covers some discoloration first. For heavy under-eye coverage, apply concealer after. For blemish coverage on bare skin, before foundation works better.
How do you make makeup last all day?
Prep with moisturizer and a mattifying or grip primer suited to your skin type. Set cream products with translucent powder. Finish with setting spray. On oily skin, blotting paper mid-day preserves the look without disrupting the makeup underneath.
How do you apply eyeshadow for beginners?
Start with an eye primer. Apply a transition shade into the crease first, then add lid color. Blend the edges with a fluffy brush using a circular motion. Keep the darkest shade at the outer corner only. Build slowly rather than starting bold.
What is the correct way to apply blush?
Smile lightly and apply blush to the apples of the cheeks, blending upward toward the temples. For a more lifted effect, apply higher on the cheekbones. Cream blush goes on before powder. Placement depends on your face shape and the finish you want.
How do you apply lip liner correctly?
Line the natural lip edge first, then fill in the entire lip as a base. This extends wear and prevents feathering. Match the liner shade to your lipstick, or go one shade deeper for definition. Apply lipstick on top for a clean, long-lasting result.
How do you contour for your face shape?
Apply a cool-toned contour powder below the cheekbones, along the temples, and at the jawline. Blend upward and outward. Placement shifts depending on whether you want to slim, lengthen, or add structure. Always use a cool-toned shade, not warm bronzer, for true shadow effect.
How do you stop foundation from looking cakey?
Apply in thin layers with a damp sponge. Moisturize and prime beforehand to prevent the base from clinging to dry patches. Avoid heavy powder all over the face. If it looks cakey mid-application, pressing a damp sponge lightly over the skin smooths it out immediately.
How do you apply setting spray correctly?
Hold the bottle 6 to 10 inches from the face. Spray in an X and T motion across the entire face with eyes closed. Let it dry naturally without touching your face. Setting spray always goes last, after powder, to melt everything together for a seamless finish.
Conclusion
This conclusion is for an article presenting the full makeup application process, from skin prep and primer through foundation blending, concealer placement, eye makeup, brow shaping, and lip color.
Every step covered here connects to the one before it. Get the base right and everything on top of it performs better.
The tools matter as much as the products. A damp beauty sponge, the right brushes, and a setting spray are the difference between a look that holds and one that fades mid-day.
Start with one section at a time. Master the makeup application order before adding complexity.
Consistency builds skill faster than any single product purchase ever will.

She started writing on the site after fielding the same questions from clients and friends often enough to just write the answers down: which red won't turn orange on a warm undertone, how to keep lipstick from feathering into fine lines, why a "12-hour" formula rarely survives dinner.
Every review on the site follows the same rule she uses with paying clients: wear it first, then decide if it's worth recommending.
- What Is CC Cream and How Is It Different? - July 16, 2026
- What Is Skin Tint and Why Everyone Is Obsessed - July 11, 2026
- What Is Foundation and How Do You Choose One? - July 6, 2026


