

Your eyeshadow creases by noon, colors fade to nothing, and that carefully blended look turns into a smudged mess before lunch ends.
Learning how to use Urban Decay eyeshadow primer correctly solves these problems and extends your eye makeup wear from a few hours to all day.
This guide covers proper application techniques, drying time, tool selection, and troubleshooting for different eye shapes and skin types. You’ll discover how to layer primer with powder, cream, and liquid shadows, plus removal methods that protect delicate eye skin.
By the end, you’ll know exactly how much product to use, where to place it, and how to prevent common issues like patchiness and color distortion.
What is Urban Decay Eyeshadow Primer

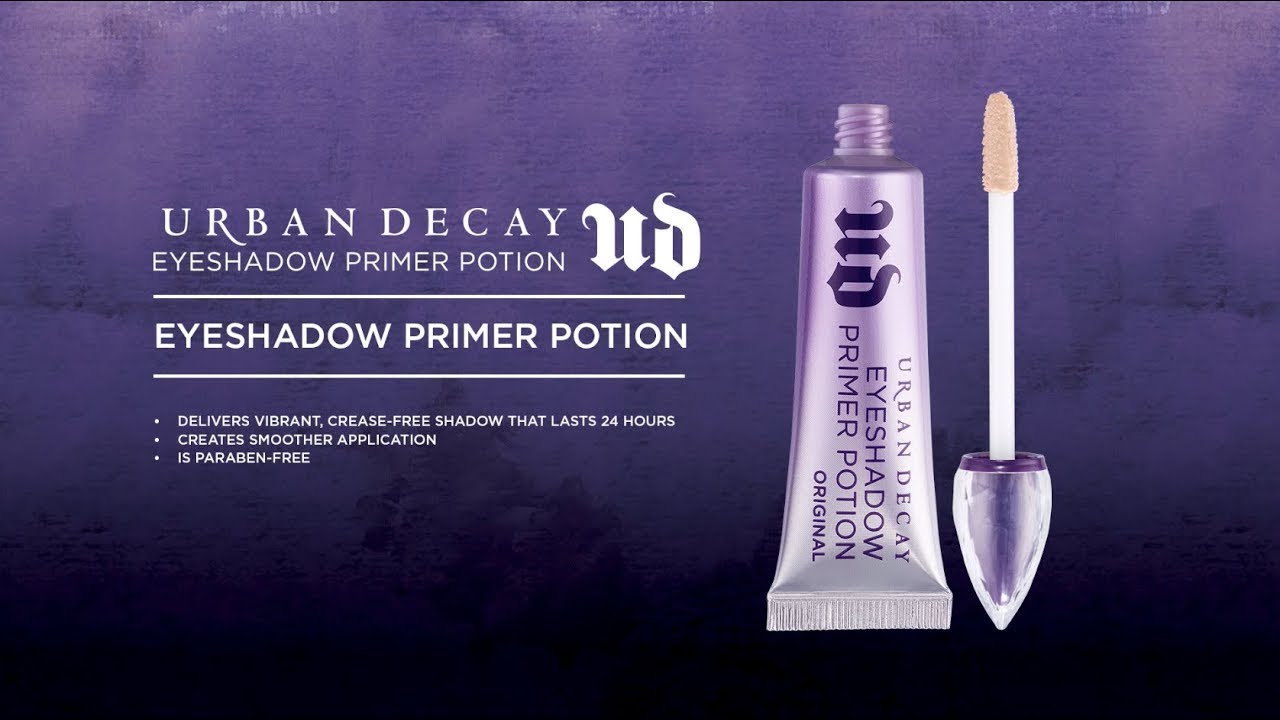
Urban Decay Eyeshadow Primer is a makeup base that creates a smooth canvas on eyelids, preventing eyeshadow from creasing, fading, or smudging throughout the day.
The formula acts as an adhesive layer between your skin and powder eyeshadow, locking pigments in place for extended wear time.
Understanding Eyeshadow Primer Formulation
Product Variations and Their Attributes
Urban Decay Primer Potion comes in four main formulas: Original (nude beige), Eden (peachy corrector), Anti-Aging (with peptides), and Minor Sin (shimmery champagne).
Original works for most skin tones. Eden neutralizes purple-toned veins on fair to medium lids.
Minor Sin adds subtle luminosity. Anti-Aging targets mature skin with smoothing ingredients.
Chemical Composition
Silicone-based primers create a grippy texture that holds shadow in place without feeling heavy.
Polymers form a film on the lid surface. This prevents natural oils from breaking down pigment intensity.
Dimethicone smooths lid texture. Cyclopentasiloxane provides slip during application, then evaporates for a matte finish.
Skin Type Compatibility
Oily eyelids need the strongest formulation. Original Primer Potion controls excess sebum for 12-plus hours.
Dry lids benefit from hydrating bases. The formula shouldn’t emphasize flaky patches or pull moisture from the skin.
Mature skin requires primers that don’t settle into fine lines. Anti-Aging versions contain ingredients that temporarily plump the lid surface.
Preparing Your Eyelids Before Application
Cleansing Requirements
Start with oil-free cleanser on the eye area.
Residual moisturizer, sunscreen, or natural oils will prevent primer adhesion. The lid needs to be completely clean and dry.
Product Layering Order
Apply eye cream to the orbital bone only, not the moveable lid.
Wait 3-5 minutes for full absorption. Any cream residue on the actual eyelid will cause the primer to pill or slide.
Skip oil-based serums in the eye zone on makeup days. Water-based products work better under primer formulas.
Moisture Level Management
Blot lids with a clean tissue before priming.
The skin texture should feel smooth but not slick. Tacky or damp surfaces reject silicone formulas.
Pat (don’t rub) to remove excess product from the crease and lash line.
Application Techniques for Different Eye Shapes

Hooded Eyes
Apply primer across the entire visible lid when eyes are open, extending slightly above the natural crease.
Use more product on the hood itself where shadow transfer happens. The goal is preventing color from stamping onto the hooded area.
Focus coverage on the outer corner where creasing starts first.
Monolid Eyes
Cover the full lid from lash line to brow bone with thin, even coverage.
Monolid eyes lack a defined crease, so shadow placement spans a larger area. Primer prevents migration across this expanded canvas.
Build coverage gradually rather than applying too much at once.
Deep-Set Eyes
Concentrate primer on the actual lid, avoiding the prominent brow bone.
Deep-set eyes already have natural shadow definition. Primer goes where you’ll place color, not the entire eye socket.
Blend edges carefully so there’s no visible line where primer stops.
Prominent Eyes
Apply a thin layer across the entire lid, including the outer corners that protrude forward.
Prominent eyes show more lid space. Even product distribution prevents patchy shadow application later.
Extend primer to the lower lash line if you plan shadow placement there.
Almond Eyes
Standard application works well. Apply from lash line to crease, tapering at inner and outer corners.
This eye shape has balanced proportions. A pea-sized amount covers both lids completely.
Focus on the center of the lid where most shadow color sits.
Tools and Methods for Applying Primer

Fingertip Application
Fingertips warm the product and provide the most control.
Use your ring finger (it has the lightest pressure). Tap and press rather than rubbing or dragging.
The heat from your skin helps the primer set faster and creates better adhesion for shadow.
Synthetic Brush Method
Flat synthetic brushes distribute primer more precisely than fingers.
Stipple the product onto the lid in patting motions. Sweeping can cause patchiness.
Clean the brush immediately after use since silicone formulas dry quickly on bristles.
Doe-Foot Applicator
The built-in applicator works for quick application but lacks precision.
Swipe product directly onto the lid, then blend with fingers or a brush. Don’t leave it sitting in streaks.
This method uses more product than necessary but saves time on busy mornings.
Beauty Sponge Technique
Dampened sponges create the thinnest, most natural layer.
Bounce the sponge over the lid to press primer into skin texture. This method works well for applying makeup on textured or mature lids.
The sponge picks up excess product, preventing that thick, cakey feeling.
Application Motion Comparison
Tapping provides the best coverage and longest wear. Press product into the skin rather than sliding it across.
Sweeping motions can pull on delicate lid skin and create uneven distribution. They also encourage primer to settle into fine lines.
Circular blending works for edges but not initial application. Use it to feather out harsh lines where primer meets bare skin.
Drying Time and Setting Process
Tackiness Level Indicators
Fresh primer feels slightly sticky to the touch. This tackiness signals proper adhesion readiness.
Wait 30-60 seconds before applying eyeshadow. The surface should feel grippy but not wet.
Color Shift During Setting
Most shades start opaque then dry down transparent or semi-transparent.
Original appears beige in the tube but becomes nearly invisible on the lid. Eden’s peach tone neutralizes without adding visible color.
Watch for the formula to lose its wet sheen. That’s your signal to start shadow application.
Climate Impact on Drying
Humidity extends drying time by 15-30 seconds. Dry air speeds it up.
Cold rooms slow the setting process. Warm environments help primers dry faster and set harder.
Use a fan if you’re in a rush. Moving air cuts wait time in half.
Layering Primer with Different Eyeshadow Formulas
Powder Eyeshadow Interaction
Powder eyeshadow adheres best to primer’s tacky surface. Color intensity increases by 40-50% compared to bare lids.
Blending stays smooth without patchiness. The silicone base lets shadows glide rather than skip.
Fallout decreases since pigments stick on contact instead of drifting down the face.
Cream Shadow Compatibility
Cream eyeshadow can slide over silicone primers if applied too soon.
Let primer dry completely (90 seconds minimum). The formula needs to be set, not tacky, for cream products.
Some creams never fully mesh with silicone bases. Test before important events.
Liquid Shadow Application
Liquid eyeshadow sits on top of primer rather than sinking into it.
This creates longer wear but can cause balling if you rub or blend too much. Pat instead of swipe.
Metallic liquid formulas show the most vibrant color payoff over primer.
Glitter Adhesion
Loose glitter needs the tackiest primer surface possible. Apply shadow immediately after primer while it’s still sticky.
Pressed glitters work better than loose versions. They contain their own binders that lock onto the silicone base.
Layer glitter eyeshadow with a damp brush for maximum adhesion and intensity.
Metallic Formula Performance
Metallic shadows perform best over primer. The reflective particles sit flat against the smooth base instead of catching on skin texture.
Foiled metallics need minimal blending over primer. Too much movement breaks up the foil effect.
Color shifts and duochromes show their full range over an even primer layer.
Troubleshooting Common Primer Issues
Creasing Prevention
Creasing happens when too much product pools in the fold. Use less primer and blend it thinner.
Set primer with translucent powder before shadow if you have extremely oily lids. This adds extra grip.
Avoid moisturizer on the actual lid, only around the orbital bone.
Fixing Patchiness
Patchy application comes from not blending edges or letting primer dry partially before finishing coverage.
Work quickly across both lids. Don’t let one eye dry while priming the other.
Buff edges with a clean brush if you see distinct lines where primer stops.
Color Distortion Solutions
Some primers alter shadow color, especially on deep skin tones where beige primers create an ashy cast.
Switch to Minor Sin or Eden for warmer undertones. Original works best on fair to medium skin.
Test shadows over primer before buying. Colors can read differently than they swatch on bare skin.
Excessive Dryness Management
Primers can emphasize dry patches or flaking skin. Exfoliate lids gently 2-3 times weekly.
Use a hydrating eye cream 30 minutes before makeup. Let it absorb fully before primer application.
Mix one drop of facial oil into primer if dryness persists. This dilutes the formula slightly but maintains adhesion.
Product Pilling Issues
Pilling happens when primer rubs into little balls instead of blending smoothly.
Your skincare hasn’t absorbed yet. Wait longer after applying makeup primer to the face before moving to eyes.
Certain silicone-heavy moisturizers don’t play well with silicone primers. Switch to water-based eye products.
Primer Placement for Specific Makeup Looks
Cut Crease Technique

Apply primer only below the cut line where shadow will sit. Leave the crease area bare or use concealer as the base instead.
The primer creates the sharp lower edge. Concealer on top carves the actual cut with contrast.
Blend primer edges thoroughly so there’s no visible texture difference between primed and unprimed zones.
Smoky Eye Application
Cover the entire lid and extend primer onto the lower lash line for a smoky eye.
The lower lashline needs just as much staying power as the lid. Use a small brush for precise placement.
Blend primer up toward (but not onto) the brow bone where you’ll place transition shades.
Halo Eye Coverage

Prime the inner and outer thirds of the lid heavily. Use less in the center where lighter shades will create the halo effect.
The center needs primer but not a thick layer. Too much can muddy the light-to-dark transition.
Extend primer slightly past the outer corner for wing-out placement of darker shades.
Graphic Liner Requirements
Apply primer exactly where liner will sit. Skip areas that will stay bare skin.
Heavy primer under gel or liquid liner prevents feathering and extends wear to 16-plus hours.
Less is more for graphic looks. Excess primer can make clean lines harder to achieve.
Minimal Makeup Approach
A thin primer layer under one neutral shadow provides natural staying power without looking heavy.
Skip primer entirely for sheer washes of color if you’re going for a barely-there look. Primer intensifies pigmentation, which defeats minimal eye makeup goals.
Use it only in the crease area if that’s where your natural oils cause fading.
Extending Primer to Lower Lashline and Waterline Areas
Lower Lashline Application Safety
The lower lashline sits further from the eye than the upper lid. Primer is safe here with normal application.
Use minimal product. The lower lashline is smaller and needs less coverage than the full upper lid.
Blend down slightly onto the top of the cheek to prevent shadow from staining skin below the eye.
Waterline Considerations
Never apply primer to the waterline. This mucous membrane needs specialized waterproof formulas designed for wet environments.
Primer will sting, blur vision, and wash away within minutes. Use waterproof eyeliner or shadow specifically labeled as waterline-safe.
The waterline produces moisture constantly. Silicone primers can’t grip in wet conditions.
Inner Corner Technique
Apply primer to the inner corner if you plan to place shadow or highlighter there. This area creases and fades quickly without a base.
Keep primer at least 2mm away from the tear duct itself. Too close can cause irritation or migrate into the eye.
Pat product gently here. The skin is thinner and more sensitive than the rest of the lid.
Outer Corner Coverage
Extend primer past the outer corner where wings or extended shadow placement will go.
This prevents color from transferring to the temple area or fading where makeup sits on bare skin instead of primed surface.
Blend the edge so there’s no visible line between face and primed eye area.
Primer Interaction with Concealer and Color Corrector

Concealer as Base Alternative
Some artists use concealer instead of primer for a tackier, more pigmented base that also color-corrects.
Concealer works but creases more than actual primer. It’s better for cut creases where you need that specific beige/skin tone.
Set concealer with powder before shadow. Raw liquid concealer stays too wet.
Color Corrector Layering
Apply color corrector before primer if you need serious vein or discoloration coverage. Let it set 60 seconds before adding primer on top.
Peach corrects purple and blue tones on fair to medium skin. Orange works for deeper skin tones.
Skip corrector if you’re using Eden primer. It already contains peach tones for neutralization.
Correct Product Order
The order matters: corrector first, then primer, then powder (optional), then shadow.
Putting primer under corrector makes the corrector slide around. The silicone base is too slippery for cream products applied on top.
Powder between primer and shadow adds extra longevity but can dull metallic finishes.
Climate and Environment Impact on Primer Performance
Humid Weather Effects
Humidity breaks down primer faster. Wear time drops from 12 hours to 8-9 hours in tropical or humid climates.
Layer translucent powder over primer before shadow in humid conditions. This creates a moisture barrier.
Reapply blotting papers to lids midday. Oil control extends primer life.
Dry Climate Performance
Dry air helps primers set harder and last longer. You might get 14-16 hours of wear.
Dry climates emphasize any lid texture or flakiness. Moisturize more thoroughly the night before makeup application.
Use less primer in arid environments. The formula dries faster and grips harder with less product needed.
Air Conditioning Impact
Indoor air conditioning creates a dry environment that helps primer perform well.
Temperature-controlled spaces prevent the natural oils and sweat that break down eye makeup.
You can use lighter coverage in air-conditioned offices compared to outdoor summer events.
Outdoor Exposure Challenges
Direct sun heats the lid and increases oil production. Primer breaks down faster in these conditions.
Sweat is primer’s enemy. Set with powder foundation or translucent powder for outdoor activities.
Wind doesn’t affect primer directly but can cause watering eyes that ruin makeup. Waterproof formulas help here.
Removing Eyeshadow Primer at Day’s End

Oil-Based Cleanser Method
Oil-based cleansers dissolve silicone primers completely. Massage onto dry lids for 30-60 seconds before rinsing.
Micellar water alone won’t remove primer fully. It leaves residue that builds up and clogs pores.
Double cleansing is mandatory. First pass removes makeup, second pass cleans skin.
Makeup Remover Balm Technique
Cleansing balms melt primer and shadow in one step.
Scoop a dime-sized amount and massage over closed eyes. The solid formula liquefies and binds to makeup.
Wipe away with a damp cloth before following with face wash.
Micellar Water Limitations
Micellar water removes surface shadow but struggles with primer’s silicone base.
Use it as a first step only. Follow with an oil-based cleanser to actually break down primer.
Saturate a cotton pad and hold it on the lid for 5 seconds before wiping. This gives the solution time to work.
Double Cleansing Requirements
First cleanse removes makeup and primer. Second cleanse actually washes skin.
Skip the second cleanse and you’ll notice primer residue that causes texture and breakouts over time.
Use gentle pressure. Tugging on eye skin causes premature aging and wrinkles.
Consequences of Residue Buildup
Leftover primer clogs pores around the eye and causes milia (small white bumps).
Old primer mixing with new primer the next day creates patchiness and prevents proper adhesion.
The skin can’t breathe overnight if silicone residue remains. This leads to dryness and irritation.
Comparing Urban Decay Primer to Alternative Products
MAC Paint Pot Differences
MAC Paint Pot is a cream shadow base that adds color while priming. Urban Decay is invisible and purely functional.
Paint Pots work as one-and-done eyeshadow. Primer Potion requires shadow on top to complete the look.
Paint Pot texture is thicker and harder to blend than Urban Decay’s liquid formula.
Too Faced Shadow Insurance Comparison
Too Faced Shadow Insurance has similar longevity (12 hours) but a thinner consistency.
Urban Decay feels tackier and grips pigment harder. Too Faced blends more sheerly for subtle shadow looks.
Price point is nearly identical. Performance comes down to personal texture preference.
NARS Pro-Prime Features
NARS Pro-Prime comes in one neutral shade compared to Urban Decay’s four options.
The formula is lighter weight but offers 10-12 hours of wear versus Urban Decay’s 12-plus hours.
NARS works better under cream shadows. Urban Decay dominates with powder formulas.
Milani Eyeshadow Primer Value
Milani costs 60% less than Urban Decay with 80% of the performance.
Budget option for testing whether primer works for your eye shape and skin type before investing in prestige brands.
The tube size is smaller, so cost per use evens out slightly. Still the most affordable primer that actually prevents creasing.
Vegan and Cruelty-Free Status
Urban Decay is cruelty-free and offers vegan formulas across most primer versions.
MAC is cruelty-free but not vegan. Too Faced is both cruelty-free and vegan.
NARS is cruelty-free as of 2021. Milani is cruelty-free and many products are vegan (check specific primer version).
Shade Selection Guide for Different Skin Tones
Fair Skin Recommendations
Original Primer Potion works perfectly on fair skin without altering shadow color.
Eden adds warmth if your fair skin has pink or red undertones that you want to neutralize.
Minor Sin gives a subtle glow without competing with shadow colors.
Medium Skin Matching
Medium skin tones can use Original but might find Eden creates better color payoff.
The slight peach tone in Eden counteracts any darkness or veining visible on medium lids.
Minor Sin looks most natural on medium to tan skin as a luminous base.
Deep Skin Options
Original can create an ashy cast on deep skin tones. Eden is the better neutral choice here.
The peach-orange undertone in Eden complements deeper skin without leaving a chalky layer visible under sheer shadows.
Minor Sin provides subtle shimmer without the frosty look some highlighters create on dark skin.
Cool Undertone Selection
Cool undertones (pink, red, blue-based skin) benefit from Original’s neutral beige.
Eden can look too warm on very cool-toned skin. Test before buying the full size.
Minor Sin with its champagne shimmer flatters cool undertones beautifully.
Warm Undertone Pairing
Warm undertones (yellow, golden, olive-based skin) glow with Eden primer.
The peach base enhances warmth without turning orange on the lid.
Minor Sin adds to the golden effect but can be too much shimmer for daytime natural makeup looks.
Natural Finish vs. Brightening Effect
Original and Eden both dry down to natural finishes that don’t add dimension or glow.
Minor Sin creates visible brightening and catches light. Choose this for evening looks or when you want lid highlighting without separate shimmer application.
Anti-Aging has the same nude tone as Original with added skincare benefits but no color-correcting properties.
FAQ on How To Use Urban Decay Eyeshadow Primer
How much Urban Decay eyeshadow primer should I use?
A rice grain-sized amount covers one eyelid completely. Using more creates a thick layer that causes patchiness and extends drying time without improving wear.
Can I use Urban Decay primer on my lower lashline?
Yes, apply primer to the lower lashline for extended shadow wear. Use a small brush for precise placement and blend edges onto the upper cheek.
How long should I wait before applying eyeshadow over primer?
Wait 30-60 seconds for the primer to dry from wet to tacky. The surface should feel grippy but not damp when you touch it lightly.
Does Urban Decay primer work with cream eyeshadow?
Yes, but let primer dry completely (90 seconds minimum) before applying cream shadow. The formula must be fully set, not tacky, for cream products to adhere properly.
Which Urban Decay primer shade should I choose?
Original works for fair to medium skin. Eden suits medium to deep tones with its peach corrector. Minor Sin adds shimmer. Anti-Aging targets mature skin concerns.
Can I apply concealer over Urban Decay primer?
Yes, concealer over primer works for cut crease looks. Apply primer first, let it dry, then add concealer on top. Set with translucent powder before shadow.
Why does my primer look patchy on my eyelids?
Patchiness happens when skincare hasn’t absorbed fully or you let one eye dry while priming the other. Work quickly and ensure lids are completely clean before application.
How do I remove Urban Decay eyeshadow primer at night?
Use an oil-based cleanser or makeup remover balm to dissolve the silicone formula. Massage for 30-60 seconds, then follow with a second cleanse to remove all residue.
Can I use Urban Decay primer on oily eyelids?
Yes, Original Primer Potion specifically controls excess sebum on oily lids for 12-plus hours. Set with powder before shadow for maximum oil control and longevity.
Does Urban Decay primer prevent eyeshadow creasing?
Yes, primer prevents creasing by creating a barrier between natural lid oils and eyeshadow pigments. Use thin layers and avoid applying moisturizer directly on the moveable lid.
Conclusion
Mastering how to use Urban Decay eyeshadow primer transforms your eye makeup from temporary to transfer-proof, with proper application being the difference between colors that last 12 hours versus fading by midday.
The key steps are simple: clean lids, wait for full primer absorption, apply shadow while the base is tacky, and remove thoroughly each night to prevent buildup.
Your eye shape, skin type, and shadow formula all influence primer technique. Hooded eyes need more product on the hood itself, oily lids require powder setting, and cream shadows demand completely dry primer.
Choose Original for most skin tones, Eden for color correction on medium to deep complexions, or Minor Sin when you want subtle luminosity beneath your shadow placement.
With the right shade and application method, your eyeshadow stays vibrant and crease-free regardless of climate or wear time demands.

She started writing on the site after fielding the same questions from clients and friends often enough to just write the answers down: which red won't turn orange on a warm undertone, how to keep lipstick from feathering into fine lines, why a "12-hour" formula rarely survives dinner.
Every review on the site follows the same rule she uses with paying clients: wear it first, then decide if it's worth recommending.
- What Is CC Cream and How Is It Different? - July 16, 2026
- What Is Skin Tint and Why Everyone Is Obsessed - July 11, 2026
- What Is Foundation and How Do You Choose One? - July 6, 2026
