

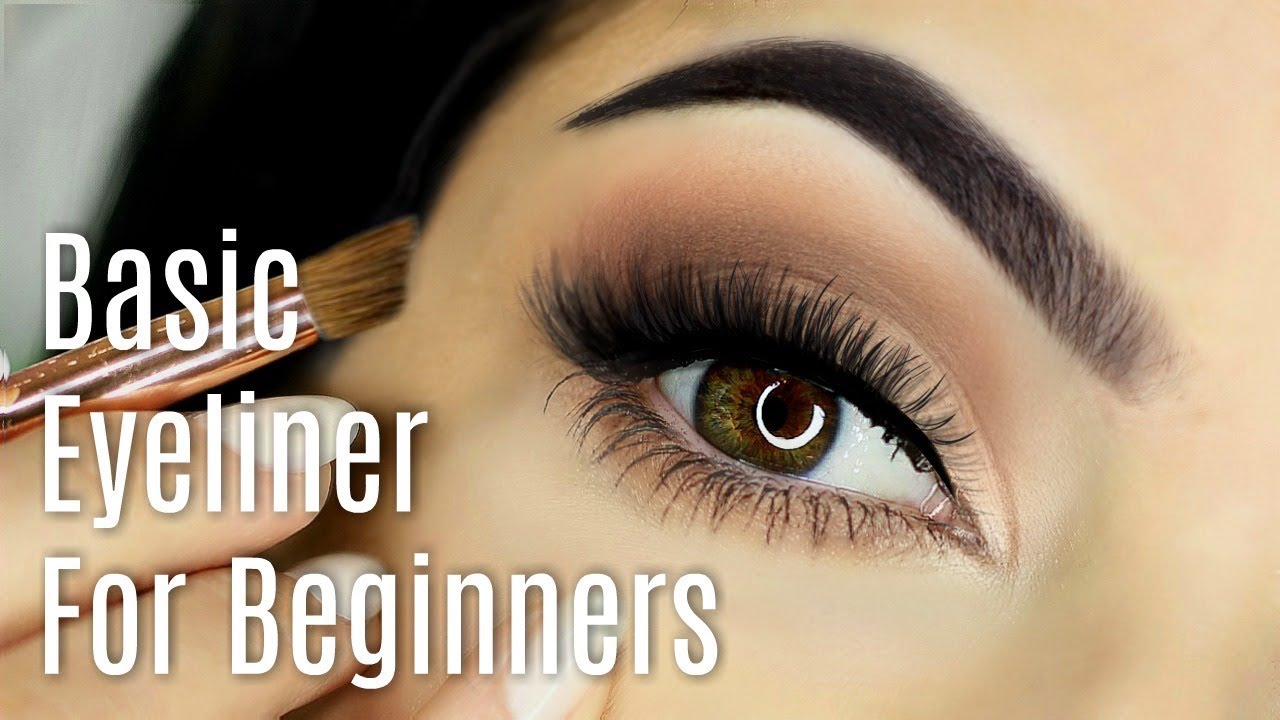
A shaky hand, a smudged wing, liner that fades by noon. Sound familiar?
Knowing how to apply eyeliner correctly changes the entire result, whether you’re drawing a clean lash line or building a sharp cat eye.
This guide covers everything from choosing the right formula for your eye shape to pencil, liquid, and gel application techniques that actually hold all day.
You’ll also find specific steps for hooded, monolid, and downturned eyes, plus how to remove waterproof liner without damaging the skin around your lash line.
What Eyeliner Types Exist and What Each Does
Eyeliner is a color cosmetic applied to the eye contours to define, shape, and enhance overall eye appearance. It comes in several formulas, and each one behaves differently on skin.
Nearly 70% of cosmetic users include eyeliner in their daily routine, according to Reanin market data, which makes it one of the most consistently used products in any makeup kit.
The format you pick determines how much control you get and how long the result lasts. Pick the wrong one for the look you want and you’ll spend ten minutes fixing a smudge that shouldn’t have happened.
| Type | Texture | Best For | Control Level |
|---|---|---|---|
| Pencil / Kohl | Soft, waxy | Waterline, smudged looks | Medium |
| Liquid (felt-tip) | Fluid, precise | Winged liner, cat eye | High |
| Gel (pot or pencil) | Creamy, buildable | Tight-lining, defined lash line | High |
| Felt-tip pen | Ink-based | Sharp lines, graphic looks | Very High |
Pencil and Kohl Eyeliner
Best for beginners and soft looks. A pencil liner drags less than liquid and allows for easy smudging along the lash line or waterline.
Kohl pencils have a softer, creamier texture than standard pencils. They work well for a smoky eye or a lived-in liner look, but they transfer more on oily lids.
Sharpen before every use. A dull tip skips skin and deposits uneven product, which makes clean lines impossible.
Liquid Eyeliner
Liquid liner delivers the most defined, long-wear results. The liquid eyeliner format dominates the market: the liquid eyeliner segment was valued at USD 3.12 billion in 2024, according to Verified Market Reports, and is projected to reach USD 5.67 billion by 2033.
Most felt-tip liquid liners have a micro-tip or brush tip applicator. Micro-tips work better for precise wings. Brush tips give a softer, more painterly line.
- Dries fast, so mistakes set quickly
- Not ideal for the waterline
- Works best over a primer on oily lids
Gel Eyeliner
Gel liner sits between pencil and liquid. It gives better pigmentation than a pencil and more control than a liquid on a bad hand-steadiness day.
Pot gels require a separate angled liner brush. The brush loading is where most people go wrong: too much product and the line bleeds, too little and it skips.
Products like MAC Fluidline and Urban Decay 24/7 Glide-On are used on almost every professional set because they stay put without moving for hours.
Tools You Need Before You Start

The product is only half the equation. What you apply it with and what goes underneath it directly affects how long it lasts and how clean the line looks.
Brushes and Applicators
Angled liner brush: for gel pot application, tight-lining, and drawing close to the roots of the lashes.
Fine-tip detail brush: for precise inner corner work or filling small gaps in a liquid line.
Cotton swabs: for correcting edges while product is still wet. Keep a few next to your mirror. Dipped in a little micellar water, they clean up a smudged wing in seconds without disturbing the rest of your eye makeup.
Primers and Base Products
Skipping eye primer is the main reason eyeliner fades, creases, or transfers. Full stop.
- A thin layer of eyeshadow primer grips product and extends wear by several hours
- Concealer or skin-tone eyeshadow also work as a base in a pinch
- On oily lids, set the primer with a translucent or skin-toned powder before applying liner
On dry skin, skip the powder base. It can make pencil liner look patchy and drag on application.
Removal Tools
Have your removal tools ready before you start. This one sounds backwards, but it changes the way you apply liner because you stop being precious about making mistakes.
Micellar water on a cotton swab handles most liner corrections. For waterproof formulas, an oil-based remover is more effective. Removing eye makeup correctly matters as much as application, especially around the sensitive skin near the lash line.
How to Apply Pencil Eyeliner
Pencil liner rewards patience more than skill. The technique is simple. Getting it right comes down to prep, pressure, and a sharpened tip.
Upper Lash Line Application
Short strokes work better than one long sweep. Start from the inner corner and work outward in small, connected dashes. Then go back and connect them.
Press gently. Heavy pressure causes the pencil to tug on the skin and creates an uneven, dragged line. The goal is deposit, not push.
- Pull the outer corner of the eye taut with one finger for a cleaner surface
- Draw as close to the lash roots as possible, filling gaps between lashes
- Build depth with a second pass rather than pressing harder on the first
Waterline Application
The waterline is the moist inner rim just above the lower lashes. Lining it with a kohl pencil makes the eyes look more defined and slightly smaller, which is a look some people want and others don’t.
Waterproof formulas hold better here. Regular pencils smear within an hour because of moisture from the eye. NYX Epic Smoke Liner and Urban Decay 24/7 Glide-On are popular picks for this.
Never share waterline products. This is one area where hygiene actually matters for eye health, not just makeup performance.
Smudging for a Softer Look
Apply pencil liner to the upper lash line, then use a smudge brush or a cotton swab to blur the edge upward immediately after. Do it while the product is still slightly wet for the easiest result.
This technique works for a soft smoky eye that doesn’t require eyeshadow. It also covers any small gaps or unevenness from the original application line.
How to Apply Liquid Eyeliner
Liquid liner has the steepest learning curve of all eyeliner formats. The payoff is a sharp, high-definition line that holds all day. The tradeoff is that mistakes dry fast and mistakes do happen.
Steadying Your Hand
Rest your elbow on a flat surface. This is the single most effective thing you can do before you draw a single line. A floating arm is why most people can’t get a clean result.
Tilt your chin down slightly and look downward into the mirror. This flattens the lid and gives you a cleaner surface to work on. Most people look straight ahead and wonder why their liner disappears when they open their eyes.
The Dot-and-Connect Method
Place small dots along the upper lash line from inner to outer corner, then connect them. This is less intimidating than trying to draw a single stroke and gives you a guide to follow.
- Work from the inner corner outward
- Stay as close to the lash roots as possible
- Let the line dry fully before blinking
- Go back and fill any gaps with the tip
Products with a flexible felt-tip hold up better for this method. Stiff applicators are better for one-stroke drawing once you have more practice.
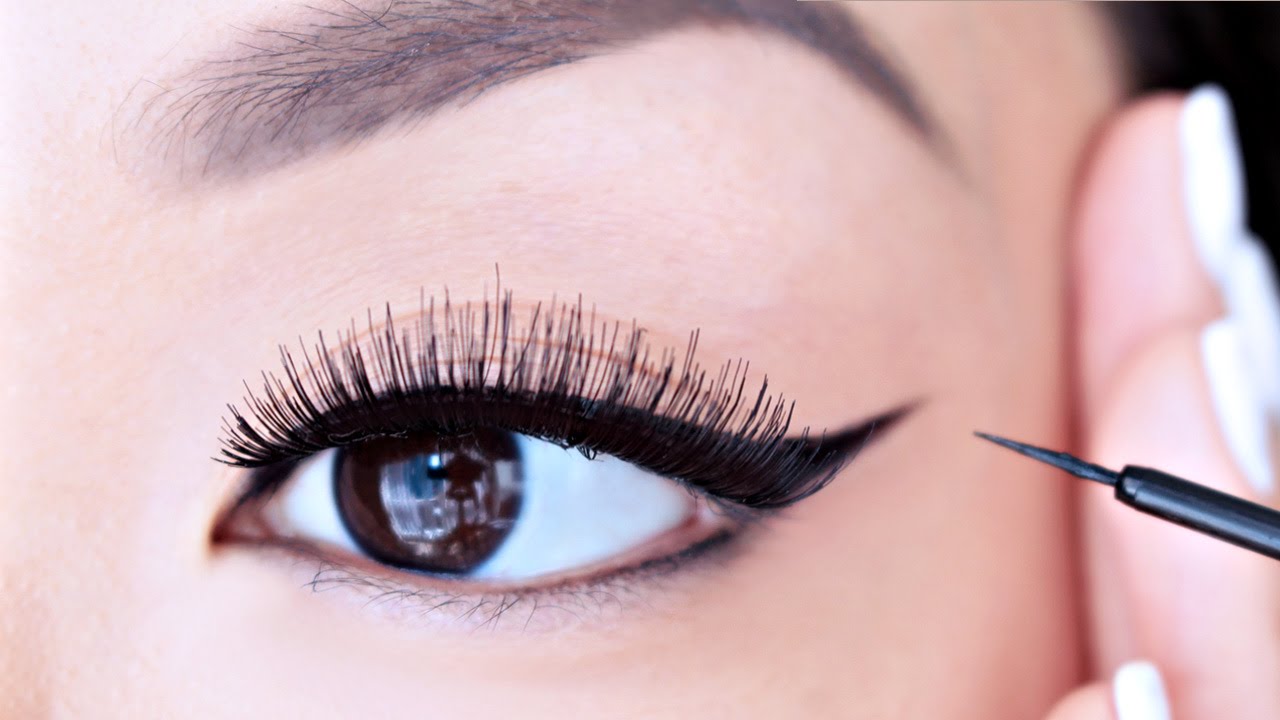
Building a Wing
Map the wing first before drawing. Look straight ahead and use the lower lash line as your angle guide. The flick should point toward the end of your brow, not straight up.
Draw the flick first as a short line from the outer corner, then connect it back down to the lash line and fill in the triangle. This works better than trying to extend the lash line and flick in one stroke.
Stila Stay All Day Liner is one of the most consistently recommended products for this, mostly because the tip stays fine throughout the whole product’s life, not just at the start.
For a guide on doing winged eyeliner step by step, the wing angle, symmetry fixes, and different eye shape adjustments all make a difference in the final result.
Fixing Mistakes
Wet mistakes: use a dry cotton swab to absorb excess product immediately. Dry mistakes: a cotton swab dipped in micellar water or an oil-free makeup remover cleans the edge without disturbing the rest of the line.
A pointed cotton swab or a fine brush dipped in concealer can sharpen a blurry wing edge without redoing the whole line. This is faster than starting over and gets used on almost every professional job.
How to Apply Gel Eyeliner

Gel liner gives you more working time than liquid before it sets, which makes it easier to correct. That said, once it dries fully it holds surprisingly well, even on oily lids.
Over 25 new gel eyeliner variants were introduced globally in 2024 alone, many featuring smudge resistance up to 24 hours and vitamin-enriched formulas for sensitive eyes (Market Reports World, 2024).
Loading the Brush Correctly
Too much product is the most common gel liner mistake. Dip the angled brush into the pot and wipe off the excess on the inner edge of the lid. You want a thin, even coat on the brush, not a clump.
Draw with the flat side of the brush pressed against the lash line. The angle of the brush, not the pressure, controls the line width.
Tight-Lining With Gel
Tight-lining means placing liner on the upper waterline, right at the base of the lashes, so it fills the gap between the lashes and makes them look thicker and more rooted. Gel is the best formula for this because it holds in a damp environment better than pencil.
- Tilt your head back slightly and look down
- Gently lift the upper lid with one finger
- Apply product directly to the upper lash line between the roots
- Use short strokes and work section by section
For a detailed breakdown of the tightline technique, the prep steps and brush angle both affect how clean and long-lasting the result is.
Preventing Smudging After Application
Set gel liner with a matching matte eyeshadow pressed over the top using a flat shader brush. This seals the product and significantly extends wear time, especially in humid conditions or on oily lids.
Wait 60 seconds after application before setting. If you go in too soon, the powder disrupts the product before it has bonded to the skin.
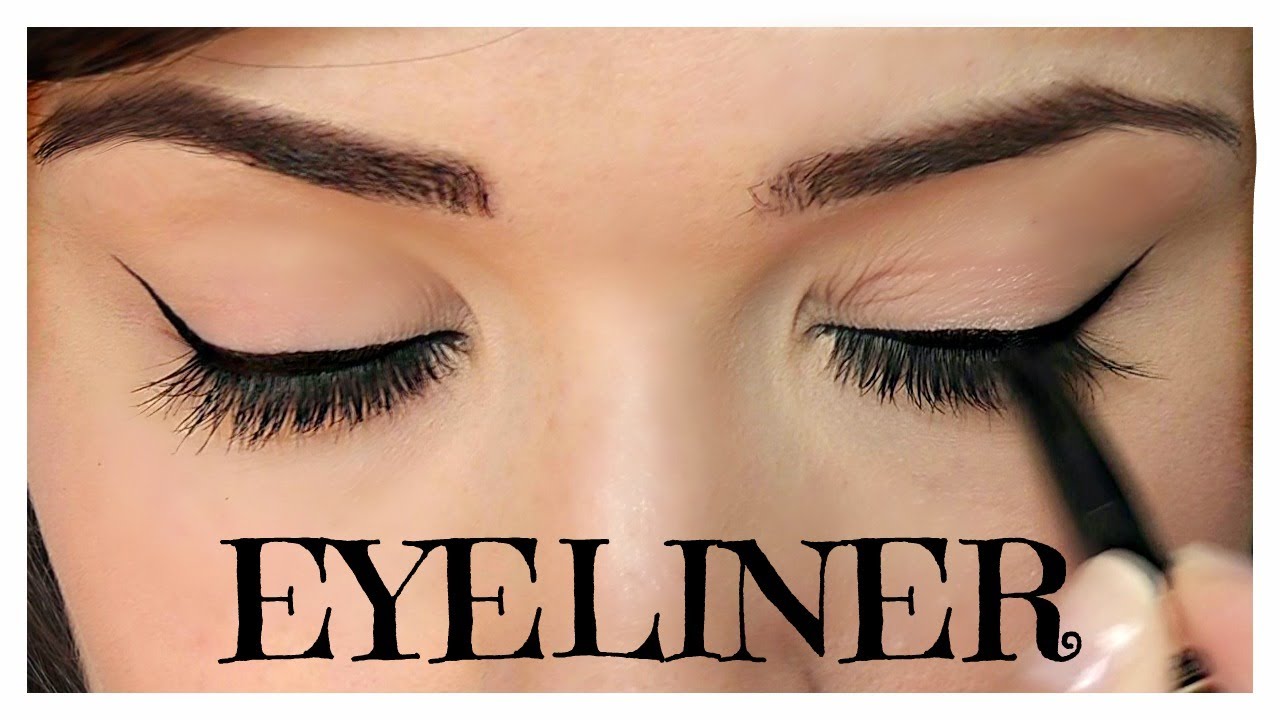
How to Create a Winged Liner Look

The winged liner look is the most searched eyeliner technique online, and it’s also the one people give up on fastest. It’s not difficult. It just requires a consistent method rather than a freehand approach every time.
Winged eyeliner had a notable resurgence at the 2024 British Fashion Awards red carpet, with celebrities including Rihanna and Jourdan Dunn opting for sharp flicks, reinforcing its position as a durable, high-impact look (Who What Wear, 2024).
Using a Guide for the Wing Angle
Place a piece of tape or a business card at the outer corner of your eye, angled toward the end of your brow. Use this as a stencil for the outer edge of the wing. Draw the flick along the guide, remove it, and connect back to the lash line.
This works. It removes the guesswork around angle and keeps both sides consistent.
An alternative: use a pencil eyeliner to lightly map the wing shape first, then go over it with liquid or gel for the final line. The pencil acts as a guide and can be blended or corrected before you commit to the sharper product.
Wing Construction by Eye Shape
Almond eyes: any wing angle works, the shape is naturally balanced.
Hooded eyes: draw the wing with your eye open, not closed. The wing needs to sit above the fold so it shows when your eyes are open. A shorter, steeper flick works better than a long, flat one.
Downturned eyes: angle the flick upward more steeply than feels natural. This lifts the outer corner visually. A horizontal or downward-angled wing makes the eye look more downturned.
Round eyes: extend the wing outward rather than upward. This elongates the eye shape and adds definition without making the eye look rounder.
For more on cat eye makeup variations by eye shape, the placement rules change significantly depending on your lid structure.
Fixing Symmetry Issues
Draw both wings before finishing either one. This lets you adjust angle and length while both sides are still in progress, instead of committing to one perfect side and struggling to match it.
Step back from the mirror. Small asymmetries that look major up close disappear at normal viewing distance. Overfixing is how one decent wing becomes two uneven ones.
If one side is noticeably off, use a cotton swab dipped in micellar water to sharpen or reduce the wing. Then adjust the other side to match rather than trying to make the imperfect side perfect.
Eyeliner Application by Eye Shape

Most eyeliner tutorials assume almond eyes. They don’t work well on anything else. Knowing your eye shape before picking up a liner changes the whole result.
According to HAYA Beauty, almost 50% of all Asians have a monolid, yet most mainstream liner tutorials skip this entirely. Adjusting technique to eye shape is what separates a flattering liner look from one that disappears the second you open your eyes.
| Eye Shape | Key Adjustment | Best Formula |
|---|---|---|
| Hooded | Apply with eyes open; thicker line | Waterproof liquid or gel |
| Monolid | Start at outer third; bold wing | Gel or long-wear liquid |
| Round | Elongate outward, not upward | Felt-tip liquid |
| Downturned | Steep upward flick at outer corner | Liquid liner, waterproof |
Hooded Eyes
Draw with your eyes open. This is the rule that changes everything for hooded lids. If you apply liner with your eye closed, the line disappears into the fold once your eye opens.
Keep the inner corner thin and build thickness toward the outer corner. A line that’s uniform in width from inner to outer corner will look uneven when your eyes are open because the hood covers more product toward the center.
Waterproof and transfer-resistant formulas are non-negotiable here. Maybelline Tattoo Studio Ink Pen and L’Oreal Infallible Grip are consistently recommended by artists specifically for hooded lids because they don’t migrate into the crease.
Monolid Eyes
Monolids have no visible crease, which means there’s no fold to absorb or hide product. This actually gives more surface for a bold, defined look.
Start liner at the outer third of the lash line, not the inner corner. Beginning too far inward makes the eyes appear narrower. Draw outward and extend into a wing angled toward the temple.
- Bolder, thicker lines read better than thin ones on this lid shape
- Gel liner grips the lid well and prevents transfer on the mobile lid
- Set with a matching matte shadow to prevent smudging during the day
Round and Downturned Eyes
Round eyes: focus liner on the center and outer portions of the upper lash line only. Starting from the inner corner closes the eye shape down. Build thickness outward and extend horizontally to elongate rather than open.
Downturned eyes: angle the wing steeply upward, steeper than feels natural. The outer corner already dips, so a horizontal or low-angled wing reinforces that droop. The goal is a visible upward lift at the outer corner. According to Revlon’s makeup artist guidance, following the natural eye shape on downturned eyes pulls the focus downward. Correct against the natural direction instead.
For more on doing makeup for hooded eyes, liner placement is only one part of the wider technique that makes this eye shape work.
How to Make Eyeliner Last All Day

Eyeliner fades for one of two reasons: wrong formula for the skin type, or missing prep steps. Both are fixable.
A 2024 study published in the Journal of Cosmetic Dermatology found that makeup zones trap moisture and increase sebum output within just 20 minutes of activity, which directly explains why liner migrates on oily lids without a primer base underneath.
Primer and Base Prep
Eyeshadow primer is the single most impactful step for liner longevity. It creates a grip layer that keeps product from sliding and reduces the oil contact between liner and skin.
Apply primer, let it set for 30 seconds, then dust a thin layer of translucent powder over the lid before lining. This is the combination professional artists use on long shoot days. It sounds like extra steps. It is. It’s also worth it.
- MAC Paint Pots work as both primer and base in one product
- Urban Decay Eyeshadow Primer Potion is the standard kit product for most working artists
- On dry skin, skip the powder layer entirely. It makes pencil liner patchy.
Layering Products for Extended Wear
Layering extends wear significantly on oily or combination lids. The principle is simple: stack a less saturated product under a more saturated one.
Method: apply a pencil liner first along the lash line, then go over it with gel or liquid. The pencil acts as a tacky base that the top layer grips. This is why some gel liners last on people who usually can’t get liner to stay past noon.
Dust a matching matte eyeshadow over the finished line with a flat shader brush. This seals the product and adds depth. Charlotte Tilbury artists use this technique consistently on clients with transfer-prone skin.
Setting and Finishing
Setting spray seals the full eye look after liner application. One light pass from a distance is enough. Holding it too close disturbs the line before it can set.
Important: wait at least 60 seconds after applying liner before adding setting powder or spray. Product that hasn’t fully bonded to skin will move when touched, no matter what you put over it.
For a full breakdown of making makeup last all day, the prep steps before liner application matter as much as the formula choices.
The global waterproof eyeliner segment is growing partly because of this demand. Brands like Maybelline introduced the Tattoo Studio Gel Pencil in August 2023 specifically to meet growing consumer demand for smudge-proof formulas that don’t require layering techniques (Allied Market Research, 2023).
Formulas Worth Knowing
Gel liner contains higher wax content and less oil than pencil liner, according to Dome Beauty’s formulation notes. This is why it sets firmer and transfers less on oily lids.
Long-wear picks by formula type:
- Liquid: Stila Stay All Day (24-hour wear claim), NYX Epic Ink Liner
- Gel: MAC Fluidline, Bobbi Brown Long-Wear Gel Eyeliner
- Pencil: Urban Decay 24/7 Glide-On, L’Oreal Le Liner Signature
How to Remove Eyeliner Without Irritating Eyes

Removal technique matters for eye health, not just skincare. The skin around the eye is the thinnest on the face and has almost no subcutaneous fat underneath it. Repeated tugging and rubbing accelerates collagen breakdown in this area.
MAC global senior artist Michelle Clark states that scrubbing the eye area hard enough will cause lash fallout over time, in addition to skin irritation. The right method is soak-and-press, not wipe-and-scrub.
Removing Standard Liner
Micellar water handles most non-waterproof pencil and gel formulas without friction. The micelle molecules in the formula attract and lift pigment, so the product comes off with minimal pressure.
Steps that work:
- Saturate a cotton pad, not a cotton ball (cotton balls leave fibers near the eye)
- Press the pad gently over the closed eye and hold for 10 to 15 seconds
- Wipe downward in the direction the lashes grow
- Use a cotton swab dipped in micellar water for the waterline and inner corner
No rubbing. Holding the product against the eye does most of the work. The soaking time is what breaks the formula down.
Removing Waterproof Eyeliner
Waterproof formulas contain polymers and waxes that bond to skin and resist moisture. Micellar water alone won’t dissolve them efficiently. Oil breaks these bonds faster and with less friction.
Oil-based removers: coconut oil, jojoba oil, dedicated cleansing oils, or balm-formula removers all work. Apply a small amount to a cotton pad, press against the closed eye for 20 to 30 seconds, then wipe downward once.
Follow with micellar water to remove the oily residue, then cleanse the full eye area. Leaving oil-based remover on the skin without a second cleanse can cause congestion around the lash line over time.
For waterproof formulas on the waterline specifically, a cotton swab soaked in oil-based remover gives the most precise removal without product spreading into the eye. For a full guide to removing waterproof makeup, the technique differs depending on whether you’re working on the lash line, waterline, or lower lid.
What to Avoid
Three removal habits that cause long-term problems around the eye area.
Rubbing laterally: side-to-side motion stretches the orbital skin repeatedly and contributes to fine lines faster than almost any other daily habit.
Dry removal: wiping liner off without a solvent requires force. Force damages lashes and skin. Always use a product, even if it’s just a small amount of facial oil.
Skipping removal entirely: sleeping in eyeliner, especially waterline or gel liner, can block meibomian glands on the eyelid margin. Certified aesthetician Valerie Aparovich notes that prolonged product buildup in this area causes inflammation and can affect vision health over time, not just skin health.
For people with sensitive eyes or contact lens wearers, an ophthalmologist-tested skincare and eye care routine is worth establishing before experimenting with long-wear waterproof formulas around the lash line and waterline.
FAQ on How To Apply Eyeliner
What is the easiest eyeliner to apply for beginners?
Pencil eyeliner is the most forgiving for beginners. It’s easier to control than liquid, smudges out cleanly, and mistakes wipe off fast. Start with a soft kohl pencil before moving to gel or liquid liner.
How do you apply eyeliner without it smudging?
Apply an eyeshadow primer first, then dust translucent powder over the lid before lining. Set the finished liner with a matching matte eyeshadow. Waterproof formulas like NYX Epic Ink Liner or Stila Stay All Day hold significantly longer.
How do you draw a winged liner look?
Map the flick angle first using tape or a card. Draw the wing from the outer corner toward the brow end, then connect it back to the upper lash line. Fill in the triangle and clean edges with a cotton swab.
How do you apply eyeliner on hooded eyes?
Keep your eyes open while applying. Draw the line with eyes relaxed so you can see exactly where product sits. Use a waterproof liquid liner and go thicker toward the outer corner so the line stays visible when your eyes are fully open.
What is the difference between tight-lining and regular liner application?
Regular liner sits on top of the lash line. Tight-lining places product directly at the base of the upper lashes, filling gaps between them. It makes lashes look thicker and more rooted without a visible liner line.
How do you apply gel eyeliner without it looking patchy?
Load the angled brush lightly and wipe off excess on the pot edge before drawing. Too much product causes bleeding. Work in short strokes close to the lash line, build with a second pass rather than pressing harder on the first.
How do you stop eyeliner from running?
Switch to a waterproof or long-wear formula. Prime the lid beforehand and set liner with powder. If liner runs consistently under the eye, stopping eyeliner from running often comes down to skin prep rather than product choice alone.
Can you apply eyeliner on the waterline?
Yes. Use a kohl pencil or waterproof gel formula specifically. Standard pencils fade quickly on the waterline due to moisture. Dark shades make eyes look more defined and slightly smaller. White or nude liner on the waterline opens the eye up visually.
How do you apply eyeliner for a cat eye look?
Start with a thin line along the upper lash line and thicken it toward the outer corner. Extend a short flick angled toward the brow tail. For a full guide on doing eye makeup, the cat eye shape works on most eye shapes with minor angle adjustments.
How do you remove eyeliner without irritating your eyes?
Press a soaked cotton pad against the closed eye for 15 seconds before wiping. Use micellar water for standard formulas. For waterproof liner, an oil-based remover breaks down polymers faster and with less friction than any water-based product.
Conclusion
This conclusion is for an article presenting how to apply eyeliner in a way that actually works for your eye shape, your formula, and your skill level.
Choosing the right product matters. So does prep. A thin layer of primer, the correct brush for gel application, and a steady elbow make more difference than any expensive liner ever will.
Whether you’re working on a tight-line technique, adjusting your wing for monolid or downturned eyes, or just trying to keep pencil liner on the waterline past noon, the fixes are almost always technical.
And when the day’s done, remove it properly. Your lash line and the skin around it will hold up better for it.
Practice the steps. Smudge-proof wear and a clean cat eye flick are both repeatable once you know the method.

She started writing on the site after fielding the same questions from clients and friends often enough to just write the answers down: which red won't turn orange on a warm undertone, how to keep lipstick from feathering into fine lines, why a "12-hour" formula rarely survives dinner.
Every review on the site follows the same rule she uses with paying clients: wear it first, then decide if it's worth recommending.
- How to Choose Setting Powder for Your Skin Type - August 1, 2026
- How Long Does Eyeliner Last Before It Expires? - July 28, 2026
- What Is Contour and How Do You Apply It? - July 25, 2026


