

Summarize this article with:
Formal events demand more from your makeup than any other occasion.
Knowing how to do makeup for a formal event is not just about applying more product. It is about choosing the right formulas, building a base that lasts, and creating a polished look that holds up through hours of dining, dancing, and flash photography.
Whether you are preparing for a black-tie gala, a cocktail party, or an awards ceremony, the approach matters. This guide covers everything from skin prep and long-wear foundation to formal eye makeup, lip color, and the setting techniques that keep everything in place all evening.
What Is Formal Event Makeup
Formal event makeup is a polished, deliberately constructed look built to last through long hours, bright lighting, and photography. It is not everyday makeup applied with more product. It is a different approach altogether, from how you prep the skin to which formulas you choose.
The main difference comes down to intent. Daytime makeup is designed for natural light and a few hours of wear. Formal makeup has to hold up under chandeliers, flash photography, and a full evening of movement, heat, and contact.
How “Formal” Affects Your Choices
Not every formal event calls for the same intensity. A cocktail party and a black-tie gala are both “formal,” but the makeup expectations are different.
| Event Type | Makeup Intensity | Key Focus |
|---|---|---|
| Black tie / Gala | Full glam | Dramatic eye or bold lip, full-coverage base |
| Cocktail party | Polished glam | Defined features, medium-to-full coverage |
| Formal dinner | Elevated everyday | Flawless skin, one statement feature |
| Award ceremony | Camera-ready full glam | Flash-proof finish, long-wear everything |
Knowing the type of event upfront saves you from either under-doing it or showing up in a look better suited for the stage.
The Most Common Mistake People Make
Applying the same products they use daily, just with a heavier hand. That approach leads to creasing, fading, and a look that photographs poorly.
Formal makeup requires long-wear formulas, proper primers, and a setting strategy. Product choice matters as much as application technique here. You can check out a range of formal makeup looks to get a clearer picture of what the finish should look like before you start.
Skin Prep Before Formal Makeup Application

Skin prep is where formal makeup either succeeds or fails before a single product touches your face. Skip this step and foundation will separate, crease, and oxidize by the third hour of the event.
Proper prep takes 20 to 30 minutes. That time investment pays off for the entire evening.
The Correct Order of Steps
Most people rush this part. They moisturize, wait two minutes, and go straight to primer. That is not enough time for products to absorb properly.
Cleanse first, even if you just woke up or did a fresh face that morning. Residual oils and skincare will interfere with adhesion.
Moisturize based on your skin type. Dry skin needs a hydrating cream. Oily skin does better with a lightweight gel. Wait at least 10 minutes before moving forward.
Eye cream goes under the eyes before anything else. Press it in gently. Do not rub. Give it five minutes to settle before you apply concealer on top.
Primer comes last in skin prep. This is where most people make the biggest mistake: using a single primer for the whole face when different areas need different formulas.
Choosing the Right Primer
Pore-filling silicone primers work on areas with visible texture, typically the nose, forehead, and chin. They create a smooth surface that helps foundation sit evenly.
Hydrating primers suit dry or mature skin. They prevent foundation from clinging to dry patches and looking flaky under event lighting.
Eye primer is non-negotiable for formal events. It prevents eyeshadow from creasing and keeps lid color vibrant for hours. Urban Decay’s Eyeshadow Primer Potion is one of the most-used options in professional kits for exactly this reason.
Using the right makeup primer for your skin type makes a measurable difference in how long everything lasts.
How Long to Wait Between Skincare and Makeup
A minimum of 10 minutes after moisturizer, ideally 15. For anyone using serums or treatment products underneath, wait 20 minutes. Product layered on top of tacky skincare will pill and roll, which is a problem that is very hard to fix mid-event.
One practical tip: do your hair first, then come back for makeup. That built-in wait time solves the timing issue without adding anything to your routine.
Foundation and Concealer for a Formal Look

The base sets the tone for everything built on top of it. A formal event base needs to look polished in-person, hold up under venue lighting, and photograph without flashback or oxidation.
The long-lasting liquid foundation market is projected to reach approximately $25 billion by 2033 (Archive Market Research), driven largely by demand for performance formulas that deliver all-day wear. That demand is very much coming from people dressing for events.
Coverage Level and Formula Type
Medium to full coverage is standard for formal settings. Sheer tints look beautiful in person but tend to disappear in photos and under harsh lighting.
Liquid foundation gives the most control over coverage and finish. It blends well with both brushes and sponges, and most long-wear formulas are in this category.
Stick foundation works well for dry-to-normal skin. It builds coverage quickly and stays in place, though it can look heavy if over-applied.
For more detail on which format suits different skin types, the comparison between powder vs liquid foundation covers the tradeoffs clearly.
Matching Foundation to the Event’s Lighting
This is something most people do not think about when they buy a foundation for a special occasion.
Warm-toned venues (candlelit dinners, amber-lit ballrooms) can make cool foundations look ashy. Lean toward warmer or neutral shades for these settings.
Bright white lighting and flash photography expose powders with silica or titanium dioxide, causing flashback. Avoid heavy powder highlights and loose glittery powders in these environments.
Charlotte Tilbury’s Airbrush Flawless Foundation became a go-to for event makeup largely because it photographs cleanly under all lighting conditions and does not oxidize dramatically over a long evening.
Concealer Application for Formal Events
Full coverage concealer under the eyes, not just spot coverage. Formal events mean people are looking at you, photographs are happening, and lighting is unforgiving.
Use a creamy formula that does not dry down matte too fast. Set it with a very thin layer of translucent powder pressed in with a damp sponge, not dusted on. This prevents caking without leaving the area shiny by hour three.
A solid guide on using concealer correctly covers the blending and setting techniques that make a real difference under event conditions.
Setting the Base

Set in stages. Powder the areas that move and crease first: the center of the face, around the nose, under the eyes. Leave the cheekbones and outer face either powder-free or lightly dusted depending on your skin type.
Finish with a long-wear setting spray after all powder is applied. Applying setting spray correctly, with a figure-eight motion held about 12 inches from the face, melts everything together and removes the powdery look.
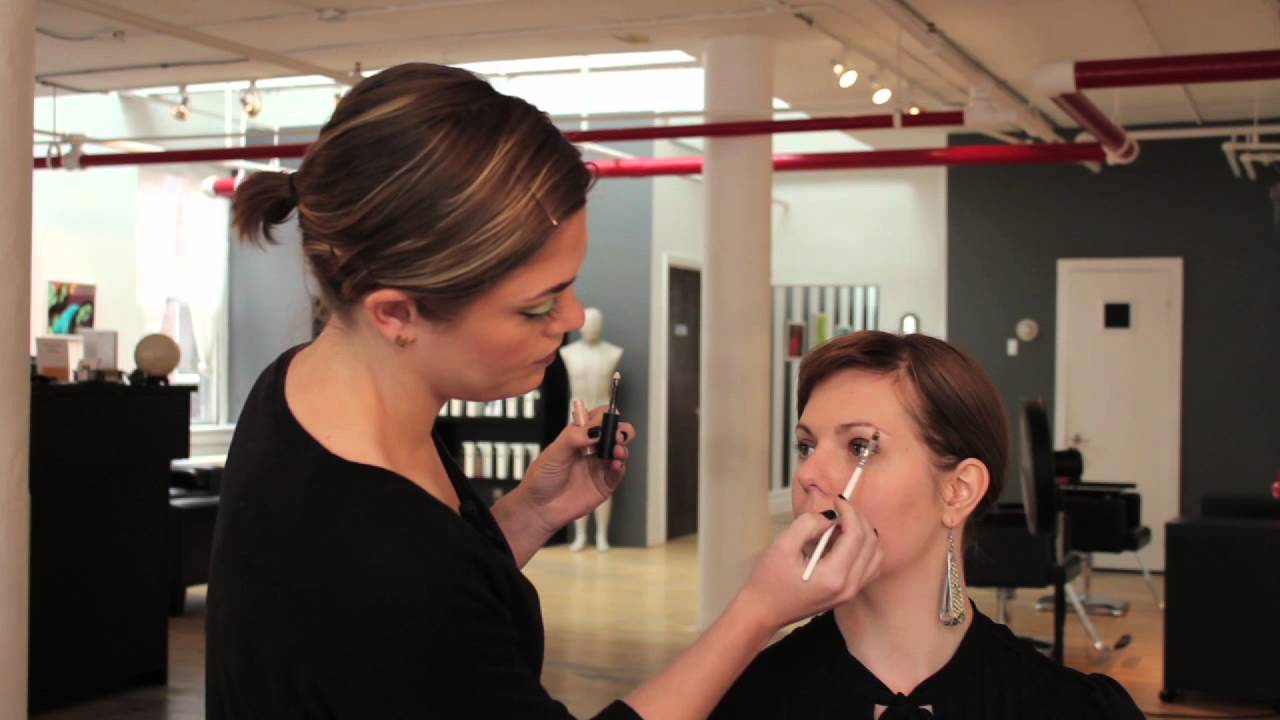
Formal Eye Makeup

The eyes are the focal point of most formal looks. A well-executed eye can carry an entire face and hold up as the statement piece even with a subdued lip.
The global eyeshadow market was valued at $2.91 billion in 2022 and is projected to reach $4.62 billion by 2029 (Hollywood Mirrors), which tracks with the steady rise in demand for event-ready eye products.
The Go-To Formal Eye Looks
Three eye looks consistently work for formal settings:
- Smoky eye: deep, blended shadow using charcoal, brown, or plum tones. Dramatic without being overdone when blended properly.
- Cut crease: sharp definition between the lid and crease. More graphic and editorial, works well for galas and awards events.
- Halo eye: a lighter or metallic shade placed at the center of the lid with deeper tones at the inner and outer corners. Suits almost every eye shape.
For a broader look at what these actually look like styled out, smokey eye makeup looks and elegant makeup looks give solid reference points before you start blending.
Eyeshadow Application Order
Order matters more than most people realize. Going in wrong sequence makes blending exponentially harder and muddier.
Start with a transition shade in the crease, a matte tone two shades darker than your skin. This builds the dimension that makes the rest of the look work. Then lid color, then darker tones in the outer corner and deep crease, then blending.
Pat McGrath’s eyeshadow palettes are a staple in professional formal makeup kits specifically because the pigment payoff works in one or two passes, keeping the application clean without overworking the product.
How to Choose Between Bold and Subtle Eye Looks
This comes down to two things: your outfit and your lip color.
Bold eye, quiet lip. A deep smoky eye or graphic cut crease pairs with a nude, blush, or satin lip. Trying to do both bold creates visual competition.
Subtle eye, statement lip. A classic red, berry, or deep matte lip reads more powerfully when the eyes are softly defined rather than dramatic.
Skin tone also affects which direction reads better. On deeper skin tones, a rich eye look with a complementary bold lip often works where it might look too heavy on fair skin. Your mileage varies, and the balance is something you figure out best by testing it under the same lighting conditions as your event.
Eyeliner and Lashes for Formal Settings

Tightlining is the single most underused technique for formal eye looks. Placing a dark pencil or gel liner along the upper waterline makes lashes appear denser without adding an obvious liner line. It photographs naturally and holds up well.
For lashes, strip falsies work better than individual clusters for formal events because they distribute weight evenly and are less likely to lift at the corners mid-evening. The global false eyelashes market reached $1.9 billion in 2024 (Grand View Research), with strips holding over 39% of that market, which reflects exactly how widely they are used for occasions like these.
Detailed guidance on applying false eyelashes and how to tightline eyes will help you execute both techniques cleanly.
Brows for Formal Events
Brows frame everything. An otherwise flawless formal look can read unfinished if the brows are too sparse, too light, or over-drawn.
Formal brows should look defined, not constructed. The goal is a polished version of your natural brow, not a drawn-on shape.
Filling vs. Sculpting
These are two different approaches and they are not interchangeable.
Filling uses light hair-like strokes to add density where growth is sparse. Works well for people with mostly full brows that just need a bit more definition.
Sculpting uses a combination of product under the brow and a clean-up step to define the shape. Better suited to people who need more structure or who have brows that do not have a natural arch.
Anastasia Beverly Hills Brow Wiz is the most consistently recommended pencil for filling in formal settings. The ultra-fine tip allows for realistic hair strokes rather than blocky coloring.
Product Choices by Brow Type
| Brow Type | Best Product | Why It Works |
|---|---|---|
| Sparse, thin brows | Brow pomade | High pigment builds density quickly |
| Full brows needing definition | Fine-tip brow pencil | Adds hair-like strokes without bulk |
| Any brow type for hold | Clear or tinted brow gel | Sets shape and keeps brows in place all day |
Brow gel is the final step regardless of what else you use. Without it, even well-filled brows shift and lose shape over a long night.
Contouring, Blush, and Highlight for Formal Settings
Dimension in formal makeup is not optional. Flat, one-dimensional skin reads washed out under event lighting, and photographs worse than it looks in person.
The key is knowing how to layer these products so they enhance rather than compete with each other.
Contouring for Photos vs. In-Person Appearance
There is a real difference here that most people do not account for when doing their own makeup.
In-person, a subtle contour reads as natural shadow and adds structure to the face. In flash photography, that same contour can disappear entirely or, with the wrong product, look grey and unflattering.
For formal events that include photography, use a warm-toned matte contour powder or cream rather than a cool grey shade. Warm browns photograph more naturally and still provide definition under flash.
Cream contour applied before setting powder gives the most realistic shadow effect. Powder contour sits on top of the skin more visibly. Both work, but cream integrates better for events where you are photographed in natural and artificial lighting. A guide on using cream contour shows the blending technique that prevents the “muddy stripe” issue most people run into.
Blush Placement for Formal Looks
Blush placement at formal events should be slightly higher than for daytime looks. When people are looking up at you on a stage or across a large room, lower-placed blush tends to disappear.
Apply blush from the apple of the cheek upward toward the temple. For a more sculpted approach, a draped blush technique that sweeps color from the cheekbone up toward the outer eye adds dimension without needing a separate contour step.
Cream blush tends to last longer than powder blush when applied under setting powder, especially for oily skin types. The guidance on applying blush on different face shapes is worth reviewing if you are not sure where exactly to place it for your structure.
Highlight Placement and Flash Photography
This is where a lot of people make mistakes at formal events, especially those involving professional photographers.
Loose glitter highlighters and products with large chunky particles cause flashback, which appears as a bright white spot in photographs. The light reflects off the particles in a way that looks nothing like how it reads in person.
For formal settings, use a finely milled satin or pearl highlighter rather than a glitter formula. Apply to the highest points of the cheekbones, the brow bone, and optionally the cupid’s bow.
Skip the highlighter directly on the nose bridge if flash photography is involved. It tends to flatten and widen the nose in photos, which is the opposite of the intended effect.
Fenty Beauty’s Killawatt Freestyle Highlighter became a professional favorite for exactly this reason: the fine particle size photographs cleanly without heavy flashback.
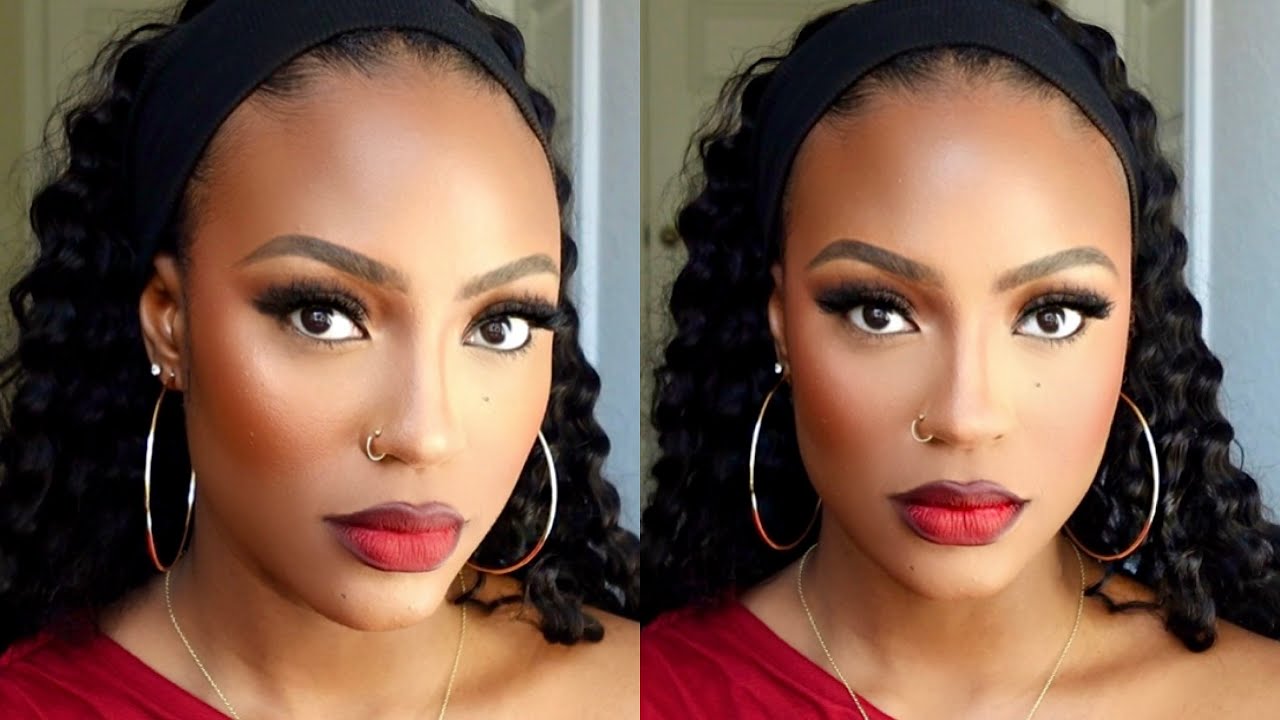
Lip Color for Formal Events

The lip is often the last decision people make, but it should actually be one of the first. Your lip color determines whether you go bold or subtle with the eye, and whether your overall look reads as classic, dramatic, or modern.
Lip liner sales in Europe grew 28% in the first half of 2024 compared to the same period in 2023 (Circana), reflecting a shift toward more precise, defined lip application for polished looks. That trend shows up clearly in formal makeup.
Classic Formal Lip Colors That Always Work
Red: the most historically consistent formal lip choice. Works across skin tones when you match undertone correctly, cool red for cool skin, warm red for warm and olive tones.
Berry and deep plum: a strong choice for evening events, especially on medium to deep skin tones. Reads as dramatic without requiring heavy eye makeup to balance it.
Nude and mauve: the most versatile pairing with bold eye looks. Harder to choose than it sounds. A nude that is too light looks washed out. Aim for one or two shades deeper than your natural lip color.
Guidance on picking the right lipstick color and choosing a red lipstick that actually suits your undertone covers this in detail.
Lip Liner as a Base, Not Just an Outline
Lining lips and filling in the entire lip with liner before applying color is the single most effective technique for making lip color last through a formal event. The liner acts as a base that gives the lipstick something to grip.
Apply lip liner in short strokes following the natural lip line, then fill in the entire lip. This prevents feathering and gives the color hours more wear than lipstick alone.
Charlotte Tilbury’s Lip Cheat liner is widely used in professional bridal and event kits because the formula grips well and photographs cleanly under all lighting conditions.
Matte vs. Satin vs. Gloss for Formal Events
| Finish | Longevity | Best For | Watch Out For |
|---|---|---|---|
| Matte | Longest (6–8 hours) | All-night events, photography | Can dry lips mid-event |
| Satin | Medium (4–6 hours) | Dinners, cocktail events | Needs touch-ups after eating |
| Gloss | Shortest (2–3 hours) | Layered over a liner base | Transfers easily |
For events that involve eating, a matte lipstick applied over a filled-in liner base is the most practical choice. It survives a meal with only minor touch-up needed at the center of the lip.
Detailed advice on applying matte lipstick without it looking dry or patchy covers the hydration prep steps that make the finish look polished rather than flat.
How to Keep Lipstick Off Your Teeth
After applying, place a clean finger just inside your lips and pull it out slowly. Any excess product on the inner lip transfers to your finger instead of your teeth.
Blotting once with tissue after application also removes the top layer of excess product that is most likely to transfer. The color underneath stays intact.
The guide on keeping lipstick off your teeth and making lipstick transfer-proof covers the full technique in detail.
Setting and Longevity Techniques

Getting the look right is only half the job. A formal event typically runs four to eight hours. The makeup that goes on at 6pm needs to hold until midnight, through dancing, dining, humidity, and everything in between.
A 2024 study in the Journal of Cosmetic Dermatology found that foundation measurably altered skin moisture and sebum levels within just 20 minutes of activity, confirming that oil and sweat are the primary reasons bases break down unevenly over long wear periods.
The Correct Setting Sequence
Most people either over-powder or skip powder entirely. Neither works at a formal event.
- Set under-eyes with finely milled translucent powder, pressed in with a damp sponge
- Dust T-zone with loose powder using a fluffy brush
- Leave cheekbones and outer face either bare or with the lightest possible dusting
- Apply setting spray as the absolute final step, after all powder
The global setting spray market was valued at $943 million in 2024 and is projected to reach $1.73 billion by 2030 (Grand View Research). That growth tracks with how embedded setting spray has become in event and professional makeup routines.
Setting Spray Types by Skin Concern
Matte formula: best for oily skin or warm venues. Controls shine and locks down powder without dulling the finish.
Dewy formula: suited to dry or normal skin. Adds back some luminosity that gets flattened by setting powder.
Long-wear formula: the best choice for events exceeding five hours. Brands like Urban Decay All Nighter and Charlotte Tilbury’s Airbrush Flawless Setting Spray are the most-used options in professional kits.
What to Pack for Touch-Ups
Keep it minimal. A full makeup bag at an event is impractical and you will barely use half of it.
- Blotting papers (not powder) for mid-event oil control
- Your lip liner and lipstick
- A travel-size setting spray
- A small concealer for any emergency under-eye fading
Blotting papers remove oil without disturbing the base. Adding more powder on top of an already-set face typically creates a cakey, uneven result by hour five.
How to Blot Without Ruining Your Base
Press the paper flat against the skin. Do not rub or drag it. Hold for two to three seconds and lift straight off.
Focus on the T-zone and the center of the chin. The outer face and cheeks rarely need blotting unless you are in a very warm environment.
A quick spritz of setting spray after blotting refreshes the finish and re-melds any areas where the base has shifted slightly. That single step can make a four-hour-old face look freshly applied.
Formal Makeup for Different Skin Tones and Types

Formal makeup looks different depending on skin tone, skin type, and the conditions of the event. The same products and techniques do not produce the same results across all complexions, and adapting the approach is where a good formal look either succeeds or falls flat.
Foundation and Concealer Across Skin Tones
Finding the right shade match matters more at formal events than in everyday situations because full coverage formulas leave less room for error. A slightly off shade reads more obviously under event lighting.
Fair skin: avoid pink-heavy foundations in flash photography settings. They create an overly washed-out appearance. Neutral to warm-leaning shades photograph more naturally.
Medium and olive skin: watch for grey or ashy undertones in foundations marketed as neutral. Test in natural light before committing. Yellow-leaning or golden formulas typically read more accurately on olive complexions.
Deep skin tones: full coverage foundations in this range still suffer from limited shade options at many brands. Fenty Beauty’s Pro Filt’r line became the most widely referenced standard for deep shade matching precisely because it was one of the first to take the range seriously with over 40 shades at launch.
Adapting the Look for Oily Skin
Oily skin is the most common concern for formal event makeup. The combination of nerves, warmth, and hours of wear creates a situation where even good makeup breaks down faster than usual.
- Use a mattifying primer across the full face, not just the T-zone
- Set foundation immediately after application, before moving to any other step
- Avoid cream blush and cream highlighter directly on the skin with no powder layer underneath
- Carry blotting papers, not a powder compact
A guide on applying makeup for oily skin covers the formula choices and layering sequence that hold up through long events.
Dry Skin Adjustments for Long Events
Powder-heavy formal applications are a known problem for dry skin. By hour three, setting powder emphasizes texture, patches, and fine lines in a way that looks significantly worse in-person and in photos.
Key swap: use a dewy setting spray instead of powder wherever possible. Skip powder on the outer face and cheeks entirely. Only set areas that need it: under-eyes, the nose, and the center forehead.
For anyone applying makeup on dry skin for a formal occasion, the product layering sequence matters as much as the individual products chosen.
Bold Colors on Different Skin Tones
Bold lip and eye colors perform differently across complexions, and this is where a lot of self-applied formal makeup misses.
Deep berry and plum lips read as a classic, sophisticated formal choice on medium to deep skin. On very fair skin, the same shade can look severe without a carefully balanced eye look to frame it.
Rich gold and bronze eyeshadow tones complement warm and deep complexions in a way they do not on cool, fair skin. For cool undertones, champagne, silver, and taupe shades provide the same metallic dimension without the clash.
For tailored color choices by complexion, references on formal makeup for dark skin and matte lipstick for fair skin are worth reviewing before committing to a specific palette.
Tools and Products Needed for Formal Makeup

The right tools make application cleaner, blending faster, and the overall result more polished. You do not need a full professional kit. But a few well-chosen brushes and the right product formats make a measurable difference at a formal event compared to using everyday tools.
Essential Brush Types
Six brushes cover the full formal application without any redundancy:
- Fluffy blending brush: for eyeshadow transition and crease work
- Flat shader brush: packing lid color and building intensity
- Fan brush: precise highlight placement on cheekbones
- Contour brush (angled): placing and blending contour under the cheekbone
- Fluffy powder brush: setting the T-zone and applying loose powder
- Small concealer brush: precise under-eye and blemish coverage
Sigma Beauty and Morphe Brushes are the two most commonly cited brands in professional kits for formal and event work, specifically because their synthetic bristles work with both powder and cream formulas without absorbing excess product.
Beauty Blender vs. Brush for Foundation
For formal events, a damp beauty sponge typically produces a more natural, skin-like result than a brush. The stippling motion presses product into the skin rather than dragging it across the surface.
A brush gives more control over coverage placement and builds higher coverage faster. Well, actually, it depends on the foundation formula. Thicker, higher-coverage formulas blend more easily with a sponge. Lighter, more fluid formulas can be applied with either.
The guide on applying makeup with a sponge versus applying makeup with a brush breaks down when each tool delivers better results.
Product Format Recommendations for Formal Events
| Product Category | Best Format for Formal | Why |
|---|---|---|
| Foundation | Long-wear liquid | Buildable coverage, holds well |
| Concealer | Creamy full coverage | Blends smoothly without emphasizing texture |
| Contour | Matte powder or cream stick | Looks natural in photos, easy to blend |
| Blush | Cream under powder or powder | Longer wear, especially for oily skin |
| Eyeshadow | Pressed pigment palette | Better buildability and blendability |
| Lip color | Matte or satin over lip liner | Survives eating with minimal touch-ups |
Budget vs. Professional Products
This is worth being direct about. A $10 NYX Professional Makeup concealer can outperform a $40 option from a prestige brand for certain skin types and coverage needs. Product price does not equal product performance.
Where budget really does matter: long-wear foundation and setting spray. These two products carry the most weight for formal event longevity, and the difference between a mid-range and a professional-grade formula is noticeable over an eight-hour event.
The area where you can save without consequence: brushes. Well-made synthetic brushes in the $15 to $30 range perform comparably to professional brushes for personal use. You are not blending on 20 faces in a row. One good set lasts years with proper care.
For a full picture of how to put the look together before the event, makeup for a party and evening makeup looks give useful visual references for calibrating the finished result across different event types.
FAQ on How To Do Makeup For A Formal Event
What foundation works best for a formal event?
A long-wear liquid foundation with medium to full coverage is the most reliable choice. Look for transfer-proof formulas from brands like Giorgio Armani Beauty or Charlotte Tilbury. Avoid SPF in the formula if flash photography is involved, as it causes white cast.
How do I make my makeup last all night?
Start with a skin prep routine, apply primer, set foundation with translucent powder, and finish with a long-wear setting spray. Urban Decay All Nighter is a professional favorite. Carry blotting papers, not powder, for mid-event touch-ups.
Should I do a bold eye or a bold lip for a formal event?
Pick one statement feature, not both. A smoky eye pairs with a nude or satin lip. A classic red or berry lip works best with softly defined eyes. Competing bold features create visual imbalance in person and in photos.
What lip color is best for a formal event?
Classic red, deep berry, and warm nude are the most reliable formal choices. Apply lip liner first and fill in the entire lip as a base. Matte formulas last longest through dining and drinking without needing constant touch-ups.
Do I need false lashes for a formal event?
Not required, but strip lashes add definition that reads well under event lighting and in photographs. Tightlining with a dark pencil along the upper waterline is a strong alternative. It adds density without the commitment of a full strip lash.
How do I prevent my makeup from creasing?
Use an eye primer before eyeshadow and press translucent powder under the eyes with a damp sponge rather than dusting it on. Avoid heavy skincare products directly before makeup application. Layering properly is more effective than using extra product.
What is the right contouring approach for formal events?
Use a warm-toned matte contour powder or cream, not a cool grey shade. Warm browns photograph more naturally under flash. Apply below the cheekbone, along the temples, and lightly along the jawline. Blend thoroughly so there are no visible edges.
How do I do my brows for a formal look?
Fill sparse areas with a fine-tip brow pencil using short hair-like strokes, then set with a brow gel. Anastasia Beverly Hills Brow Wiz is widely used for this. Brows should look defined and polished, not drawn-on or overly sculpted.
How early should I start my formal makeup?
Allow 60 to 90 minutes for a complete formal look, including skin prep and wait time between skincare layers. Rushing the base is the most common reason formal makeup does not hold. Doing hair first gives skincare time to absorb properly.
How do I adapt formal makeup for my skin type?
Oily skin needs a mattifying primer, powder setting at each layer, and blotting papers for touch-ups. Dry skin should skip heavy powder on the outer face and use a dewy setting spray. Both skin types benefit from a long-wear foundation formula.
Conclusion
This conclusion is for an article presenting a complete approach to event-ready makeup that holds up from the first hour to the last.
Getting a polished formal look comes down to preparation, the right product formats, and a setting strategy that actually works under event lighting and flash photography.
From long-wear foundation and eye primer to lip liner technique and blotting papers for touch-ups, every step in this guide serves a practical purpose.
Brands like Charlotte Tilbury, Fenty Beauty, and Anastasia Beverly Hills offer reliable formulas across each category. But technique matters as much as the products you choose.
Nail the prep, layer correctly, and your gala makeup look will still be intact when the night ends.

- What Is Skin Tint and Why Everyone Is Obsessed - July 11, 2026
- What Is Foundation and How Do You Choose One? - July 6, 2026
- How to Make Blush Last Longer - July 3, 2026


