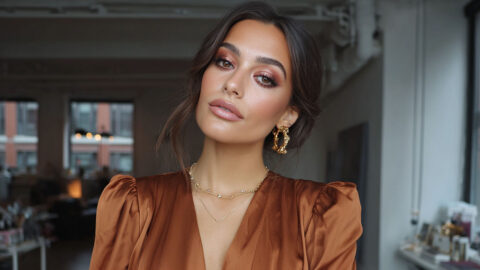
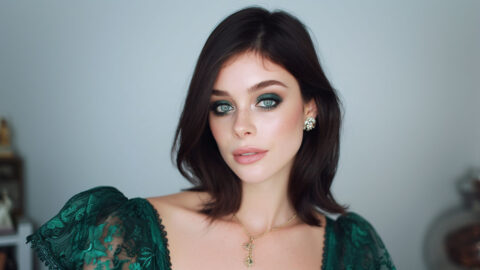
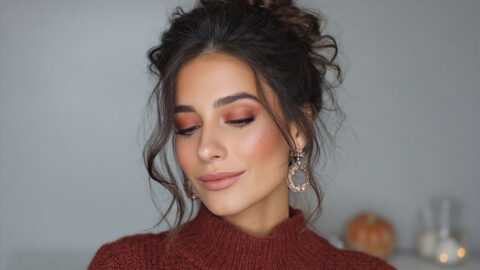
Most eye makeup requests come down to a short list: natural or soft glam, smokey eye, colorful or glitter eyes, halo eye, cut crease, and winged or graphic liner.
What separates them is where the shadow, liner and lashes go, not which products you own. L’Oreal Paris builds cut crease, monochrome and smokey looks from a single eyeshadow palette.
Which one suits you depends on your eye shape and iris color, and on where you’re headed that day. Each look also goes wrong in its own way, whether that’s creasing on oily lids or fallout under dark shadow.
Which eye makeup looks are worth learning, and how hard is each?

Natural or soft glam is the easiest to learn, and winged liner is the hardest. The other looks sit somewhere between them.
The ranking below goes by how much precision a look demands. It’s an editorial judgment, not a published scale, so fewer hard edges and less symmetry to match means a lower rank.
| Rank | Look | Defining placement | Where it usually fails |
|---|---|---|---|
| 1 | Natural or soft glam | One soft wash on the lid, slightly deeper in the crease | Flat lid when every shade has the same depth |
| 2 | Smokey eye | Dark shade blended from the lash line up into the crease | Fallout and a heavy, muddy edge |
| 3 | Colorful or glitter eyes | One saturated shade or sparkle packed on the lid | Glitter fallout, clashing hues |
| 4 | Halo eye | Light center on the lid, dark shades at the inner and outer edges | Contrast bleeds together into one gray patch |
| 5 | Cut crease | Contrasting shade traced along the crease, lid left bright | Uneven crease line |
| 6 | Winged or graphic liner | Liner extended past the outer corner or drawn as a shape | Mismatched wings, smudging |
The Everygirl’s editors call the one-shadow look the easiest to pull off, since it takes one shade and one brush.
Start with natural or soft glam, then move on to smokey eye. Colorful, glitter and halo looks come after that. Cut crease and winged liner can wait, because both punish an unsteady hand and uneven sides.
Brands don’t agree on how to group these looks. Urban Decay’s smokey eye guide files cut crease and halo eye under smokey eye variants, while All About Vision lists smokey, cut crease and halo as separate types next to cat eye and shimmer.
This article follows the second grouping. Placement differs in each one. A smokey eye grades outward from the lash line and a halo keeps the center bright, while a cut crease holds a hard line.
Products and brushes each look needs
A base, shadow, liner and mascara go into almost every look, and dramatic ones add strip lashes. Three brushes handle most of the work.
Shadow, primer and base products
A primer or base smooths the lid and holds pigment in place. Matte shadow builds depth in the crease and outer corner without sparkle, while shimmer catches light on the lid center and inner corner.
Liner defines the lash line and builds wings and graphic shapes (formulas are compared below). Mascara lengthens and thickens the upper lashes, and strip lashes add volume to evening and dramatic looks.
Primer goes on first in every routine, and what an eyeshadow primer actually does is grip pigment so color stays on the lid instead of sliding into the crease.
The American Academy of Ophthalmology says to throw away creamy and liquid eye makeup after three months. That covers mascara and cream shadow, and gel liner too.
The FDA adds a storage warning. Cosmetics left for long stretches in hot places, a hot car for example, become more susceptible to deterioration of their preservatives.
Brushes and the zone each one covers

| Brush | Zone | Used in |
|---|---|---|
| Flat shadow brush | Lid, lash line to crease | Every look, for packing on color |
| Fluffy blending brush | Crease and outer corner | Smokey, soft glam, halo |
| Small precise brush | Crease line and inner corner | Cut crease, highlights |
Keep one blending brush for dark shades and a second for transition shades. Running both through a single brush is the usual source of muddy blends.
Liner formulas compared
Each liner formula suits a different job.
Gel liner
It smudges and builds well, which makes it good for smoky lines. The catch is that a clean wing needs an angled brush and a steady hand.
Liquid liner
This gives the sharpest line and is the pick for wings and graphic shapes, but it shows every wobble and leaves no room to correct.
Kohl pencil
Soft, fast, and easy to smudge into a smoky edge. It slides on oily lids, though, and the label needs a check before you buy.
That label check matters. The FDA warns against color additives not approved near the eye, true kohl included, and links kohl to lead poisoning in children.
Some products carry the word only as a shade name, so it helps to know what the word kohl means on an eyeliner label. The FDA also says not to use a lip liner as an eyeliner.
How to apply eye makeup in the right order
Work from the base up and finish with lashes. Shadow goes on before mascara so fallout can be wiped away before the lashes are coated.
- Prime the lid with a thin layer and let it set.
- Sweep a base shade close to skin tone from the lash line to the brow bone.
- Blend a transition shade into the crease with small windshield-wiper strokes.
- Deepen the outer corner and crease with a darker shade.
- Pack lid color, matte or shimmer, onto the center of the lid with a flat brush.
- Highlight the brow bone and inner corner with a light shade.
- Line the upper lash line, then add a wing if the look calls for one.
- Curl and coat the lashes, or apply strip lashes.
- Brush away fallout and clean the edges with a swab.
L’Oreal Paris builds its eye-shape tutorials on this same sequence: primer, neutral base, crease depth, brow bone highlight, then liner and mascara.
Placement and pressure matter most at steps 3 to 5, and a full walkthrough of applying eyeshadow in stages covers each brush stroke in more detail.
Where the order changes
Liner doesn’t always go last. Too Faced’s smokey eye tutorial smudges a waterproof liner across the lid first, then buffs shadow over it to diffuse the line.
Setting liner with shadow gives a smoked edge. Finishing with liner, as L’Oreal Paris does, keeps the line crisp.
The last step has its own rules. The FDA classes false eyelashes, lash extensions and their adhesives as cosmetics, so safety and labeling requirements apply to them. A guide to how a pair of false lashes goes on covers the glue timing.
Tightlining: popular technique, medical pushback
Makeup instruction treats the waterline as fair game. MasterClass teaches tightlining as a way to make lashes look fuller.
Ophthalmology guidance says the opposite. The American Academy of Ophthalmology advises applying makeup outside the lash line to avoid blocking the oil glands of the eyelid.
A small pilot study led by Alison Ng at the University of Waterloo supports that advice. It found that between 15 and 30 percent more pencil eyeliner particles moved into the tear film within five minutes when liner went on inside the lash line instead of outside it.
My position is to line outside the lash line. The fuller look isn’t worth the gland blockage the AAO describes.
How to build each core look
Each look keeps the base order and changes where the dark shade sits and whether the edge is blended or cut. What goes on the lid varies too.
Natural and soft glam eye
Stay close to skin tone, and let the finish do the work.
Natural is a single matte wash, a touch of definition in the crease and mascara. Minutes, not a routine.
Soft glam starts from the same wash and adds shimmer on the lid center and a deeper outer corner, plus a soft wing or fuller lash line if you want one.
Feelunique’s everyday routine follows that pattern: a cream shadow stick across the lid, a palette shade smoked into the crease, then shimmer on the high points.
Smokey eye

Smoke comes from grading. The darkest shade hugs the lash line and fades upward until no edge is visible.
Beauty Bay’s smoky eye tutorial puts a mid-tone shade across the lid, blended just above the crease, then works a darker shade into the crease in circular motions. A clean fluffy brush softens any edge that looks heavy.
Blending decides whether the result reads as smoke or as a smudge, and a full smokey eye walkthrough goes deeper on shade choice.
Colorful and glitter eyes

The American Academy of Ophthalmology tells people with dry eyes to avoid metallic, glitter and flaking powder makeup.
The AAO also names glitter getting into the eye as a common cause of corneal irritation. Color-only looks without sparkle avoid that problem, so the risk sits mostly with the sparkle.
If you do wear glitter, stick to cosmetic-grade only, since craft glitter is cut differently and uses different dyes (All About Vision). The adhesive has to be safe for use around the eyes as well. If glitter gets in, rinse with sterile solution or artificial tears.
For a plain color look, prime, then pack the saturated shade on the lid with a flat brush. Keep the crease neutral so the color is the only focus.
Halo eye
Halo eye is the smokey eye flipped. Dark goes at the edges and light in the middle.
L’Oreal Paris describes a center-lid shade ringed by a contrasting color. All About Vision places the darker shade at the inner and outer edges and dusts a lighter one through the middle. Both describe the same structure.
It fails when the dark edges and bright center bleed into a single gray patch. Blend only where the shades meet, using a small clean brush.
Cut crease

All About Vision describes cut crease as a contrasting shade traced across the crease, then blended slightly or left sharp. L’Oreal Paris defines the crease with a darker shadow or liner and barely blends it.
Maybelline India puts concealer on the lid to create the sharp cut against the crease shade. A small, precise brush does the work, since the line is the whole look.
A hard line shows every wobble. Cut one eye first, then match the second by eye height, not by feel.
Winged and graphic liner

Winged liner extends the upper line past the outer corner. All About Vision notes the cat eye looks different on everyone, from a subtle curve to a sharp angle.
Liquid liner gives the sharpest edge and gel gives more room to correct. Draw outside the lash line, as the AAO advises.
Graphic liner uses the same tools but swaps the wing for shapes such as floating lines or double lines. Getting both sides to match takes practice, and a guide on getting a winged eyeliner symmetrical helps with the angle.
The sharper the wing, the less forgiving the line. A softer, smudged wing hides small mistakes.
Where to place eyeshadow for hooded, monolid, round and other eye shapes
Place shadow where it stays visible with the eyes open, and let the eye shape decide where that spot is. Makeup artist Courtney Hart tells Makeup.com readers to look straight into the mirror while applying, so the visible part of the lid is obvious.
Hooded and deep-set eyes

People mix these two up. Laura Geller defines hooded eyes as skin folding over the crease. Deep-set eyes are a separate problem, sitting back under a strong brow bone according to PureWow.
For hooded eyes, lift the shadow above the fold. Jamie Dorman told Bustle to apply with the eyes open, and Geller keeps placement slightly above the crease with upward blending.
Geller also keeps liner light, because heavy liner overwhelms a hooded lid.
Deep-set eyes need the lid brought forward. Nikki DeRoest, quoted by PureWow, concentrates shadow along the lash line and stops before the crease.
Perfect Corp’s guide pairs that with shimmery shades on the lid and a medium matte blended just above the crease.
Full walkthroughs of makeup for hooded eyes go further into liner and lash choices.
Monolid eyes

Monolids have no visible crease, so crease placement is borrowed or faked. Sources disagree on how.
A PureWow beauty editor learned in a Korean makeup class to put the darkest shade on the outer thirds of the lid and lighten toward the inner corner (a horizontal gradient). Lane Crawford goes vertical instead, with a base shade across the lid, a darker tone halfway up and the darkest hue near the lash line.
The disagreement extends to cut crease. All About Vision calls it a good fit for monolids because it draws a crease where none shows.
Vogue Singapore quotes artist Airin Lee saying cut-crease and smokey looks that contour the features read as less defined on monolids. She recommends a one-tone gradient instead.
Test both gradients in the mirror with the eyes open and keep whichever leaves color visible.
Lashes carry more of the look here. Lee calls them the main cast and recommends the J-curl technique when curling.
Round and almond eyes

Almond eyes have a naturally upturned outer corner, which Charlotte Tilbury says makes the standard move easy: blend through the crease, then buff upward and outward. Makeup.com adds that most styles suit this shape.
Round eyes need length. Huda Beauty recommends accentuating the top lash line and outer corners, with a slight arch and a long tail on the liner, while Makeup.com starts with a medium matte over the lid and a darker shade on the outer third.
On round eyes, Ayu Cosmetics and Huda Beauty both say to skip light shimmer across the whole lid (it makes the eye read larger) and a heavy lower lash line.
Downturned eyes
Charlotte Tilbury places shadow slightly above the actual outer corner and blends in upward circles, because following the natural slope drags the eye down.
Artist Kalyani Nayak, quoted by Elle India, starts the wing where the outer corner begins to slope, not at the very end. Keep the darkest shade concentrated on the outer edges for lift.
The other route is to follow the slope. Elle India’s experts also describe puppy liner, a wing angled slightly downward.
Which shades flatter blue, brown, green and hazel eyes?
Ulta and e.l.f. Cosmetics both teach the same logic. Shades opposite the iris on the color wheel make the eye look brighter, which means orange-based tones for blue eyes, red or purple for green, and purple and blue for brown.
| Iris color | Contrast shades | Softer daytime option |
|---|---|---|
| Blue | Orange and other warm shades | Warm earthy tones |
| Brown | Purple, blue, plum | Warm browns and golds |
| Green | Red-toned shades, purple | Shimmery brown, charcoal, forest green |
| Hazel | Soft gold, purply rose, deep plum | Rich autumn tones: warm browns, golds, greens |
Ulta’s guide also gives the opposite route. Neighbors on the wheel (analogous shades) produce a subtler, more harmonious look.
That split shows up in green-eye advice, where Beaut.ie points to red-based shadow and Superdrug suggests browns, charcoal and forest green for daytime.
Brown irises are the most forgiving, and a closer look at eye makeup for brown eyes shows how far the palette can stretch.
Hazel eyes shift between brown, green and gold, so a set of hazel eyes makeup looks gives more room to pick a direction.
Where the color wheel stops working
Complementary doesn’t mean saturated. Beaut.ie notes that a red-toned base is enough for green eyes, and a red lid is optional.
Intensity matters too. Superdrug warns that dark, smokey shadow can overpower blue and hazel irises in daylight.
My rule is to pick the hue from the wheel and the depth from the occasion.
Choosing an eye makeup look for the occasion

Match the look to how long it has to last and how much attention it should draw.
For a workday or everyday wear, natural or soft glam reads polished without competing with the outfit. Evenings can take a smokey eye, halo eye or winged liner, and creative or party looks are where colorful, glitter or graphic liner belong. Weddings call for neutral soft glam built from waterproof formulas, so it survives tears and a long day.
An evening look has less room for touch-ups, so it pays to pick a technique you can repeat reliably. A guide to makeup for a night out covers the rest of the face.
When time is short, choose from the easier end of the difficulty ranking.
Bridal eye makeup
Dermstore makeup artist Christine Walsh advises booking a trial at least three weeks before the wedding.
- Waterproof mascara and liner. Laura Geller calls waterproof the only way to go for mascara.
- An eye primer so the shadow doesn’t shift over a long day, per celebrity artist Gia Mills.
- A dry under-eye area with no rich eye creams, per Vincent Ford in Marie Claire.
- A setting spray over the finished look (Dermstore).
The trial tests the rest of the face too, and a full-face wedding makeup plan covers the base and lips.
How to stop creasing, fallout and fading
Creasing mostly comes from lid oil. Fallout comes from loose pigment, smudging from oil plus blinking, and fading from skipped prep.
| Problem | Usual cause | Fix |
|---|---|---|
| Creasing | Lid oil breaks down shadow, which gathers in the fold | Primer, then a light powder set |
| Fallout | Loose pigment on the brush, dark high-pigment shades | Tap off the brush, catch dust with powder |
| Smudging | Oil and blinking on gel or pencil liner | Set the line with matching shadow |
| Fading or muddy color | No base, or too many layers | Prime, build thin layers, blend with a clean brush |
RMS Beauty founder Rose-Marie Swift names excess lid oil as the main cause of creasing, with unprimed lids, unset cream shadow and hooded lids adding friction.
Lane Crawford suggests baking the under-eye area with translucent powder over concealer, so fallout lands on powder and brushes away. The same guide sets gel or pen liner with a dark shadow to stop smudging.
For lines that migrate, a guide to keeping eyeliner from running goes deeper.
Artists disagree on setting. Dermstore’s bridal advice calls for a setting spray, while Swift cautions against spray setting products and pats a little powder between shadow layers instead.
If you go with a spray, technique matters, and a guide to applying setting spray covers it.
When the usual fixes stop working
Very oily lids are the hard case. Primer plus powder buys hours for some lids and not others, and Swift’s position is to work with the oil and use less product.
Hooded lids have the fold touching the shadow with every blink, so transfer continues even with primer.
Waterproof formulas hold through tears and sweat, but Swift cautions against relying on them long term as a creasing fix.
Fewer layers fail less often.
Eye Makeup Looks FAQ
How do I find my eye shape?
Look straight into a mirror and compare the outer corner to the inner corner. A lifted outer corner means upturned eyes, a dipping one means downturned, and no visible crease with the eyes open points to monolids.
Makeup.com notes that many people combine features, so use the closest match as a starting point.
Can concealer replace eyeshadow primer?
Yes, in a pinch. A thin layer of concealer on the lid evens out color and gives shadow something to sit on.
It grips pigment less firmly than a primer, so on oily lids primer plus a light powder set is the safer base.
Which looks suit mature or crepey lids?
Soft, matte-leaning natural and soft glam looks. Bobbi Brown’s routine for older hooded eyes uses a light shade under the brow bone, a medium shade across the lid, and a slightly deeper soft brown near the lash line.
She warns that going too dark makes the eyes recede.
How do I do a smokey eye with only eyeliner?
Draw a thick line of soft pencil or gel liner along the upper lash line, then smudge it upward with a small brush before it sets. Add a thinner line on the lower outer third and blend the two together.
Both formulas smudge best while still creamy, so work one eye at a time.
Which looks make small eyes look bigger?
A slight wing, a light shade on the lid and depth concentrated in the outer corner open small eyes the most. Laura Geller says piling on shadow or liner is not the answer when the goal is bigger-looking eyes.
Building a Starter Kit for Eye Makeup Looks
A starter kit can stay small: one eyeshadow primer, four shadows, two brushes, one liner and one mascara. That set builds five of the six core looks.
Colorful and glitter eyes need one extra saturated shade, or cosmetic-grade glitter with an eye-safe adhesive.
Buy the primer first, since every look sits on it. A flat brush and a fluffy blending brush come next, then four shadows covering a light base, a transition, depth and shimmer.
The downside is range, since four shadows leave little room for color that contrasts with the iris.
Pick the four shades with a makeup color palette generator.
This kit follows FDA and AAO guidance as of October 2026. Revised guidance on waterline products or glitter would change the liner and colorful-eye choices.

She started writing on the site after fielding the same questions from clients and friends often enough to just write the answers down: which red won't turn orange on a warm undertone, how to keep lipstick from feathering into fine lines, why a "12-hour" formula rarely survives dinner.
Every review on the site follows the same rule she uses with paying clients: wear it first, then decide if it's worth recommending.
- How to Make Eyeliner Last Longer Without Smudging - August 31, 2026
- How to Make Eyeshadow Last Longer All Day - August 29, 2026
- How to Find Your Undertone in 5 Easy Steps - August 27, 2026