

Summarize this article with:
What looks great in the mirror does not always survive a camera lens.
Knowing how to do makeup for a photoshoot means understanding how studio lighting, flash photography, and color temperature change the way every product reads on screen.
This guide covers everything from skin prep and foundation finish to contouring under studio strobe, eye makeup that holds under lights, and the on-set products that actually last.
Whether you are preparing for an editorial shoot, a commercial headshot, or a portrait session, the same core rules apply: build depth the camera will subtract, control shine before it starts, and choose flash-safe products from the start.
What Photoshoot Makeup Is
Photoshoot makeup is a specific application approach where every product choice, placement, and finish is decided based on how a camera lens reads the face, not how it looks in a mirror.
Your eyes process light differently than a camera sensor does. What reads as polished in person can photograph as flat, washed out, or patchy under studio strobes or flash.
How Camera Lenses Read the Face Differently
Flash photography flattens everything. Shadows disappear. Dimension disappears. Features that looked defined in a bathroom mirror end up looking soft and undefined on screen.
Studio lighting, whether it is continuous LED or Profoto strobe, affects how skin texture, product finish, and pigment read on camera. A satin foundation that looks perfect under warm indoor light can turn greasy under a softbox.
Cameras also exaggerate shine. Any dewy finish gets amplified. So a look that would work beautifully for a date night will likely read oily in a beauty closeup.
Why “Natural” Makeup Fails on Camera

Everyday makeup is built for real-life viewing distances. Photography puts the lens close, removes natural shadows, and strips warmth from the skin.
Key result: lightly applied brows disappear. A nude lip vanishes. Contouring done at a typical in-person level becomes invisible under studio flash.
The makeup artist’s job for a shoot is to rebuild depth and definition the camera will subtract. That usually means going 20 to 30 percent stronger on everything: brows, liner, contouring, lip color.
| Feature | Everyday Makeup | Photoshoot Makeup |
|---|---|---|
| Foundation finish | Dewy or natural | Matte to satin, shine-controlled |
| Contour intensity | Soft and subtle | More defined and structured |
| Brow definition | Light fill | Full, camera-ready definition |
| Eye makeup depth | Minimal blending | Layered depth for clarity on camera |
| Lip color | Sheer or glossy | Defined with liner, more pigmented |
The global makeup artist service market was valued at $6.57 billion in 2024, growing at 5.6% annually through 2035, partly driven by rising demand for professional makeup at photo-based events (Wise Guy Reports).
Skin Prep Before Applying Any Product

Skin prep is the step most people skip or rush. On a photoshoot, it is the difference between a base that stays put under hot lights for six hours and one that slides, pills, or creases by hour two.
Good prep is not about piling on products. It is about putting the right things on in the right order, at the right time.
Timing Your Skincare Before Makeup
Moisturizer and serum: Apply at least 10 to 15 minutes before primer. Heavy products need time to absorb. If you jump straight into primer on top of damp serum, you will get pilling.
Eye cream: Tap it on with the ring finger, not rubbed. Marc Reagan, global artistry director at Hourglass, recommends applying eye cream immediately after skincare and before primer to reduce puffiness and give any concealer applied on top a smoother surface.
Skip new products the week before a shoot. Introducing anything unfamiliar to the skin risks reactions, redness, or breakouts that will show up on camera more than they would in person.
Primer Type by Skin Concern
A lot of people use whatever primer they have. That is usually a mistake, because the wrong primer does almost nothing.
- Oily skin: Pore-minimizing or mattifying primer, like Smashbox Photo Finish. Controls T-zone shine before it starts.
- Dry skin: Hydrating primer. Something like the NYX Professional Face Freezie Cooling Primer gives a grip base without pulling at dry patches.
- All skin types for shoots: Let it sit for 60 to 90 seconds before foundation. It needs to tack up slightly to actually grip.
One thing that catches people off guard: products with SPF can cause white cast under flash. If you want to learn more about prepping skin before makeup in general, the same rules about layering order apply. For shoots specifically, swap any SPF-heavy primer for a flash-safe version.
Managing Oiliness vs. Dryness Under Lights
Studio lights and flash heat the skin. Even people with balanced skin can get oily under hot continuous LED setups.
For oily skin: Blotting papers backstage, a toner before moisturizer to shrink pores, and a matte primer over oil-prone zones.
For dry skin: Hyaluronic acid serum before moisturizer. Skip heavy face oils if you are shooting under strong flash. They sit on the surface and reflect light straight back at the camera.
One thing that is easy to miss: heavy moisturizers applied right before a shoot, even good ones, can cause foundation to slip. If time is short, apply a light layer and blot the excess before primer.
Foundation and Skin Coverage for Camera

Foundation for a photoshoot is not the same decision as foundation for a Tuesday morning. The lens sees everything: patchiness, oxidization lines at the jaw, uneven coverage near the hairline.
The global makeup market reached $43.61 billion in 2024, with makeup sales growing by 8% year on year (Fortune Business Insights). That growth is partly pushed by demand for long-wear, photo-ready base products.
Choosing the Right Finish
Finish is the first decision. Get it wrong and nothing else will fix it.
Matte or satin finish is the safer starting point for most shoots. Flash amplifies any dewy base into something that reads greasy on camera. A semi-matte finish gives skin a natural look without the shine problem.
Dewy finish can work for natural light shoots where flash is not involved. It falls apart fast under studio strobes. If the brief calls for a fresh, glowy editorial look under natural light, a satin-dewy hybrid like Make Up For Ever HD Skin can hold up.
| Shoot Type | Best Foundation Finish | Coverage Level |
|---|---|---|
| Studio strobe / flash | Matte or satin | Medium to full |
| Natural light portrait | Satin to dewy | Light to medium |
| Commercial / headshot | Natural matte | Medium to full |
| Beauty close-up | Satin, skin-like | Full, flawless |
Application Tools and Their Camera Results
A damp Beautyblender gives the most skin-like finish. It presses product into the skin rather than sitting it on top. For camera, that matters because heavy surface texture catches light and reads as cakey.
Dense flat brushes build more coverage but leave more visible texture. Good for when full coverage is the priority. For beauty closeups, the sponge almost always wins.
Airbrush is a different category entirely. It gives an extremely smooth, fine finish that photographs very well. Charlotte Tilbury Airbrush Flawless and Dermablend are both popular in professional shoot settings for their longevity and even layer.
Color Matching Under Different Lighting
Foundation shade that looks right in natural daylight can read orange or ashy under studio lighting. Always check the match in the lighting type the shoot is actually using.
Warm studio lights (tungsten): Go slightly cooler in shade to avoid the face reading too warm on camera.
Cool continuous LED: Go one half shade warmer, or the face can photograph pale and flat against the background.
Blend foundation past the jawline and into the neck. This is something I see skipped on self-applied shoot makeup constantly. The camera catches that line immediately, especially in profile shots.
Setting for Longevity Under Lights
Laura Mercier Translucent Setting Powder is a standard choice on professional shoots. Fine milling, no flashback, and it controls shine without adding visible texture.
Avoid setting powders with titanium dioxide or high silica content when flash is involved. Both can cause flashback, a white cast that appears around the nose and forehead in flash photos and is nearly impossible to retouch cleanly.
Setting spray locks everything after powder. Urban Decay All Nighter is reliable for long shoots. Apply it as a final mist in a T or X motion. Do not rub or pat after applying. Let it dry fully before any additional touch-ups.
Contouring and Highlighting for Different Lighting Setups

Flash wipes out natural shadows. That is the core problem. Any bone structure the face naturally has becomes invisible the moment a strobe fires.
Contouring under studio lights is not about looking sculpted. It is about replacing the shadows the camera removes, so features still read as three-dimensional on screen.
Contour Placement for Camera Angles
Standard portrait shot: Contour along the hollows of the cheeks, temples, hairline, sides of the nose, and jawline. These are the areas flash bounces off, so contouring them reduces that reflection and adds structure back.
Overhead angle (common in editorial): Strengthen cheekbone and jawline contour. The nose contour becomes less important because overhead lighting already creates some natural shadow there.
Low angle: Focus more on jawline and under-chin. This angle tends to flatten the jaw on camera more than anything else.
Product Texture by Skin Type and Lighting
Powder contour is easier to blend and more forgiving under flash. Cream contour photographs with slightly more depth, but it requires strong blending to avoid looking streaky.
- Oily skin under studio lights: powder contour, applied after setting the base
- Dry skin or natural light shoot: cream contour, blended well and then lightly set with powder
- Both skin types, beauty closeup: cream first, powder on top, gives the cleanest depth on camera
NYX Contour Palette has been popular on-set for its range of shades and blendable formula, particularly when working across different Fitzpatrick skin types in the same session.
Highlight Placement: What Photographs vs. What Looks Greasy
Highlighter on camera is a fine line. Placed correctly on the high planes of the cheekbone, brow bone, and cupid’s bow, it adds life to the face. Applied too generously or too close to oily zones, it reflects flash and reads as sweat.
Safe placement: Very top of the cheekbone, inner corner of the eye, tip of the brow bone.
Avoid: Down the center of the nose in flash settings, broad application across the T-zone, glitter-based or chunky shimmer highlighters. Glitter particles scatter flash in multiple directions and look messy, not glowy, on camera.
Cream highlight like MAC Strobe Cream photographs more naturally than chunky powder formulas. It reads as hydration rather than shimmer product, which is a better look for most commercial and portrait work.
Eye Makeup That Reads on Camera

Eye makeup is where a lot of people underdo it for shoots. The assumption is that strong eye makeup will look overdone. In practice, a look that feels bold in person often photographs as mid-level definition on screen.
The Fitzpatrick skin type scale matters here too. Deeper skin tones often need more pigment depth in eye looks to get the same visual impact on camera that lighter skin tones achieve with less product.
Building Eyeshadow Depth for the Lens
Flat, single-shade eyeshadow reads as one-dimensional on camera. The lens collapses depth, so building in layers is necessary to get the visual result that looks like normal eye definition in the final image.
Layer order:
- Eyeshadow primer first. Urban Decay Eyeshadow Primer is a standard on-set choice for longevity under lights.
- A light transition shade across the lid, blended into the crease
- Medium tone in the crease and outer corner to add dimension
- Darker shade deepened into the outer V and along the lash line
For editorial and fashion shoots, going deeper into the outer corner than feels comfortable is usually right. Pull back later if needed, but start with depth.
Liner, Lashes, and Camera Clarity
Tight lining is one of the most useful techniques for camera work. Running liner along the upper waterline fills the gap between lashes and makes eyes read as larger and more defined without visible liner product. Learn more about how to tightline eyes for a cleaner, camera-ready look.
Wing liner reads well in profile shots and beauty closeups. Smudged liner along the lower lash line adds depth but needs to be set with matching eyeshadow or it will migrate under lights.
False lashes are almost always useful for shoots. They add lash density the camera reads as eye definition. Individual clusters or a full strip, both work, but individual placement along the outer two-thirds of the lash line is my preference for a result that looks natural in beauty work rather than theatrical.
A note on applying mascara for shoots: use it to fill gaps and blend the natural lashes into the false ones. Applying too many coats on top of falsies creates a clumped, heavy look that photographs oddly under harsh lighting. One coat, focused on natural lash roots, is enough.
Brows, Lips, and Face Details
These are the parts of the face that get rushed at the end of prep. On camera, rushed brows and undefined lips show up immediately. A shot can have perfect skin and flawless contour and still read as incomplete because the brows are too light or the lip color has bled past the line.
Brow Intensity for Camera
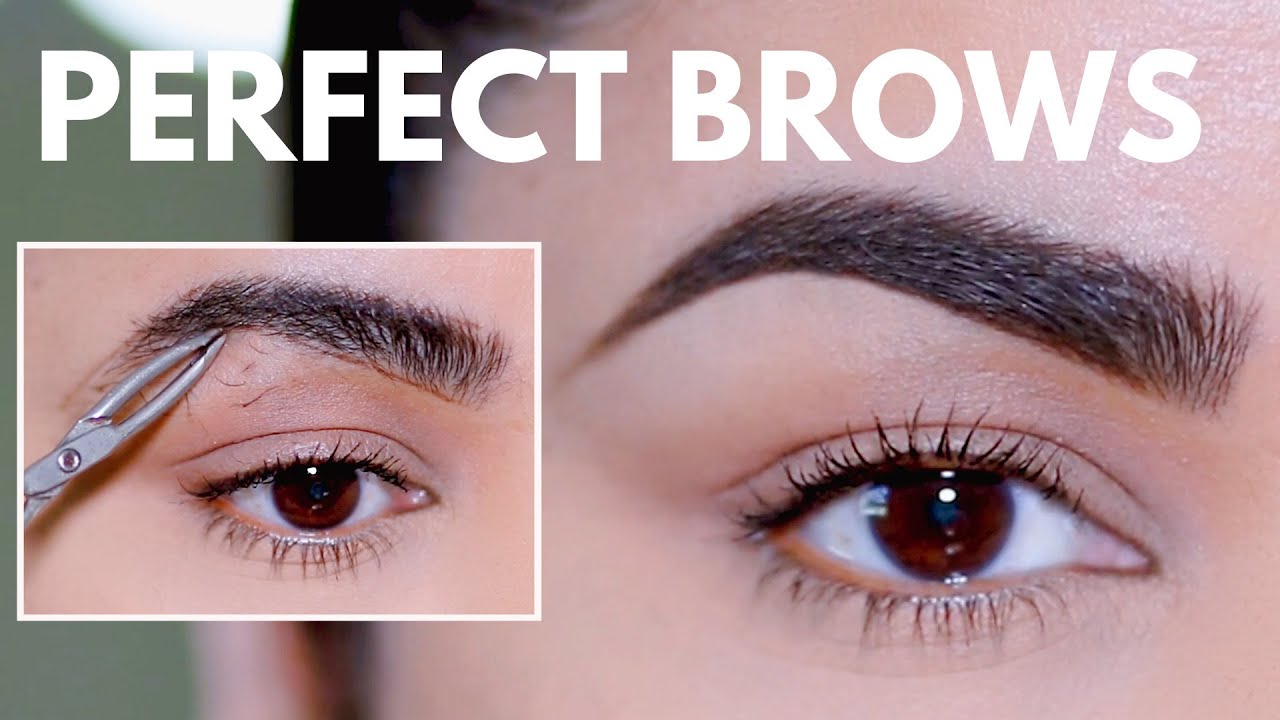
Eyebrows frame every expression on camera. Underdone brows make the face look bare even when everything else is fully done.
For most photoshoot contexts, brows need to be about 30% more defined than they would be for everyday wear. That does not mean heavy or blocky. It means filled-in, shaped, and set so they do not shift under lights.
Powder brow pencil with short strokes: Most natural-looking result on camera. Mimics the look of individual hairs without looking drawn on. Finish with brow gel to hold the shape through a long shoot.
For beauty and editorial closeups, a slightly bolder brow tends to photograph better. For commercial headshots and corporate work, stay closer to a clean, natural shape. The brief from the photographer usually guides this.
Lips for Longevity and Camera Finish
Lip liner is non-negotiable for shoots. Not just to define the shape, but to give the lip color something to grip so it does not fade, feather, or transfer onto teeth mid-session.
Understanding how to apply lip liner properly, meaning filling in the entire lip before color, not just outlining, makes a significant difference in how long a lip look lasts under lights. When choosing a lip liner, match it to the lipstick shade or go one tone deeper for definition that reads on camera without looking harsh. Knowing how to keep lip liner lasting through a full shoot session is worth the extra prep time.
Matte lipstick is the most camera-safe choice for shoots. It does not reflect flash, it stays put longer than glossy formulas, and it photographs with clear color and sharp edges. If the look calls for a gloss, apply it only at the center of the lip and keep the outer edges clean. If you want to know more about applying matte lipstick in a way that does not look dry or flat on camera, the finish matters a lot in how it reads under studio lighting.
Gloss on its own tends to disappear fast and creates reflection issues under flash. A matte base with a gloss center is a reasonable compromise for looks that need shine. For choosing the right shade, considering lipstick colors for cool undertones versus warm lighting can help avoid colors that read muddy or off on camera. Similarly, lipstick colors for warm undertones behave differently under cool LED studio light than they do in natural daylight.
Concealing and Color Correcting for Camera

A camera picks up color variation and texture that the naked eye softens or ignores. Hyperpigmentation, redness around the nose, and blue-purple under-eye circles all read stronger on screen than in person.
Color correcting before concealer:
- Orange or peach corrector under the eyes for dark circles on deeper skin tones
- Green corrector for redness and blemishes before concealer
- Yellow corrector for blue-toned veins on lighter skin
NYX Color Correcting Concealer is a workable option for on-set correction without a large product kit. Apply NARS concealer on top, set with translucent powder, and the correction holds through a full day of shooting.
Concealer shade for shoots should be one to two tones lighter than foundation under the eyes, not dramatically lighter. A very bright concealer under the eyes creates a triangle of light that flashes back as a white area in photographs, not a brightening effect.
Controlling Shine and Skin Texture During a Shoot
Oil breakthrough happens fast under studio lights. A full set of lights running for an hour raises the ambient temperature enough that even well-prepped skin starts producing more oil than it would in normal conditions.
Setting spray at the end of prep is the first line of defense. Charlotte Tilbury Airbrush Flawless Setting Spray is popular on professional sets for a reason: it delivers up to 16 hours of wear without disturbing foundation or powder underneath (Reader’s Digest, 2024).
Blotting vs. Powder Touch-Ups Mid-Shoot
Blotting papers first, always. They lift oil without disturbing or building up product layers. Pressing gently into the T-zone, then lifting, is the right technique. Rubbing will displace foundation.
Powder touch-ups are for after blotting. Too much powder layered through a long shoot creates visible buildup that photographs as cakiness. Targeted application with a small brush, only over oily zones, keeps the base looking clean.
Professional makeup artists working on all-day photoshoots tend to use Ben Nye Final Seal over makeup that needs to survive both heat and movement. It creates a stronger hold than most consumer-grade sprays and is standard in film and TV work.
On-Set Touch-Up Kit Essentials
This is what I keep accessible during every shoot, not locked in a kit across the room:
- Blotting papers (not tissue, which leaves lint)
- Small fan brush and targeted setting powder
- Concealer matching the base shade
- Lip liner and lipstick for touch-ups between set changes
- Setting spray for full refreshes between major lighting setups
What not to bring on set: gloss (applies unevenly with a brush and migrates), full-size products that slow down touch-ups, anything with SPF that could flashback if reapplied under flash.
How Heat and Lights Break Down Products Faster
Continuous LED setups generate less heat than tungsten but still affect foundation longevity over long sessions. Profoto strobe flash does not generate sustained heat, but repeated firing still warms skin slightly.
Cream products break down faster than powders under heat. If a shoot is going to run four hours or more, building the contour and blush in powder from the start is smarter than using cream products that need constant repair.
Keeping the room temperature controlled during prep makes a measurable difference. Applying makeup in a warm environment and then stepping into a cool studio causes product to shift as skin adjusts. Apply in the conditions you will be shooting in when possible.
Adjusting Makeup for Lighting Type and Shoot Style

The same face needs different makeup depending entirely on what kind of light it will be captured under. A look built for natural light will fall apart under studio strobe. A look built for strobe can appear heavy and flat in soft daylight.
Studio lighting is the standard for corporate headshots, fashion editorials, and commercial product work because it gives photographers complete control over shadows and color temperature (Kandid Clicks, 2025). That control demands that makeup be built specifically for those conditions.
Natural Light vs. Studio Strobe
Natural light: Softer. Flattering. More forgiving of skin texture. Makeup can be slightly lighter, with a satin or dewy finish working well. Contour does not need to be as deep because the light creates some natural shadow itself.
Studio strobe (Profoto, softbox setup): Flattens everything. Requires stronger contour, more defined brow, more pigmented lip. Flash-safe products are a requirement, not an option.
| Lighting Type | Foundation Finish | Contour Intensity | Shimmer / Gloss |
|---|---|---|---|
| Natural light | Satin to dewy | Medium | Fine shimmer is acceptable |
| Studio strobe / flash | Matte to satin | Strong | Avoid glitter and gloss |
| Continuous LED (cool) | Natural matte | Medium to strong | Keep shimmer minimal |
| Tungsten (warm) | Matte with slightly cooler undertone | Medium | Avoid shimmer and gloss |
Editorial vs. Commercial vs. Headshot
Shoot style matters as much as lighting type. Editorial work allows more creative latitude. Commercial and headshot work typically calls for cleaner, more conservative makeup choices.
Editorial (fashion, Vogue-level): Deeper eye looks, more graphic liner placement, stronger contour depth, bolder lip color. The makeup is part of the visual story.
Commercial / advertising: Polished but neutral. Makeup should look like the best version of natural. Nothing that distracts from the product or brand being shot.
Headshot (actor, corporate): Skin-first approach. The face should read as put-together and clear, not made-up. Brows defined, skin even, lip color close to natural. Nothing that photographs as a costume.
Working With a Photographer’s Brief
A mood board from the photographer tells you almost everything you need. Color palette in the reference images usually indicates the warmth or coolness of the lighting planned. Skin finish in the references tells you the intended foundation finish.
If the brief shows warm, film-style references: go slightly warmer in product tone, contour lightly, lean toward a satin finish.
If the brief shows clean, high-contrast editorial references: stronger contour depth, clear liner definition, matte base, no shimmer.
When in doubt, ask the photographer what lights they plan to use before the day. That one question saves more in-the-moment adjustments than any amount of prep guesswork.
Product Recommendations by Shoot Type

The right product choices for a photoshoot are not necessarily the same products that work best for everyday use. Long-wear formulation, flash-safe ingredients, and on-camera finish all matter in ways they simply do not at a dinner or event.
Makeup sales grew 8% in 2024, with demand increasingly driven by long-wear and photo-ready formulas (Fortune Business Insights). Professional photographers and MUAs on working sets have narrowed down the products that consistently perform.
Long-Wear Foundations and Base Products
Make Up For Ever HD Skin is a consistent choice among professional MUAs for shoots. It reads like skin on camera without flashback and holds through long sessions. Estee Lauder Double Wear is another standard for commercial and headshot work, particularly for its longevity and range of shades across the Fitzpatrick scale.
Graftobian HD Foundation is used specifically in high-flash photography. It needs to be set with powder, but it has no SPF and contains no titanium dioxide, making it a clean flash-safe option. Hollywood makeup artists also rely on it for TV and film work where bright continuous lighting is involved.
When applying foundation for a photoshoot, using a damp Beautyblender in a pressing motion rather than swiping produces a more skin-like finish on camera. This is worth taking seriously if you tend to use a brush for everyday application.
Setting and Longevity Products
Laura Mercier Translucent Loose Setting Powder is a flash-safe standard. RCMA No-Color Powder is another go-to in professional kits, particularly for setting under the eyes without adding color or visible texture.
Two setting sprays worth knowing:
- Urban Decay All Nighter: Long-wear hold, matte-leaning finish. Reliable on extended shoots and in warm conditions.
- Charlotte Tilbury Airbrush Flawless Setting Spray: Up to 16 hours wear, contains green tea antioxidants, finishes with a natural satin. Used on red carpet and editorial work.
When applying setting powder on set, the baking method under the eyes, leaving translucent powder for two to three minutes before dusting off, gives cleaner coverage that holds longer under lights than a quick sweep. Applying setting spray as a final step melts all the layers together so the base photographs as one cohesive skin finish, not a stack of visible products.
What to Avoid and Why
These specific product types consistently cause problems on camera, regardless of brand or price point:
- Foundations with SPF or titanium dioxide: Cause flashback, the white cast that appears around the nose and forehead in flash photos.
- Silica-heavy setting powders: Same flashback issue. RCMA No-Color Powder and Laura Mercier Translucent avoid this.
- Chunky glitter highlighters: Scatter flash in multiple directions. Reads as uneven reflection, not glow, on camera.
- Heavy gloss on lips: Reflects flash and creates hot spots in the lip area. Use it only at the lip center if the look calls for shine.
Budget versus professional-grade is less significant than people assume. The actual variables that matter are SPF content, silica content, and finish type. A drugstore foundation without those ingredients can photograph better than a prestige product that contains them. When applying makeup with a sponge versus a brush, the sponge consistently produces a more skin-like base for camera work regardless of which foundation you are using. Using concealer correctly under the eyes is also essential: one to two shades lighter than the foundation, not dramatically lighter, to avoid a bright triangle that flashes back under studio lights.
For lips specifically, knowing how to make lipstick last longer during a shoot comes down to liner as a base, a thin first layer of product, a blot with tissue, then a second layer before shooting. That method holds significantly longer than a single heavy application. Choosing a matte lipstick shade that works on camera is also worth considering ahead of time: colors that look accurate under warm indoor light may shift to muddy or flat under cool LED studio setups.
FAQ on How To Do Makeup For A Photoshoot
Should makeup look different for a photoshoot than for everyday wear?
Yes. Camera lenses flatten depth and amplify shine. You need stronger contour, more defined brows, and better-set skin than you would for everyday wear. What looks bold in person usually reads as normal on camera.
What foundation finish works best for studio flash photography?
Matte or satin. Dewy foundations amplify under flash and photograph as oily skin. Avoid anything labeled ultra-luminous or glass-skin for studio strobe settings. A natural matte finish gives the cleanest result.
Can SPF foundations cause problems in photos?
Yes. Foundations containing SPF or titanium dioxide reflect flash back at the camera, creating a white cast around the nose and forehead. Use flash-safe, SPF-free formulas like Make Up For Ever HD Skin for any shoot involving flash.
How do I stop my makeup from fading under hot studio lights?
Set your base with a finely milled translucent powder, then finish with a long-wear setting spray. Keep blotting papers on set. Rebuild with targeted powder touch-ups only, not full reapplication, to avoid cakiness building up through the session.
How much stronger should eye makeup be for camera-ready looks?
About 30% stronger than you think you need. Flash photography washes out eyeshadow depth and liner definition. Tight lining, layered shadow, and false lashes all help eyes read clearly through the lens without looking overdone in person.
What lip products last longest during a photoshoot?
Fill the entire lip with liner first, then apply matte lipstick in thin layers with a blot between each. This method outlasts a single heavy application and prevents color from migrating or fading within the first hour of shooting.
Does contouring actually matter under studio lighting?
Yes, more than in any other context. Studio strobe removes natural facial shadows completely. Without contour, features photograph flat and undefined. Focus on cheekbones, jawline, and temples using a matte powder or cream formula matched to your skin tone.
What products should I avoid for flash photography?
Avoid foundations with SPF, silica-heavy setting powders, chunky glitter highlighters, and heavy lip gloss. All of these reflect flash unpredictably. Stick to finely milled powders, cream or fine shimmer highlight, and matte or satin lip finishes.
How far in advance should I prep my skin before a photoshoot?
Moisturize and apply serum at least 10 to 15 minutes before primer. Heavy skincare applied too close to makeup application causes pilling and sliding. Avoid new products in the week before the shoot to reduce any risk of skin reactions showing on camera.
Does makeup need to change for natural light versus studio light shoots?
Yes. Natural light is softer and more forgiving, so makeup can be slightly lighter with a satin finish. Studio strobe requires stronger contour, flash-safe products, and a matte base. Always ask the photographer which lights they plan to use before prep day.
Conclusion
Getting makeup right for a photoshoot comes down to understanding how a camera lens reads the face differently than the human eye does.
Every decision, from choosing a flash-safe foundation to building contour depth under studio strobe, connects back to one principle: rebuild what the camera removes.
Control shine before it starts. Define brows, eyes, and lips stronger than feels natural. Use matte lip finishes and long-wear setting products that survive heat and lights.
Whether the brief calls for a soft portrait session under natural light or a full editorial shoot under Profoto strobes, the same core rules apply across every shoot type and skin tone.
Prep well, choose the right products, and the camera will do the rest.

- What Is Skin Tint and Why Everyone Is Obsessed - July 11, 2026
- What Is Foundation and How Do You Choose One? - July 6, 2026
- How to Make Blush Last Longer - July 3, 2026


