

Knowing how to use highlighter makeup correctly is the difference between a stripe of shimmer and an actual glow.
Most people pick up a highlighter, swipe it across the cheekbones, and wonder why it looks more glittery than luminous. The product is rarely the problem. Placement, formula, and technique are.
This guide covers everything: what highlighter actually does to the face, which formula fits your skin type, where to place it by face shape, and how to make it last past noon. Whether you’re building an everyday makeup look or going full glam, the same core rules apply.
What Is Highlighter Makeup
Highlighter is a light-reflecting product applied to the raised areas of your face to create dimension and luminosity. It works by bouncing light off the skin, making specific zones appear lifted, fuller, and more radiant.
The difference between highlight and contour comes down to light versus shadow. Highlighter pulls areas forward. Contour pushes them back. Used together, they shape the face. Used separately, each still has a clear job.
The global highlighter market reached USD 2.41 billion in 2024, growing at a 6.2% CAGR through 2033, according to Growth Market Reports. That kind of growth doesn’t happen with niche products. It happens when something becomes a daily-use staple across skin types, ages, and looks.
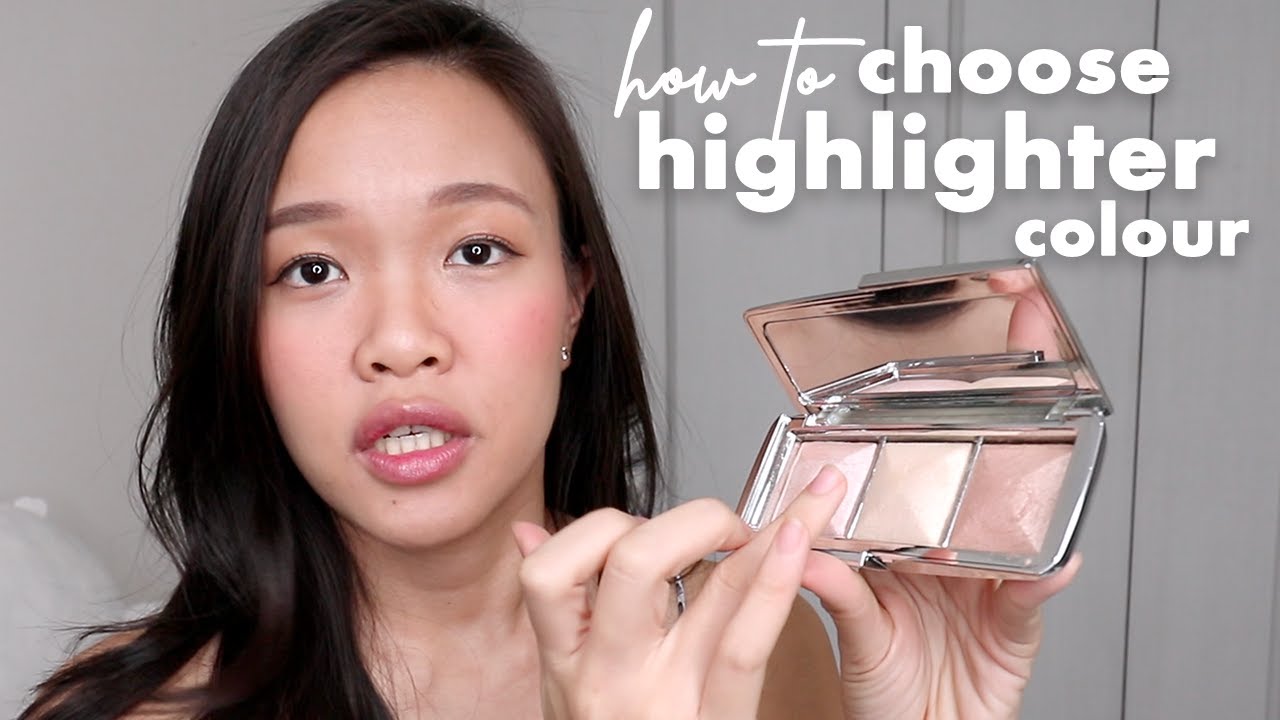
Powder, liquid, cream, and stick are the four main formats. Each gives a different finish. Each works better for specific skin types. This matters more than most people realize when they’re standing in front of a display wall trying to pick one.
And no, highlighter isn’t just for glam looks. It shows up in natural makeup looks, everyday routines, and editorial work. The application changes. The product stays the same.
| Formula | Finish | Best For | Application |
|---|---|---|---|
| Powder | Defined shimmer | Oily skin, beginners | Fan or tapered brush |
| Cream | Natural glow | Dry skin, no-makeup looks | Fingers or sponge |
| Liquid | Dewy radiance | Mixing with foundation | Fingers, sponge, or brush |
| Stick | Concentrated glow | Targeted placement, travel | Direct application, blend out |
Face Anatomy for Highlighting

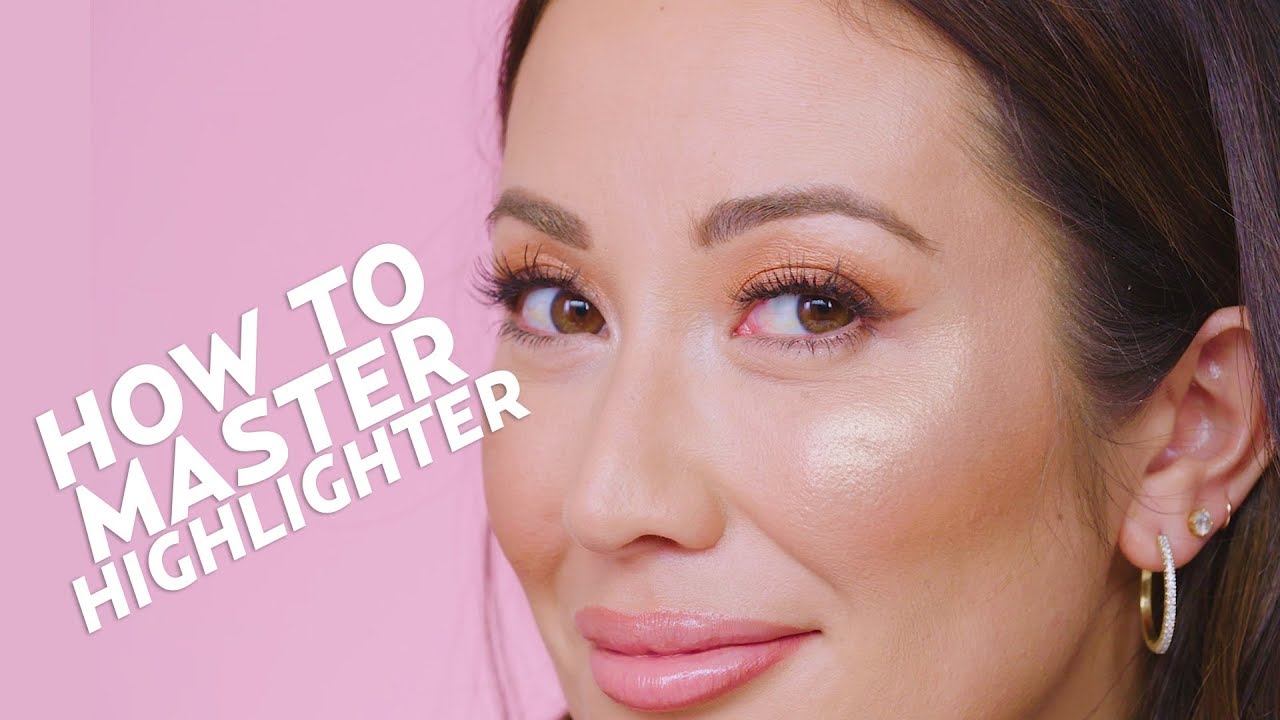
Highlighter belongs on the high points of your face. These are the areas that naturally catch light outdoors or in a well-lit room: the tops of the cheekbones, brow bone, bridge of the nose, cupid’s bow, and inner corners of the eyes.
Why these spots? Light hits the face unevenly. The raised areas get more of it. Highlighter mimics that natural contrast, giving the face dimension that flat foundation coverage removes.
Areas to avoid are just as important. The T-zone, if oily, will turn shimmer greasy within an hour. Skin with visible texture or open pores doesn’t need shimmer drawing attention to it. The under-eye area with heavy shimmer can actually make dark circles look worse, not better.
Placement by Face Shape
According to highlight placement guides from both Charlotte Tilbury and Glo Skin Beauty, the adjustment by face shape is not about skipping zones entirely. It’s about emphasis and restraint.
Oval: The most balanced shape. Focus on the tops of the cheekbones, bridge of the nose, and a touch on the brow bone. Everything else is optional.
Round: Apply higher on the cheekbones, blending upward toward the temples. A thin line down the nose bridge adds subtle length. Avoid the apples of the cheeks entirely since highlight there adds width.
Square: Soft curved strokes on the cheekbones to reduce sharpness. A small touch on the center forehead and chin helps. Skip wide horizontal sweeps.
Heart: Cheekbones and under the brow arch. A touch on the chin widens it visually. Go light on the forehead.
Highlighter Formulas and When to Use Each
Powder highlighters dominate the market. They hold the largest revenue share in 2024, according to Growth Market Reports, driven by ease of use, versatility, and suitability for almost every skin type.
But powder is not always the right call. Dry skin under powder highlighter can look flaky. Textured skin can look patchy. That’s where formula choice actually changes the result.
Powder highlighter: Best for oily to combination skin. Blends easily, sits on top of powder foundation without disrupting it, and gives more control over intensity.
Cream highlighter: Melts into the skin for a natural glow. Great for dry skin. Works well under or mixed into foundation for an all-over luminous base. When applying cream highlighter, fingers give the most skin-like finish.
Liquid highlighter: The most flexible format. Can be worn alone, mixed into moisturizer, or layered under powder for extra intensity. The liquid highlighter market alone is estimated at $2.5 billion in 2025 (Archive Market Research), with 8% CAGR projected through 2033.
Stick highlighter: Precise. Good for small zones like the brow bone and inner corner. Easy to travel with. Tends to have higher pigment concentration than loose formulas.
Baked highlighter: Pressed and baked in an oven during manufacturing. Gives intense, buildable payoff. Popular with professional artists working under photography lighting.
Tools for Applying Highlighter

Tool choice changes the result more than most people expect. The same product applied with a fan brush versus a dense tapered brush gives a completely different finish.
| Tool | Best Formula | Finish |
|---|---|---|
| Fan brush | Powder | Soft, diffused glow |
| Tapered highlight brush | Powder | Precise, concentrated |
| Fingers | Cream, liquid | Natural, skin-like |
| Damp beauty sponge | Liquid, cream | Sheer, blurred |
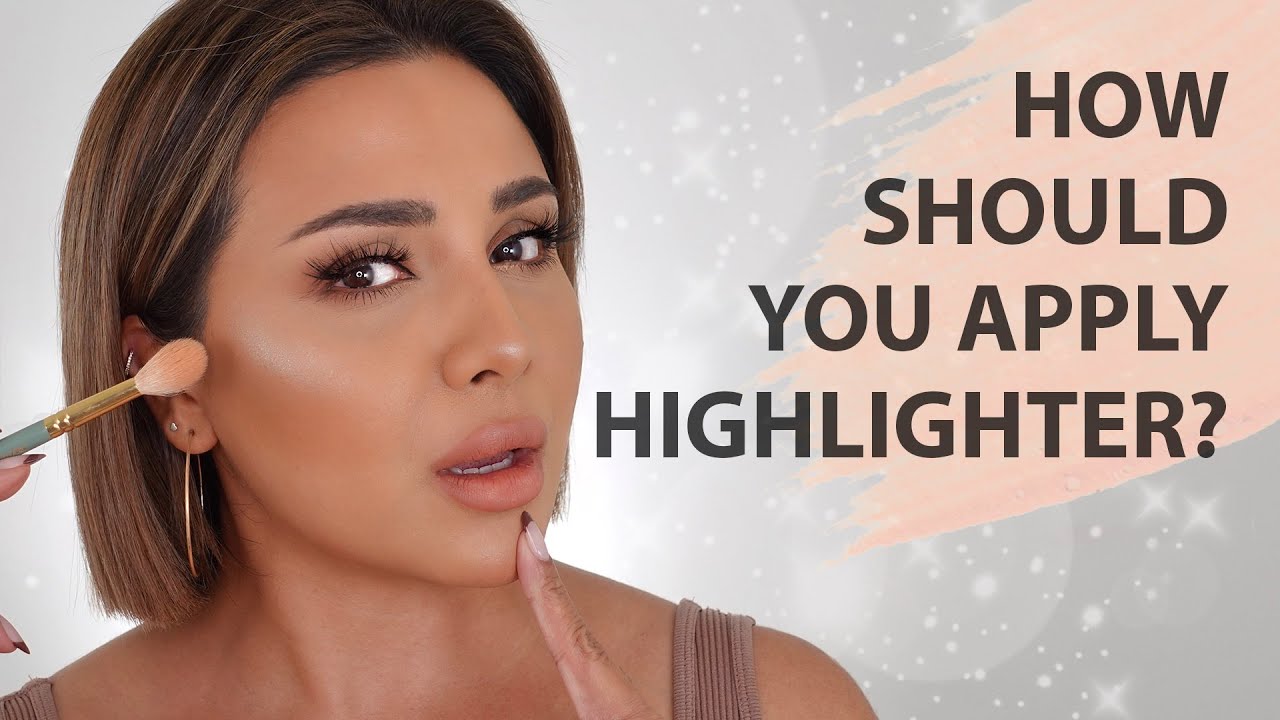
A fan brush picks up less product and deposits it lightly. Perfect for a daytime, barely-there glow.
A tapered brush packs more pigment onto the skin. Better for an evening look or whenever you want the cheekbone to actually show in photos.
Fingers are underrated. Warmth from your skin melts cream formulas into the complexion in a way no brush can replicate. Tap, don’t swipe. Swiping moves foundation underneath it.
A damp beauty sponge sheers everything out. If you’ve ever over-applied and ended up with a glittery stripe, a damp sponge fixes it fast.
Step-by-Step Application for an Everyday Look

Highlighter goes on after foundation, concealer, blush, and bronzer. Not before. Applying it too early means blending everything else over it, which removes it.
Basic Application Order
Prep skin, apply foundation. Set with powder if needed. Add blush and any bronzer. Highlighter is always last in the face step of your routine.
For everyday wear, pick up a small amount. A fan brush lightly tapped into the pan is plenty.
Step 1: Smile slightly to locate the apex of your cheekbone. Apply highlighter at the highest point and blend upward toward the temple.
Step 2: Swipe a small amount along the brow bone just below the tail of the brow. Not across the entire forehead.
Step 3: Dab the tiniest amount into the inner corners of the eyes. This step is optional but makes eyes look more awake.
Step 4: If you want, add a thin line down the nose bridge and a small touch to the cupid’s bow.
Less is always more on the first pass. You can build up. You cannot easily remove shimmer from foundation without disturbing everything else.
Common First-Timer Mistakes
The most frequent error is using too much product in one swipe. A dense brush loaded with shimmer powder leaves a thick stripe, not a glow.
Fix it: Tap excess off the brush before it touches your face. Sheerer application layered twice looks better than one heavy coat.
Using a shade that’s too pale on medium or deep skin is another one that comes up constantly. A highlighter that’s lighter than your skin tone by three or more shades reads white or grey, not luminous. Match the undertone, then go one shade lighter.
How to Apply Highlighter for a Glam or Editorial Look

Strobing is the technique of using highlighter as the primary structural element of the face, rather than supporting contour. It became a mainstream trend around 2015 and still works for specific looks. The hybrid makeup market showing 6.1% CAGR growth through 2030 (Accio, 2025) partly reflects how strobing-focused products merged with skincare.
Layering for Intensity
Patrick Ta’s technique reverses standard layering: cream highlighter first, then powder over it. Most of us were told to always put powder over cream only during setting. Ta’s method creates a multidimensional finish with real staying power.
Start with a cream or liquid formula pressed into the high points. Let it set for 30 seconds. Then pack a powder highlighter directly over it with a dense brush. The result reads differently than either product alone.
For photography and flash: Avoid glitter-heavy formulas. They reflect light in unpredictable ways on camera and can look harsh. Satin and pearl-finish powders photograph better. Fenty Beauty’s Killawatt and NARS Albatross are two powders regularly used for this reason.
Going Beyond the Face
Highlighter on the collarbone, shoulders, and tops of the arms works for events and editorial shoots. Apply with a larger fan brush or a body brush. The finish reads as a healthy glow rather than obvious shimmer when applied lightly.
62% of Gen Z consumers discovered and purchased beauty products through social media in 2024 (Accio), and a lot of that content features full-body highlight techniques. It’s not just a professional set skill anymore.
For a full glam face, adding a touch to the center of the eyelid lifts the entire eye look. This pairs well with inner corner highlight to widen and open the eyes significantly. If you’re doing soft glam makeup looks, this is one of the defining steps that separates a polished result from something that reads as unfinished.
Highlighter for Different Skin Tones

Shade matching in this category matters more than most people realize. A highlighter that’s too light or too icy reads grey or white on deeper complexions. Too warm on fair skin and you get an orange stripe instead of a glow.
The rule is simple: match undertone first, then adjust depth. One to two shades lighter than your actual skin tone gives a natural radiance. Going three or more shades lighter is where things start to look off.
Clean makeup brands now hold nearly 20% market share in the highlighter category at Sephora, with shade-inclusive shade ranges being a major driver of that growth, according to YipitData (2025). Brands like Rare Beauty and Fenty Beauty built their highlighter presence specifically around undertone-matched formulation.
Shade Guide by Skin Tone
| Skin Tone | Best Shades | Avoid |
|---|---|---|
| Fair / Light | Champagne, pearl, icy pink | Deep bronze, heavy gold |
| Medium / Olive | Gold, peach-gold, rose gold | Frosty or silvery tones |
| Tan | Gilded gold, copper, warm rose gold | Pale champagne, icy shades |
| Deep / Dark | Bronze, deep gold, rich copper | Opalescent, frosty, or pale shades |
Why Undertone Matters More Than Depth
Cool undertones (blue-purple veins on wrist): stick to silver, pearl, and rose-based highlighters. Warm golds will clash with the skin’s natural tone.
Warm undertones (green veins): gold, bronze, and peach-gold all work. These shades reflect warmth back rather than fighting the skin’s natural color.
Neutral undertones: genuinely the easiest group to shop for. Rose gold, champagne, and soft gold all work. Your mileage varies with very bright or very deep shades.
Charlotte Tilbury’s Hollywood Glow Glide line uses this principle across seven shades, from Bronze Glow for deeper tones to Pillow Talk Glow (a pearlescent pink) as a cross-tone option, per Charlotte Tilbury’s own shade guide.
Common Highlighter Mistakes and How to Fix Them

Most problems come down to two things: too much product or wrong placement. Both are fixable. Neither requires starting over from scratch.
Highlighter shoppers at Sephora in 2024 were consistently cross-shopping blush, concealer, and foundation, according to YipitData. These are engaged beauty users who know their routines. Still, even experienced people make the same few errors repeatedly.
Over-Application
A loaded brush dragged across the cheekbone leaves a stripe. It looks glittery, not glowing. The fix is not a lighter product. It’s less product on the brush.
How to fix mid-look: Take a clean, dry fan brush and lightly buff over the area in circular motions. This diffuses the shimmer without removing all of it. A damp beauty sponge pressed (not dragged) over the area also works for powder highlighters.
Wrong Placement on the Cheek
Applying highlighter to the apples of the cheeks instead of the tops of the cheekbones is one of the most common beginner errors. The apples sit lower on the face. Highlight there and you visually widen and flatten the face rather than lifting it.
Correct target: The highest bone, located by lightly pressing a finger along the cheek until you feel the ridge. That’s where the highlight goes, not below it.
Using a Formula That Emphasizes Texture
Shimmer over skin with visible pores or texture makes both more obvious. The light-reflecting pigment catches the edges of pores the same way it catches bone structure.
- Switch to a satin or pearlescent powder instead of chunky shimmer
- Use a damp sponge to apply so product sits on top of skin rather than settling in
- Apply makeup primer on textured areas before foundation, which smooths the surface before shimmer goes on
Skipping Blending
Highlighter placed and left without blending looks like a product sitting on the skin rather than a glow coming from within it. Two or three seconds of circular blending at the edges is all it needs.
Quick rule: If you can see where the highlight starts and stops, it needs more blending at the perimeter. The center can stay packed and intense. The edges should fade to nothing.
How to Make Highlighter Last All Day
Skin produces oil and sweat throughout the day. A 2024 study published in the Journal of Cosmetic Dermatology found that foundation altered sebum levels within just 20 minutes of physical activity, confirming that oil is the main reason face makeup, including highlighter, breaks down unevenly.
The fix is layering. Not more product. Smarter product order.
Skin Prep and Primer
Moisturized skin is the starting point. Dry skin pulls moisture from products sitting on top of it, which breaks down the formula faster. Let moisturizer fully absorb (two to three minutes) before applying anything else.
Primer under highlight zones makes a real difference, not just under foundation. A small amount of face primer or eyeshadow primer tapped onto the cheekbones before foundation gives the highlight something to grip later.
Properly prepping skin before makeup is a step most people rush. It directly affects how long everything above it lasts.
Setting Cream Highlighter Correctly
Cream highlighter applied and left alone will fade and move. Set it with a matching or slightly lighter powder highlighter pressed directly on top. This locks the cream in place and can actually intensify the finish at the same time.
Who What Wear noted that pro artists specifically recommend layering brightening loose powders over cream highlight to preserve both tone and intensity without losing the sculpted finish underneath.
Sequence that holds:
- Primer on cheekbones
- Foundation and concealer as usual
- Cream or liquid highlighter, pressed in with fingers or sponge
- Powder highlighter packed over it with a tapered brush
- Setting spray as the final step
Mid-Day Touch-Ups
Blot before you touch up. Pressing blotting paper onto the face removes excess oil without disturbing the makeup underneath. Applying fresh powder over an oily base just creates buildup and patchiness.
After blotting, a light dusting of powder highlighter on the cheekbones refreshes the look in under 30 seconds. You don’t need to re-apply anything else.
Beautyblender notes that high-performance setting spray can extend full-face wear by several hours. For highlighter specifically, it keeps the finish looking fresh rather than faded or patchy by the afternoon.
One thing that genuinely kills highlighter longevity faster than anything else: heavy facial oils or oil-based moisturizers applied right before makeup. Silicone-based or water-based primers between skincare and makeup create a barrier that slows that breakdown significantly. The order you layer makeup in is not arbitrary. It determines how long everything holds.
FAQ on How To Use Highlighter Makeup
Where do you put highlighter on your face?
Apply it to the high points: tops of the cheekbones, brow bone, bridge of the nose, cupid’s bow, and inner corners of the eyes.
These zones naturally catch light. Highlighting them mimics that effect and adds dimension to an otherwise flat base.
What goes on first, contour or highlighter?
Contour goes on before highlighter. Apply foundation, then contour to add shadow, then blush and bronzer.
Highlighter is always last in the face step. Applying it earlier means blending everything else on top of it, which removes it.
Can you use highlighter without foundation?
Yes. Cream and liquid highlighters work directly on bare or moisturized skin. They blend into the complexion rather than sitting on top of it.
Powder highlighter on bare skin can look patchy without a base underneath.
What highlighter shade works for dark skin?
Bronze, deep gold, and rich copper. These shades have enough pigment to show on deeper complexions without reading grey or washed out.
Avoid frosty, opalescent, or pale champagne shades. They sit on top of deep skin rather than blending in.
How much highlighter is too much?
If you can see a defined edge where it starts and stops, that’s too much. A glow should have no visible border.
Tap excess off your brush before applying. Build in thin layers rather than one heavy swipe.
Which highlighter formula is best for oily skin?
Powder highlighter. It sits on top of skin without slipping and absorbs some of the excess oil produced throughout the day.
Cream and liquid formulas tend to move on oily skin unless set with a matching powder directly on top.
Can you apply highlighter with your fingers?
For cream and liquid formulas, fingers are actually ideal. The warmth melts the product into skin for a natural, seamless finish.
Tap, don’t swipe. Swiping drags foundation underneath and creates patchiness.
How do you fix over-applied highlighter?
Take a clean fan brush and lightly buff over the area in small circular motions. This diffuses shimmer without fully removing it.
A damp beauty sponge pressed gently over the zone also pulls back excess powder without disturbing the base.
Does highlighter work on mature skin?
Yes, with the right formula. Cream and satin-finish highlighters work better than chunky shimmer, which can settle into fine lines.
Apply with a light hand. Applying highlighter on mature skin is about placement precision and keeping the finish soft rather than blinding.
How do you make highlighter last all day?
Layer cream highlighter first, then press a matching powder highlighter on top. Finish with setting spray.
Blot oil mid-day before touching up. Applying fresh product over an oily base just creates buildup. Skin prep and primer under the cheekbone zone also extend wear significantly.
Conclusion
This conclusion is for an article presenting how to use highlighter makeup as a practical skill, not a guessing game.
Pick the right formula for your skin type. Match your shade to your undertone. Place it on the actual high points of your face, not wherever feels intuitive.
Whether you’re reaching for a powder highlighter on oily skin or layering a cream formula for a dewy finish, the technique stays consistent: less product, precise placement, clean blending.
Strobing, cheekbone definition, inner corner highlight, full glam or barely-there radiance. All of it comes down to the same fundamentals covered here.
Start simple. One product, the right brush, the right zone. Build from there.

She started writing on the site after fielding the same questions from clients and friends often enough to just write the answers down: which red won't turn orange on a warm undertone, how to keep lipstick from feathering into fine lines, why a "12-hour" formula rarely survives dinner.
Every review on the site follows the same rule she uses with paying clients: wear it first, then decide if it's worth recommending.
- How to Choose Setting Powder for Your Skin Type - August 1, 2026
- How Long Does Eyeliner Last Before It Expires? - July 28, 2026
- What Is Contour and How Do You Apply It? - July 25, 2026


