

Getting your makeup right for a night out is a different challenge from your everyday routine.
Artificial lighting, long hours, and flash photography all demand more from your products and your technique. A look that works at noon can disappear completely by 10 PM.
Knowing how to do makeup for a night out means understanding which products hold up, where to place color for low lighting, and how to build a base that actually lasts.
This guide covers everything from skin prep and foundation to eye makeup, lip color, setting technique, and the tools that make the difference. By the end, you’ll have a full routine you can rely on for any evening out.
What Night Out Makeup Is
Night out makeup is built differently from a daytime look. It’s higher in pigment, more structured in finish, and designed to hold up under artificial lighting for hours, not minutes.
Daylight is forgiving. Club lighting, restaurant candles, and flash photography are not. Those conditions pick up every undertone, every crease, every product that’s sitting on top of the skin rather than blending into it.
The result is a routine where product choices and layering technique matter more than usual. You’re not just applying color. You’re building something that survives a full evening out.
How Night Out Makeup Differs From Daytime

Key differences at a glance:
| Factor | Daytime Look | Night Out Look |
|---|---|---|
| Coverage | Light to medium | Medium to full |
| Finish | Dewy, skin-like | Satin or semi-matte |
| Eye intensity | Soft, minimal | Defined, bold |
| Lip choice | Tinted balm, sheer | Bold color or long-wear formula |
| Setting steps | Optional | Non-negotiable |
The focus point rule matters here. Bold eye or bold lip, not both at full intensity.
Choosing one to lead keeps the look balanced and prevents the face from reading as too heavy under dim, artificial lighting. Bold eye with a nude lip. Or a statement lip with clean, defined eyes. Pick your lane.
What Makes a Look Work for Low Lighting
Low lighting adds depth but kills definition. Products that look sharp in natural light can disappear entirely under dim venue lighting.
That’s why doing smokey eye makeup works so well at night. The blended-out depth reads clearly even in dark settings, where lighter, more blended looks can wash out completely.
Flash photography is the other extreme. It flattens and overexposes, making anything too shimmery or too powdery look cakey or grey.
The sweet spot for nighttime is controlled contrast: matte skin, defined eyes, and one color-payoff moment that holds up in both lighting environments.
Skin Prep Before Applying Anything

Skin prep is where most people lose time they’ll never get back at midnight. Foundation breaks down from underneath when skin isn’t ready for it, not because the product is bad.
Around 42% of consumers use primers specifically to extend makeup wear (Global Growth Insights, 2026). That number suggests people understand the concept but still regularly skip the steps that make primers actually work.
Cleanse and Moisturize First
Clean skin holds product. Skin with leftover SPF, environmental residue, or old moisturizer on the surface does not.
Wash your face, apply moisturizer, and then actually wait. Five to ten minutes minimum. Applying primer or foundation over moisturizer that hasn’t absorbed results in pilling, uneven coverage, and a base that slides around by 10 PM.
If your skin is dry, a hydrating serum under moisturizer helps. But again, let it absorb fully before you continue.
Primer Selection for Night Looks
Pore-filling primers (like NYX Pore Filler) create a blurred canvas that holds foundation through humidity and heat.
Grip primers work by giving foundation something to adhere to, extending wear time significantly. Good choice when you know you’ll be dancing or sweating.
Tatcha Silk Canvas sits in its own category. It’s technically a finishing powder but functions as a primer, giving a smooth, almost airbrushed surface that works well under satin-finish foundations.
Worth knowing: the makeup primer market was valued at USD 2.25 billion in 2024 and is projected to grow at a CAGR of 5.64% through 2032 (Wise Guy Reports). The growth is driven largely by demand for long-lasting wear, which is exactly what a night out demands.
Color Correcting Before Foundation
Going heavy with a smoky eye or bold lip means the base needs to be clean and even. Color correcting handles the things full-coverage foundation alone can’t fix.
- Green corrector: redness, breakouts, visible capillaries
- Peach or orange corrector: dark circles on medium to deep skin tones
- Lavender corrector: sallowness or yellow undertones
- Pink corrector: dark circles on fair to light skin tones
Apply color corrector only where needed. Set it lightly before moving to foundation. Learning how to apply color corrector correctly makes a visible difference, especially under flash.
Foundation and Base for Low-Light Settings

Foundation choice at night comes down to two things: how long it lasts and how it reads under venue lighting.
Skin-tint and dewy-finish territory don’t belong here. According to a consumer survey by PoweredXBeautyBuddy, 54% of foundation buyers prioritize long-wear performance as a key purchase factor, and that preference is even more pointed when the plan involves a full night out.
Coverage and Finish
Medium-to-full coverage holds up through sweat, humidity, and multiple hours of contact with fabric, fingers, and everything else that happens at night.
Satin and semi-matte finishes are the practical choice for nighttime. They don’t look flat in photos and they don’t turn oily or shiny under heat the way dewy foundations do.
Two reliable options at different price points:
- Charlotte Tilbury Airbrush Flawless Foundation: medium-to-full coverage, satin finish, holds for 24 hours
- Maybelline Fit Me Matte+Poreless: accessible price point, controls oil, reads cleanly under flash
The global foundation market held the largest share of the makeup base segment at 40.6% in 2024, with approximately 61% of consumers using foundation as their primary base (Grand View Research).
Setting the Base to Last
Setting powder is what keeps foundation from moving. Translucent powder pressed gently with a damp beauty sponge works better than dusted-on powder, which sits on top rather than bonding with the base.
Focus setting powder on the T-zone and under eyes. Those are the two areas where foundation consistently breaks down first.
For high-drama events where cameras are involved, the baking technique adds extra staying power. Apply a thick layer of translucent powder under the eyes and on the nose, wait 5 to 10 minutes, then dust away the excess.
A note on powder foundation as an alternative: it works for some skin types at night but tends to sit visibly on textured skin under direct lighting. Liquid plus setting powder is usually the better approach for longevity.
Concealer Placement That Holds All Night

Concealer under the eyes is the area most likely to crease by hour two. It’s also the area most people apply incorrectly.
The problem is usually one of two things: too much product, or applying without setting properly. Both lead to the same result.
Under-Eye Concealer That Doesn’t Crease
Apply concealer in a triangle shape under each eye, pointing down toward the cheek. This covers more area and blends more naturally than just patching the dark circle.
Set it immediately with translucent powder using a damp sponge in a pressing motion, not swiping. Swiping moves the concealer. Pressing locks it in place.
Wait 30 seconds before dusting away excess powder. That pause makes a real difference in how long the concealer holds through the night.
Avoid layering too much product. Two thin layers, well-set, last longer than one thick layer with powder on top. If you’re learning how to use concealer for events, less product plus better setting technique is the move every time.
Spot Concealing vs. Full Coverage
If your foundation is already medium-to-full coverage, you may not need concealer over the whole face. Spot concealing targets specific areas: under eyes, around the nose, any breakouts.
Full-face concealing over full-coverage foundation adds unnecessary product layers. More layers mean more creasing potential, especially in creases around the nose and mouth.
Match your concealer to your skin tone or go one shade lighter under the eyes specifically. Concealer that’s too light reads grey under flash photography.
Eye Makeup for a Night Out
Eyes carry more weight at night than during the day. The room is darker, the lighting is artificial, and a strong eye look does the work that the rest of the face can’t do in low light.
The eyeshadow primer market was valued at USD 3.8 billion in 2024 and is projected to reach USD 6.2 billion by 2032 at a CAGR of 6.31% (Wise Guy Reports). The demand reflects how seriously people take eye makeup longevity, which matters even more for a night out than everyday wear.
Eyeshadow Primer: Non-Negotiable
Urban Decay Primer Potion is the standard reference for a reason. It grips eyeshadow and prevents creasing for hours, even on oily lids.
Apply a thin layer across the lid and up into the crease. Let it dry for 30 seconds before adding any shadow. Skipping this step is the main reason eyeshadow fades or creases mid-evening.
Cream shadows and glitter-based products also need primer underneath. Without it, they migrate into the crease within an hour.
Smoky Eye Step-by-Step
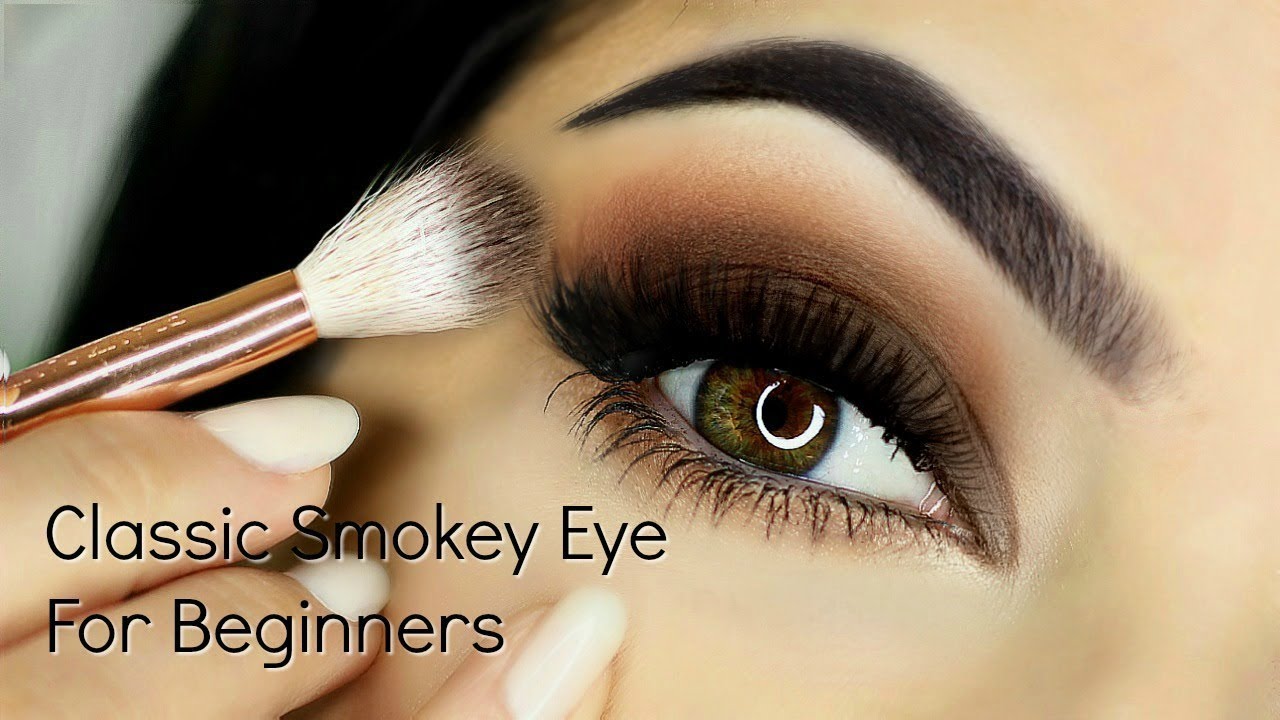
A smoky eye is the most reliable night out eye look because it reads in every lighting environment.
- Apply a mid-tone matte shadow across the lid and blend into the crease
- Pack a darker shade onto the outer corner and outer crease
- Blend the two shades together using a fluffy brush in windshield-wiper motions
- Tight-line the upper waterline with a black or dark pencil liner
- Apply kohl liner to the lower waterline for added depth
- Smudge a dark shadow along the lower lash line
- Add mascara last
The whole thing takes about 15 minutes once you know the sequence. Blending time is where most people rush, and that’s exactly where the look either comes together or falls apart.
Graphic or Cut Crease Option
Graphic liner is the 2025 alternative to the traditional smoky eye. A bold wing, geometric inner corner, or colored liner look works well for dinner or rooftop settings where flash photography is involved.
Cut crease takes more time but the result is clean and intentional, which reads well in photos. Use a flat concealer brush to define the crease line before packing shadow above and below it.
Both options require a solid base of eyeshadow primer underneath. The longevity difference with and without primer is significant, especially in a warm venue.
False Lashes and Mascara
For a full night out look, false lashes are worth the effort. Strip lashes with a clear band sit more naturally on the lash line and are easier to remove at the end of the night.
Individual clusters give more control over density and are better for people who find strip lashes uncomfortable. Learn how to apply false eyelashes a few times before the actual night out. The first attempt is never the smoothest.
If skipping false lashes, layer mascara: one coat, let it dry, second coat. Waterproof mascara only for a night out. Non-waterproof mascara under humid or warm conditions will be under your eyes by midnight.
Brows, Contour, and Face Structure
Nighttime makeup needs structure. Without defined brows and some level of contour, even a strong eye look can read flat under artificial lighting.
Contour was one of the fastest-growing segments across major beauty brands in 2024, with consumer demand for face-shaping products accelerating into 2025 (Beauty Independent).
Brow Definition at Night
Brows need to be slightly bolder than you’d wear them during the day. Not drawn-on, not overfilled. Just defined enough to frame the eye look without disappearing under lighting.
Fill in any gaps with a brow pencil that matches your hair color. If your brows are naturally full, a tinted brow gel is enough to keep them in place through a full evening.
Sparse brows benefit from a pencil first, then brow gel on top to set the shape. Without the gel, pencil brows migrate by the end of the night.
Contour and Blush Placement
Nighttime contour differs from daytime. The goal is definition that reads from across a dim room, not a naturally sun-kissed look.
Placement breakdown:
- Contour: temples, hollows of the cheeks, jawline
- Blush: temples and upper cheeks (draping technique), not the apples
- Highlight: inner corners of the eyes, bridge of the nose, cupid’s bow
The draping blush technique, where blush sweeps from the cheekbone up toward the temple, works better for night looks than the apple-of-the-cheek placement. It reads more dimensional under venue lighting.
Go easy on highlighter. Blinding highlight on the nose reads harsh in flash photos. A subtle, skin-like glow on the cheekbones is enough.
Cream vs. Powder Products
Cream contour and blush blend more naturally into the skin and hold better under heat. Apply them before setting powder.
Powder contour goes over setting powder. It’s easier to control intensity and build up gradually. Both approaches work for nighttime, but cream underneath powder is the combination with the longest wear.
Charlotte Tilbury’s Filmstar Bronze and Glow is a reliable dual product for nighttime structure. The contour side is warm and blendable, not ashy, which reads naturally under both dim and bright lighting.
Lip Options and How to Choose

The lip decision is where a lot of night out looks either come together or go sideways. Get this right and the whole look lands. Get it wrong and the face reads muddy.
The global lipstick market was valued at USD 17.49 billion in 2024 and is projected to reach USD 23.77 billion by 2030 at a CAGR of 4.7% (Grand View Research). Liquid lipstick is the fastest-growing format, expanding at 8.34% CAGR through 2030, driven almost entirely by demand for long-wear, transfer-resistant formulas (Mordor Intelligence).
Bold Lip vs. Nude Lip: The Decision

One focal point per look. That’s the rule.
If the eye makeup is heavy (smoky, cut crease, dramatic liner), a nude or berry-toned lip keeps the balance. If the eyes are clean and defined, a bold lip carries the look.
Bold eye + bold lip works in editorial settings, not at a dinner table or bar. The face needs breathing room.
Options worth knowing for night out night out makeup looks:
- Classic red with a simple wing and bronzed skin
- Deep berry or plum with a minimal base
- Nude lip that’s one shade warmer than your natural tone (avoids washing out under dim lighting)
Long-Wear Lip Formulas for a Full Night
Liquid lipstick is the standard for long wear. Apply with the wand, blot once, apply a second layer. That two-layer technique is what makes it actually transfer-resistant.
Lip liner as a base is the other approach. Fill in the entire lip with a matching liner, then apply lipstick on top. The liner acts as a grip layer, and the color lasts significantly longer.
Learning how to apply lip liner properly makes the difference between a lip look that holds all night and one that fades to a line around the edge of your mouth by hour three.
For anyone choosing liquid lipstick, let it dry completely before pressing your lips together. Two minutes. Most people don’t wait, and that’s why it transfers.
Lip Color Choices by Look and Venue
| Venue Type | Lip Suggestion | Why It Works |
|---|---|---|
| Club / bar | Bold red, dark berry | Stands out in dim and colored lighting |
| Dinner date | Matte nude, soft rose | Polished look that holds up while eating |
| Rooftop / outdoor | Coral, warm red | Flatters in both natural light and flash photography |
| Concert | Tinted balm, gloss | Low maintenance and survives heat and movement |
Overdrawing and Lip Shape
Slightly overdrawing the lip line adds fullness and makes lips read better in photos. The key word is slightly. One millimeter outside the natural lip line, maximum.
Going too far outside the natural line looks obvious in person. Under venue lighting it’s even more visible.
For a natural-looking overdrawn result, use a lip liner that matches the lipstick shade or is one shade darker. Fill it in fully, then apply lipstick on top. The result is a fuller, cleaner lip shape that lasts longer than liner-less application.
If you want the technique for extra fullness without going overdrawn, ombre lips use a lighter shade in the center of the lip to create dimension and the illusion of more volume.
Setting the Makeup to Last
Setting is the step most people rush or skip. It’s also the step that determines whether the look holds for two hours or eight.
The setting spray market was valued at USD 1.1 billion in 2024 and is forecast to nearly double to USD 2.1 billion by 2034 at a 6.7% CAGR (Market.us). That growth is almost entirely consumer-driven, with people increasingly treating setting spray as a non-negotiable final step rather than an optional add-on.
Setting Spray: Which One and How to Use It
Three options that actually perform for night out wear:
- Urban Decay All Nighter: 24-hour hold, works in heat and humidity
- MAC Fix+: adds a natural finish, good for skin that doesn’t need heavy lock-in
- Morphe Continuous Setting Mist: budget-friendly, strong hold for oily skin
Technique matters as much as product. Hold the bottle 8 to 10 inches from the face and mist in an X and T pattern. Let it dry naturally, don’t fan it. Fanning disrupts the film before it sets.
One coat is usually enough. Two coats (letting the first dry completely before the second) is worth it for humid venues or outdoor events.
Powder Setting Before the Spray
Setting spray works best over properly powdered makeup. The spray locks in the powder layer, not the foundation directly.
Press-don’t-swipe is still the rule here. A damp beauty sponge pressed over powdered areas after misting blends everything into a seamless, skin-like finish.
This combination, powder plus setting spray, is what most professional makeup artists use before long events. MAC’s team used this technique consistently on red carpet clients throughout 2024.
Touch-Up Kit for the Night
A small bag can save the look without carrying a full kit. Keep it minimal and focused.
The five things worth having:
- Blotting papers (not powder) for oil control mid-night
- A mini lipstick or lip liner for touch-ups
- Concealer pen for under-eye creasing
- Travel-size setting spray
- Cotton swabs for mascara smudging or liner cleanup
Powder touch-ups mid-night add product buildup. Blotting papers remove excess oil without layering more onto the skin, which keeps the base looking fresh without going cakey.
Adjusting the Look for Different Night Out Settings
The same base routine adapts to different venues with small changes to intensity, product choice, and finish. You don’t need a different look for every occasion, just different decisions within the same routine.
Club and Bar: Full Glam
Dim lighting, dancing, heat. Everything needs to be waterproof and well-set.
Key adjustments: waterproof mascara, setting spray applied twice, matte finish foundation over primer. Contour can be slightly heavier here because the low lighting will naturally soften it.
Glitter eyeshadow and metallic liner read well in club lighting. Both were among the standout trend directions for 2025 according to Vogue Scandinavia’s year-end report, with silver and metallic accents specifically called out as the go-to update for evening looks.
Dinner Date: Polished, Not Heavy
Well-lit tables, close-up conversation. Makeup that looks flawless from two feet away matters more here than looks that survive a mosh pit.
Satin finish foundation reads more naturally in restaurant lighting than fully matte.
Blush should be blended well. Heavy pigment that looks soft in dim venues can read harsh under warm restaurant lighting. Go slightly lighter on blush intensity and slightly heavier on skin prep for this setting.
Lip choice matters more at dinner. A long-wearing formula (liquid lipstick or lip liner as base) handles eating and drinking better than a straight bullet lipstick with no liner underneath. Making lipstick last longer through a meal comes down almost entirely to the prep layer under the color.
Rooftop, Outdoor, and Concert: Practical Glam
Wind, sweat, potentially rain. This is where a lighter approach wins.
Minimal base or tinted moisturizer over primer, waterproof eye products, a tinted lip balm or gloss over liner. Less to move around, less to fix.
For concerts specifically, the 2025 and 2026 trend direction from IPSY points to graphic liner, glitter, and embellishments as the go-to look. Minimal base plus one high-impact feature: graphic liner, or glitter on the lid, or a bold lip. Pick one. Trying to do all three outdoors in variable lighting just means more product to manage.
Flash photography at outdoor events is less predictable than indoor. A powder-set matte base without heavy shimmer reads cleanest across different light conditions.
Tools That Make a Difference at Night

The right tools don’t make average products perform miracles. But they do make good products easier to apply correctly, which matters more when the routine is complex.
The global makeup brush and tools market was valued at USD 7 billion in 2024 and is projected to grow to USD 12.9 billion by 2034 at a CAGR of 6.3% (GM Insights). Brushes held the dominant product share, accounting for USD 4.3 billion of that total.
The Brushes That Actually Matter
Not every brush in a kit is useful for a night out look. These are the ones that earn their place:
Fluffy blending brush: eyeshadow blending, especially crease work. No substitute for this one.
Flat shader brush: packing shadow onto the lid with intensity. Fluffy brushes diffuse color, flat brushes deposit it.
Small smudge brush: lower lash line shadow and kohl smudging. A Q-tip works in a pinch but doesn’t give the same control.
Fan brush: highlight placement. More controlled than a fluffy brush; applies less product with more precision.
Sponge vs. Brush for Foundation at Night
Over 63% of beauty-conscious users prefer advanced makeup tools for precision and ease of application (Reanin, 2024).
For night looks specifically, a damp beauty sponge gives a more seamless finish than a brush for liquid foundation. Brushes can leave streak marks that become visible under venue lighting, especially on dry or textured skin.
Use the sponge in a pressing and bouncing motion, not dragging. This method pushes foundation into the skin rather than sitting it on top, which is exactly what you want for a look that needs to hold through hours of movement.
Setting Spray Technique with Tools
After misting with setting spray, pressing the damp sponge lightly over the face melts powder and foundation together. This is the step that gives a natural, skin-like finish rather than a powdery or layered look.
Wait until the spray has gone from wet to almost-dry before pressing. Too wet and the sponge just moves product around. The timing is roughly 20 to 30 seconds after misting.
This whole process, proper tools used in the right sequence, is what separates a night look that photographs well from one that just looks heavy in person. The tools don’t do the work independently. The sequence does.
FAQ on How To Do Makeup For A Night Out
How do I make my makeup last all night?
Start with a pore-filling primer, use medium-to-full coverage foundation, set with translucent powder, and finish with setting spray.
Press, don’t swipe. That sequence alone adds hours to your wear time.
Should I do bold eyes or bold lips for a night out?
Pick one focal point. Bold eye with a nude or berry lip. Bold lip with clean, defined eyes.
Doing both at full intensity reads as too heavy, especially under artificial lighting.
What foundation finish works best for nighttime?
Satin or semi-matte finishes hold longer and photograph better than dewy formulas.
Dewy foundations tend to look oily under venue lighting and break down faster through heat and movement.
Do I need eyeshadow primer for a night out?
Yes. Without it, eyeshadow creases within an hour, especially on oily lids or in warm venues.
Urban Decay Primer Potion is the standard reference. Apply a thin layer, let it dry, then build your eye look on top.
What lip product lasts the longest on a night out?
Long lasting lip liner used as a base under liquid lipstick gives the best result.
Fill the entire lip with liner first, apply liquid lipstick on top, blot once, then apply a second layer.
How do I stop my concealer from creasing at night?
Apply in a triangle shape, set immediately with translucent powder using a damp sponge in a pressing motion.
Wait 30 seconds before dusting away the excess. Less product plus better setting technique beats more product every time.
What eye makeup works best in low lighting?
A smoky eye is the most reliable option. The blended depth reads clearly in dim settings where lighter looks disappear.
Tight-lining the waterline adds definition without requiring heavy liner that can smudge under venue conditions.
How do I prep my skin before night out makeup?
Cleanse, moisturize, and wait for everything to fully absorb before applying primer. Rushing this step causes pilling and uneven coverage.
Five to ten minutes of absorption time makes a visible difference in how the base sits and holds.
What should I pack for makeup touch-ups?
Keep it minimal: blotting papers, a concealer pen, travel setting spray, lip liner or lipstick, and a few cotton swabs.
Blotting papers beat powder mid-night. Powder builds up and turns cakey; blotting removes oil without adding product layers.
How do I adjust my makeup for different night out venues?
Clubs need waterproof everything and double-set foundation. Dinner dates call for a satin base and well-blended blush.
Outdoor events and concerts work best with a lighter base, one high-impact feature, and minimal products to manage through heat.
Conclusion
This conclusion is for an article presenting how to do makeup for a night out, and the core takeaway is simple: preparation and product choice determine everything.
Skin prep, the right primer, a long-wearing base, and a strong setting routine are what separate a look that holds from one that fades by midnight.
Your eye makeup and lip color do the visual work. But none of it stays without the foundation underneath it being built correctly.
Adjust your approach for the venue, keep a focused touch-up kit, and pick one focal point per look.
Follow these steps and your full glam makeup routine will hold through dinner, dancing, and everything in between.

She started writing on the site after fielding the same questions from clients and friends often enough to just write the answers down: which red won't turn orange on a warm undertone, how to keep lipstick from feathering into fine lines, why a "12-hour" formula rarely survives dinner.
Every review on the site follows the same rule she uses with paying clients: wear it first, then decide if it's worth recommending.
- How to Choose Setting Powder for Your Skin Type - August 1, 2026
- How Long Does Eyeliner Last Before It Expires? - July 28, 2026
- What Is Contour and How Do You Apply It? - July 25, 2026


