

Summarize this article with:
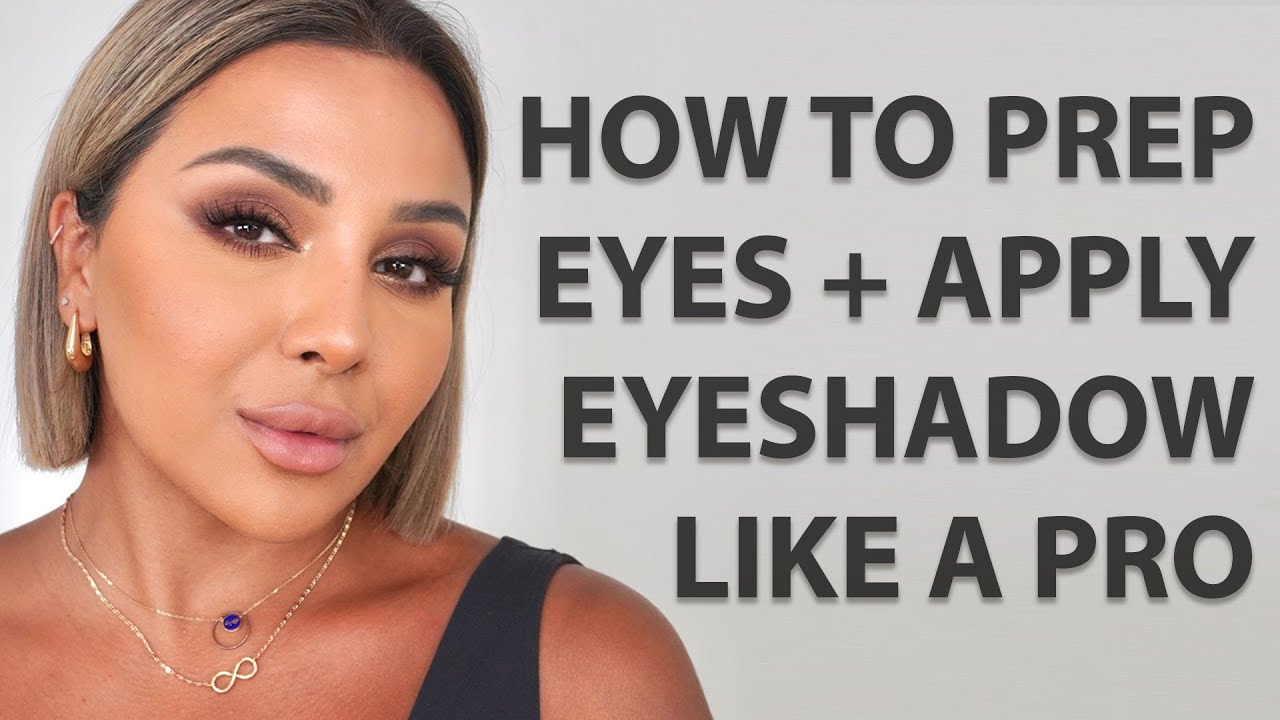
The smokey eye is one of those looks that makes people stop and ask what you’re wearing.
Learning how to do smokey eye makeup sounds tricky, but the technique comes down to a few key steps – the right tools, the right order, and knowing how to blend eyeshadow without muddying the colors.
This guide covers everything: product selection, eye prep, step-by-step application, fixes for common mistakes, and adjustments for different eye shapes.
By the end, you’ll have a clear, repeatable process for pulling off a dramatic eye look that actually lasts.
What Is Smokey Eye Makeup

Smokey eye is a blended eye makeup technique that creates a gradient of dark-to-light shadow around the eye, with diffused edges rather than sharp lines.
The name comes from the visual effect itself: shadow that looks like it has been smudged, softened, and layered to create depth. It is not a single look but a technique with dozens of variations.
| Version | Color Range | Occasion |
|---|---|---|
| Classic black smokey | Charcoal, black, gray | Evening, events |
| Brown smokey | Taupe, warm brown, nude | Everyday, daytime |
| Colored smokey | Navy, burgundy, plum | Creative, editorial |
| Soft smokey | Mauve, dusty rose, champagne | Office, casual |
Key distinction: a true smokey eye has no harsh edges. If you can see a clear line where the shadow starts or stops, it needs more blending.
According to Statista (2024), the smokey eye was the top makeup trend on TikTok in 2024, collecting over one million mentions. That number reflects more than a passing moment — the look has been part of professional eye makeup looks since the 1990s grunge era and has not left since.
Tools and Products Needed for a Smokey Eye

Getting the right products before you start makes a real difference. You can technically do a smokey eye with one dark shadow and your finger, but the result will not look the same.
The non-negotiables:
- Eye primer (any skin-toned or translucent formula)
- Eyeshadow palette with at least three shades: light, medium, dark
- Flat shader brush for packing pigment
- Fluffy blending brush for diffusing edges
- Small pencil brush for detail work and the lower lash line
- Kohl pencil or gel liner
- Setting spray
Recommended Eye Shadow Palettes for Smokey Eyes
The global eyeshadow market was valued at USD 3.32 billion in 2024 (Maximize Market Research), and there is no shortage of options at every price point.
What to look for in a palette:
- At least one true matte black or deep brown
- A medium transition shade (taupe, medium brown, or warm gray)
- A highlight shade (champagne, vanilla, or soft pink)
- Matte and shimmer options in the same palette
Drugstore picks that work: NYX Professional Makeup has a strong range of blendable shadows at accessible price points. Urban Decay’s original Naked Palette remains a reliable choice for a nude-to-dark gradient.
Higher-end options: Charlotte Tilbury palettes are formulated specifically for blendability. Pat McGrath Labs eyeshadows have intense pigment payoff, which means you need less product to build depth.
Cream shadows are worth mentioning here too. They are easier for beginners because the formula blends with body heat, which is more forgiving than powder on a dry lid.
How To Prep Your Eyes Before Applying Smokey Eye Makeup
Skipping prep is the single most common reason a smokey eye creases, fades, or looks patchy by midday.
Eye primer: Apply a thin layer over the entire lid, from lash line to brow bone. Let it set for 30-60 seconds before touching it. Urban Decay Eyeshadow Primer Potion is one of the most tested options for long-wear results.
Concealer as a base: If you don’t have eye primer, a thin layer of concealer (then set with translucent powder) works in a pinch. It evens out lid discoloration and gives pigment something to hold onto.
Setting the base: Apply a neutral, skin-toned shadow over the primed lid. This step is easy to skip but it makes blending the actual look significantly easier because it creates an even canvas.
A primer can extend eyeshadow wear by up to 12 hours according to product testing data cited by multiple beauty editors. For a dramatic look with dark pigment, that wear difference is noticeable.
Why oily lids need extra attention: The thin skin of the eyelid produces oil throughout the day. Without primer, even high-quality shadows will crease. Powder-setting the base before applying color adds another barrier.
Step-by-Step Smokey Eye Application
The sequence matters here. Most people apply shadow in the wrong order, which leads to muddy color and overworked blending.
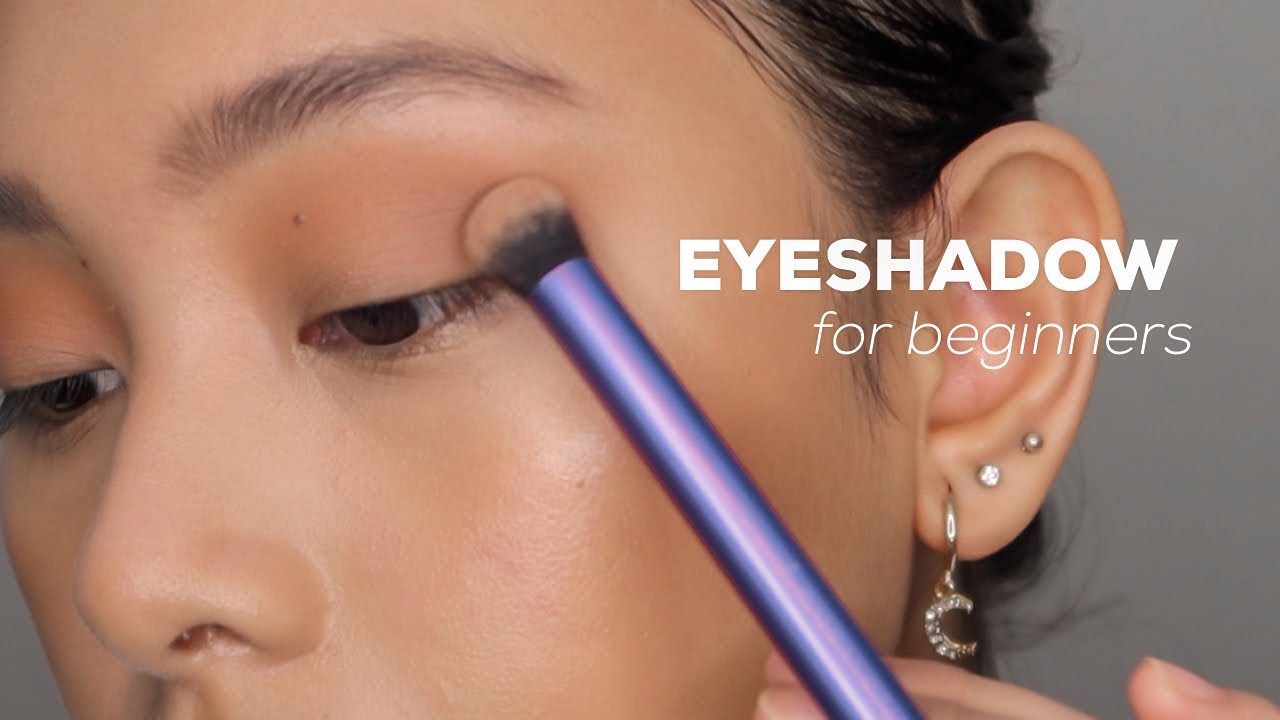
Step 1: With a flat shader brush, pack your darkest shade onto the outer third of the lid. Press the brush rather than sweeping it — pressing gives more pigment payoff with less fallout.
Step 2: Load a fluffy blending brush with your medium shade. Using windshield-wiper motions, blend it into the crease and outward over the dark shadow edge. This step takes longer than people expect.
Step 3: Apply the lightest shade to the inner corner and directly under the brow bone. These two placements open the eye significantly.
Step 4: Line the upper and lower lash line with kohl or gel liner. For a smokey effect, this liner should not be sharp or precise — smudging it slightly is the point.
Step 5: Use a small pencil brush to blend the liner into the shadow on the lower lash line, creating a continuous dark gradient from upper to lower lid.
Apply mascara last. Two coats minimum for this look.
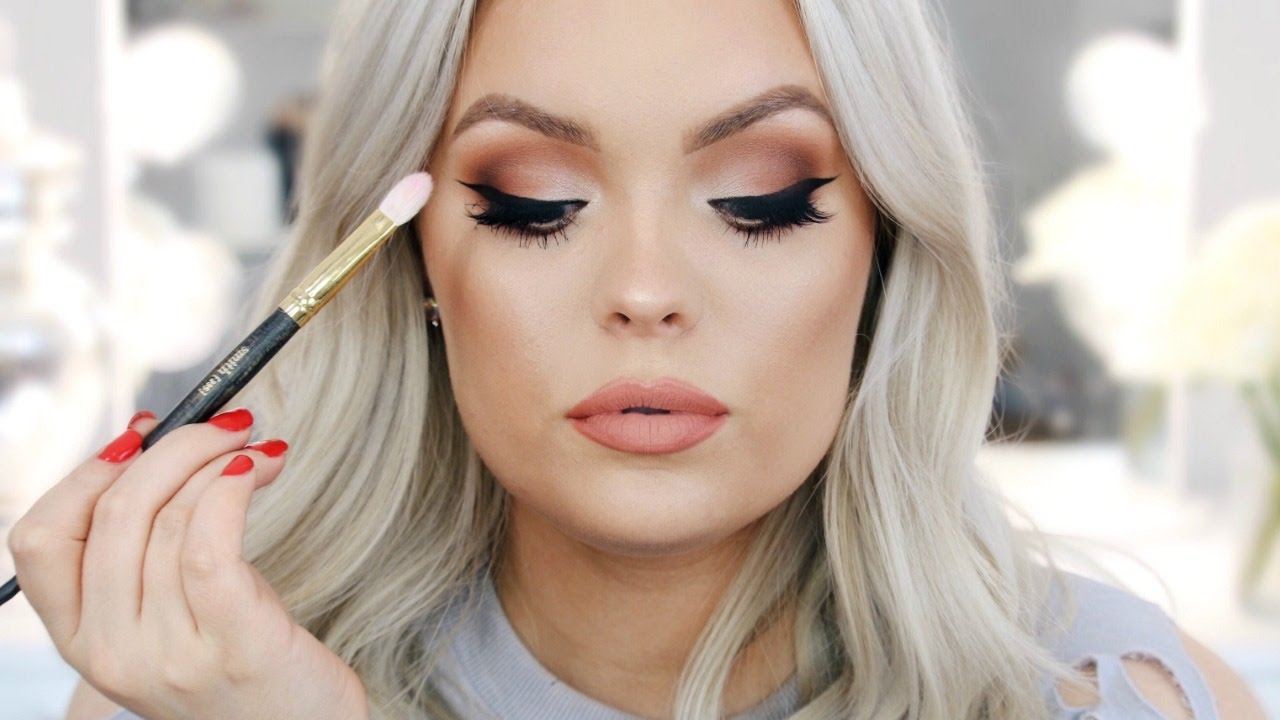
How To Blend a Smokey Eye Properly
Blending is what separates a smokey eye from just dark eye shadow. Most people under-blend.
Windshield-wiper vs. circular motion: Use windshield-wiper motions in the crease for building the transition. Circular motions work when softening the outer edge of the darkest color. Both motions have a place.
Common mistake: Over-blending until the dark shadow loses all intensity. The goal is soft edges, not a faded look. Stop blending when edges are diffused, not when the pigment disappears.
How to know when you’re done: Step back. If you can see a defined line anywhere, blend that specific edge. If the shadow fades gradually from dark to light with no sharp stops, you’re finished.
How To Do a Smokey Eye on Hooded Eyes
Hooded eyes have a skin fold that covers part or all of the crease when the eye is open.
The fix: Apply shadow slightly higher than where the crease sits on a relaxed lid. When the eye opens, the fold brings the shadow down to the right visible position.
What to avoid: Heavy shadow on the mobile lid when eyes are closed often disappears entirely when eyes open on hooded lids. Build most of the color above the hood.
Dark liner on the waterline can make hooded eyes look smaller. Use it on the lower waterline only, or skip it entirely in favor of the lower lash line alone.
Eyeliner Techniques for a Smokey Eye

Liner placement for a smokey eye is different from a standard liner application. The goal is depth, not definition.
Tight-lining the upper waterline: Running a kohl pencil along the inner rim of the upper lid fills in the space between lashes and creates the illusion of a fuller, darker lash line. This step alone adds significant intensity without looking overdone.
Smoking out the lower lash line: Apply pencil liner along the lower lash line, then immediately use a small brush or cotton swab to smudge it upward. Blend it into any shadow already sitting on the lower lid.
| Liner Type | Best For | Smudge Factor |
|---|---|---|
| Kohl pencil | Waterline, lower lash line | Easy to smudge |
| Gel liner | Precise upper lash line | Moderate |
| Liquid liner | Sharp wing (not typical for smokey) | Does not smudge |
| Eyeshadow as liner | Smoked-out lower lash line | Very easy to blend |
Timing: Apply liner after your shadow is blended, not before. Liner applied first gets covered and smudged during blending. Applying it last gives you control over placement and intensity.
One thing worth noting: if your liner smudges onto your undereye during wear, switch to a formula with more staying power. Smashbox and MAC both make gel liners that hold in the waterline through long wear.
How To Adjust a Smokey Eye for Different Eye Shapes
Eye shape affects where shadow should be placed, not how dark it should be.
Almond eyes are the most forgiving shape. Standard smokey eye placement works well. The outer corner V-shape and crease blending create natural-looking depth without modification.
Round eyes benefit from elongation. Concentrate the darkest shadow on the outer corner and blend it outward and slightly upward. Avoid ringing the entire eye with dark color, which emphasizes the roundness.
Monolid eyes have no visible crease, so crease-focused blending is pointless. Build shadow directly on the lid surface instead, starting light at the inner corner and building darker toward the outer edge.
Deep-set eyes already have natural shadow in the crease from bone structure. Heavy crease application doubles down on that depth and can make eyes look smaller. Keep the crease lighter, and focus color on the lid and outer corner instead.
For a detailed breakdown of doing eye makeup for hooded eyes specifically, placement adjustments go further than what applies to the smokey eye alone.
A note on eye makeup for older women: heavier shadow in the crease can exaggerate the appearance of fine lines. A soft, blended smokey in lighter tones — taupe, rose gold, soft brown — gives drama without settling into texture.
Classic Black Smokey Eye vs. Brown Smokey Eye
These two are the most used smokey eye variations, and they are not interchangeable. The color choice changes the tools, the skin tone suitability, and how much blending work is actually involved.
| Feature | Black Smokey | Brown Smokey |
|---|---|---|
| Pigment intensity | High, builds quickly | Lower, more forgiving |
| Best for | Evening, events, deep skin | Everyday, warm skin tones |
| Common palette brands | Urban Decay, NARS, MAC | Charlotte Tilbury, Too Faced |
| Blending difficulty | Less forgiving | Easier to control |
Black smokey eye uses charcoal, true black, and gray. The contrast between dark pigment and skin creates intensity fast, which means mistakes show up faster too. Cool-toned blacks suit fair and olive skin well. On deeper skin tones, the effect is especially striking.
Brown smokey eye uses taupe, warm brown, and nude. Blending is more forgiving because the pigment buildup is gradual.
The 2025 trend shift is worth knowing: Cosmetics Business reported that eye makeup’s share of total makeup sales has dropped from 23% in 2021 to 18%, but is expected to rebound as softer, blended looks gain ground again. The brown smokey sits right in that recovery lane.
Victoria Beckham Beauty’s Smoky Eye Brick palette (four coordinating shades in a warm brown range) was specifically designed for building a soft everyday smoky, which is a clear signal that the market is moving toward more wearable, less dramatic blended eye looks.
For more ideas on what the finished look can become, smokey eye makeup looks cover a wide range of color interpretations worth looking through before you commit to one direction.
Common Smokey Eye Mistakes and How To Fix Them

Most smokey eye mistakes are fixable mid-application. A few of them just require knowing what you’re looking at.
Eyeshadow fallout under the eyes is the most frequent complaint. Fallout happens when you sweep (rather than press) dark shadow onto the lid. The fix: always tap off excess product from your brush first. Do eye makeup before foundation, so any fallout can be cleaned up without ruining your base.
Over-blended, faded shadow is the opposite problem. You blend so long that all pigment intensity disappears.
Stop blending when edges are diffused. If color fades too much, repack pigment with a flat shader brush in the outer corner, then blend only the perimeter, not the center of the color.
Liner that refuses to smudge: most gel liners set quickly and resist smudging after 60 seconds. For a smokey effect, smudge liner immediately after application. If it sets before you blend it, dampen a small brush with micellar water and soften the edge.
Shadow too dark to recover: dip a cotton swab in micellar water and lightly press onto the darkest areas. This lifts pigment without spreading it. Follow with a neutral shimmer to blend the corrected area back in.
Harsh lower lash line: a common issue is applying liner or dark shadow too heavily under the eye, which pulls the eye down. Keep lower lash line color lighter than the upper lid application.
MAC Cosmetics, whose makeup artists work with dark eye techniques across every skin tone, advise building shadow in thin layers rather than applying full intensity in one pass. The layered approach makes correcting the color significantly easier at any stage.
How To Make a Smokey Eye Last All Day or Night

Longevity for a smokey eye comes down to layering products in the right sequence, not just choosing waterproof formulas.
The sequence that actually works:
- Eye primer on clean, dry lids
- Skin-toned shadow to set the primer
- Shadow applied in layers, not all at once
- Liner after shadow, not before
- Translucent powder pressed over liner to lock it
- Setting spray as the final step
Setting spray distance matters. Hold the bottle 6 to 8 inches from your face. Closer than that delivers too much product and can cause shadow to shift. Matte setting sprays work better for smokey eyes because they reduce the shine that heavy dark pigment can create.
A 2024 study published in the Journal of Cosmetic Dermatology found that foundation altered sebum levels during just 20 minutes of activity, confirming that oil is the primary reason eye makeup breaks down during wear.
Two formulas worth knowing about:
- Powder shadows hold better over long wear than cream when properly set with primer
- Cream shadows blend easier but need powder set on top to prevent creasing after 4 hours
For a full approach to making makeup last all day, the same layering and setting principles apply to the rest of the face, not just the eyes.
Touch-up kit for a night out: a small flat brush, a matching dark shadow, and a travel setting spray. That is all you need to refresh the look between applications.
How To Remove Smokey Eye Makeup Without Damaging the Eye Area
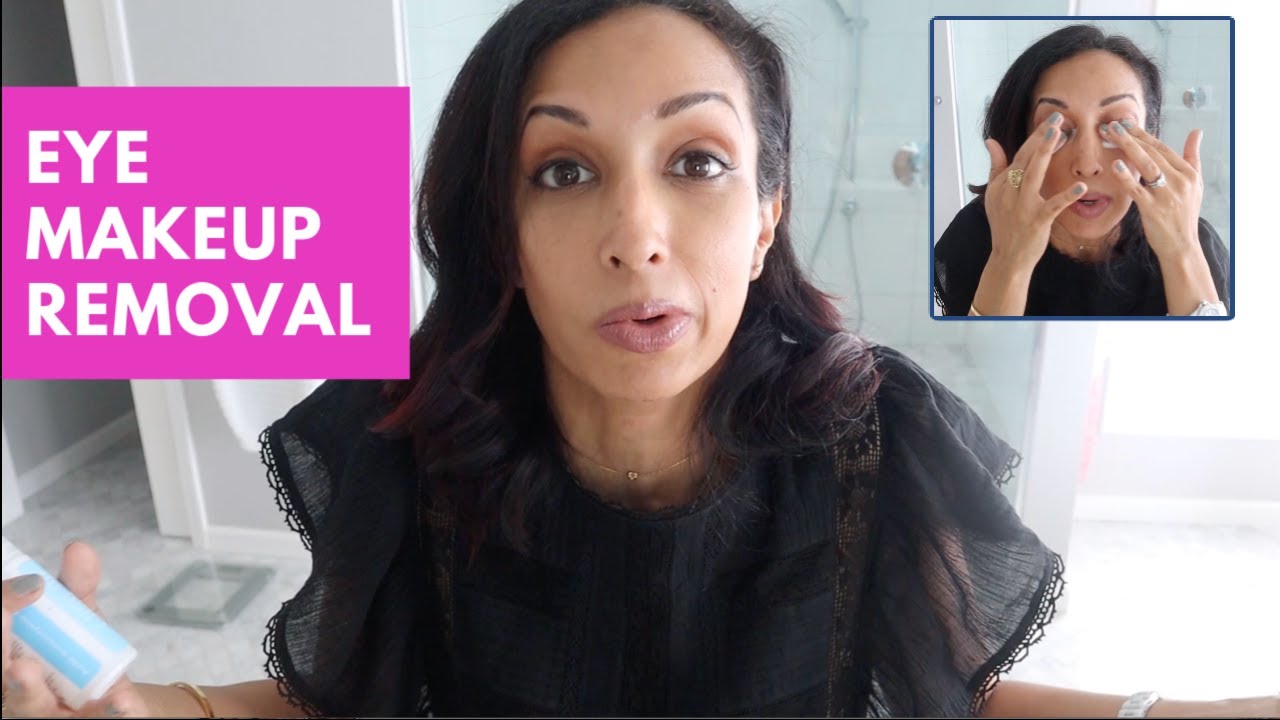
Heavy pigment, kohl on the waterline, and layered liner need a specific removal approach. Rubbing is the main thing to avoid.
Oil-based remover vs. micellar water:
- Oil-based removers (cleansing oils, cleansing balms) break down waterproof and long-wear formulas most effectively. Apply to dry skin, massage gently, then emulsify with water.
- Micellar water is gentler and works on standard formulas. Soak a cotton pad, press it on the closed eye for several seconds, then wipe outward without rubbing.
For dark pigment that transfers with one wipe, always hold the cotton pad on the eye first. The soak-and-press technique lifts more product than wiping immediately.
According to dermatologist Dr. Mona Gohara, the correct method is to “soak a cotton pad with the remover and pat over the product,” swiping softly without excessive rubbing. Pulling the eye area repeatedly causes lash loss over time.
Removing waterline kohl: fold a cotton swab, soak it in micellar water or eye-safe oil remover, and run it gently along the inner waterline. Do not use dry cotton directly on the waterline.
Post-removal skincare is often skipped but matters. The eye area is the thinnest skin on the face. A lightweight eye cream or plain facial oil after removal reduces the dryness that pigment-heavy shadows leave behind.
For the full eye makeup removal process covering all product types, that covers everything from waterproof mascara to glitter shadow.
If you want to explore more dramatic makeup looks that use similar blended shadow techniques, the smokey eye application principles transfer directly to those as well.
FAQ on How To Do Smokey Eye Makeup
What do I need to do a smokey eye?
You need an eyeshadow primer, a palette with at least three shades (dark, mid-tone, highlight), kohl or gel eyeliner, a fluffy blending brush, a flat shader brush, and mascara. That covers the full technique from base to finish.
Do I need eyeshadow primer for a smokey eye?
Yes. Dark pigments make creasing far more visible than neutral shades. Without primer, the blended gradient breaks down within a few hours. Urban Decay Primer Potion and NARS Pro-Prime are reliable options used by professional makeup artists.
What order do I apply a smokey eye?
Prime first, then pack the dark shade on the outer V, blend the mid-tone into the crease, add highlight to the inner corner and brow bone, line the waterline, and finish with mascara. Always do eye makeup before foundation.
How do I blend eyeshadow without it looking muddy?
Use a clean, dry fluffy brush and work in side-to-side windshield-wiper motions. Build color in thin layers instead of applying it all at once. Stop blending the moment edges look soft – over-blending flattens the gradient completely.
Can beginners do a smokey eye?
Yes. Start with a cream eyeshadow stick rather than powder. Place it along the lash line and outer corner, then buff the edges with a fluffy brush. Matte formulas are more forgiving than shimmer and won’t crease as easily.
What colors work for a smokey eye besides black?
Brown, navy, plum, copper, and deep green all work well. A brown smokey eye is more wearable for daytime. Navy and burgundy suit evening looks. The color choice matters less than the blending technique applied to it.
How do I do a smokey eye for hooded eyes?
Place shadow above the natural crease, not on the lid, since the hood covers the lid when eyes are open. Keep the lower lash line light. Work with your eyes open so you can see exactly where the shadow shows.
How do I make a smokey eye last all day?
Start with eyeshadow primer, layer powder shadow over a cream or kohl base, and finish with a setting spray. Avoid touching or rubbing the eye area. A powder shadow pressed on top of kohl liner adds serious staying power.
What lipstick goes with a smokey eye?
Nude, soft pink, or a sheer gloss keeps the face balanced. Bold lips and a full smokey eye compete for attention – unless that contrast is intentional. Check out the best eye makeup pairings for red lipstick if you want to push both.
How do I fix eyeshadow fallout under the eyes?
Do eye makeup before foundation so fallout lands on bare skin. Sweep it away with a dry brush or a clean cotton pad. If foundation is already on, use a small concealer brush to cover the fallout without disturbing the rest of your base.
Conclusion
This conclusion is for an article presenting how to do smokey eye makeup – and the core takeaway is straightforward: the technique is learnable by anyone willing to practice the eyeshadow blending steps in the right order.
Primer, brush selection, and placement make the biggest difference. Get those three right and the rest follows.
From adjusting placement for hooded or monolid eyes to switching from classic black to a brown smokey eye or deep plum, the variations are endless once the foundation is solid.
Pick up a kohl liner, a fluffy blending brush, and start with one palette. The smudged, dramatic eye look you’ve been after is closer than you think.

- What Is Skin Tint and Why Everyone Is Obsessed - July 11, 2026
- What Is Foundation and How Do You Choose One? - July 6, 2026
- How to Make Blush Last Longer - July 3, 2026


