

Most eye makeup tutorials weren’t written for you. They assume smooth lids, a visible crease, and lashes that actually show up.
Learning how to do eye makeup for older women means working with hooded lids, crepey texture, thinning lashes, and sparse brows, not pretending they aren’t there.
The techniques that worked at 30 don’t always translate to mature skin. Product texture, placement, and application order all shift once the skin structure changes.
This guide covers everything: primer and base prep, eyeshadow placement on aging eyes, eyeliner technique, mascara for fine lashes, brow filling, and a step-by-step routine you can actually use daily.
What Eye Makeup for Older Women Actually Means
Eye makeup for older women means working with the eye area as it actually is now, not as it was 20 years ago. Hooded lids, crepey skin, sparse lashes, thinning brows, and under-eye hollowing are the real variables to address. The goal shifts from dramatic transformation to enhancing what’s already there.
Most standard makeup tutorials assume a smooth lid, a visible crease, and dense lashes. That’s not the reality for most women over 50. Techniques that worked at 25 physically fail on aging skin, not because the person is doing something wrong, but because the skin structure has changed.
As award-winning makeup artist Natalie Setareh put it, entering your 50s gives you “the privilege to use makeup in ways to achieve whatever it is you want.” That shift in framing matters. This isn’t about covering up. It’s about understanding what your eyes look like now and choosing techniques that actually work for them.
What changes and why:
- Lid hooding: skin folds over the natural crease, reducing visible lid space
- Crepey texture: fine surface lines grip powder differently and emphasize fallout
- Thinning lash line: mascara clings to fewer lashes, increasing clumping risk
- Brow thinning: outer brow tails often disappear first, changing the eye’s framing
- Under-eye hollowing: volume loss creates shadows that read as dark circles
Understanding these changes isn’t depressing. It’s just practical. Once you know what you’re working with, the technique adjustments are actually pretty simple.
How Skin Changes Around the Eyes After 50

Collagen declines at roughly 1 to 1.5% per year from your mid-20s onward, according to research published in npj Aging. By the time you hit 50, you may have lost 25% or more of total skin collagen. Women experience an even sharper drop during menopause, losing up to 30% of skin collagen in just five years.
Around the eyes, this plays out in specific, visible ways.
Lid hooding is one of the most common changes. As skin loses elasticity, it droops over the natural crease. When the eye is open, the visible lid space shrinks or disappears. Eyeshadow placed in the crease simply doesn’t show up.
Crepey texture on the lid changes how powder products behave. Instead of sitting smoothly, powder grabs at the surface irregularities. This makes blending harder and fallout more common.
Lash thinning happens because hair follicles slow production with age. Most women over 50 have shorter, finer lashes with visible gaps, especially toward the outer corners.
According to a 2023 review in Skin Aging and Type I Collagen, the decline of type I collagen is a central contributor to dermal thinning, loss of elasticity, and sagging. These findings explain why skin around the eye area, which is thinner than the rest of the face to begin with, changes more visibly than other areas.
| Change | What Causes It | Makeup Impact |
|---|---|---|
| Lid hooding | Collagen and elastin loss | Shadow placement must move higher |
| Crepey lid texture | Reduced skin density | Powder grabs unevenly |
| Thinning lashes | Follicle slowdown with age | Mascara clumps on fewer hairs |
| Under-eye hollowing | Volume and fat pad loss | Dark circles deepen; concealer needed |
| Sparse brows | Hormonal shifts, hair thinning | Eye area loses framing and lift |
Knowing the cause makes the fix obvious. Eyeshadow placement, product texture choices, and liner technique all shift once you understand what the skin is actually doing.
Eye Primer and Base Prep for Mature Lids

Skip the primer step and almost everything else falls apart. Mature skin around the eye area is drier, crepier, and less firm than it used to be, which means shadow has less to grip and more texture to settle into. A good eye primer creates an even, smooth base that extends wear and keeps color from migrating into fine lines.
Oscar and Emmy-winning makeup artist Linda Dowds explains it clearly: the primary job of a primer on mature eyes is to create a smooth, even surface so that “makeup does not settle unevenly in the more crepey and dry areas of the lid.”
Primer type by skin concern:
- Dry or crepey lids: Look for hyaluronic acid, glycerin, or vitamin E. The Urban Decay Anti-Aging Eyeshadow Primer Potion is specifically formulated for this.
- Oily or combination lids: A mattifying formula like MAC Prep + Prime 24-Hour Extend Eye Base grips product for longer without slipping.
- Budget option: A thin layer of concealer, lightly set with translucent powder, works reasonably well in a pinch.
Application technique matters as much as product choice. Dowds recommends using fingertips rather than a brush, since “the warmth of your fingers seems to soften and work the product in more organically.” Work the primer gently into any crepey areas without overloading the lid. For hooded eyes, lightly lift the skin with one finger while blending with the other to get full coverage. Let it set for 30 to 60 seconds before touching any shadow.
One thing to avoid: heavy or greasy eye cream on the upper lid before makeup. Eye creams are designed for the under-eye area. Applied to the lid, they break down product and cause creasing fast.
Eyeshadow Techniques That Work on Hooded and Mature Eyes
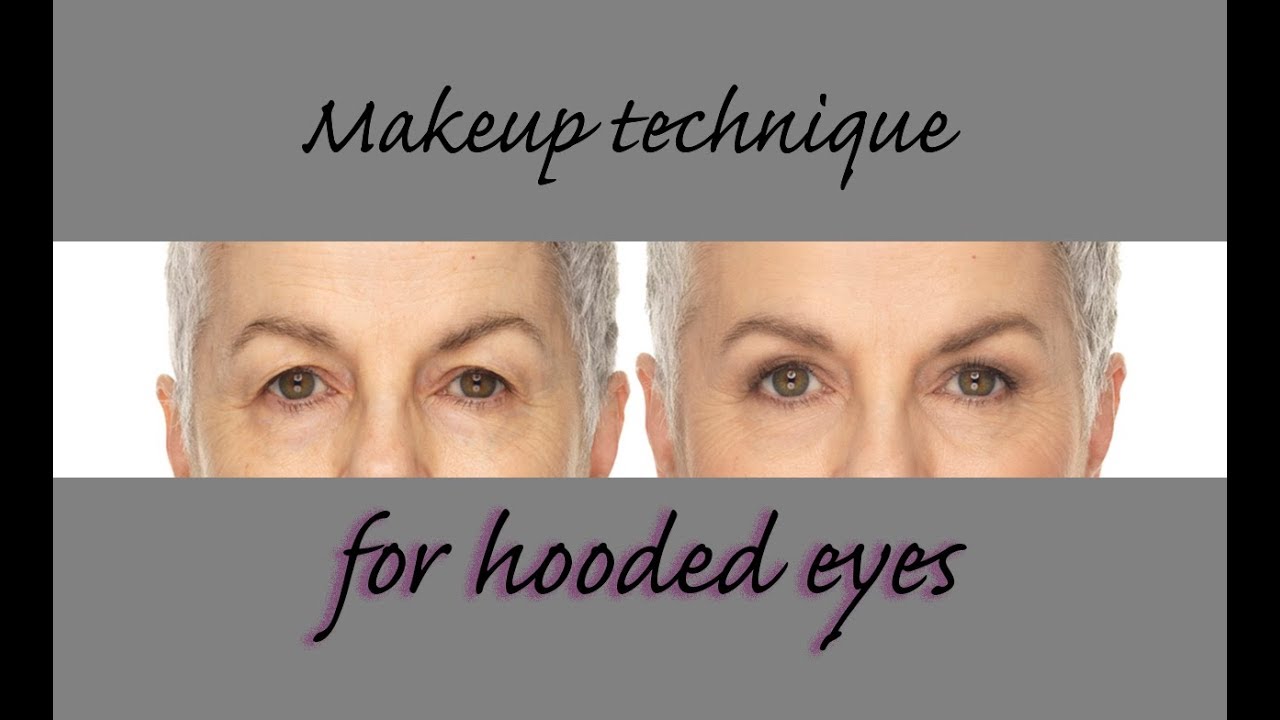
Standard crease placement is useless on hooded lids. When the eye is open, the hood covers the natural crease, so shadow applied there simply disappears. The fix is to apply transition and depth shades above the natural crease, higher toward the brow bone.
Marco Antonio, makeup artist and Chanel Beauty Ambassador, confirms this: apply matte shadow slightly above the natural crease to create the illusion of depth even when the lid is barely visible.
Matte vs. shimmer on mature skin:
- Matte shades add depth and definition without emphasizing texture. Best for the crease area and transition zones.
- Shimmer shades can look beautiful on the inner corner or center of the lid, but on crepey skin, they catch in the surface irregularities and call attention to texture. Use them carefully and sparingly.
- Satin finishes sit right in the middle and tend to be the most forgiving on mature skin overall.
Apply eyeshadow with the eye open whenever possible. Placing shadow with the eye closed looks very different from how it reads when the eye is open. Most technique tutorials show closed-eye placement, which gives a warped picture of where the shadow will actually land once you’re done.
Eyeshadow Colors That Complement Mature Skin Tones
Warm neutrals, soft taupes, and dusty mauves work well across most mature skin tones. They add definition without creating harsh contrast against skin that has less pigment than it once did.
Colors to handle carefully:
- Deep blacks and charcoals: heavy all over, but effective as a tight-line accent
- Frost and glitter: highlight lid texture in unflattering ways
- Very light, icy shades: can wash out the eye area instead of opening it
A useful rule from AARP beauty editors: go a shade warmer or deeper than feels instinctive to counteract any ashiness or fatigue in the skin tone. This applies to eyeshadow in the same way it applies to foundation.
Eyeliner Application for Older Eyes

Heavy liner all the way around the eye is probably the single most aging thing you can do with a pencil. It closes off the eye, makes it look smaller, and emphasizes any drooping at the outer corners. That doesn’t mean skipping liner entirely. It means using it more strategically.
Tight-lining (applying liner between the lashes at the very base of the upper lash line) adds definition without drawing a visible line that can shift or smear. For most mature eyes, this works far better than a full upper lid line.
Liner type comparison:
| Liner Type | Performance on Mature Skin | Best Use |
|---|---|---|
| Pencil | Soft, blendable, forgiving | Tight-lining, smudged looks |
| Gel | Long wear, stays put without migrating | Precise lash line definition |
| Liquid | Most precise but least forgiving on thin skin | Best avoided for most mature eyes |
For the lower lash line, less is almost always more. A full line on the lower lid pulls the eye downward, which emphasizes sagging. A very soft smudge of brown or taupe in the outer third only, or skipping the lower line entirely, keeps the eye looking lifted.
CNN Underscored beauty contributors confirmed this in their makeup-over-50 coverage, noting that a soft pencil eyeliner “tends to be more flattering than harsh liquid liner” and that gel formulas can be smudged and blurred for a less severe line.
For tight-lining technique, the key is working the product into the base of the lashes rather than drawing above them. Done right, it adds density to a thin lash line without any visible liner mark.
Mascara for Sparse or Thinning Lashes

Most women over 50 have fine, short lashes with visible gaps along the lash line, especially toward the outer corners. AARP beauty editors note that the majority of women over 50 have short or thin lashes that benefit from a lightweight plumping formula rather than a heavy lengthening one. Go for volume, not length.
Curling is non-negotiable. A lash curler used before mascara opens the eye dramatically on hooded lids. Technique matters: once lashes are in the curler, turn your wrist away as you squeeze, hold for a few seconds, release, then squeeze again. Never curl after mascara.
Mascara by lash concern:
- Fine, sparse lashes: Lightweight volumizing formula. CoverGirl Simply Ageless Lash Plumping Mascara is specifically designed for this.
- Watery eyes or moist lids: Waterproof formula. L’Oreal Paris Voluminous Waterproof or Maybelline Full ‘N Soft Waterproof both perform well.
- Classic black vs. brown: Emmy-winning makeup artist Donni Davy told Parade in 2025 that brown mascara is “so beautiful and rich for any age.” Lighter skin tones can try a soft brown; deeper skin tones should go darker brown to avoid looking washed out.
Apply mascara with the eye open and look straight ahead or slightly downward. Wiggle the wand at the base of the lashes before pulling upward to deposit product at the root, which is where volume actually builds. One well-applied coat beats two clumpy ones.
The lower lash line: minimal or skip it entirely. A tiny amount of the same mascara on just the outer lower lashes can add some framing without dragging the eye down. Full lower lash mascara on fine lashes usually ends up smudging under the eye within hours anyway.
For anyone struggling with clumpy mascara, the issue is almost always too much product on the wand. Wipe one side of the wand on a tissue before applying. One clean, loaded side is all you need.
Eyebrow Shaping and Filling for Mature Faces
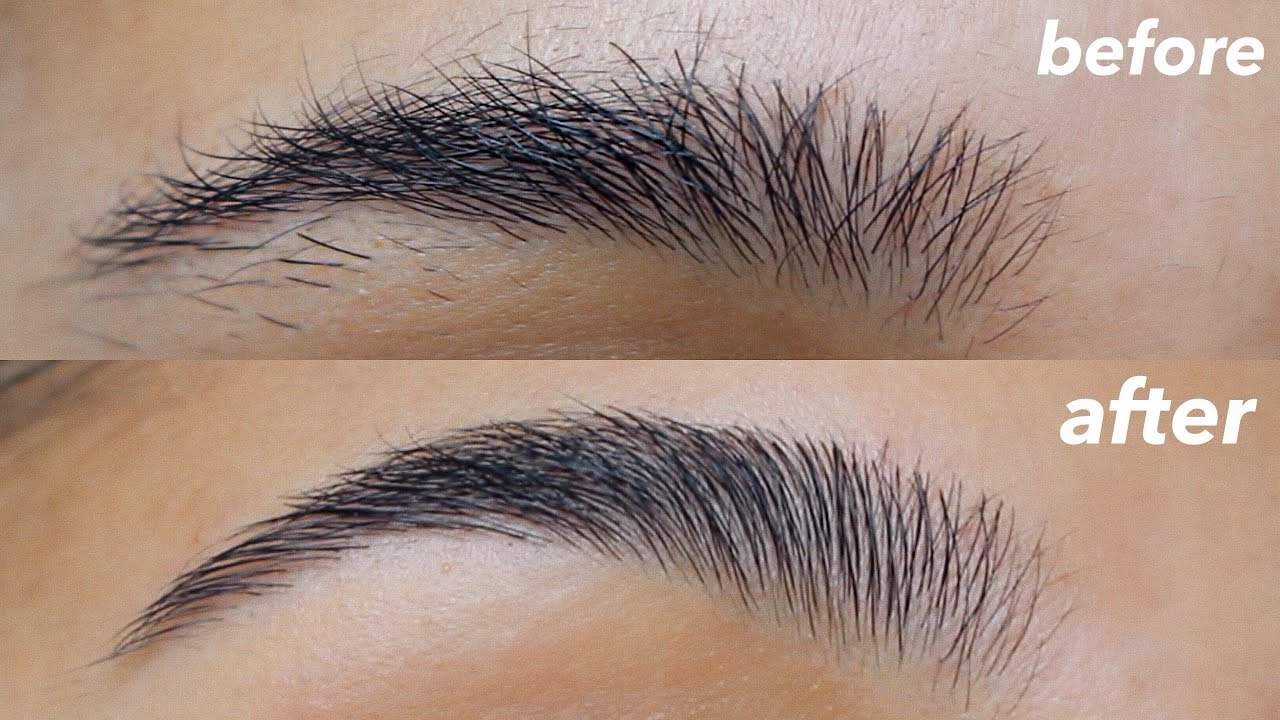
Brows do more structural work on the face than most people realize. As skin loses elasticity, the brows tend to drop slightly, and thinning along the outer tails becomes noticeable. Filling them in changes the entire shape of the eye area, sometimes more dramatically than any eyeshadow technique.
A 2023 BELLAMI ACADEMIE survey found that 70% of respondents said they would feel more confident if their eyebrows looked perfect all the time. That’s a significant number, and it tracks with what you see in practice: sparse, undefined brows flatten the face and remove the lift that frames the eyes.
Filling method by brow situation:
- Sparse but existing hair: A micro brow pencil with hair-like strokes. Celebrity makeup artist Margina Dennis recommends using a shade the same color as or slightly lighter than your hair. Going too dark hardens the face and can actually age the appearance.
- Missing tail or gaps: Brow powder applied with an angled brush for a softer, more natural finish than pencil alone.
- Wiry or unruly hairs: A tinted brow gel like Benefit Gimme Brow or e.l.f. Wow Brow. These lay hairs down, add color, and build the appearance of density quickly.
- Grey or white brows: Taupe shades often work better than standard brown. Eye Embrace specifically makes pencils and powders in seven grey shades for white brow hair.
One reliable placement method from Fabulous50s: use the 3-point technique. Place a pencil from the outer nose edge straight up for the start, angled through the eye center for the arch, and from the nose to the outer eye corner for the tail. Light dots at each point give you a reference before you draw.
Professional Brow Options Worth Considering
The global microblading market was valued at $2.5 billion in 2024, growing at a projected CAGR of 12% through 2028, according to market analysis data. But microblading’s popularity is actually softening, according to celebrity brow specialist Joey Healy, who notes that the healing and fading process tends to disappoint over time.
Brow tinting is the more practical alternative for most women over 50. It makes existing hairs more visible, adds subtle color underneath for density, and lasts 4 to 6 weeks. No damage, no commitment.
Microblading still makes sense when brow hair is almost completely gone. When used correctly, fine hair-stroke technique can create a full brow design from nothing. The key is finding a practitioner who understands mature skin, since thinner skin requires lighter pressure and more careful pigment selection.
Common Mistakes That Age the Eye Area

Most of these are easy to fix once you know what you’re looking for. The tricky part is that many of them come from techniques learned years ago, when the skin was different. The skin has changed. The techniques need to.
| Mistake | Why It Ages | Fix |
|---|---|---|
| Dark liner all around the eye | Closes and pulls the eye down | Upper tight-line only, or skip lower |
| Frost or glitter on the lid | Catches in crepey texture | Satin finish, shimmer on inner corner only |
| Too much under-eye concealer | Settles into lines, looks cakey | Thin layer, lightweight formula, set lightly |
| Skipping eye primer | Shadow creases within hours | Always prime, even for a minimal look |
| Dark, heavy eyeshadow all over | Shrinks hooded eyes, adds heaviness | Depth in the outer corner only |
Makeup artist Katie Moyer, writing about mature skin in 2024, singled out over-applying concealer as one of the most common and aging errors she sees. “The product can gather in lines and emphasize, rather than flatter,” she explains. Less product, applied in thin layers, always reads better on mature skin.
The glitter issue is one people push back on, but it’s worth understanding why it fails. Shimmer on a smooth lid in your 20s reflects light evenly. On crepey texture, it catches in all the surface irregularities and calls attention to them. A small amount of shimmer on the inner corner or the very center of the lid? That still works well. Glitter or frost all over the lid? Not anymore.
Neglecting the brows entirely is also a mistake. As AARP beauty editors note, most women over 50 are missing outer brow tails. A defined tail, even a soft one, lifts the entire eye area. It’s one of the simplest things to do and one of the most commonly skipped.
For a complete look at eye makeup application start to finish, the process is more straightforward than most tutorials suggest when you’re working with the right products and technique order.
Full Eye Makeup Routine for Older Women Step by Step

The order of application matters as much as product choice. Getting the sequence right means less reworking, less fallout on the under-eye area, and better wear overall.
Full routine, start to finish:
- Start with clean, dry lids. No eye cream on the upper lid area.
- Apply eye primer from the lash line to the brow bone. Blend with a fingertip. Wait 30 to 60 seconds.
- Dust a light setting powder over the under-eye area before shadow. This catches any fallout and makes cleanup easy.
- Apply a neutral transition shade above the natural crease, blending upward toward the brow bone.
- Add depth shade to the outer corner and blend inward. Keep it soft.
- Apply lid color (matte or soft satin) with a flat shader brush, pressing rather than sweeping.
- Curl lashes before liner or mascara.
- Tight-line the upper lash line with a pencil or gel liner.
- Apply mascara. Wiggle at the root, pull upward. One careful coat.
- Fill brows using your chosen method. Finish with a brow gel to hold.
- Brush away the under-eye setting powder and apply concealer if needed. Pat, don’t rub.
The under-eye step at the end is intentional. Concealer applied before eyeshadow gets disturbed by fallout. Doing it last means a clean, fresh application every time.
Quick 5-Minute Version
Non-negotiable steps: primer, mascara, brow fill. These three alone do most of the heavy lifting.
For the fast version, skip the multi-step eyeshadow process entirely. Instead, press a single neutral matte shade across the entire lid up to the brow bone. It adds just enough definition without requiring any blending skill.
A cream eyeshadow stick like the IT Cosmetics Superhero Eye Shadow or a simple taupe pencil dragged across the lid works well here. No brushes, no fallout, finished in under 2 minutes on the eyes alone.
One product that genuinely speeds things up: a fiber brow gel. One stroke per brow, shaped while slightly wet. Done.
Product Recommendations by Skin Concern

Makeup artist Suzanne Sabat puts it clearly: “Choose formulas that are lightweight and buildable. Mature skin clients have texture or movement to their skin and anything too heavy can enhance that.” The product list below reflects that principle across every category.
| Concern | Product Type | Strong Options |
|---|---|---|
| Creasing lids | Eye primer | Urban Decay Anti-Aging Primer Potion, MAC Prep + Prime 24HR |
| Sparse lashes | Volumizing mascara | CoverGirl Simply Ageless Lash Plumping, L’Oreal Paris Voluminous Waterproof |
| Liner migration | Gel or pencil liner | Bobbi Brown Long-Wear Cream Eyeliner Stick, NYX Epic Wear Liner |
| Under-eye lines | Lightweight concealer | Kosas Revealer Concealer (hyaluronic acid), Lancôme Teint Idole Serum Concealer |
| Thin brows | Micro pencil or fiber gel | Benefit Gimme Brow, Anastasia Beverly Hills Brow Wiz, e.l.f. Wow Brow |
On eyeshadow palettes, cream formulas consistently outperform powder on mature skin. Today.com’s 2026 updated guide highlights the IT Cosmetics Superhero Eye Shadow Sticks as a top pick for mature skin, noting the vitamin E and synthetic beeswax formula glides on without pulling at crepey texture and holds up to 12 hours.
Budget doesn’t have to mean compromise. The e.l.f. Lock It Down Eyeshadow Primer received a strong review from a mature-skin tester in Marie Claire’s 2024 roundup, who noted it outperformed higher-end formulas for her specifically. Primer performance varies by skin type, not price point.
For anyone dealing with creasing under the eyes, the fix starts before concealer: a thin layer of setting powder applied before eyeshadow protects the under-eye during application, and a lightweight, hydrating concealer patted on at the end keeps the skin from looking heavy or textured.
One final note: applying makeup to look younger on mature skin isn’t about using more product. It’s the opposite. Fewer layers, lighter formulas, and better placement do more than a full face of coverage ever will.
FAQ on How To Do Eye Makeup For Older Women
What is the best eyeshadow for mature skin?
Cream and satin formulas work best on aging skin. They don’t settle into crepey texture the way powder does.
Look for hydrating ingredients like vitamin E. Matte shades add depth without emphasizing fine lines on the lid.
How do you apply eyeliner to hooded eyes?
Tight-lining works better than a full lid line on hooded eyes. Apply pencil or gel liner between the lashes at the base of the upper lash line.
This adds definition without creating a visible mark that disappears under the hood when the eye opens.
Should older women wear eyeshadow?
Yes. Skipping eyeshadow entirely is just as unflattering as wearing too much.
Soft neutrals, taupes, and muted mauves add definition. A single transition shade blended above the crease is enough for an everyday eye makeup routine.
What mascara is best for thinning lashes?
A lightweight volumizing formula outperforms lengthening mascara on fine, sparse lashes. CoverGirl Simply Ageless Lash Plumping Mascara is designed specifically for this.
Always curl lashes before applying mascara. It opens hooded eyes more than any product alone.
How do you stop eyeshadow from creasing on mature skin?
Use an eye primer before any shadow. It grips product and prevents it from settling into fine lines throughout the day.
Avoid rich eye cream on the upper lid before makeup. It breaks down product and causes creasing fast.
How do you fill in sparse eyebrows?
Use a micro brow pencil with light, hair-like strokes. Choose a shade matching or slightly lighter than your hair color.
Brow gel with fibers is faster for everyday wear. Finish with a spoolie to blend and remove excess product.
What eyeliner is most flattering for older eyes?
Soft pencil or gel liner in brown, taupe, or grey reads more flattering than harsh black on mature skin.
Avoid lining the full lower waterline. It pulls the eye downward. A smudged outer corner only keeps the eye lifted.
How do you apply eye makeup for droopy eyes?
Place eyeshadow higher than the natural crease to create the illusion of a lifted lid. Apply depth shade in the outer corner and blend upward, not outward.
Skip heavy lower lash liner entirely.
What eye makeup mistakes age the face?
Frost or glitter eyeshadow on crepey lids, dark liner all the way around the eye, and heavy under-eye concealer are the three most aging moves.
Skipping brow filling is also a common mistake that removes lift from the entire eye area.
How do you do a quick eye makeup look for older women?
Three steps: eye primer, a single neutral matte shade pressed across the lid, and one coat of volumizing mascara.
Fill brows with a fiber brow gel. The whole process takes under five minutes and covers the most impactful steps.
Conclusion
This conclusion is for an article presenting the real adjustments that make eye makeup for older women actually work, from primer selection to brow filling technique.
Crepey lids, sparse lash lines, and thinning brows aren’t obstacles. They’re just variables that call for different products and placement.
Swap powder eyeshadow for cream formulas. Move your transition shade above the natural crease. Tight-line instead of drawing a full lid line. These small shifts add up fast.
The everyday eye makeup routine doesn’t need to be complicated. Three products handled correctly beat ten applied wrong.
Work with what your eyes look like now, and the results will follow.

She started writing on the site after fielding the same questions from clients and friends often enough to just write the answers down: which red won't turn orange on a warm undertone, how to keep lipstick from feathering into fine lines, why a "12-hour" formula rarely survives dinner.
Every review on the site follows the same rule she uses with paying clients: wear it first, then decide if it's worth recommending.
- How to Choose Setting Powder for Your Skin Type - August 1, 2026
- How Long Does Eyeliner Last Before It Expires? - July 28, 2026
- What Is Contour and How Do You Apply It? - July 25, 2026


