Cream bronzer is tricky. Most people either apply too much, put it in the wrong spots, or watch it fade by noon.
The Rare Beauty Warm Wishes Effortless Bronzer Stick fixes a lot of those problems, but only if you know how to use it correctly.
Knowing how to use the Rare Beauty bronzer stick means understanding placement, blending technique, shade matching, and how to make the cream-to-powder formula actually last.
This guide covers all of it, including which tools work best, where to apply bronzer on your face, how to layer it with other products, and how to fix the most common mistakes.
What the Rare Beauty Bronzer Stick Is

The Warm Wishes Effortless Bronzer Stick is a cream bronzer by Rare Beauty, launched in December 2021. It uses a liquid-like cream formula that melts into skin rather than sitting on top of it.
The finish is natural, not shimmery. Think second-skin warmth, not glitter.
Rare Beauty hit $350 million in sales in 2023 (Business of Fashion), and the bronzer stick is one of the brand’s most-talked-about products alongside its iconic liquid blush. That kind of traction doesn’t happen by accident. The formula actually works.
Formula and Finish
Texture: Cream-to-powder. Starts creamy, dries to a soft, natural finish without greasiness.
Formula highlights:
- Water-resistant and non-pore-clogging
- Botanical blend of lotus, gardenia, and white water lily
- Key emollients: Meadowfoam Seed Oil and Sunflower Seed Oil
- Free of parabens, phthalates, mineral oil, and sulfates
- Vegan and cruelty-free
The cream bronzer segment is growing fast. Grand View Research values the global face bronzer market at $20.50 billion in 2024, with cream and liquid formats projected as the fastest-growing category through 2030.
Shade Range and Undertones
The bronzer comes in 8 shades, ranging from light to deep. Options include Happy Sol, Always Sunny, Bright Side, and Power Boost.
| Skin Tone Range | Recommended Shades | Undertone |
|---|---|---|
| Fair to light | Happy Sol, Bright Side | Warm to neutral |
| Light to medium | Always Sunny | Warm golden |
| Medium to tan | Warm Wishes, Power Boost | Deep warm |
| Deep to rich | Full of Life, Extra Warmth | Rich warm brown |
Bright Side is the only shade with cool undertones, making it a good pick for fair skin that leans pink rather than yellow.
How It Differs from Powder Bronzer
Powder bronzer sits on top of skin. Cream bronzer blends into it. That distinction matters a lot for how the finished look reads.
Cream bronzer pros: More natural-looking, better on dry skin, easier to layer under setting powder.
Powder bronzer pros: More precise, longer wear without touch-ups, better for oily skin on its own.
Makeup artist Tomy Rivero specifically recommends cream bronzer for drier skin types, applied with a damp sponge. The Rare Beauty stick works the same way. It also differs from the contour category. Bronzer adds warmth. Contour creates shadow. The Warm Wishes stick is not a contour product.
Tools You Need Before Applying

You don’t need a lot. But the tool you choose changes the result significantly.
Fingers give the most natural, skin-like finish. The warmth of your hands melts the cream formula into skin faster than any brush can. Most makeup artists, including celebrity MA Jenny Patinkin, agree that cream formulas respond best to hands-on application.
Fingers vs. Brush vs. Sponge
| Tool | Finish | Best For |
|---|---|---|
| Fingers | Most natural, skin-fused glow | Everyday wear, bare skin looks |
| Dense brush | More blended, slightly airbrushed | Full coverage base, layering over foundation |
| Damp sponge | Sheer, diffused warmth | Dry skin types, subtle application |
A damp beauty sponge is worth trying if you have dry skin. It picks up just enough product for a sheer wash of color without dragging.
Skin Prep That Matters
Cream formulas behave differently on bare, prepped skin versus dry or unprepped skin. Applying to dry patches makes blending harder and the color uneven.
Minimum prep: Moisturizer, absorbed fully before application. Primer is optional but does extend wear on oily skin.
A makeup primer helps if your skin tends to get shiny by midday. It gives the cream formula something to grip without adding texture. Skip heavy silicone primers though. They can interfere with how the cream blends.
Do You Need Setting Powder First?
No. Applying setting powder before a cream bronzer defeats the purpose.
Powder before cream creates a barrier. The bronzer won’t melt in the way it’s designed to. Save the setting powder for after, once the bronzer is blended. That’s when it locks everything in and adds a touch more staying power.
Where to Apply the Bronzer Stick on Your Face
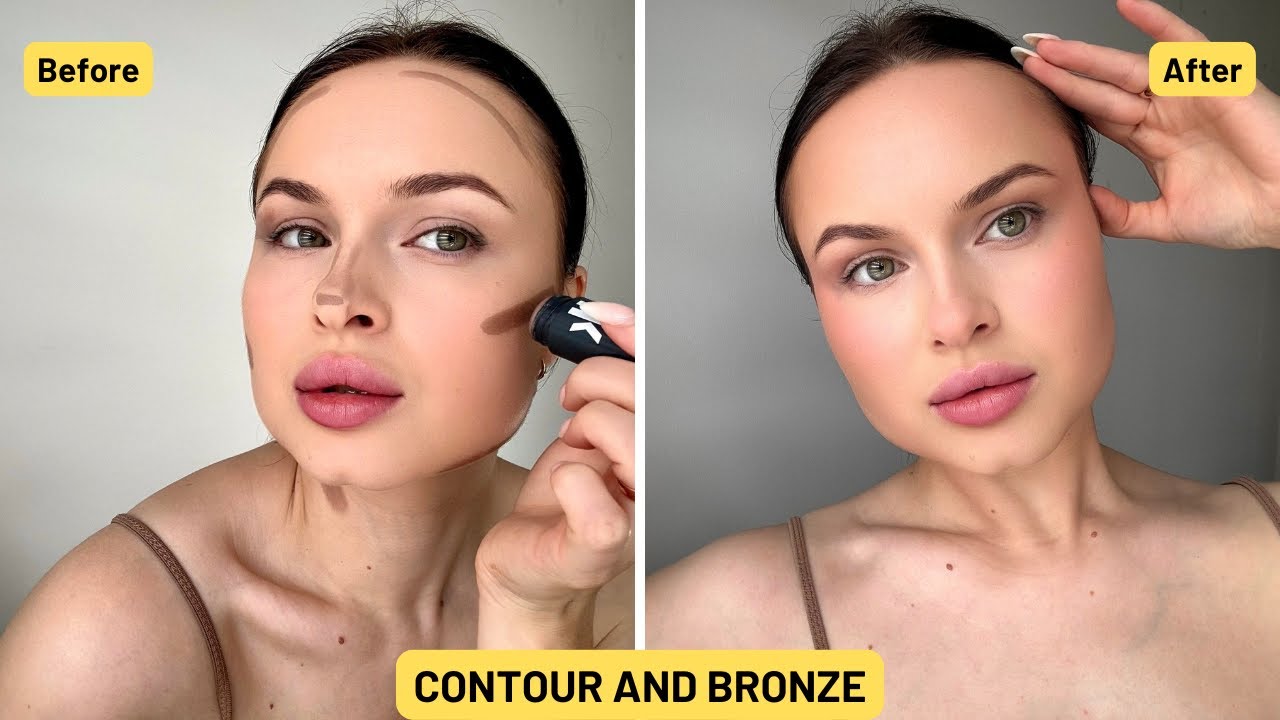
Placement is where most people go wrong. Apply bronzer where the sun would naturally hit your face. That’s the whole framework.
Celebrity makeup artist Ash K. Holm puts it simply: hit the forehead around the hairline, the tops of the cheekbones, and a little along the bridge or sides of the nose. That’s your base. Everything else builds from there.
Primary Application Zones
- Temples and hairline: Sweep along the outer edge of the forehead, not down the center
- Cheekbones: Apply above and along the bone, not on the apples of the cheeks
- Nose bridge and tip: Light touch only. One small swipe. Blend immediately.
- Chin: A dot in the center, blended outward
- Eyelids: The Rare Beauty stick works here as a warm eyeshadow wash
Jawline and Neck
This step gets skipped constantly. And it’s the one that gives away a makeup look in photos.
Blend a small amount along the jawline and just under it. A few taps along the neck keeps the color from looking like it stops at your chin. CNN Underscored makeup expert Ghodstinat recommends subtly applying bronzer to the high points of the neck specifically to keep the color harmonized.
Common Placement Mistakes
Too low on the cheeks: Applying bronzer onto the apples of the cheeks reads more like blush than bronzer. Go higher.
Too centered on the forehead: Center-forehead bronzer can make skin look dirty rather than sun-kissed. Keep it toward the hairline and temples.
Applying over unblended product: Layering before blending creates muddy patches. Apply a small amount, blend fully, then add more if needed.
Lancôme’s bronzer guidance is worth noting here: thin layers built gradually beat heavy application every time. Over-application is harder to fix than under-application.
How to Apply It Step by Step

Twist the stick until a small amount of product is exposed. You need less than you think. Start with one short swipe per zone.
The bronzer application sequence below works whether you’re going minimal or building toward a more defined look.
Applying with Fingers
Step 1: Swipe directly from the stick onto your forehead, cheekbones, and chin.
Step 2: Use your ring or middle finger to press and blend in small circular motions. The warmth from your hand does most of the work.
Step 3: Blend the edges outward, especially at the hairline and jawline. There should be no visible line where the bronzer ends.
This method gives the most natural finish. It’s also the fastest. Took me a while to actually trust fingers over tools, but it’s the right call for this specific formula.
Applying with a Brush or Sponge
Swipe the product directly from the stick onto the back of your hand first. Pick it up with a dense blending brush or damp sponge from there.
Buffing technique: Use circular motions with a kabuki or fan brush for a more diffused, airbrushed finish.
Stippling technique: Press a damp sponge onto the skin rather than dragging. Good for sheerer coverage or dry skin types.
Building coverage is easier with a brush than undoing over-application. Start with light passes and add layers. Once you’ve gone too heavy, you’re blending for twice as long.
How to Layer It with Other Products

The Rare Beauty bronzer fits into almost any routine order. But where you place it changes what the final look does.
Generally: apply makeup layering in this order for the cleanest result. Base products first (foundation, concealer), then cream color (bronzer, blush), then powder to set.
Makeup Routine Order
Option A (foundation-first):
- Moisturizer and primer
- Foundation or tinted moisturizer
- Concealer where needed
- Bronzer stick, blended
- Cream blush if using
- Setting powder to lock it all in
Option B (skin-first, no base): Apply the bronzer directly to prepped, moisturized skin for a natural glow look. No foundation needed. This is where the formula really shines on its own.
Pairing with the Rare Beauty Blush Stick
The bronzer and blush stick from Rare Beauty are designed to work together. Apply bronzer first, blend, then layer the blush on the apples of the cheeks and blend up toward the bronzed cheekbones. The two cream formulas melt together where they meet.
A soft pink or peach blush on top of bronzed cheekbones gives a warm, flushed look that reads very natural. If you’re applying cream blush as well, the same finger or sponge technique works for both.
Adding Powder Bronzer on Top
This is a layering trick worth knowing. Apply the cream bronzer stick first, blend it out, then dust a light layer of matching powder bronzer on top.
The powder sets the cream and intensifies the color without adding a cakey texture. It also significantly improves wear time. For events or long days, this combo is more reliable than cream alone.
If you’re also using translucent powder to set your base, apply it before the powder bronzer, not after. Translucent powder first, then the bronzing powder, seals everything in the right order.
Application by Skin Tone

The Warm Wishes range covers 8 shades, but shade selection alone isn’t the full picture. Technique adjusts by skin tone too.
The bronzer market is growing partly because brands are finally expanding shade ranges. Grand View Research notes that inclusivity and deeper shade options are among the key drivers of market growth through 2030.
Light Skin Tones
Happy Sol and Bright Side are the right starting points here.
Key tip: Use a very light hand. One swipe, blend completely, then decide if you need more. On fair skin, cream bronzer shows quickly. Bright Side is the only cool-toned option in the range, which works better if your skin has pink undertones rather than yellow.
Avoid applying too many zones at once. Forehead and cheekbones first. Add the nose bridge last, if at all.
Medium Skin Tones
Always Sunny and Warm Wishes work well here. Both sit in the medium-warm range without pulling orange.
Medium skin tones handle more product than lighter ones, so buildable coverage is actually useful. Apply one layer, blend, check in daylight, then add a second pass if the warmth isn’t showing enough.
The “3” technique works particularly well on medium skin: sweep the stick in a 3 shape from temple to under the cheekbone to jawline on each side. Blend outward after each pass.
Deep Skin Tones
Shades to reach for: Power Boost, Full of Life, Extra Warmth.
Ashiness is the main concern on deeper skin tones when using bronzer. The Rare Beauty shades in this range are formulated warm, which helps. Still, layering over a good base matters. On deep skin, bronzer applied over dry or unprepped skin can pull ashy or uneven.
A damp sponge blends more evenly than fingers on deeper tones for the first pass. Fingers work well for building warmth in specific zones afterward.
Avoiding ashiness:
- Moisturize thoroughly before application
- Choose shades with warm brown undertones, not orange
- Blend the neck and jawline to keep the color unified
How to Make It Last Longer
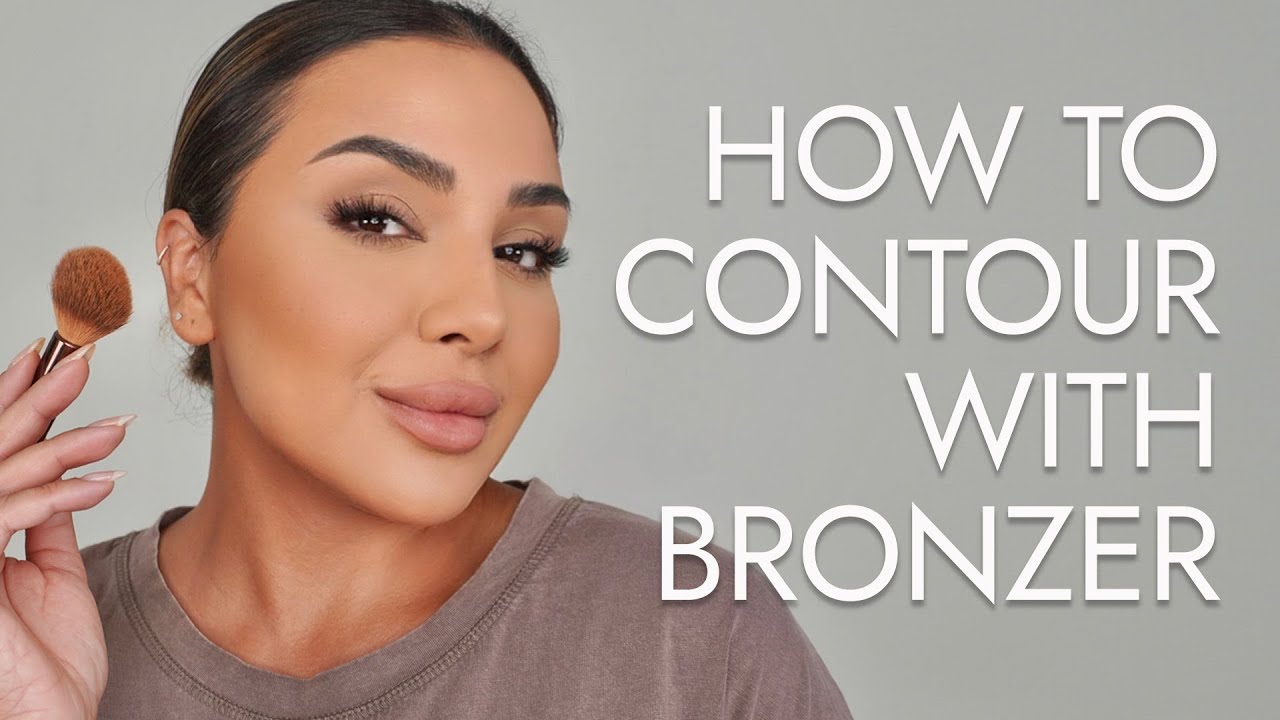
Cream bronzer migrates. That’s just the reality of the formula. On its own, without any setting steps, the Warm Wishes stick will fade faster than a powder bronzer, especially on oily or combination skin.
The fix isn’t complicated. Makeup artist Lovello (via IPSY) puts it clearly: layering both cream and powder bronzer gives the longest wear of any application method.
Setting Cream Bronzer with Powder
The sequence that works:
- Apply and blend the cream bronzer stick fully
- Let it settle for 30 seconds before touching it again
- Dust a matching powder bronzer or translucent powder lightly on top
- Follow with setting spray as a final lock
High-quality setting sprays can extend makeup wear up to 16 hours, according to StansOut Beauty Company research. Budget options typically hold for 8 to 10 hours.
The key to all-day makeup with cream products is working in thin layers. One heavy layer of cream bronzer will always migrate faster than two light layers that have been set between applications.
Primer Tips for Cream Products
Not all primers play well with cream formulas. Heavy silicone-based primers create a slippery surface that makes cream bronzer slide.
Hydrating primer: best for dry skin. Lets the cream formula melt in naturally.
Mattifying primer: better for oily skin. Reduces the slip that causes cream bronzer to move.
Skip primer entirely on normal skin if moisturizer has fully absorbed. The formula grips well on bare, prepped skin.
Touch-Up Strategy Throughout the Day
Carry a small powder bronzer for touch-ups rather than reapplying the cream stick over existing makeup. Pressing cream over set powder mid-day creates pilling and unevenness.
A damp sponge tap-blended over a powder bronzer top-up is the cleaner fix. Keep blotting papers in the bag first. Removing excess oil before any touch-up makes the powder sit cleaner.
How Humidity and Oily Skin Affect Wear
Cream bronzer and oily skin are not natural allies. Vogue Scandinavia’s bronzer testing (2026) noted that most cream formulas slip, migrate, or disappear within hours on oily skin without setting steps.
Oily skin protocol:
- Mattifying primer before foundation
- Light layer of cream bronzer
- Set immediately with powder bronzer
- Matte setting spray as final step
In humid conditions, the same rules apply. The Warm Wishes stick is water-resistant, which helps. But water resistance doesn’t mean sweat-proof or oil-proof.
Common Mistakes and How to Fix Them

Who What Wear spoke to makeup artist Giglio, who identified the three mistakes novices make most: wrong shade selection, applying too much product, and not blending enough. All three show up constantly with cream bronzer sticks specifically.
The good news: every one of them is fixable mid-application.
| Mistake | What It Looks Like | Fix |
|---|---|---|
| Too much product at once | Patchy, heavy warmth in one spot | Blend outward with a damp sponge; avoid adding more |
| Wrong shade or undertone | Orange cast or ashy finish | Layer a more neutral powder on top to correct |
| Placement too low on cheeks | Looks like blush, not bronze | Blend upward toward temples immediately |
| Blending on dry skin | Streaky, uneven patches | Tap with a damp sponge to re-activate and blend |
Applying Too Much Product at Once
One swipe from the stick is usually enough for one zone. Two cheekbones, hairline, and chin combined need no more than four to five short swipes total from the product.
The rule: apply less than you think you need, blend fully, then assess. Adding more takes seconds. Removing over-application takes much longer.
If you’ve gone too heavy, a damp sponge pressed (not dragged) over the area picks up excess product and diffuses the edges cleanly.
Blending onto Dry or Unprepped Skin
Cream bronzer needs moisture in the skin to blend correctly. Applied over dry patches, the formula grabs unevenly and produces streaks that are hard to fix after the fact.
Refinery29 reported that celebrity makeup artist Sir John flagged patchy, muddy bronzer as one of the most commonly googled bronzer complaints. Most of those cases come down to dry, unprepped skin rather than bad product.
Mid-application fix: mist a tiny amount of facial spray or water onto a sponge and tap over the streaky area. The added moisture re-activates the cream formula and lets it blend.
Wrong Placement and How to Redirect It
Bronzer placed too centrally on the forehead or too low on the cheeks looks either dirty or blush-adjacent. Neither reads as a sun-kissed glow.
The correction: using a clean finger or brush, blend the over-placed product upward and outward toward the hairline and temples. Cream formulas stay workable for a minute or two after application, which gives a decent window to adjust placement before setting.
If the color has already set and can’t be moved, a light dusting of foundation or face powder over the misplaced area tones it down without removing everything and starting over.
How to Remove or Tone Down Over-Applied Product
Over-applied cream bronzer that’s already blended isn’t always fixable with more blending. At some point, you need to neutralize rather than move.
Options, in order of gentleness:
- Damp sponge pressed firmly to lift product
- Translucent or light-coverage powder dusted over to mute intensity
- Tinted moisturizer or light foundation patted over the over-bronzed zones
The last option is the nuclear option but it works. Applying a Rare Beauty tinted moisturizer over the area blends the bronzer into it, softening the overall effect without fully stripping the look.
If the color is genuinely too dark and none of the above works, a makeup wipe over just that area and a fresh, lighter application is always faster than chasing a mistake for ten minutes.
FAQ on How To Use Rare Beauty Bronzer Stick
How do you apply the Rare Beauty bronzer stick for beginners?
Twist up a small amount and swipe directly onto your temples, cheekbones, and chin.
Blend immediately with your fingers or a damp sponge using circular motions. Start light. The cream-to-powder formula builds easily, so one pass is enough to start.
Where exactly do you put the Rare Beauty bronzer stick on your face?
Apply it where the sun naturally hits: temples, hairline, tops of cheekbones, nose bridge, and chin.
Avoid the center of the forehead and the apples of the cheeks. Blend a small amount along the jawline and neck so the color looks natural rather than cut off.
Do you apply the bronzer stick before or after foundation?
After. Complete your base (foundation, concealer) first, then apply the bronzer stick on top.
On bare skin days, you can apply it directly over moisturizer for a natural bronzed glow with no base at all. Both approaches work depending on the coverage you want.
Can you use the Rare Beauty bronzer stick on your eyelids?
Yes. The formula is safe for eyelid use and works as a warm eyeshadow wash.
Swipe lightly across the lid and blend with your finger. It gives a sun-kissed, low-effort eye look that pairs well with the rest of the bronzed face.
Which Rare Beauty bronzer stick shade should I choose for my skin tone?
Fair skin works best with Happy Sol or Bright Side. Medium tones suit Always Sunny or Warm Wishes.
For deep skin, reach for Power Boost, Full of Life, or Extra Warmth. Shade matching by undertone matters as much as depth. Bright Side is the only cool-toned option in the range.
How do you make the Rare Beauty bronzer stick last longer?
Set it with a powder bronzer or translucent powder immediately after blending. That step alone significantly extends wear.
On oily skin, use a mattifying primer beforehand and finish with a matte setting spray. Skipping the setting step is the main reason cream bronzer fades by midday.
Can you use fingers to blend the Rare Beauty bronzer stick?
Fingers are actually the best tool for this formula. The warmth of your hands melts the cream into skin faster than any brush.
Use your ring or middle finger and press in small circular motions. A damp sponge works well too, especially on dry skin that needs a sheerer, more diffused finish.
Is the Rare Beauty bronzer stick good for dry skin?
Yes. Cream bronzer is generally better suited to dry skin than powder bronzer, which can look patchy on dry texture.
The Warm Wishes formula contains Meadowfoam Seed Oil and Sunflower Seed Oil, both of which add a layer of moisture during application. Prep with a hydrating moisturizer first for the smoothest blend.
What is the difference between the Rare Beauty bronzer stick and contour stick?
The bronzer stick adds warmth with golden-brown tones. The contour stick is cooler-toned and creates shadow rather than warmth.
Use bronzer on areas where the sun hits. Use contour in the hollows of cheeks, sides of the nose, and under the jawline. They serve different purposes and can be layered together.
Can you use the Rare Beauty bronzer stick with no other makeup on?
Completely. The formula blends directly into moisturized bare skin for a no-makeup, sun-kissed look.
Apply to temples, cheekbones, and the bridge of the nose, then blend well. Pair it with the Rare Beauty blush stick for a full no-foundation face that still looks polished and put-together.
Conclusion
This conclusion is for an article presenting how to use the Rare Beauty bronzer stick, and the takeaway is straightforward: placement, blending technique, and shade matching do most of the work.
The Warm Wishes Effortless Bronzer Stick formula is forgiving once you understand it. Light layers, full blending before adding more, and a setting powder on top will get you a sun-kissed result that holds.
Whether you’re going for a natural no-foundation look or building warmth over a full base, the same rules apply.
Get the bronzer placement zones right, match the shade to your undertone, and adjust your tools to your skin type.
Everything else follows from there.

She started writing on the site after fielding the same questions from clients and friends often enough to just write the answers down: which red won't turn orange on a warm undertone, how to keep lipstick from feathering into fine lines, why a "12-hour" formula rarely survives dinner.
Every review on the site follows the same rule she uses with paying clients: wear it first, then decide if it's worth recommending.
- How to Make Eyeliner Last Longer Without Smudging - August 31, 2026
- How to Make Eyeshadow Last Longer All Day - August 29, 2026
- How to Find Your Undertone in 5 Easy Steps - August 27, 2026