

Most base makeup either covers too much or slides off by noon. The Rare Beauty Positive Light Tinted Moisturizer SPF 20 sits in a different category entirely.
Knowing how to apply Rare Beauty tinted moisturizer correctly is what separates a natural, dewy skin finish from a patchy, over-applied mess. The formula is forgiving, but technique still matters.
This guide covers everything: the right tools, skin prep, step-by-step blending technique, shade matching, buildable coverage, setting, and the mistakes that are easy to avoid once you know what they are.
What Rare Beauty Tinted Moisturizer Is (and What It Actually Does)
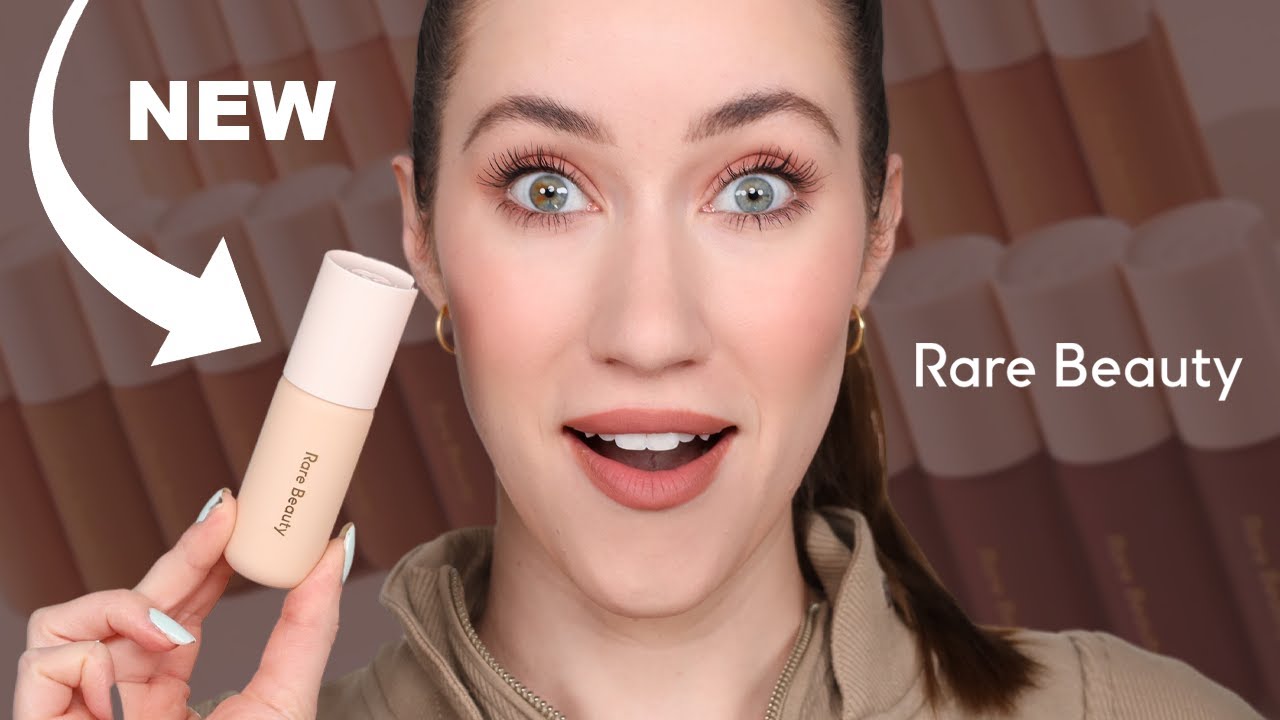
The Positive Light Tinted Moisturizer SPF 20 is a lightweight, buildable-coverage base that sits somewhere between a full skin tint and a traditional tinted moisturizer. It delivers a dewy, naturally radiant finish that blurs without masking. Think complexion evening, not complexion replacement.
The formula contains vitamin E, a botanical blend of lotus, gardenia, and white water lily, plus a hybrid of chemical and physical sun filters (homosalate, titanium dioxide, zinc oxide). That hybrid approach is what keeps deeper shades from going ashy. It’s also noncomedogenic, paraben-free, vegan, and cruelty-free.
Skin Tint vs. Tinted Moisturizer
A lot of people use these terms interchangeably, but there’s a real difference in what you get from each.
| Feature | Tinted Moisturizer | Skin Tint |
|---|---|---|
| Coverage | Light to medium, buildable | Sheer, barely-there |
| Texture | Creamy, slightly thicker, emollient | Watery, serum-like, ultra-light |
| Finish | Dewy, hydrated, softly blurred | Natural, glassy, skin-like |
| Best for | Dry, normal, combination skin | Normal to oily, low-maintenance |
Rare Beauty’s Positive Light lands firmly in tinted moisturizer territory. It has real pigment that evens out redness and blurs pores. In a consumer study cited by Rare Beauty, 94% of users said it evens out skin tone with a natural-looking finish.
Coverage and Finish to Expect
Finish: Dewy, non-sticky, naturally radiant.
Coverage: Light to medium. It covers mild redness and minor texture. It won’t fully hide deeper blemishes or significant hyperpigmentation in one layer, but it builds without getting cakey if you wait between coats.
The global tinted moisturizer market hit USD 2.01 billion in 2024 and is growing at 7.5% annually (Grand View Research). That growth is driven almost entirely by people shifting toward skincare-makeup hybrids for daily wear, exactly what this product is built for.
Who This Works Best For
Dry skin benefits most from this formula. The hydrating base means you can skip or minimize extra moisturizer underneath. Normal and combination skin also work well.
Oily skin can wear it, but expect midday shine. The dewy finish adds glow, which amplifies natural oil. You’ll want a setting step. More on that in section six.
Tools for Applying Rare Beauty Tinted Moisturizer

Your tool directly changes the finish. Same formula, completely different results depending on what you use.
Fingers
Rare Beauty’s own directions say to massage a few drops into skin using your fingertips. That’s genuinely the best method for this formula.
The warmth from your hands melts the texture into skin, and the result looks the most natural. No edges, no streaks. It’s the fastest method too. Clean hands only, obviously.
Result: Dewy, second-skin finish with the lightest possible coverage.
Damp Beauty Sponge
A damp Beautyblender or sponge presses the formula into skin rather than dragging it. The key word is damp, not wet. Wring it out fully before use.
The sponge absorbs a small amount of product, which actually sheers out the formula and reduces the chance of over-applying. It diffuses coverage more evenly than fingers across larger areas like the forehead.
Result: Slightly more airbrushed, still dewy but with better blending on texture.
Foundation Brush
Use a dense, flat brush rather than a fluffy one. A fluffy brush moves product around without blending it in. Rare Beauty recommends their own Liquid Touch Foundation Brush, but a brush like the Sephora Collection #70 also works.
Brush application gives the most coverage and the most control for spot-building. It’s the least natural finish of the three, but still nowhere near foundation-level.
Result: More polished, slightly more coverage, less skin-like.
| Tool | Finish | Coverage Level | Best When |
|---|---|---|---|
| Fingers | Most natural, dewy | Lightest | Quick routine, dry skin |
| Damp sponge | Airbrushed, dewy | Light to medium | Textured skin, even coverage needed |
| Dense brush | Polished, slightly matte | Medium | More coverage, precise application |
How to Prep Your Skin Before Application

Skin prep matters more with a lightweight tinted moisturizer than with full-coverage foundation. A heavy base hides uneven prep. This formula doesn’t.
Moisturizer First
Apply a lightweight gel or cream moisturizer before the tinted moisturizer, not instead of it. The tinted moisturizer adds hydration, but it’s not a substitute for your base moisture step.
Wait a minute or two for it to sink in. Rushing this step causes pilling, where the tinted moisturizer balls up instead of blending. Heavier or overly occlusive creams can also disrupt the formula. Stick with something that absorbs quickly.
SPF Layering
The Positive Light has SPF 20, but that’s not enough to rely on as your only sun protection. To hit the labeled SPF, you’d need roughly a nickel-sized amount of a dedicated sunscreen on your face alone. Most people don’t apply nearly that much tinted moisturizer.
The correct order is: moisturizer, sunscreen, then the tinted moisturizer. Let your sunscreen set for two to three minutes before going in with the base. Skipping this step means your SPF 20 is your only UV protection for the day.
Primer: When to Use It and When to Skip It
Honestly, primer isn’t always necessary with this formula. If your skin is well-moisturized and your tinted moisturizer goes on smooth, you don’t need it.
Where primer actually helps:
- Enlarged pores you want to minimize
- Very oily skin that needs extra grip
- Longer wear in hot or humid conditions
Rare Beauty makes their own Always an Optimist Illuminating Primer, which pairs well with this formula without disrupting the dewy finish. If you use any silicone-based primer, let it fully set before applying the tinted moisturizer or you’ll get pilling.
Dry Patches and Texture
This is where people run into trouble. Dry patches around the nose, mouth, or cheeks will grab the formula and make it look patchy or flaky. Address them before applying.
A quick fix: use a slightly richer moisturizer just on those spots before the rest of your routine. Let it absorb. A gentle exfoliation the night before also helps significantly for chronically dry areas.
Step-by-Step Application Process

The most common mistake is using too much product. Start with three to five drops for your whole face. You can add more; you can’t take it away once it’s on.
Placing and Distributing the Product
Dispense onto the back of your hand first, not directly onto your face. This gives you control over quantity and warms the formula slightly before application.
Dot it onto five points: center forehead, both cheeks, nose, and chin. Then blend outward from each point. Starting from the center and moving outward prevents product buildup at the hairline and jaw.
Key detail: Work in sections rather than trying to blend the whole face at once. The formula moves fast and can dry at the edges before you’ve blended everything through.
Applying With Fingers
Use your middle and ring fingers. Those are your weakest fingers, which means less pressure and a lighter touch by default.
Use gentle patting and pressing motions, not rubbing. Rubbing moves the product sideways instead of pressing it into skin. Around the nose and nostrils, use your pinky or a small brush for detail work.
Blend down the jawline and into the neck. Not doing this is the most obvious sign that someone is wearing base makeup. The line where it stops should be invisible.
Applying With a Sponge
Dampen the sponge, then squeeze out all excess water. It should feel damp, not dripping.
Use a stippling or bouncing motion, pressing the product into skin rather than dragging. Work from the center outward. Pay extra attention to the sides of the nose and around the hairline, areas where product tends to sit unevenly.
The sponge picks up a small amount of excess formula as you work, which actually helps prevent over-application. If you load on too much product and try to sponge it out, you’ll just move it around without blending. Less product, more stippling.
How to Build Coverage With This Formula
The Positive Light is buildable, but only if you respect the drying time between layers. Apply too fast and layers merge into a single heavy coat that looks unnatural and settles into lines.
Layering for More Coverage
Wait between layers. Apply the first layer, let it sit for 30 to 60 seconds, then add a second light layer only where you need it. Full-face layering all at once is what leads to cakeyness.
Most people don’t need a second all-over layer. Focus a second application on areas with redness, mild hyperpigmentation, or uneven skin tone. The center of the face, around the nose, and any blemishes benefit most from targeted layering.
When to Use Concealer Instead
There’s a limit to how much this formula can cover, and that’s fine. For anything that two layers of tinted moisturizer won’t fully address, use the Rare Beauty Positive Light Concealer on top. The concealer is designed to match the same finish and undertone system as the tinted moisturizer, so they layer without clashing.
Apply concealer after the tinted moisturizer has settled, not before. Applying it first means the tinted moisturizer will push it around during blending. Pat the concealer in with a finger or small brush, don’t rub.
Using concealer over a blurred base means you’ll use far less than you would on bare skin. This helps using concealer look more natural and avoids the heavy, layered look.
The Limit of Buildability
The formula starts to look less natural past two layers. You’ll notice it sitting in pores or fine lines. If you need that level of coverage, this isn’t the right product for that day. Pair it with a light-coverage foundation only on targeted areas instead.
Setting the Tinted Moisturizer for Longer Wear
Whether or not you set this formula depends on what finish you’re after and what your skin type is doing.
Setting With Powder
Powder only where you need it. Applying it all over kills the dewy finish that makes this product worth using.
The T-zone (forehead, nose, chin) benefits from a light dusting of loose translucent powder for oil control. Leave the cheeks and high points powder-free. Rare Beauty’s own Always an Optimist Soft Radiance Setting Powder is a good match because it doesn’t shift the formula’s finish dramatically.
Loose powders give a more natural look than pressed powders. The pigment is less concentrated, so the finish is softer.
Setting With Spray

Setting spray is the better option for a fully dewy look. It sets the formula without mattifying anything, and it merges any powder you’ve used into the skin so it doesn’t look powdery.
Hold the bottle about eight inches from your face. Mist two to four times. Let it dry naturally rather than touching your face while it’s wet.
This is especially useful for applying setting spray over the full face as the final step rather than powder, since it locks everything in place while keeping that natural, skin-like texture.
Oily Skin Adjustments
Oily skin needs a slightly different approach with this formula because the dewy finish amplifies natural shine.
- Apply a mattifying primer before the tinted moisturizer
- Use a damp sponge rather than fingers for application
- Set the T-zone with translucent powder
- Keep blotting papers on hand for midday touch-ups rather than adding more product
The formula is still wearable on oily skin. It just needs more intentional setting than dry or normal skin types.
Shade Selection and Blending Into the Skin

Getting the shade right matters more with a tinted moisturizer than with full-coverage foundation. A slightly off foundation shade hides under layers. A tinted moisturizer blends into skin, so the wrong undertone shows clearly.
The inclusive shade foundation market hit USD 3.4 billion in 2024 and is forecast to reach USD 8.2 billion by 2033, growing at a CAGR of 10.2% (Market Intelo). That growth is driven directly by consumers demanding accurate undertone matching, not just depth range coverage.
Understanding the Rare Beauty Shade System
The Positive Light comes in 24 shades. Each shade uses a number for depth and a letter for undertone.
| Letter | Undertone | Best for |
|---|---|---|
| N | Neutral | Mix of warm and cool tones |
| W | Warm | Yellow, golden, peachy skin |
| C | Cool | Pink, red, bluish undertones |
Rare Beauty uses a hybrid of physical and chemical sun filters specifically so deeper shades avoid the white or ashy undercast that titanium dioxide-only formulas create. This is what separates it from most tinted moisturizers in a similar price range.
How to Match Your Shade

Test on your jawline, not your wrist. The jawline sits between your face and neck, making it the most accurate test point for whether a shade disappears into your skin.
Check the swatch in natural light, near a window. In-store lighting, especially warm fluorescent light, skews shades and makes everything look warmer than it is. Wait two to three minutes after swatching. The formula can oxidize slightly on the skin as it dries, so what looks right wet may shift slightly after setting.
If you land between two depths, go for the lighter one. This formula is buildable and sheer enough that a slightly lighter shade reads as natural skin. A shade too dark at this coverage level looks like a mask.
Mixing Shades and Matching Neck to Face
If your exact tone sits between two shades, mix them on the back of your hand before applying. A 70/30 blend usually hits it. Rare Beauty’s sheer base makes custom mixing forgiving.
Always blend the tinted moisturizer down the jaw and slightly onto the neck. A hard stop at the jawline is one of the most visible signs of base makeup, especially on deeper skin tones where sun exposure differences between face and neck are more pronounced. Blending down solves this completely.
Common Application Mistakes
Most problems with this formula come down to three things: too much product, unprepped skin, or stopping blending too soon. All three are easy to fix once you know what to look for.
Too Much Product

Three to five drops covers most faces. Most people use twice that on the first try.
Over-applying is the single biggest cause of cakeyness with this formula. Excess product sits on top of skin instead of blending in, and once it starts to dry, no amount of extra blending will fix it. Less is genuinely more here. Start with less than you think you need, assess after blending, then add more only where coverage is thin.
Unprepped Dry Patches
Dry patches around the nose and chin grab this formula and won’t let go. The result is flaking, uneven color, and visible texture exactly where you’re trying to blur it.
A 2023 study in the Journal of Cosmetic Dermatology found that subjects with visible flaking showed 40% higher transepidermal water loss and 65% lower natural moisturizing factor concentration than matched controls, even when both groups reported normal skin types. The fix isn’t more product. It’s targeted moisturizing on those patches before the rest of your routine, and waiting for full absorption.
Wrong Sponge Dampness
A dry sponge absorbs product instead of blending it. A soaking wet sponge dilutes the formula and sheers it out too much.
Squeeze it out until no water drips when you press it. It should feel damp, not wet. Sponge dampness is one of those things that sounds minor until you realize it explains every streaky, uneven application you’ve had.
Setting With Heavy Powder All Over
Applying powder across the entire face defeats the point of choosing a dewy tinted moisturizer.
- T-zone only: forehead, nose, chin
- Cheeks and high points stay powder-free
- Loose powder over pressed powder for a softer finish
The way you apply setting powder here directly affects whether the dewy base finish survives. Too much powder in the wrong places and the whole look shifts from “your skin but better” to obviously made-up.
Stopping at the Jawline
This one is quick to fix and makes an immediate difference. Blend every single time down the jaw and slightly onto the neck.
Facial coverage should fade gradually, not stop abruptly. Use downward strokes along the jaw. In natural light, a hard edge at the jawline looks like a mask even with light coverage. Even with a sheer formula like this one, an unblended jawline reads clearly in daylight.
Selena Gomez has said in interviews about the Positive Light that she applies it with her fingers in two minutes and blends it into her neck as part of that same step. The blending-down-the-neck habit is worth building from the first application.
For a full primer-to-setting routine that ties everything together, prepping skin before makeup is the step that makes the biggest difference to how this formula performs and lasts throughout the day.
FAQ on How To Apply Rare Beauty Tinted Moisturizer
How much Rare Beauty tinted moisturizer should I use?
Start with three to five drops. That covers most faces. Over-applying is the most common mistake with this formula. Dot it on five points, blend outward, then add more only where coverage looks thin.
Can I apply Rare Beauty tinted moisturizer with my fingers?
Yes, and it’s actually the method Rare Beauty recommends. Finger warmth melts the formula into skin for the most natural, dewy finish. Use your middle and ring fingers with light patting motions, not rubbing.
Do I need a primer before Rare Beauty tinted moisturizer?
Not always. Well-moisturized skin usually doesn’t need one. Primer helps with enlarged pores, oily skin, or longer wear in heat. Rare Beauty’s Always an Optimist Illuminating Primer pairs well without disrupting the dewy finish.
How do I build coverage with Rare Beauty tinted moisturizer?
Apply one layer, wait 30 to 60 seconds, then add a second thin layer only where needed. Full-face layering all at once causes cakeyness. Target areas with redness or uneven tone rather than covering everything again.
Does Rare Beauty tinted moisturizer work on oily skin?
It does, but needs more prep. Use a mattifying primer, apply with a damp sponge, and set the T-zone with translucent powder. The dewy finish amplifies natural shine, so strategic setting is key for oily skin types.
How do I shade match the Rare Beauty tinted moisturizer?
Test on your jawline in natural light. The shade system uses N for neutral, W for warm, and C for cool undertones. Wait two to three minutes after swatching. The formula oxidizes slightly, so check the dry result before deciding.
How do I set Rare Beauty tinted moisturizer without losing the dewy finish?
Use loose translucent powder only on the T-zone. Leave cheeks and high points powder-free. Setting spray over the full face is the better option for a fully dewy look, locking everything in without any mattifying effect.
Why does my Rare Beauty tinted moisturizer look patchy?
Unprepped dry patches are almost always the cause. Apply a targeted moisturizer to flaky areas before your routine and let it fully absorb. Rushing the skin prep step or using too much product also creates patchiness.
Should I blend Rare Beauty tinted moisturizer onto my neck?
Always. Stopping at the jawline creates a visible edge, especially in natural light. Use downward strokes to blend coverage gradually onto the neck. The finish should fade naturally rather than stop at a line.
What tools work best for applying Rare Beauty tinted moisturizer?
Fingers give the most natural finish. A damp makeup sponge gives a more airbrushed, even result. A dense foundation brush adds the most coverage and control. Each tool produces a noticeably different finish from the same formula.
Conclusion
This conclusion is for an article presenting the full process of applying Rare Beauty tinted moisturizer, from skin prep to shade matching to setting for longer wear.
The Positive Light Tinted Moisturizer SPF 20 rewards a light hand and prepped skin. Get those two things right and the buildable coverage, dewy finish, and natural complexion evening follow without effort.
Tool choice shapes the result. Fingers for the most skin-like finish, a damp sponge for even blending, a dense brush when you want more control.
Blend down the jaw every time. Set only the T-zone. And if the formula looks patchy, the fix is almost always in the prep, not the product.
Once the technique clicks, this becomes a two-minute base routine that genuinely looks like your skin.

She started writing on the site after fielding the same questions from clients and friends often enough to just write the answers down: which red won't turn orange on a warm undertone, how to keep lipstick from feathering into fine lines, why a "12-hour" formula rarely survives dinner.
Every review on the site follows the same rule she uses with paying clients: wear it first, then decide if it's worth recommending.
- How to Choose Setting Powder for Your Skin Type - August 1, 2026
- How Long Does Eyeliner Last Before It Expires? - July 28, 2026
- What Is Contour and How Do You Apply It? - July 25, 2026


