

Summarize this article with:
Knowing how to apply Rare Beauty highlighter correctly is what separates a natural, skin-like glow from a product that just sits on top of your face.
The Positive Light Liquid Luminizer is one of Rare Beauty’s best-selling products, but the doe-foot applicator and buildable liquid formula behave differently from a powder highlighter. Placement, blending tools, and layering order all change the result.
This guide covers everything: skin prep, highlight placement by face shape, blending techniques for different finishes, how to layer over or under powder, and which shades suit different skin tones.
What Rare Beauty Highlighter Is

The Positive Light Liquid Luminizer is a liquid-to-powder formula packed with superfine, light-catching pearl particles and a botanical blend of lotus, gardenia, and white waterlily.
It sits in a category of its own. Not a glitter. Not a sheer wash. Something in between: buildable pigment that reads as skin, not product.
The doe-foot applicator is central to how this works. It controls deposit precisely, so you place glow exactly where you want it rather than dusting it across half your face.
The global liquid highlighter market was valued at $1.5 billion in 2023 and is projected to reach $3.1 billion by 2032 (DataIntelo), reflecting how fast this formula category has grown relative to traditional powder options.
Liquid vs. Powder: What Actually Changes
| Feature | Positive Light Liquid Luminizer | Positive Light Silky Touch Powder |
|---|---|---|
| Finish | Dewy, skin-like radiance | Natural sheen with more control |
| Layering | Works under or over base makeup | Best applied over a set, powdered base |
| Best For | Dry to normal skin; glass-skin looks | Oily skin; buildable, long-wearing |
| Applicator | Doe-foot wand | Brush or fingertip application |
The powder version won the Allure Best of Beauty Award three consecutive years (2023, 2024, 2025). Both formats serve different skin types. The liquid format is where most beginners start.
Shade Range and What Each One Actually Does
Enlighten (champagne): works across fair to medium skin as a clean, cool-toned highlight on the brow bone and nose bridge.
Mesmerize (rose bronze): the most versatile. Sits naturally on medium to tan skin and gives cheekbones a warm flush of light rather than a metallic hit.
Flaunt (bronze gold): built for deeper skin tones. Rich and warm. Looks flat on fair skin, dimensional on deeper tones.
Exhilarate (champagne gold): the newest addition. Sits between Enlighten and Mesmerize, warm enough for medium undertones, bright enough for a full glam moment.
Skin Prep Before Applying Rare Beauty Highlighter
Liquid formula highlights texture. That’s the whole point, and also the catch.
If your skin is dry, flaky, or sitting on a rough base, the doe-foot applicator will drag and deposit unevenly. The glow won’t look like skin. It’ll look like product sitting on skin. Different thing entirely.
In 2024, glass skin was the most talked-about beauty trend on TikTok with over 700,000 posts (The Wellness Co.), and proper skin prep was cited as the non-negotiable first step by every professional referenced in the coverage.
What Your Base Needs Before You Touch the Wand
Moisturizer first, always. For dry skin, a richer cream gives the liquid formula something to meld into. For oily skin, a water-based gel moisturizer keeps the base from turning greasy once the luminizer layers on top.
Give your moisturizer time to absorb. Two minutes minimum. Applying the Luminizer onto tacky moisturizer causes pilling. That’s probably the most common mistake people don’t realize they’re making.
- Primer is optional but helpful on oily skin. A pore-minimizing primer under the highlighter zones smooths the surface and extends wear.
- Skip heavy setting powder before the liquid luminizer. It blocks absorption and kills the dewy finish.
- If you use foundation, let it fully set before applying highlighter on top.
Dry Skin vs. Oily Skin: Prep Differences
Dry skin benefits from a hydrating serum before moisturizer. Hyaluronic acid layers well under the Luminizer and adds to the glass skin effect rather than competing with it.
Oily skin needs the opposite approach. A mattifying primer on the T-zone combined with the liquid luminizer only on the high points keeps the finish looking intentional instead of shiny. The texture difference between a matte center and glowing cheekbones actually looks more dimensional than an all-over glow on oily skin.
Where to Place Rare Beauty Highlighter on the Face

Placement determines whether this reads as a natural glow or a full strobing moment. The Luminizer is buildable, so the zones you choose matter more than the amount you apply.
Most makeup artists use the same five placements as a starting point: tops of the cheekbones, brow bone, bridge of the nose, cupid’s bow, and inner corners of the eyes. From there, it comes down to face shape and the look you want.
Placement by Face Shape
| Face Shape | Key Placement Zones | What to Skip |
|---|---|---|
| Oval | Cheekbones, brow bone, Cupid’s bow | None – all areas work well |
| Round | High outer cheekbones, brow bone | Nose bridge (can add width) |
| Square | Center of cheekbones, Cupid’s bow | Jawline and temples |
| Heart | Lower cheekbones, tip of the nose | Broad forehead/high temple placement |
Inner Corner Brightening
This one placement makes the biggest difference for tired or smaller eyes. A single dot of Enlighten or Exhilarate pressed into the inner corner with a fingertip widens the eye and adds lift without touching eyeshadow at all.
The key is less product here than anywhere else on the face. One small dot, pressed in gently. More than that and it migrates into the under-eye and looks unintentional by midday.
Body Placement
The Luminizer works on collarbones and shoulders for event looks. Flaunt and Mesmerize read best on deeper and medium skin tones for body use. Enlighten can wash fair skin out in body placement, so go for Exhilarate as the better option there.
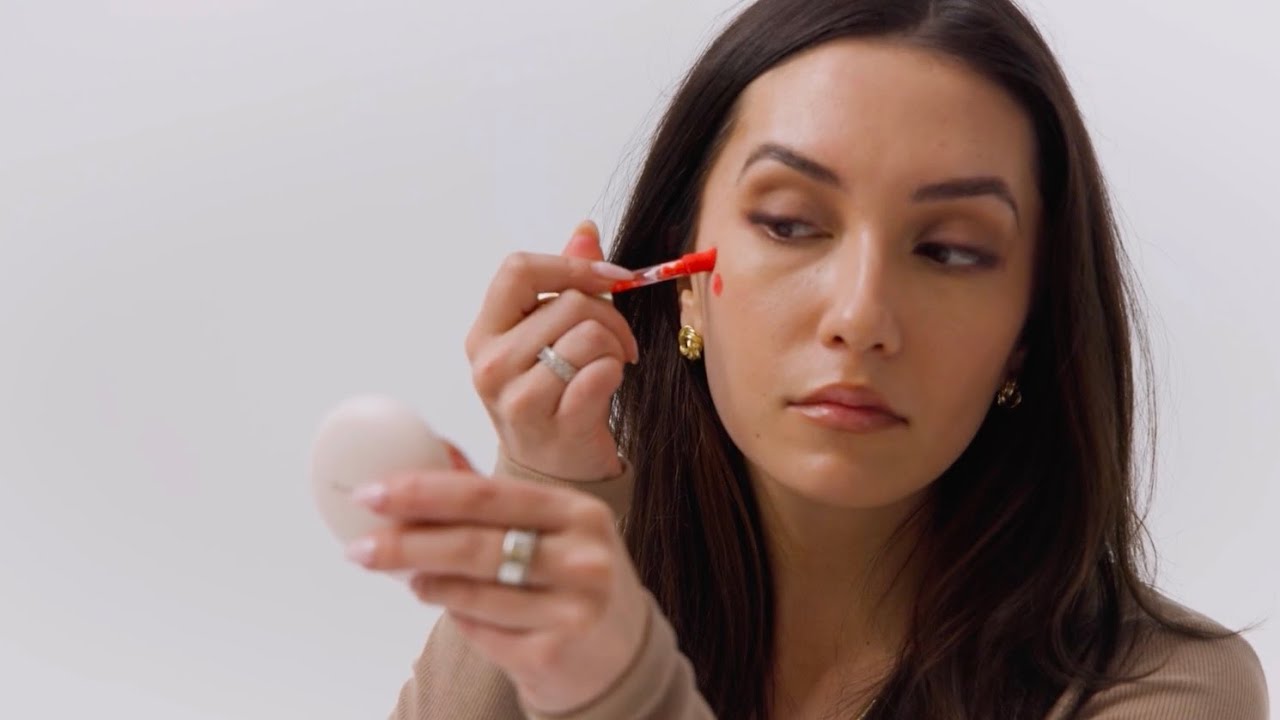
How to Apply Rare Beauty Highlighter with the Doe-Foot Applicator

The doe-foot is not a brush. It deposits concentrated product. A lot of people treat it like one and end up with too much in one spot and a patchy, unblended result.
Rare Beauty’s own suggested usage recommends applying one or two dots wherever you want to add glow, then blending immediately. That’s the whole method. The issue is most people either skip the blending or wait too long before blending.
The Dot-and-Blend Method
- Press the wand gently to the skin. Don’t drag it. A press deposits; a drag smears.
- Place one dot on each cheekbone, directly on the high point. Two dots per cheek is too much for most looks.
- Blend within 10-15 seconds of applying each dot. The formula sets fast.
- Use your ring finger (lightest pressure) or a damp silicone sponge to press the product into skin.
The common mistake: applying all dots across the face first, then trying to blend everything at once. By then, the first dots have started to set and won’t blend seamlessly with the rest.
How Much Product to Use
For a natural glow: one small dot per zone, blended with a finger.
For full glam: two dots layered, blended with a damp sponge between layers. Let the first layer set for 30 seconds before adding the second.
The formula is forgiving if you under-apply. It is not forgiving if you over-apply. Start less, build up.
Blending Techniques for Different Finishes
The tool you blend with changes the finish more than the amount of product you use. This is probably the part most tutorials skip over.
Makeup artists like Renee Childs have noted using the Positive Light Liquid Luminizer as eyeshadow and mixed into body lotion, pointing to how versatile the formula is across different blending contexts.
Fingers: The Skin-Like Finish
Body heat from your fingertip melts the formula into the skin. The result looks like the glow is coming from inside rather than sitting on top.
This is the best method for a no-makeup everyday look or anything where you want the highlight to read as healthy skin rather than a makeup product. The ring finger has the lightest natural pressure, which prevents over-blending and keeps the glow concentrated where you placed it.
Fan Brush: The Editorial Finish
Best for: diffused, swept-back glow across wide cheekbone areas.
A fan brush disperses the product over a larger surface, softening the edges of the highlight and creating a more spread-out, less defined glow. Good for full glam looks where you want the highlight to carry across the whole upper cheek rather than just the peak.
Silicone Sponge: The Glass Skin Finish
A silicone sponge presses the formula flat against the skin without absorbing any of the product (unlike a regular sponge). The result is a smooth, almost wet-looking sheen that sits exactly where you placed it.
Glass skin was the dominant beauty trend of 2024, with TikTok driving over 700,000 posts on the topic. The silicone sponge plus liquid luminizer combination is the most direct way to achieve that finish at home without professional tools.
Layering Rare Beauty Highlighter Over or Under Powder
The order you apply the Luminizer in changes the result completely. This is where most people get confused, and where tutorials tend to be vague.
There are three real scenarios: applying the liquid luminizer before any powder, after setting powder, or mixed directly into foundation. Each gives a different finish and serves a different purpose.
Under Setting Powder: Natural, Filtered Glow
Apply the Luminizer directly over moisturized skin or over liquid foundation, then dust a very light layer of translucent powder over the top.
The powder softens the glow from blinding to filtered. It looks less like a highlighter and more like naturally radiant skin. This layering works well for daytime and for anyone who finds liquid highlighters too intense applied alone.
Key detail: use a light hand with the powder. Heavy powder application kills the glow entirely.
Over Setting Powder: Maximum Impact
Apply the Luminizer as the final step after your full base is set. The product sits on top of the powder layer and catches light at maximum intensity.
This is the approach for full glam makeup looks or anything photographed. Paired with the Rare Beauty Soft Pinch liquid blush, the monochromatic effect is stronger because both products share a similar luminous finish.
Mixed into Foundation: All-Over Luminosity
Add one or two drops of the Luminizer directly into your foundation before applying. This spreads the glow across the full face as a base-level radiance rather than a concentrated placement.
Works best for fair to medium skin tones using Enlighten or Exhilarate. On deeper skin tones, Flaunt mixed into a deeper-coverage foundation creates a dimensional warmth across the whole base rather than just the high points.
How to Apply Rare Beauty Highlighter for Specific Looks

The same product reads completely differently depending on how much you use, where you place it, and what you blend with.
A 2024 study published in the Journal of Cosmetic Dermatology found that oil and sebum buildup during activity is the primary reason makeup formulas break down unevenly. That finding applies directly to how you apply the Luminizer for different contexts: a no-makeup look needs a lighter touch that works with sebum, while a full glam application needs a setting layer underneath to anchor the formula.
No-Makeup Glow
Less product, fewer zones, finger-only blending.
One dot of Enlighten or Enchant pressed onto the peak of each cheekbone. That’s it. Skip the nose bridge and brow bone entirely for this look.
- Blend with the ring finger using a pressing motion, not a sweeping one
- No setting powder over the top
- Pairs well with a Rare Beauty tinted moisturizer base for a consistent skin-first finish
Jasmine Beauty School’s 2024 trend analysis notes that minimalist makeup routines built around subtle highlighter placement on cheekbones are the dominant approach for daytime and everyday looks.
Full Glam
The Luminizer’s buildable formula means you can layer toward a full strobing moment. The key is doing it in controlled steps rather than applying heavily all at once.
Layer one: apply and blend with fingers across cheekbones, brow bone, and nose bridge.
Layer two: wait 30 seconds, then press a second dot onto the peak of the cheekbones only with a fan brush.
Pair with the Rare Beauty Soft Pinch liquid blush directly underneath the highlight zone. The matching luminous finish on both products creates a monochromatic flush that reads as intentional rather than two separate products competing for attention.
Glass Skin
This approach is less about placement zones and more about surface coverage. The goal is a continuous luminous plane across the upper face, not defined peaks of highlight.
Mix one to two drops of Exhilarate or Enlighten into your foundation before applying. Then, after your base is set, add a second layer of the same shade using a silicone sponge across the entire upper cheek, nose bridge, and forehead center.
- No powder anywhere on the high planes
- Setting spray (dewy formula) as the final step
In 2024, glass skin was TikTok’s most talked-about beauty trend with over 700,000 posts (The Wellness Co.). The silicone sponge technique is what separates a convincing version from one that just looks like too much product.
Making Rare Beauty Highlighter Last
Liquid highlighter wear time depends more on what’s underneath it than on the formula itself.
A 2024 study found that even 20 minutes of activity raises sebum levels under makeup, which breaks down formulas unevenly from the base up. That means your prep layer matters more than your setting layer for long-term wear.
The Anchor Layer: Primer Under Highlight Zones
Best for oily and combination skin.
A pore-minimizing primer applied only to the cheekbones, brow bone, and nose bridge before foundation gives the Luminizer something stable to sit on. Without it, excess sebum migrates into the highlight formula and turns a controlled glow into unintentional shine by midday.
Charlotte Tilbury’s formulation guidance for oily skin recommends primer as the primary longevity tool for liquid and cream highlighter formats specifically, noting that powder formulas are more self-anchoring.
Setting Without Killing the Glow
Translucent powder over the Luminizer is not the same as translucent powder everywhere. The difference in approach:
| Skin Type | Powder Approach | Result |
|---|---|---|
| Oily | Lightly dust powder over highlight zones only | Softened glow with improved longevity |
| Dry | Skip powder entirely | Full dewy finish is preserved |
| Combination | Powder the T-zone only; avoid highlight areas | Glow remains radiant while T-zone stays matte |
Typsy Beauty’s 2024 longevity guide recommends setting cream or liquid highlighter with a similar-toned powder directly over the product to extend wear without changing the finish significantly.
Touch-Up Without Pilling
The biggest mistake during midday touch-ups is applying fresh product directly over what’s already on the skin. The layers separate and the result looks patchy.
Instead: press a clean finger lightly over the existing highlight zone first to redistribute the formula that’s already there. Only add new product if the glow has fully faded rather than just shifted.
- Blotting papers on the T-zone before touching highlight zones
- Never rub, always press
Rare Beauty Highlighter Shades and Which Skin Tones They Work For
The Positive Light Liquid Luminizer now comes in 10 shades. Picking the wrong one doesn’t ruin the look, but picking the right one means the highlight reads as an extension of your skin rather than a separate layer on top of it.
Selena Gomez uses Enlighten as her go-to across both the liquid and powder formats, applying three dots across each cheekbone. Space NK’s review notes that Enlighten is the palest shade with a cool champagne tone. Not every skin tone gets the same result from it, and that’s by design.
Fair to Light Skin Tones
Two shades work here, and the choice comes down to undertone.
Enlighten (cool champagne): the right choice for cool or neutral undertones. Sits on the skin without reading orange or yellow.
Exhilarate (champagne gold): better for warm undertones on fair skin. The gold base gives warmth without the bronzed shift of deeper shades.
Medium Skin Tones
Exhilarate and Mesmerize are the two go-to options here, and most reviewers with medium skin land on Exhilarate as the most universally flattering across warm, cool, and neutral undertones.
Mesmerize (rose bronze): described as rose bronze by Rare Beauty, though several reviewers note it reads closer to peach on skin. Particularly good for neutral to cool medium undertones. Works as a blush topper as well as a standalone highlight.
Deep Skin Tones
| Shade | Tone | Best Placement |
|---|---|---|
| Flaunt | True gold, bold and warm | Cheekbones, eyelids |
| Captivate | Rich copper, warm and dimensional | Cheekbones, brow bone |
| Reflect | Deep bronze, luminous | High points of the face, body |
MissLJBeauty’s independent review notes that Mesmerize adapts to most skin tones including medium to deep, but Flaunt and Captivate are where the formula truly comes into its own on deeper complexions, giving the kind of dimensional warmth that champagne shades physically cannot deliver on richer skin tones.
For a complete picture of how highlighter fits into a broader full face makeup application, the order of products matters as much as shade selection. And if you want to build up the cheek area as a whole, pairing the right highlighter shade with a blush matched to your face shape gives the most cohesive result.
FAQ on How To Apply Rare Beauty Highlighter
How do you use the doe-foot applicator on the Positive Light Liquid Luminizer?
Press the wand gently onto the skin. Don’t drag it. Place one or two dots on each highlight zone, then blend immediately with your finger or a silicone sponge before the formula sets.
Where do you put Rare Beauty highlighter on your face?
The main placement zones are the tops of the cheekbones, brow bone, nose bridge, cupid’s bow, and inner corners of the eyes. Adjust based on your face shape for the most natural result.
Can you apply Rare Beauty highlighter over foundation?
Yes. The Luminizer layers well over liquid, powder, and cream bases without disturbing them. Let your foundation fully set first. Applying over a settled base gives a cleaner, more defined glow.
How do you get a glass skin look with Rare Beauty highlighter?
Mix one to two drops of Exhilarate or Enlighten into your foundation before applying. After your base sets, press a second layer across the upper face using a silicone sponge. Skip powder entirely.
Which Rare Beauty highlighter shade works for fair skin?
Enlighten (cool champagne) suits cool and neutral undertones. Exhilarate (champagne gold) works better for warm undertones on fair skin. Both read as skin-like rather than metallic on lighter complexions.
What is the best blending tool for the Positive Light Liquid Luminizer?
Fingers give the most natural, skin-like finish. A fan brush creates a diffused editorial glow. A silicone sponge produces the flattest, glassiest result. The tool choice changes the finish more than the amount of product.
How do you make Rare Beauty highlighter last all day?
Apply a pore-minimizing primer to highlight zones before foundation. For oily skin, dust a light layer of setting powder lightly over the Luminizer. Avoid touching the highlight area throughout the day.
Can you mix Rare Beauty highlighter into moisturizer?
Yes. One or two drops mixed into your moisturizer creates an all-over luminosity rather than a concentrated glow. Enlighten and Exhilarate work best for this. Flaunt can look heavy when spread across the full face.
How much Rare Beauty highlighter should you apply?
Start with one small dot per zone. The formula is highly pigmented and builds easily. Over-applying is the most common mistake. You can always add a second layer, but removing excess is much harder.
Can Rare Beauty highlighter be used on the body?
Yes. Flaunt and Mesmerize work well on collarbones and shoulders for event looks. Enlighten can wash out fair skin in body placement. Exhilarate is a better option for a full-body glow on lighter complexions.
Conclusion
This conclusion is for an article presenting how to apply Rare Beauty highlighter as a skill built on a few repeatable decisions: the right shade for your skin tone, the right blending tool for your finish, and the right layering order for your base.
The Positive Light Liquid Luminizer behaves differently from powder. Skin prep matters. Placement zones shift by face shape. And a silicone sponge gives you a completely different result than your fingers.
Start with one dot. Build from there. Whether you’re after a subtle cheekbone glow or a full glass skin finish, the formula supports both without switching products.
Get the foundation right, and the highlight takes care of itself.

- What Is Skin Tint and Why Everyone Is Obsessed - July 11, 2026
- What Is Foundation and How Do You Choose One? - July 6, 2026
- How to Make Blush Last Longer - July 3, 2026


