

Summarize this article with:
A lip product that works on your lips and cheeks, lasts up to 12 hours, and costs under $13. That’s the pitch. But knowing how to use Maybelline Teddy Tint correctly is what separates a patchy result from a clean blurred matte finish.
The Super Stay Teddy Tint is a buildable liquid lip tint with a blurring matte finish. One coat gives sheer color. Two gives that soft, diffused look. Three builds full coverage.
Get the application wrong and it looks dry, uneven, or washed out. Get it right and it genuinely stays put through meals, drinks, and a full day of wear.
This guide covers everything: prep, application technique, layering, cheek tint use, shade selection by skin tone, and how to make the color last longer.
What Is Maybelline Teddy Tint

The Maybelline Super Stay Teddy Tint is a liquid lip tint with a blurring matte finish and a mousse-like, lightweight texture.
It sits somewhere between a tinted lip balm and a traditional matte liquid lipstick. The formula uses tinted pigments that stain lips for up to 12 hours with no transfer.
What sets it apart from other lipstick types is the three-in-one coverage system: one coat gives a sheer wash of color, two coats create a soft blurred matte look, and three coats deliver bold, full-pigment coverage.
The global lip and cheek tint market was valued at $1.6 billion in 2024 and is projected to reach $3.2 billion by 2035 (Transparency Market Research). Maybelline is listed among the top players driving that growth.
| Feature | What It Means for You |
|---|---|
| Blurring matte finish | Softens lip lines for a diffused, natural look |
| Buildable coverage | Sheer to bold depending on coats applied |
| No-transfer formula | Stays put through eating and drinking (after drying) |
| Multi-use | Works on lips and cheeks |
| 20 shades available | Nudes, pinks, berries, and reds across all skin tones |
The vegan formula is waterproof, smudge-proof, and kiss-proof. It retails for around $12.99, making it one of the more affordable options in the long-lasting lip tint category.
Tools You Need Before Applying

You don’t need much. But getting these basics right makes the difference between a patchy result and a clean blurred finish.
Lips prepped and dry: Remove all lip balm or moisture before applying. Residue on the lips causes the tint to slip and apply unevenly.
Optional: lip liner. Not required for a natural look, but useful when building a bolder finish. Knowing how to use lip liner as a base can improve edge definition and color longevity.
A fingertip or clean sponge tip: Used to blend edges after application. This is what creates the soft, blurred matte look the product is known for.
A tissue helps remove excess product from the applicator when going for a sheer first coat. The doe-foot applicator deposits a lot of product by default, so wiping it down once before your first swipe gives you more control.
Lip Prep Matters More Than Most People Think
Dry, flaky lips are the main reason Teddy Tint looks patchy on people. The matte formula has zero hydrating ingredients, so any texture on your lips shows through.
Knowing how to exfoliate lips naturally before applying any matte product is worth doing at least twice a week. A simple sugar scrub or a damp washcloth is enough.
Moisturize after exfoliating, then wait. Apply the tint only once lips are fully dry. Any remaining balm or oil left on the surface will break down the formula faster and reduce wear time significantly.
How to Apply Maybelline Teddy Tint for a Natural Look

This is the method Maybelline recommends, and it actually works well once you understand the applicator.
Step 1: Wipe the doe-foot applicator on the tube rim once to remove excess product. Starting with too much formula creates a dense application that’s hard to blend.
Step 2: Begin at the cupid’s bow. Draw the outline of your upper lip first, then fill in. Repeat on the lower lip.
Step 3: Use a fingertip to tap and blend the edges outward. This creates the signature blurred matte finish. Work quickly, as the formula starts to set within 30 to 60 seconds.
Step 4: Let it dry fully. Maybelline recommends up to 15 minutes to set completely before eating or drinking.
One coat gives a sheer natural tint. That’s the sweet spot for a no-makeup makeup look on a daily basis.
Getting the Right Color Payoff
Lighter shades tend to look more wearable at one coat. Darker shades like Cool Grunge or Wild at Heart show more pigment on the first pass, so starting sheer with those takes extra care.
Key tip: If the color looks uneven after one coat, don’t immediately add a second. Let the first coat set for 2 to 3 minutes first. Adding product over a tacky base just moves the tint around instead of building coverage.
Mintel research from 2025 found that 40% of U.S. women aged 18 to 34 now use four or more different lip products regularly. The Teddy Tint works well as the base layer in that kind of routine, worn under a clear gloss or alone.
How to Layer Teddy Tint for a Bolder Look
Three coats, applied correctly with dry time between each, get you close to a full matte liquid lipstick finish.
Apply coat one and let it set for 2 to 3 minutes until fully dry and no longer tacky.
Apply coat two carefully, staying within the lines already set by the first layer. Blend edges again with a fingertip if needed.
Apply coat three only to the center of the lips for a gradient effect, or across the full lip for solid coverage. Skip blending on this final coat for the sharpest edge.
Using a liner underneath changes the game entirely. Knowing how to approach applying lip liner before a tint helps lock color at the edges and gives you a cleaner boundary for buildable coverage.
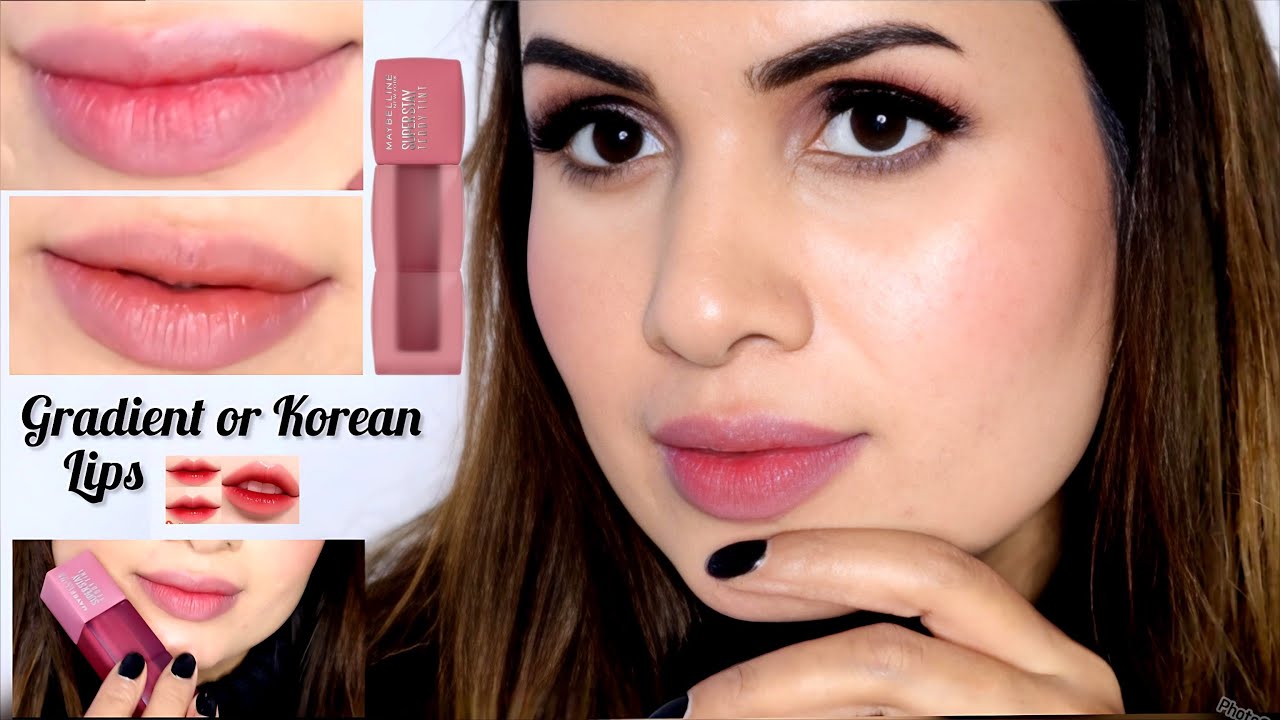
Layering for an Ombre Finish
Maybelline actually shows this technique on their official product page, and it’s easier than it looks.
Apply one coat of a lighter Teddy Tint shade to the full lip. Then take a darker shade and apply it only to the center of the lips. Blend outward with a fingertip toward the edges to create a gradient.
Good shade combinations for this effect include Petalcore as the base with Cool Grunge in the center, or Kitten Heel with Faux Freckle layered over. If you want to go deeper into this technique, there’s a useful guide on creating ombre lips with different product pairings.
Setting with translucent powder after the final layer extends the blurred matte finish and locks the layered look for longer wear.
How to Use Teddy Tint as a Cheek Tint

This is where Teddy Tint genuinely earns the “multi-use” label. It works on cheeks, and the result is a soft, matte blush that matches your lip color exactly.
Pink and red shades perform best on cheeks. Nude-brown shades like Kitten Heel or Faux Freckle tend to read muddy on the cheekbones and don’t blend out as cleanly.
Application Method for Cheeks
Dot three small drops of product directly onto the apples of the cheeks. Use a fingertip or a damp sponge to blend upward toward the temples immediately. The formula sets fast, so blend within 20 to 30 seconds.
Amount matters: Less is more here. One small dot per cheek is usually enough. The tint is concentrated, and over-applying before blending creates a patchy, over-saturated result that looks unnatural.
Set lightly with a translucent setting powder after blending. This step extends the wear and prevents the tint from transferring onto fingers throughout the day.
The dual-purpose aspect fits a broader shift in consumer behavior. Transparency Market Research notes that liquid lip and cheek tints held the largest market share at 55.2% in 2024, driven by demand for portable, multi-use products.
Common Application Mistakes and How to Fix Them

Most issues with Teddy Tint come down to three things: dry lips, too much product, and not allowing enough dry time.
| Mistake | What Happens | The Fix |
|---|---|---|
| Applying over lip balm | Tint slides, applies unevenly | Blot lips fully dry first |
| Too much product on applicator | Over-saturation, patchy finish | Wipe applicator on tube rim before each coat |
| Skipping the blend step | Hard edges, no blurred finish | Tap edges immediately with a fingertip |
| Stacking coats while still tacky | Formula moves around, uneven pigment | Wait 2–3 minutes between each coat |
| Wrong shade for skin tone | Color looks off or washed out | Test on fingertip first in store lighting |
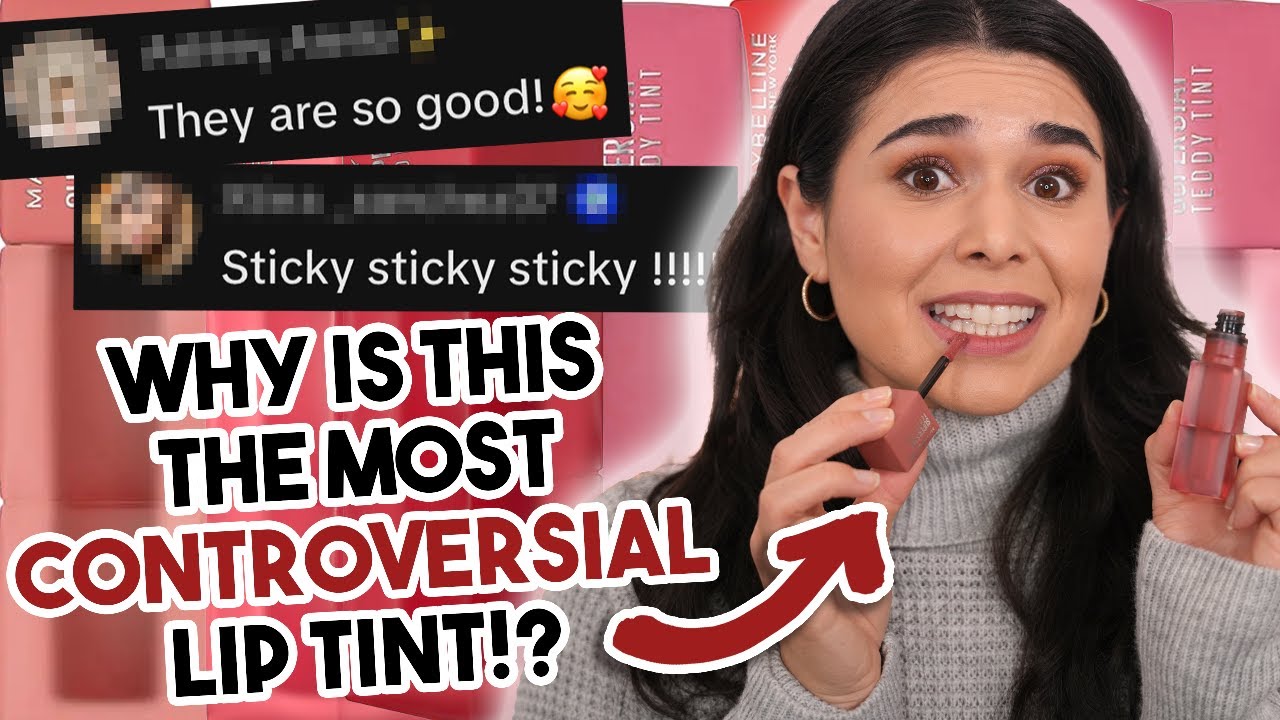
The product stays tacky for a while after application, which reviewers at Slashed Beauty have flagged as a noticeable characteristic of the formula, especially in dry climates.
If the matte finish feels uncomfortable after the first hour, applying a thin layer of clear lip gloss over it solves the problem. It also changes the blurred matte finish to something glossier, which is worth knowing before you do it intentionally or by accident.
Fixing a Patchy Application Mid-Wear
Once Teddy Tint has fully set, you can’t really re-blend it. The transfer-proof formula that makes it last is the same reason touch-ups are tricky.
The most practical fix: remove it and reapply. A micellar water-soaked cotton pad dissolves the formula without stripping the lips. Reapply with prepped, dry lips and the result looks clean again.
For minor patchiness at the edges, a fingertip with a tiny amount of makeup remover can clean up the border. This is especially useful when the tint has feathered slightly outside the lip line after eating.
How Long Teddy Tint Lasts and How to Make It Last Longer
Maybelline claims up to 12 hours of wear. Real-world results land closer to 7 to 9 hours for most people, depending on whether you eat, drink, or have naturally dry or oily lips.
The formula becomes transfer-proof after about 60 minutes of dry time. Before that point, it will transfer onto cups, straws, and anything that touches your lips.
Realistic Wear Expectations
Reviewer testing at Slashed Beauty confirmed the tint survived a full Thanksgiving meal spread, with visible color still holding after 9 hours of wear.
Dry climates shorten wear. The formula stays tacky longer in low-humidity environments, which can feel uncomfortable and cause more mid-day fading.
Quality matte liquid lipstick formulas typically last 8 to 12 hours with minimal touch-ups needed, according to Faces Canada. A single reapplication after a meal is usually enough to keep color consistent throughout the day.
Tips for Extending Wear Time
Lip liner underneath: fills lips with pigment before the tint, giving the formula more grip and a color base to fall back on as the tint fades at the center.
Translucent powder: a light dusting over the fully set tint locks the finish and adds a dry buffer against oil and humidity.
Two thin coats with dry time between: far more durable than one heavy application. The formula bonds to itself better in layers.
Knowing how to approach making lipstick last longer in general applies directly here. The same principles that extend a regular matte lipstick (prepped lips, layering technique, powder setting) work on Teddy Tint.
Touch-Up Mid-Day
Teddy Tint fades from the inside of the lips outward. The outer ring tends to stay put while the center lightens first.
The cleanest mid-day fix: blot with a tissue, then apply a single fresh coat directly over the stained lip. Don’t blend aggressively. Let it set and it will blend into the residual tint underneath naturally.
Skip gloss on top if you want to maintain the blurred matte finish. A gloss layer shifts the look entirely to a satin finish, which may not match the original application.
Shade Selection Guide

Teddy Tint comes in 20 shades across four color families: pinks, nude-browns, reds, and berry-nudes. Choosing the right one depends more on undertone than skin depth.
Maybelline confirms on their official product page that anyone can technically wear any shade, but shades aligned with your undertone will look more natural and less like an obvious lip product.
| Undertone | Best Shade Family | Recommended Shades |
|---|---|---|
| Warm (green veins) | Peachy pinks, warm nudes | Baby Tee, Petalcore, Coffee Date |
| Cool (blue veins) | Berry-nudes, cool reds | Tomato Girl, Velvet Choker, Kitten Heel |
| Neutral (mixed veins) | Mauve-nudes, soft pinks | Endgame, Soft Era, Skinny Dip |
| Deep/dark skin | Rich nudes, deep berries | Faux Freckle, Wild at Heart, Mascara Tear |
Selecting by Skin Depth
Mintel’s 2025 data shows 40% of U.S. women aged 18 to 34 regularly use four or more lip products. Many are using a lighter shade for daytime and a deeper one for evenings, which Teddy Tint’s buildable formula handles well.
Fair skin tends to wash out with very deep nudes at a single sheer coat. Kitten Heel and Skinny Dip read more clearly on lighter complexions. Buffed Out and Endgame tend to disappear on fair skin at one coat but build beautifully to two.
Medium skin tones have the most flexibility here. Most of the pink and mauve-nude range works across warm and neutral medium complexions without adjustment.
Warm Versus Cool Shade Pairings
Getting undertone wrong is the main reason a shade looks “off” even when the depth seems right. Warm undertones paired with cool berry shades can pull the lip color gray. Cool undertones with warm peachy nudes can make lips look muddy.
Fast undertone check: look at the inside of your wrist in natural light. Blue or purple veins mean cool. Green veins mean warm. A mix of both means neutral, and neutral undertones can pull from either column in the table above.
If you’re still unsure and buying in-store, test the shade on your fingertip first. The inner finger is closer in undertone to lips than the back of the hand, and gives a more accurate read of how the color will actually look.
For a deeper look at picking a nude lipstick that works with your specific coloring, the undertone matching principles apply directly to Teddy Tint’s nude-brown range. The same logic that makes a nude lipstick look skin-like instead of chalky applies here.
FAQ on How To Use Maybelline Teddy Tint
Do I need to prep my lips before applying Teddy Tint?
Yes. Start with clean, dry lips. Remove all lip balm before applying, as any moisture causes the formula to slip and apply unevenly.
If your lips are flaky, exfoliate first. The blurring matte finish shows every texture, so smooth lips make a real difference in the final result.
How many coats do I need for full coverage?
Three coats give full, bold coverage. One coat delivers a sheer wash of color. Two coats create the soft blurred matte look the product is known for.
Let each coat dry fully before adding the next. Stacking wet layers moves the tint around instead of building pigment.
How do I get the blurred lip effect?
Apply one to two coats, then immediately tap the edges with a fingertip and blend outward. Work fast. The formula starts setting within 30 to 60 seconds of application.
Can I use Teddy Tint on my cheeks?
Yes. Dot a small amount onto the apples of your cheeks and blend upward with a fingertip or damp sponge. Pink and red shades work best. Nude-brown shades tend to read muddy on cheeks.
How long does Teddy Tint actually last?
Maybelline claims up to 12 hours. Real-world wear lands closer to 7 to 9 hours. The formula becomes transfer-proof after about 60 minutes of full dry time.
Does Teddy Tint dry out lips?
It can. The formula contains no hydrating ingredients. People with dry lips find it uncomfortable during extended wear. Applying a clear gloss over the set tint helps without fully removing the matte finish.
How do I choose the right shade for my skin tone?
Match your undertone first. Warm undertones suit peachy and coral shades like Baby Tee or Petalcore. Cool undertones work better with berry-nudes and cool reds like Tomato Girl or Velvet Choker.
Should I use lip liner with Teddy Tint?
It’s optional for a natural look but recommended for a bold one. Choosing a lip liner in a matching shade and filling in lips before applying the tint improves edge definition and extends color longevity significantly.
How do I fix a patchy application?
Once fully set, re-blending isn’t possible. The best fix is to remove the tint with micellar water on a cotton pad, then reapply on prepped, completely dry lips from scratch.
Can I apply Teddy Tint over lip balm?
No. Applying over lip balm or any residual moisture causes the formula to slip, apply unevenly, and wear off significantly faster. Always blot lips fully dry before lip tint application.
Conclusion
This conclusion is for an article presenting how to use Maybelline Teddy Tint, a multi-use lip and cheek tint that rewards the right technique.
Prepped lips, controlled product amount, and proper dry time between coats are what separate a clean blurred matte finish from a patchy one.
Shade selection matters too. Match your undertone first, then adjust for skin depth.
The cheek tint application adds real versatility, especially with pink and red shades giving a soft, monochromatic flush.
At under $13, the buildable color payoff and 12-hour wear make it one of the more practical drugstore lip tints available right now.
Apply it right, and it works exactly as advertised.

- What Is Skin Tint and Why Everyone Is Obsessed - July 11, 2026
- What Is Foundation and How Do You Choose One? - July 6, 2026
- How to Make Blush Last Longer - July 3, 2026


