

Summarize this article with:
Most anti-aging serums ask you to choose between results and irritation. Clinique Smart Clinical Repair does not.
Knowing how to use Clinique Smart Clinical Repair correctly is what separates a routine that delivers visible wrinkle reduction from one that just sits on the shelf. The formula combines 9.5% peptides, an advanced retinoid, and hyaluronic acid, but the application order, frequency, and layering choices all affect how well it actually works.
This guide covers everything: what the product is, who it suits, how to apply both the serum and moisturizer, how to layer it with other skincare products, and how to store it so the active ingredients stay effective.
What Is Clinique Smart Clinical Repair

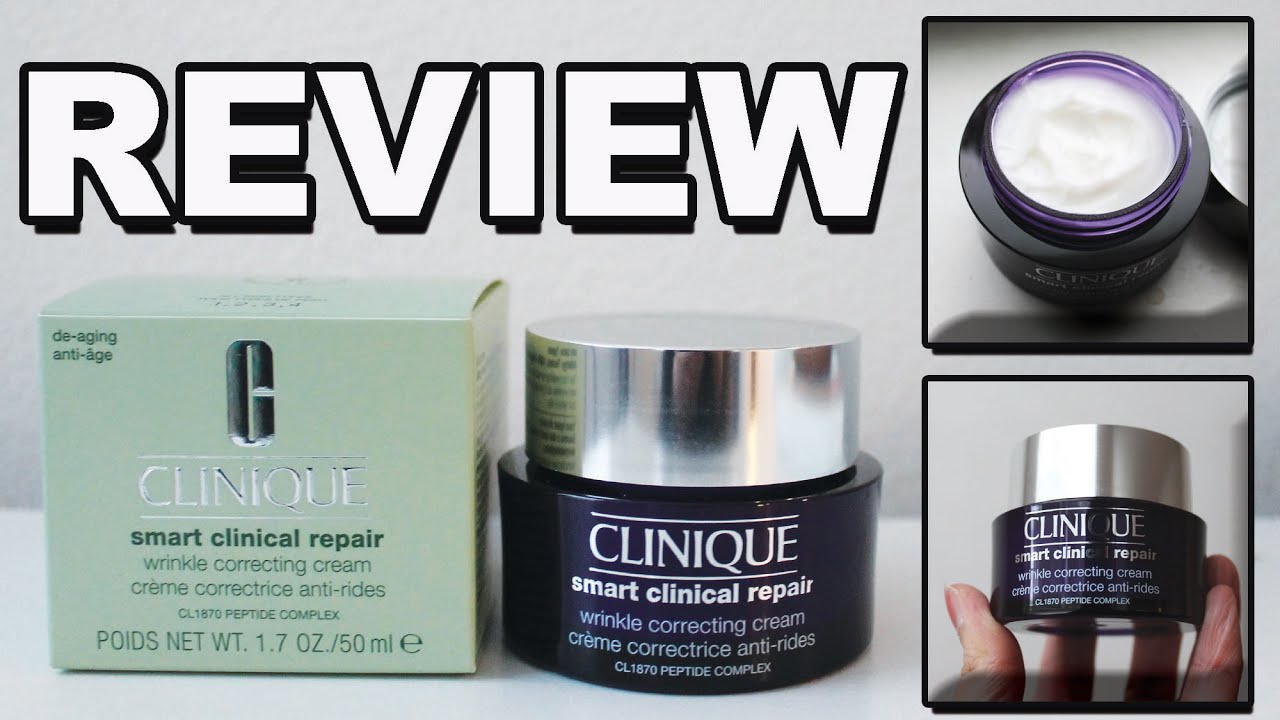
Clinique Smart Clinical Repair is an anti-aging skincare line built around three core actives: a proprietary peptide complex, an advanced retinoid, and hyaluronic acid. The line includes two main formats, a wrinkle correcting serum and a moisturizer, each designed to work in sequence.
The serum is the more concentrated of the two. It contains 9.5% peptides and 1% advanced retinoid, making it one of the higher-dose peptide formulations available without a prescription.
The retinoid used here is hydroxypinacolone retinoate, sold commercially as Granactive Retinoid. It functions similarly to retinoic acid but with less irritation potential, which is why Clinique markets it as safe for twice-daily use.
The global anti-aging products market was valued at approximately $47 billion in 2023 and is projected to reach $78.7 billion by 2032 (Market.us). Retinol and retinoid-based formulations hold over 35% of that market share, driven by consistent clinical proof of efficacy.
The Three Active Layers
CL1870 Laser Focus Complex (peptides): A blend of four signaling and neuropeptides, including palmitoyl tripeptide-1 and acetyl hexapeptide-8, designed to support collagen production and skin structure.
Advanced retinoid: Accelerates cell turnover, helps resurface texture, and reduces the visible depth of wrinkles over time with less risk of redness compared to traditional retinol.
Hyaluronic acid concentrate: Pulls moisture into the skin barrier, plumps fine dry lines, and offsets any drying effect from the retinoid.
Serum vs. Moisturizer: What Each One Does
| Product | Primary Role | Best For |
|---|---|---|
| Wrinkle Correcting Serum | Active treatment, delivers high-dose peptides + retinoid | All skin types, AM and PM |
| Wrinkle Correcting Cream | Seals and hydrates after serum absorption | Normal to dry skin |
| Wrinkle Correcting Rich Cream | Deeper overnight moisture and repair | Very dry skin, evening use |
The serum is not a substitute for the moisturizer. They serve different purposes and work better together than separately.
Who Should Use Clinique Smart Clinical Repair

The formula is built for anyone noticing early to established signs of aging: fine lines, reduced firmness, rough texture, or dullness. Clinique positions it as suitable for all skin types, including sensitive skin, because the retinoid used is gentler than standard retinol.
Practically, most people who benefit from this are in their late 20s and older. Younger skin tends to have strong natural cell turnover already. After 25, collagen production starts to slow, which is when a targeted anti-aging serum routine actually makes a noticeable difference.
Skin Types That Work Well With It
- Dry skin (benefits from the hyaluronic acid and the cream pairing)
- Combination skin (the serum is oil-free)
- Sensitive skin (allergy tested, fragrance free, designed for low irritation)
- Post-procedure skin (clinically shown to be safe following IPL treatment)
Acne-prone skin can use this, but watch for pilling if you layer it with other actives. The silicone base can occasionally cause issues when combined with heavy occlusive moisturizers.
Who Should Be Cautious
Pregnant or nursing: Retinoids, including the gentler hydroxypinacolone retinoate, are typically avoided during pregnancy. Check with a doctor first.
Retinol veterans with high tolerance: If you currently use a stronger prescription retinoid, this may feel less effective by comparison. It is not a replacement for tretinoin.
Anyone currently using other retinol products: Clinique explicitly states not to combine this with other retinol formulations. Doubling up does not speed results, it just increases irritation risk.
How to Apply Clinique Smart Clinical Repair Wrinkle Correcting Serum

The serum goes on immediately after cleansing (and toning, if you use it). Skin should be dry, not damp. Applying to damp skin can push some actives deeper than intended and increase sensitivity.
Dispense 1 to 2 pumps onto fingertips. One pump is enough for most face applications. Two pumps if you’re including the neck, which you should.
Step-by-Step Application
- Cleanse skin and pat dry
- Apply toner or Clinique Clarifying Lotion if that is part of your routine, and wait for it to absorb
- Pump 1-2 doses of serum onto fingertips and warm slightly between palms
- Press and sweep evenly over face and neck using upward strokes
- Avoid the immediate eye area
- Wait 30 to 60 seconds for the serum to absorb
- Follow with moisturizer
Clinique’s own clinical page confirms the product absorbs within roughly 30-60 seconds in most cases. Rushing past this step and layering moisturizer too quickly can cause pilling, especially over silicone-based formulas.
AM vs. PM Use
Morning: Apply serum, follow with moisturizer, then SPF. The retinoid in this formula makes daily sunscreen non-negotiable. Clinique lists this as an explicit requirement, not a suggestion.
Evening: Apply serum after cleansing, follow with moisturizer or the richer cream version if your skin is dry. Night use allows the retinoid and peptides to work during the skin renewal window that peaks while you sleep.
Retinoid-based serums work during both cycles. Skipping the AM application reduces results compared to twice-daily use.
How to Apply Clinique Smart Clinical Repair Moisturizer
The Smart Clinical Repair moisturizer line includes two variants: the standard Wrinkle Correcting Cream and the Wrinkle Correcting Rich Cream. They are not interchangeable with random moisturizers in your routine, though you can technically use any moisturizer after the serum.
Consumer testing by Clinique on 143 women showed that 85% observed a visible reduction in fine lines and wrinkles after 4 weeks of using the cream. That number improves further when paired with the serum.
Standard Cream: Application
This works for normal to combination skin. Apply a pearl-sized amount after the serum has absorbed. Use upward, sweeping strokes across the face and neck.
In the morning, the cream goes before SPF. In the evening, it is typically the final step unless you are adding an eye cream. Apply eye cream after, using a ring finger to pat (not drag) along the orbital bone.
Rich Cream: When to Use It Instead
The Rich Cream is the better choice for very dry or mature skin, especially in winter or low-humidity environments. It can also be applied as a thicker overnight mask layer on areas with deeper dryness, like the cheeks or jaw.
Key difference: richer texture, same active ingredients. It sits heavier on skin and is not recommended for oily or acne-prone skin types in the morning.
One Thing That Trips People Up
Applying too much cream on top of a silicone-based serum is the most common cause of pilling in this routine. Start with a small amount and press, not rub, into skin.
How Often to Use It

Clinique recommends using the serum twice daily, morning and night. This is backed by clinical data. The Clinique product page references a 16-week study in which twice-daily serum users showed the same improvement in lines and wrinkles as those who had a single laser treatment.
That said, not everyone should start at twice daily, especially if their skin is new to retinoids.
Starting Out: The First Two Weeks
Hydroxypinacolone retinoate is gentler than standard retinol, but it still causes adjustment in some skin. Starting with once-daily use (PM only) for the first two weeks reduces the chance of redness or flaking.
If skin feels stable with no irritation after two weeks, move to AM and PM.
What to Expect Week by Week
| Timeframe | What Typically Happens |
|---|---|
| Days 1–7 | Hydration improves, skin may feel slightly tighter as skin adjusts |
| Weeks 2–4 | Texture begins to smooth, fine dry lines look plumper |
| Weeks 4–8 | Cell turnover increases, skin surface looks fresher, early wrinkle reduction |
| Weeks 8–16 | Visible wrinkle depth reduction, firming, improved radiance |
A 2023 study published in the Journal of Cosmetic Dermatology found that 89.6% of subjects showed clinical skin improvement by Week 12 with a multi-peptide serum regimen. Consistency matters more than any single application.
Signs You Are Overusing It
Flaking, persistent redness, and stinging on application are all signs the skin barrier is being stressed. If this happens, drop back to once-daily PM use for a week before trying twice daily again.
How to Layer It With Other Skincare Products

The order that matters most: cleanser, toner (optional), serum, moisturizer, SPF (AM only). Any deviation from this sequence and you risk either reduced absorption or pilling.
People using the Clinique Clarifying Lotion as part of their existing routine can keep it in. Apply it before the serum and let it dry first. The slightly exfoliating effect of the lotion can actually help active ingredients penetrate better.
What Works Well Together
Niacinamide: Compatible. Does not react with retinoids and adds its own barrier-strengthening benefit.
Ceramides: Good pairing in the moisturizer step. Supports the skin barrier, especially during the adjustment period with the retinoid.
Vitamin C (morning only): Can be layered, but use a stable form and apply it before the serum. Ascorbyl glucoside, already present in this formula, means you may not need a separate vitamin C step at all.
What to Avoid Layering
- Other retinol products (Clinique explicitly warns against this)
- High-concentration AHAs or BHAs in the same step
- Benzoyl peroxide directly combined with the retinoid layer
- Heavy occlusive balms applied directly after serum before it absorbs
Using Clinique Moisture Surge as an alternative moisturizer in the AM is fine for normal skin types that find the dedicated cream too heavy for daytime wear.
A Note on Prepping Skin Before Makeup
If you wear makeup over this routine, prepping skin properly matters more than usual when retinoids are involved. Wait at least 2-3 minutes after the moisturizer before applying primer or foundation. Retinoid-adjusted skin can look flaky under makeup if the skin barrier is still stressed, so hydration layers need time to settle.
Common Application Mistakes

Most people who stop using a retinoid serum and decide it “doesn’t work” quit within the first four weeks. That timing is almost always too early and usually tied to one of a handful of avoidable errors.
Retinol remains the most searched skincare ingredient on both Google and TikTok, according to a 2025 analysis in the Journal of Cosmetic Dermatology. High interest doesn’t mean people are applying it correctly.
Using Too Much Product
One to two pumps covers the full face and neck. Using more doesn’t speed up results. It does increase the chance of redness and surface flaking, particularly in the first few weeks when skin is still adjusting to the retinoid.
More product = more irritation. The active concentration stays the same regardless of how much you dispense.
Skipping SPF During the Day
Retinoid use increases sun sensitivity. Skipping daily sunscreen while using this serum actively undermines the anti-aging results you are trying to build.
Clinique lists SPF as a non-negotiable step on the product page, not optional guidance. Apply broad-spectrum SPF 30 or higher to face and neck every morning after moisturizer.
Limit sun exposure during use and for a week after. This is also relevant when reapplying sunscreen over makeup during the day if you wear it.
Applying to Damp Skin
Damp skin increases the penetration speed of active ingredients. With a retinoid formula, faster penetration usually means more irritation, not better results.
Wait until skin is fully dry after cleansing, or after toner application, before dispensing the serum.
Layering Incompatible Actives
Three combinations to avoid in the same routine step:
- Other retinol products (as Clinique explicitly warns on packaging)
- High-strength AHA or BHA exfoliants in the same session
- Benzoyl peroxide directly over or under the serum layer
None of these pairings improve results. They stress the skin barrier and slow the adjustment period down considerably.
Quitting Before Results Appear
Skin cell turnover takes roughly 28 days in younger skin and up to 60 days in mature skin. Visible wrinkle reduction from retinoid-based serums typically appears between weeks 8 and 16 with consistent twice-daily use.
Dermatologists from Pacific Crest Dermatology and Woman & Home both cite early abandonment as the most common retinol mistake. Two months minimum is the realistic window to assess whether a product is working.
Makeup Pilling After Application
If you wear makeup, this matters. The silicone base in the serum can cause foundation to pill when moisturizer is applied too quickly after the serum, or when too much product is used.
Wait 60 seconds after the serum absorbs before applying moisturizer. Wait another 2 to 3 minutes after moisturizer before applying foundation. Rushing this sequence is the main reason makeup sits unevenly over an active skincare routine.
How Long Until Results Are Visible
Results depend on three things: consistent twice-daily use, SPF discipline, and realistic expectations about the timeline. Cutting any one of those corners extends the timeline significantly.
| Timeframe | What Changes | Driven By |
|---|---|---|
| Days 1–7 | Hydration, initial plumpness | Hyaluronic acid |
| Weeks 2–4 | Texture smoothing, less dullness | Retinoid cell turnover begins |
| Weeks 4–8 | Fine line reduction, improved tone | Peptide collagen support |
| Weeks 8–16 | Visible wrinkle depth reduction, firming | Combined peptide and retinoid effects |
Clinique’s own clinical study showed results equivalent to a single laser treatment after 16 weeks of twice-daily use. The laser used was a microablative CO2 fractional device, which is a meaningful benchmark.
Early Weeks: What to Actually Expect
The first week is mostly about hydration. Hyaluronic acid works fast, fine dry lines look plumper almost immediately.
Weeks two through four are the adjustment window for the retinoid. Some mild flaking or tightness is normal. It signals cell turnover is happening, not that the product is wrong for your skin. Most people who stick with it past this point report the irritation resolving on its own.
Weeks 4-8: Where Most People Notice a Shift
A 2023 long-term study published in Archives of Dermatological Research tracked 72 women using retinol over 24 weeks. Skin hydration showed a significant increase by week 8, with wrinkle depth reduction measurable from week 12 onward.
Texture improvement comes first. Wrinkle depth reduction follows. Firmness and radiance tend to develop last, but they are the changes that last longest with continued use.
What Slows Results Down
Inconsistent use: Skipping applications breaks the cell renewal cycle the retinoid is trying to establish.
No SPF: UV exposure degrades retinoid activity and reverses collagen improvements. Results stall or go backward without daily sun protection.
Starting skin that is compromised: If your skin barrier is already damaged from over-exfoliation or irritation, it needs repair before active ingredients can perform well. Using the Clinique All About Eyes cream in the eye area, where the serum shouldn’t go, can support the surrounding zone while the main formula works on the rest of the face.
How to Store It and Maintain Effectiveness

Retinoids and peptides are among the most degradation-prone active ingredients in skincare. A study by Exponent Beauty found that active ingredients in pre-mixed skincare serums degraded by roughly 40% on average within 8 weeks when exposed to air, light, and heat. Proper storage directly affects how much of the formula is still active when you use it.
Where to Keep It
Best location: A drawer or cabinet away from sunlight and away from the bathroom if possible. The bathroom is convenient but problematic. Steam and temperature swings from hot showers create exactly the conditions that break down retinoid and peptide stability.
Room temperature (around 50-70 degrees F, 10-21 degrees C) is the target range, according to cosmetic storage research. Cooler is better for retinoids specifically. A skincare fridge works well if you have one, though it’s not required.
Pump Packaging vs. Jar: Why It Matters Here
The serum comes in pump packaging, which is the better format for retinoid formulas. Pump dispensers limit air and contaminant exposure each time you use the product, preserving the active ingredients longer than open-jar formats would.
The Rich Cream, which does come in a jar format, is more vulnerable to contamination. Use a clean spatula to remove product rather than dipping fingers directly. A clean cosmetics spatula is one of those things that takes about 30 seconds to use and makes a real difference over the course of the product’s life.
Shelf Life After Opening
Check the PAO symbol on the packaging. It looks like a small open jar with a number followed by “M.” That number is the number of months the product remains effective after first opening.
Most Clinique Smart Clinical Repair formulas carry a 12M PAO symbol, meaning 12 months after opening. After that point, the formula may still appear fine but active ingredient potency is no longer guaranteed.
Signs the Product Has Gone Off
- Color change (yellowing or darkening of the serum)
- Texture shift (separation, unusual thickness, or thin watery consistency)
- Smell change (rancid or unusual odor where there was none before)
Any of these is a sign to replace the product. Using degraded actives does nothing for skin and can occasionally cause irritation.
Travel Storage Note
Heat during travel, particularly leaving products in a car or checked luggage in warm conditions, can degrade retinoid potency faster than normal. Keep the serum in carry-on luggage or pack it in an insulated bag during warm weather trips. When packing skincare and makeup for travel, the serum should stay in the coolest part of your bag, not exposed to direct light or heat sources.
FAQ on How To Use Clinique Smart Clinical Repair
How many pumps should I use per application?
Use 1 to 2 pumps per application. One pump covers the face. Two pumps if you’re including the neck, which you should. More product does not improve results and increases the chance of irritation, especially during the first few weeks.
Do I apply it to wet or dry skin?
Always apply to dry skin. After cleansing or toning, pat skin fully dry before dispensing the serum. Damp skin speeds up active ingredient absorption, which raises irritation risk with a retinoid-based formula like this one.
Can I use it twice a day?
Yes. Clinique recommends morning and night use. If your skin is new to retinoids, start with once daily (PM only) for two weeks first. Move to twice daily once your skin tolerates it without redness or flaking.
Do I need to follow it with a moisturizer?
Yes. The serum is a treatment step, not a hydration step. Follow with a moisturizer after the serum absorbs. The Clinique Smart Clinical Repair cream or rich cream is the recommended pairing, but any compatible moisturizer works.
Can I use it with other active ingredients?
Niacinamide and ceramides layer well with it. Avoid combining with other retinol products, high-strength AHAs, BHAs, or benzoyl peroxide in the same step. The formula already contains ascorbyl glucoside, so a separate vitamin C serum is usually unnecessary.
Is SPF required when using this serum?
Yes, and this is non-negotiable. The advanced retinoid increases sun sensitivity. Apply broad-spectrum SPF 30 or higher every morning after your moisturizer. Skipping sunscreen actively reverses the anti-aging results you are building with consistent use.
How long before I see results?
Hydration improves within days. Texture smoothing typically shows within 4 weeks. Visible wrinkle reduction develops between weeks 8 and 16 with consistent twice-daily use. Clinique’s own clinical data references a 16-week benchmark for measuring significant improvement.
Can I use it around the eye area?
No. Apply the serum across the face and neck but avoid the immediate eye area. The skin around the eyes is thinner and more reactive. Use a dedicated eye cream, like Clinique All About Eyes, to treat that zone separately.
Can I use Clinique Smart Clinical Repair with the 3-Step system?
Yes. The serum fits after the Clinique Clarifying Lotion (toning step) and before your moisturizer. It slots into the existing skincare routine order without replacing any step. Just allow each layer to absorb before applying the next product.
How should I store it to keep it effective?
Keep it away from direct sunlight and heat. A drawer or cabinet works well. Avoid bathroom storage if possible, since steam and temperature changes degrade retinoid potency over time. Check the PAO symbol on the packaging for the recommended use-by window after opening.
Conclusion
This conclusion is for an article presenting a complete breakdown of the Clinique Smart Clinical Repair routine, from first application to long-term skin repair results.
The serum works when you use it consistently, apply it to dry skin, and follow it with SPF every morning. Those three habits drive most of the visible improvement in fine lines, skin firmness, and texture.
The CL1870 Peptide Complex and advanced retinoid need time to do their job. Weeks, not days.
Store it correctly, respect the skincare layering order, and avoid pairing it with incompatible actives. Everything else falls into place from there.
Consistent twice-daily use, patience past the 8-week mark, and proper sun protection are what separate results from disappointment.

- What Is Skin Tint and Why Everyone Is Obsessed - July 11, 2026
- What Is Foundation and How Do You Choose One? - July 6, 2026
- How to Make Blush Last Longer - July 3, 2026


