

Your eyeshadow palette looks fine. That doesn’t mean it is.
Every time a brush touches a pan, it deposits skin oils, dead cells, and bacteria back into the product. Knowing how to clean makeup palettes properly is the difference between makeup that performs well and a palette quietly building up contamination you can’t see.
A 2024 study found microbial contamination in over half of sampled cosmetic products. Pressed powder, cream contour, blush, and highlight palettes are all affected.
This guide covers everything: the right tools, the correct isopropyl alcohol concentration, step-by-step methods for powder and cream formulas, cleaning frequency, and the mistakes that damage products during the process.
body { font-family: Georgia, serif; max-width: 800px; margin: 0 auto; padding: 20px; line-height: 1.7; color: #222; } p { margin: 0 0 1em 0; }
What Cleaning a Makeup Palette Actually Means

Cleaning a palette is not the same as sanitizing it. Cleaning removes visible buildup, fallout, and residue from the surface. Sanitizing kills bacteria and pathogens that you can’t see.
Both matter. Most people only do one.
A quick tissue wipe after use does remove surface powder, but it doesn’t touch the microbial load building up inside the pan. That layer accumulates every time a brush contacts the product, picks up skin oils, and returns for more.
Research published in the Iranian Journal of Public Health found that 56.25% of cosmetic products sampled from beauty salons showed measurable microbial contamination, with S. aureus being the most common bacterial contaminant.
There’s also a difference between depotting and cleaning. Depotting is removing a pan from its case entirely. That’s a separate process used for reorganizing a kit, not for routine hygiene.
The goal with palette cleaning is three things: remove the oxidized or contaminated top layer of product, disinfect the pan surface, and clean the physical case itself. All three are necessary, and none of them is complicated once you know the method.
Cleaning vs. Sanitizing: What Each Actually Does
| Action | What It Removes | Tools Used | When It’s Needed |
|---|---|---|---|
| Cleaning | Surface residue, fallout, visible buildup | Tissue, lint-free wipe, cotton swab | After each use |
| Sanitizing | Bacteria and cross-contamination risk | 70% isopropyl alcohol spray | Weekly (personal), after each use (professional kits) |
| Deep cleaning | Built-up residue in pans, edges, and case | Cotton swab, microfiber cloth, spatula | Monthly or as needed |
Cross-contamination from palette pan to palette pan is real. Using the same brush across multiple shades without wiping transfers bacteria between products, not just color.
When Cleaning Is a Safety Issue, Not Just Cosmetic
Eye infections are the most common consequence of poor palette hygiene. Bacteria like Pseudomonas aeruginosa and Staphylococcus aureus have been found repeatedly in used cosmetic products across multiple studies.
The FDA tracked 334 cosmetic product recalls between 2011 and 2023, with microbial contamination responsible for 76.8% of them (Journal of the American Academy of Dermatology, 2024). Bacteria were the most common contaminants, led by Pseudomonas species.
Shared palettes carry higher risk. In-use shared cosmetics in salon settings showed contamination levels far above the accepted standard of 103 CFU/g for skin products.
For personal use, this matters most if you have active breakouts, recent eye irritation, or skin that’s already compromised. Using a contaminated palette in those conditions can slow healing and spread bacteria across the face.
Tools and Products You Need Before You Start

Getting the right supplies together before cleaning means you won’t stop halfway through and grab something that damages the product. A few wrong choices here (oily wipes, rough paper towels, the wrong alcohol concentration) can ruin a palette or make the bacteria problem worse.
The Core Supplies
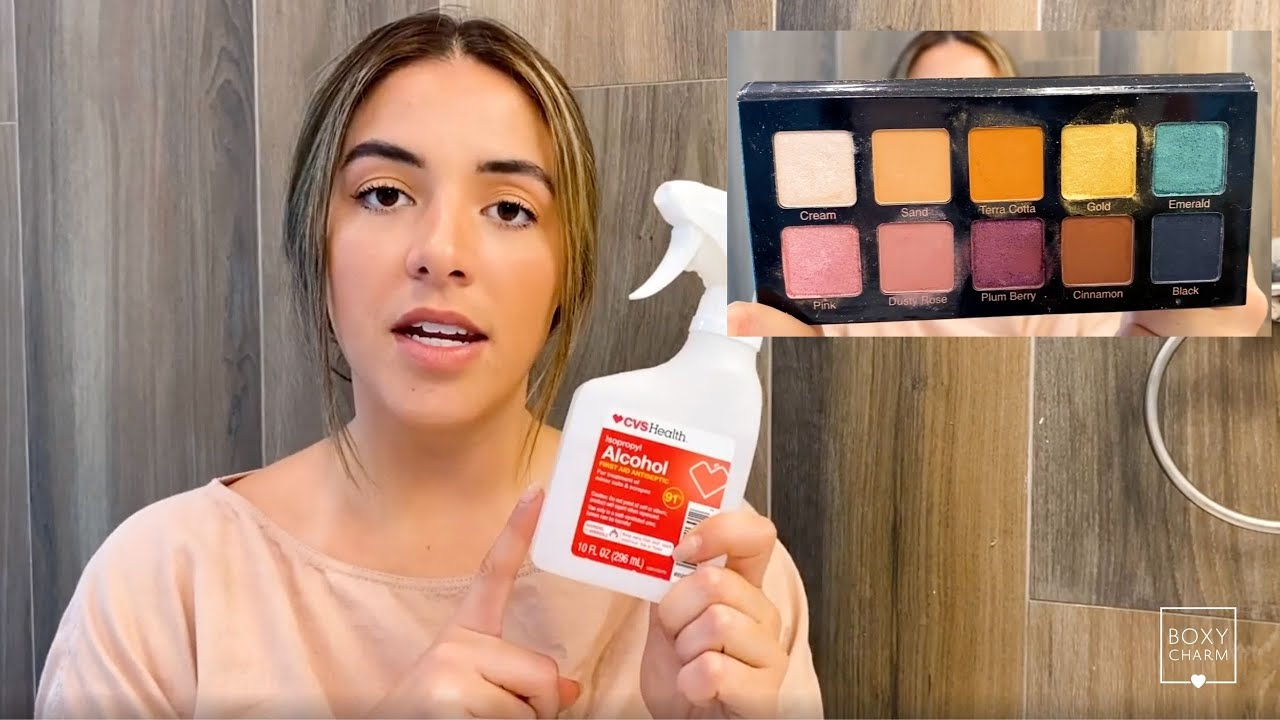
Isopropyl alcohol at 70% concentration is the standard. Not 99%. Not hand sanitizer.
The CDC recommends 60-90% alcohol solutions for disinfection, with 70% being optimal. The water content in 70% IPA slows evaporation, which gives the solution time to penetrate microbial cell walls before drying. At 99%, it evaporates too fast and can cause rapid surface protein coagulation that actually shields bacteria from the alcohol.
Studies published in the Journal of Hospital Infection show 70% IPA achieves greater than 99.9% reduction of common pathogens within 30 seconds, while 99% requires significantly longer contact time for the same result.
For pressing broken pans back together, 99% isopropyl alcohol is the exception. Its low water content makes it better suited to that specific task without over-saturating the pressed powder.
Full Supply List
- 70% isopropyl alcohol in a fine-mist spray bottle
- Lint-free wipes or cotton rounds (not regular cotton balls, which shed fibers)
- Cotton swabs for edges and crevices in the palette grid
- A small makeup spatula or toothpick for lifting dried product from the pan rim
- Microfiber cloth for the case exterior and mirrored lid
- Clean paper towel for scraping off the top layer of pressed powder
What to Avoid
Baby wipes often contain oils and moisturizing agents. They leave residue on pan surfaces and can alter the texture of pressed powders over time.
Standard paper towels shed small fibers that end up embedded in powder products. Lint-free materials only.
Acetone or nail polish remover should never go anywhere near palette pans. It dissolves binders in pressed powder and can break down the pigment suspension in cream products permanently. The palette case plastic can also degrade on contact.
How to Clean an Eyeshadow Palette

Eyeshadow palettes are the most-cleaned product in most kits, which means they’re also the most commonly cleaned incorrectly. Too much liquid, rushing the dry time, or skipping the top-layer removal are the three most common mistakes.
Step-by-Step: Pressed Powder Eyeshadow
Step one is removing the contaminated top layer. Take a clean piece of paper towel and gently scrape the very top surface of each pan. This lifts the layer that has accumulated skin oils, bacteria from previous brush contact, and oxidized product. You only need to remove a very thin layer.
Once that’s done:
- Hold the spray bottle 6-8 inches from the palette surface
- Mist lightly with 70% isopropyl alcohol, just enough to lightly dampen each pan
- Leave the palette open flat to air-dry completely, at least 10-15 minutes
- Clean the palette grid edges and hinge area with a cotton swab dipped in alcohol
Do not blow on the palette to speed up drying. That just transfers bacteria from your mouth onto the freshly sanitized surface.
Over-saturating the pan is the most common mistake. Too much liquid causes the binder in the pressed powder to break down. The result is patchy, crumbly product that applies unevenly. One light mist is enough.
How to Fix Broken Eyeshadow While Cleaning
If a pan is cracked or broken during cleaning, 99% isopropyl alcohol is the right tool here. Press the broken pieces back into the pan with a small spatula or the back of a spoon. Add a few drops of 99% IPA directly onto the pan, then press firmly with a coin wrapped in plastic wrap or a smooth flat surface.
Let it dry for at least 24 hours before using. The 99% concentration dries faster than 70%, which is why it works better for re-pressing without over-wetting the powder.
Shimmer and duochrome eyeshadow pans need a gentler touch during this process. The metallic particles that create the effect can separate from the binder if pressed too hard or flooded with liquid.
How to Clean a Cream or Liquid Palette
Cream palettes are the highest-risk format in any kit. The water activity in cream formulas creates a much better environment for bacterial growth than pressed powder. Bacteria found in cream products include the same pathogens responsible for skin infections and contact dermatitis.
Why Cream Products Need Different Handling
Research in salon-use cosmetics consistently shows skin products are the most contaminated category, partly because cream formulas have more frequent contact with powder puffs and applicators that reintroduce contamination after cleaning.
A 2024 study found that about 70% of cosmetic products in beauty salons were contaminated with bacteria, with skin-contact cream products showing the highest rates (Iranian Journal of Public Health).
The cleaning process differs from powder in one important way: you cannot scrape a thin top layer off a cream product the same way. Instead:
- Use a clean spatula to remove a small amount from the top of the cream pan, discarding it
- Wipe the walls of the pan and surrounding palette grid with a cotton swab lightly dampened with 70% IPA
- Do not spray IPA directly into the cream product. The alcohol will alter the emulsion.
- Wipe the interior lid if it has any product transfer on it
Alcohol Concentration Matters More for Cream Products
Stick to 70% for surface sanitizing around cream pans. Using 99% on the palette grid near cream products risks drying out the formula at the edges where the pan meets the case.
For professional artists working with cream contour, cream blush, or cream highlighter palettes on multiple clients, the standard is to scrape working product onto a metal mixing palette first. The original pan should never make direct contact with any applicator used on a client. That way, the palette itself stays cleaner for longer and requires less aggressive sanitizing between sessions.
How to Clean a Contour or Blush Palette

Contour and blush palettes are mostly pressed powder, but the formulas inside vary a lot. Matte powders, shimmer powders, and baked formulas all respond differently to cleaning. Using the same method across all three without adjusting is how people accidentally wreck products.
Cleaning by Formula Type
| Formula | Cleaning Method | Key Caution |
|---|---|---|
| Matte pressed powder | Light surface scrape + minimal 70% IPA mist | Avoid over-saturating; matte binders break down easily |
| Shimmer / highlight powder | Very light IPA mist only; no scraping | Scraping removes top-layer shimmer/metallic payoff |
| Baked formula | Dry wipe preferred; minimal IPA if needed | Porous texture absorbs liquid quickly and can turn gummy |
Baked eyeshadow and blush are the trickiest. The porous texture that makes them apply so smoothly also makes them absorb liquid fast. A full IPA mist can make a baked product swell, harden unevenly, and then crumble on the next use.
Cleaning the Mirrored Lid
Use a microfiber cloth dampened with a small amount of 70% IPA to wipe the mirror in one direction. Circular wiping patterns cause streaking and leave lint behind.
Most mirror issues in palettes come from powder fallout that settles on the surface and then gets pressed in by repeated handling. A weekly wipe-down prevents that buildup from becoming a permanent haze. Brands like Morphe and Urban Decay use standard glass mirrors in most palettes, which handle IPA cleaning without degrading.
How to Clean the Palette Case Itself

The case is the most skipped part. Most people clean the pans and call it done. But the exterior of a palette, the hinge, the clasp, the interior walls, and the lid all collect bacteria from hands, surfaces, and product fallout. None of that disappears on its own.
Cleaning by Case Material
Plastic cases are the most common and the most forgiving. Wipe down with a lint-free cloth dampened with 70% IPA, including the clasp and the hinge.
Cardboard cases are tricky. A 2024 survey of makeup artist practices noted that cardboard-backed palettes from brands like Morphe’s older formats don’t tolerate liquid cleaning well. For cardboard, dry wipe only. Avoid any moisture contact on the case exterior because the board warps and the foil print peels.
Metal cases (found in professional-grade palettes from brands like Z Palette or some MAC pro compacts) clean easily with IPA wipes and can handle more thorough cleaning than plastic or cardboard.
The Interior Lid and Pan Area
Foundation and cream transfer on the inside lid is extremely common and almost always ignored. A cotton swab with 70% IPA removes it cleanly. Let it dry fully before closing the palette, because trapping moisture inside a closed case creates exactly the humid environment that bacteria need to multiply.
The palette grid, the raised dividers between pans, collects pressed powder and fallout that builds up over weeks. A dry toothpick or cotton swab clears that out before any alcohol application. Doing it after means spreading damp residue into the grooves instead of removing it.
Finally, once the interior is dry, leave the palette open in a clean area for at least 15 minutes before storing. Storing while still slightly damp is one of the fastest ways to grow mold in a cream palette.
If you also want to keep your makeup brushes clean and your makeup sponges in good condition, the same general principle applies: use the right concentration of IPA, remove surface contamination first, and let everything dry fully before storing.
body { font-family: Georgia, serif; max-width: 800px; margin: 0 auto; padding: 20px; line-height: 1.7; color: #222; } h2 { font-size: 1.5em; margin-top: 2em; margin-bottom: 0.5em; border-bottom: 2px solid #ccc; padding-bottom: 6px; } h3 { font-size: 1.15em; margin-top: 1.5em; margin-bottom: 0.4em; } h4 { font-size: 1em; margin-top: 1.2em; } p { margin: 0 0 1em 0; } ul, ol { margin: 0.5em 0 1em 1.5em; } li { margin-bottom: 0.4em; } table { border-collapse: collapse; width: 100%; margin: 1em 0 1.5em 0; font-size: 0.93em; } th { background: #f5f5f5; text-align: left; padding: 8px 10px; border: 1px solid #ccc; } td { padding: 7px 10px; border: 1px solid #ddd; vertical-align: top; } hr { border: none; border-top: 1px solid #ddd; margin: 2em 0; } a { color: #b5405a; } em { font-style: italic; }
How Often to Clean Your Makeup Palettes

Frequency depends on two things: how often you use the palette, and who uses it.
Those two factors alone determine the cleaning schedule. Everything else is secondary.
According to a dermatologist cited by CNBC (2024), makeup brushes and tools that touch the skin should be cleaned and sterilized at least weekly. The same logic applies to the palette pans those brushes contact repeatedly.
Personal Use: A Realistic Schedule
Daily-use palettes need a weekly surface sanitize and a monthly deep clean of the case.
Occasional-use palettes (pulled out once or twice a month) need sanitizing every 4-6 weeks. Still regular, just less so.
Powder eyeshadow palettes generally have a shelf life of up to 24 months after opening. Cream-based palettes run closer to 12 months. Cleaning consistently extends both.
A quick check before using any palette: look for an oily film on the pan surface, a hard or waxy top layer that blocks pigment, or any smell that wasn’t there before. All three are signs the palette needs cleaning before you use it, regardless of your regular schedule.
Signs a Palette Needs Cleaning Immediately
Schedule or not, these override everything:
- Color transfer between pans that weren’t in contact with each other
- A visibly shiny or greasy film sitting on powder pans
- A recent breakout or eye irritation after using the product
- The palette was stored in a humid bathroom for an extended period
- Any brush used on it wasn’t clean
What Happens If You Skip Cleaning
Pressed powder won’t support significant bacterial growth the way cream products do. But it does accumulate skin oils, dead skin cells, and fallout from other pans over time.
That buildup does two things. First, it creates a hard, oxidized top layer that blocks pigment payoff. Second, the oils degrade the binder holding the powder together, which speeds up crumbling and patchiness during application.
The product performs worse, and the palette expires faster. Both outcomes are preventable with a weekly wipe-down.
Mistakes That Damage Palettes During Cleaning

Most palette damage isn’t from use. It’s from cleaning incorrectly.
The product can handle normal daily contact. What it can’t handle is a flood of liquid, the wrong solvent, or being closed before it’s dry.
Over-Saturating the Pan
This is the most common mistake by a wide margin.
Over-spraying causes the binder in pressed powder to dissolve. The result is a grainy, patchy surface that applies unevenly and crumbles faster than it should. Colocara’s 2025 guide on palette sanitization specifically flags this: using too much alcohol alters pigment texture and causes clumping.
One light mist from 6-8 inches away is all that’s needed. If the pan looks visibly wet, that’s too much.
Cleaning While the Palette Is Tilted or Upright
Liquid runs. That seems obvious until you’re cleaning quickly and have the palette propped against a wall. Alcohol pooling into one corner of a pan, or running under the pan rim, causes uneven damage.
Always lay the palette completely flat before applying any liquid. Clean one section at a time and let it dry before moving the palette at all.
Using the Wrong Products Near the Pans
| Product | Problem | Safer Alternative |
|---|---|---|
| Acetone / nail polish remover | Breaks down binders, damages plastic packaging | 70% isopropyl alcohol |
| Baby wipes (oily formulas) | Leaves residue that alters powder texture | Lint-free wipes or dry cotton rounds |
| Paper towels | Shed fibers into pans, contaminate product | Microfiber cloth or cotton rounds |
| Water alone | No sanitization; can oversaturate and weaken formula | 70% isopropyl alcohol (balanced for cleaning) |
Storing Before Fully Dry
Closing a palette that still has moisture inside traps humidity. That’s the exact condition bacteria and mold need to grow.
Cream palette cleaning in particular needs at least 15-20 minutes of open air drying time before the case gets closed. Powder palettes need a minimum of 10 minutes. Rushing this step undoes everything the cleaning accomplished.
Scraping Too Aggressively on Shimmer and Duochrome Pans
Hard scraping is fine for a matte powder, where the color is consistent throughout. On shimmer and duochrome eyeshadows, the metallic effect comes from reflective particles (mica, pearl, metallic pigments) sitting at the top layer. Scrape those away and you’re left with a flat, less reflective pan that won’t recover.
For shimmer pans, skip the scrape entirely. A very light mist of 70% IPA and air drying is all that’s needed for routine sanitizing.
Sanitizing Palettes for Shared or Professional Use
Personal palette cleaning is about hygiene. Professional palette sanitizing is about preventing direct infection transmission between clients.
That’s a different standard, and it requires a different approach.
The Makeup Artist Sanitation Standard (MASS) requires that makeup palettes and compacts be disinfected properly before and after each application on every client, without exception. Products that have been double-dipped into are considered contaminated and must be discarded, not cleaned.
The No-Double-Dip Rule
This is the foundation of professional palette hygiene. Once a brush, spatula, or applicator has touched a client’s skin and returns to the original palette pan, the contamination runs in both directions.
The correct workflow:
- Scrape product from the palette pan onto a clean metal mixing palette using a sanitized spatula
- Work from the mixing palette, not directly from the original pan
- Use a fresh disposable applicator for each new product pick-up on cream and lip products
- For powder eyeshadow, use only clean, dry brushes that haven’t contacted skin on that session
This keeps the main palette stock clean, which reduces how often it needs full sanitizing and extends product life considerably.
Sanitizing Protocols Between Clients
Powder palettes: Light mist of 70% IPA, allow to evaporate completely before the next use.
Cream palettes: Remove the top layer with a clean spatula, discard that product, wipe pan walls with an IPA-dampened cotton swab. Do not spray IPA directly into the cream product.
The Makeup Standard organization recommends IPA solutions between 60-80% concentration for professional on-set and in-studio sanitizing. Below 60% and the solution stops being effective. Above 80% and it evaporates too fast to complete the cell-wall penetration needed to kill pathogens.
Disposable Applicators and Their Role
Keeping a palette clean long-term is easier when the brushes and tools contacting it are already clean. Disposable lip wands, mascara spoolies, and eyeshadow applicators reduce how much bacteria reaches the palette pan in the first place.
You can also learn more about properly sanitizing makeup across your full kit, and about storing makeup correctly to reduce contamination between sessions. Both practices directly affect how long a clean palette stays clean after sanitizing.
For artists doing bridal parties, fashion work, or any high-volume session where multiple clients are served back to back, the standard recommendation is to carry 3-4 complete brush sets so cleaning between each client doesn’t create a bottleneck.
body { font-family: Georgia, serif; max-width: 800px; margin: 0 auto; padding: 20px; line-height: 1.7; color: #222; } h2 { font-size: 1.5em; margin-top: 2em; margin-bottom: 0.5em; border-bottom: 2px solid #ccc; padding-bottom: 6px; } h3 { font-size: 1.15em; margin-top: 1.5em; margin-bottom: 0.4em; } p { margin: 0 0 1em 0; } ul, ol { margin: 0.5em 0 1em 1.5em; } li { margin-bottom: 0.4em; } table { border-collapse: collapse; width: 100%; margin: 1em 0 1.5em 0; font-size: 0.93em; } th { background: #f5f5f5; text-align: left; padding: 8px 10px; border: 1px solid #ccc; } td { padding: 7px 10px; border: 1px solid #ddd; vertical-align: top; } hr { border: none; border-top: 1px solid #ddd; margin: 2em 0; } a { color: #b5405a; }
FAQ on How To Clean Makeup Palettes
Can I use 99% isopropyl alcohol to sanitize my eyeshadow palette?
Stick to 70% isopropyl alcohol for sanitizing. The 99% concentration evaporates too fast to kill bacteria effectively and can damage pressed powder binders. Reserve 99% only for re-pressing broken pans.
How do I clean a cream eyeshadow palette without ruining the formula?
Never spray IPA directly into cream pans. Use a clean spatula to remove the top layer, then wipe the pan walls with a cotton swab lightly dampened with 70% alcohol. Let it dry fully before closing.
Will isopropyl alcohol ruin my shimmer or duochrome eyeshadow?
Aggressive scraping damages shimmer pans more than alcohol does. Skip the top-layer scrape on shimmer and duochrome shades. A light mist of 70% IPA from 6-8 inches away is safe and sufficient.
How often should I clean my makeup palette?
Daily-use palettes need weekly sanitizing. Occasional-use palettes need cleaning every 4-6 weeks. Sanitize immediately if you notice an oily film on the pans, color cross-contamination, or any recent skin irritation after use.
Can baby wipes clean a makeup palette?
No. Most baby wipes contain oils and moisturizing agents that leave residue on pan surfaces. That residue alters pressed powder texture over time. Use lint-free wipes or cotton rounds with 70% isopropyl alcohol instead.
How do I fix a broken eyeshadow pan while cleaning?
Press broken pieces back into the pan with a spatula. Add a few drops of 99% isopropyl alcohol, press flat with plastic wrap over a coin or spoon. Leave open to dry for at least 24 hours before use.
How do I clean the palette case and mirrored lid?
Wipe plastic or metal cases with a lint-free cloth dampened with 70% IPA. For cardboard cases, dry wipe only. Clean mirrored lids in one direction with a microfiber cloth to prevent streaking and lint buildup.
How do professional makeup artists sanitize shared palettes between clients?
Professionals never double-dip. Product is scraped onto a metal mixing palette with a sanitized spatula. After each client, powder pans get a 70% IPA mist. Cream pans get the top layer removed, then a cotton swab wipe-down.
What are the signs that a palette needs cleaning right away?
Look for a shiny or greasy film on powder pans, color bleeding between shades, a hard surface layer blocking pigment payoff, or any odor change. Recent skin breakouts or eye irritation after use are also clear indicators.
Can cleaning extend the lifespan of my makeup palette?
Yes. Powder eyeshadow palettes last up to 24 months after opening when maintained properly. Skin oils and bacteria degrade binders and alter texture. Regular palette hygiene keeps product performance consistent and slows that breakdown significantly.
body { font-family: Georgia, serif; max-width: 800px; margin: 0 auto; padding: 20px; line-height: 1.7; color: #222; } h2 { font-size: 1.5em; margin-top: 2em; margin-bottom: 0.5em; border-bottom: 2px solid #ccc; padding-bottom: 6px; } h3 { font-size: 1.15em; margin-top: 1.5em; margin-bottom: 0.4em; } p { margin: 0 0 1em 0; }
Conclusion
This conclusion is for an article presenting a complete guide to palette cleaning frequency, product-specific methods, and the sanitation standards that protect both your skin and your kit.
The core takeaway is simple. Use 70% isopropyl alcohol, remove the top layer before sanitizing, and let everything dry fully before storing.
Pressed powder, cream contour, blush, and shimmer formulas each respond differently to cleaning. Adjust your method by formula type and you won’t damage a single pan.
For professional use, the no-double-dip rule and disposable applicators keep palette cross-contamination from becoming a client safety issue.
Consistent palette hygiene extends product life, improves pigment payoff, and removes the bacteria buildup that a tissue wipe never reaches.
body { font-family: Georgia, serif; max-width: 800px; margin: 0 auto; padding: 20px; line-height: 1.7; color: #222; } h2 { font-size: 1.5em; margin-top: 2em; margin-bottom: 0.5em; border-bottom: 2px solid #ccc; padding-bottom: 6px; } p { margin: 0 0 1em 0; }

She started writing on the site after fielding the same questions from clients and friends often enough to just write the answers down: which red won't turn orange on a warm undertone, how to keep lipstick from feathering into fine lines, why a "12-hour" formula rarely survives dinner.
Every review on the site follows the same rule she uses with paying clients: wear it first, then decide if it's worth recommending.
- How to Choose Setting Powder for Your Skin Type - August 1, 2026
- How Long Does Eyeliner Last Before It Expires? - July 28, 2026
- What Is Contour and How Do You Apply It? - July 25, 2026


