

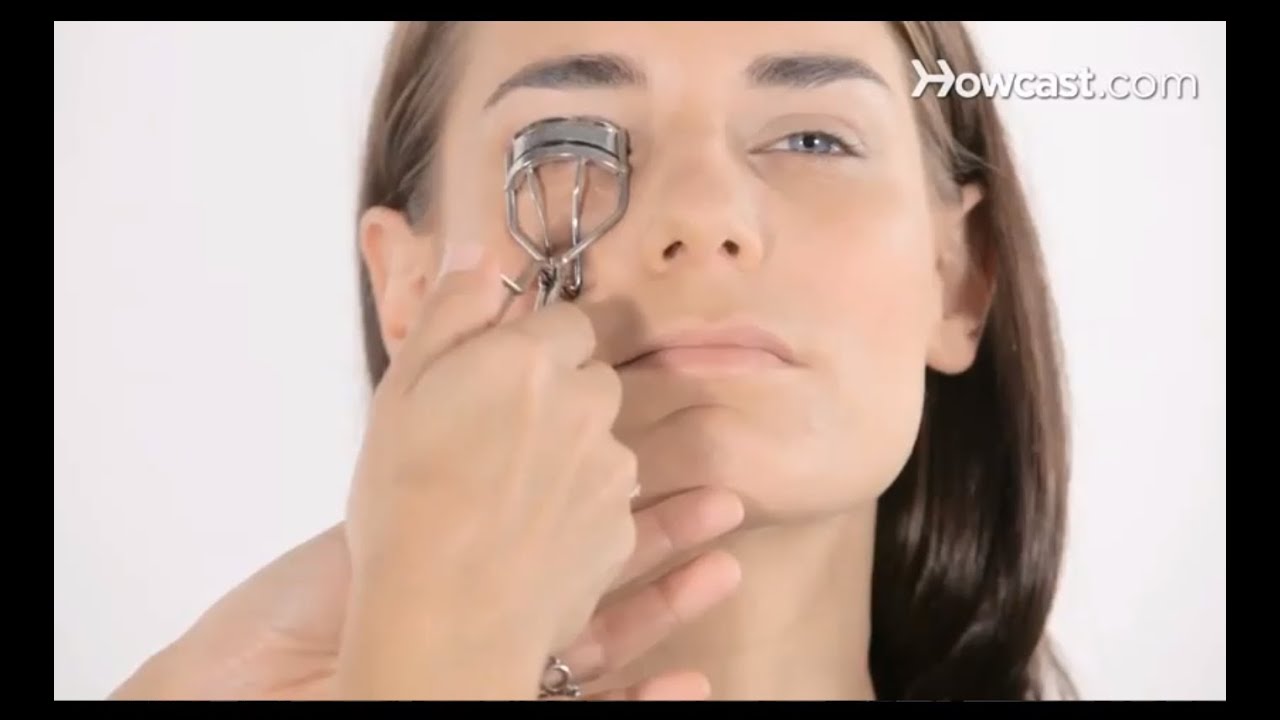
Your eyelash curler touches one of the most bacteria-prone areas on your face every single day.
Mascara residue, skin oils, and dead cells from the eyelid margin build up on the rubber pad and hinge after each use. Left unchecked, that buildup becomes a breeding ground for bacteria like Staphylococcus aureus, raising the risk of eye infections, styes, and conjunctivitis.
Knowing how to sanitize an eyelash curler properly makes a real difference, and it takes less than two minutes when you have the right method.
This guide covers everything: what sanitizing actually means versus basic cleaning, the exact supplies you need, a step-by-step curler cleaning routine, how often to do it, and when to replace the rubber pad entirely.
What Sanitizing an Eyelash Curler Means

Sanitizing is not the same as wiping your curler on a tissue. It means reducing bacterial load to a level that no longer poses a risk to the eye area.
Cleaning removes visible residue like mascara and oils. Sanitizing kills the bacteria that stick around after that residue is gone. Disinfecting goes further, targeting a broader range of pathogens. For personal use at home, sanitizing is the target.
The rubber pad absorbs sebum, proteins from tears, and dead skin cells from the eyelid margin. Once embedded, that organic material feeds microbial growth. A 2023 microbiological survey found that 92% of used eyelash curlers tested positive for culturable bacteria, with 38% harboring Staphylococcus aureus (Cosmetica Labs, 2023).
A 2025 study published in the International Journal of Microbiology found that cosmetic tools show a diverse microbial profile, with Gram-positive bacteria predominating at 81% of isolates, including Staphylococcus and Micrococcus species.
The hinge mechanism is the most overlooked spot. Moisture trapped there accelerates metal corrosion, and rust particles can flake near the delicate ocular margin. That matters especially for anyone who wears contact lenses or has a history of eye infections like conjunctivitis or a stye.
Sanitizing is also what separates a routine that protects your eye health from one that just keeps your tool looking clean on the surface. The difference between the two is bigger than most people realize.
What You Need Before You Start

You do not need a full supply cabinet. Three or four items cover everything.
The core supplies:
- 70% isopropyl alcohol (not 91% or 99%)
- Cotton pads and cotton swabs
- Mild dish soap and warm water
- A soft lint-free cloth or microfiber square
The concentration of alcohol matters more than most people expect. Studies published in the Journal of Hospital Infection (2020) show that 70% IPA achieves greater than 99.9% reduction of common pathogens within 30 seconds. The 30% water content slows evaporation, increasing contact time with the surface and allowing the alcohol to penetrate microbial cell walls.
Higher concentrations like 91% or 99% actually coagulate surface proteins too fast, forming a protective barrier that prevents deeper penetration. The CDC recommends 60-90% alcohol for surface disinfection, with 70% being the standard for healthcare settings.
What to skip:
- Acetone and bleach (both degrade rubber pads fast)
- Hydrogen peroxide (can corrode metal over time)
- Makeup wipes alone (not sufficient for sanitizing)
Optional: barbicide or a professional-grade cosmetic sanitizing solution. These are worth having if you share your kit or work on multiple people. Jones Road Beauty, founded by makeup artist Bobbi Brown, recommends wiping the curler after every use with 70% isopropyl alcohol on a cotton pad.
How to Remove the Rubber Pad
Most rubber pads slide out of a small channel or slot along the lower arm of the curler. Press one end gently to pop it loose, then slide it free.
Pad removal by brand type:
- Shiseido (213): Slide from one end of the channel, no tools needed
- Shu Uemura: Press down on one side to release; ships with a silicone replacement pad included
- Kevyn Aucoin: Red silicone pad pulls out from a groove along the lower frame
- Tweezerman: Standard rubber pad slides out from a narrow channel; replacement pads widely available at Ulta and Sephora
If the pad is stuck, use the corner of a cotton swab or a soft toothpick to push it loose. Do not use metal tools near the hinge.
Before reinserting, inspect the pad. According to InStyle, rubber pads have an average lifespan of about three months with regular use. Shu Uemura confirms the same figure for their silicone pads used daily. Surratt recommends replacing every three to four months.
Signs the pad needs replacing rather than cleaning: visible flat spots, surface cracks, discoloration that does not come off with alcohol, or any creasing in the rubber. A creased pad can crimp lashes or cause breakage. If you see a groove pressed into the surface, that pad is done.
Step-by-Step Sanitizing Process

Do this in order. Skipping the pre-clean step means sanitizing over a layer of mascara residue, which reduces how effective the alcohol actually is.
Sanitizing the Metal Frame
Start by removing visible buildup first. Wash the metal frame with warm water and a drop of mild dish soap, scrubbing lightly with a soft cloth. Rinse and pat dry immediately.
Do not let water sit in the hinge. Capillary action pulls moisture deep into the joint where it stays for days and leads to oxidation.
Alcohol application on the frame:
- Dampen a cotton pad with 70% isopropyl alcohol
- Wipe down the entire lower arm, upper frame, and both sides of the hinge
- Use a cotton swab soaked in alcohol to reach inside the hinge joint, rotating gently
- Repeat with a fresh swab until it comes out clean
Independent lab testing by Cosmetica Labs (2023) found this hinge-swabbing step eliminates 94% of hinge-trapped bacteria. Let the frame air-dry fully before reassembling. That takes about 30 to 60 seconds.
Sanitizing the Rubber Pad
Lay the removed pad flat on a clean surface. Dab both sides with 70% isopropyl alcohol using a cotton swab or the corner of a microfiber cloth.
Do not soak the pad. Soaking in alcohol degrades nitrile rubber elasticity. Some sources suggest brief submersion in alcohol for a minute or less, but repeated soaking shortens pad life significantly.
Allow the pad to air-dry for at least 60 seconds before putting it back in the frame. Reinserting it while still wet traps moisture against the metal.
Once reattached, close the curler a few times to confirm the pad is seated evenly and the spring opens cleanly. Uneven tension or sticking is a sign the pad is misaligned or the hinge needs another pass with a swab.
How Often to Sanitize
Frequency depends on how you use the curler, not just how often.
| Use Type | Recommended Frequency | Pad Replacement |
|---|---|---|
| Personal daily use | Wipe with alcohol after each use; deep clean weekly | Every 3 months |
| Personal occasional use | Deep clean before and after each use | Every 3–6 months |
| Professional / shared kit | Fully sanitize between each client | Every 4–6 weeks or after any eye issue |
| After eye infection / stye | Sanitize immediately; pause use until fully healed | Replace pad or entire curler |
Makeup artist Katey Denno and other professionals cited in Good Housekeeping recommend at minimum a wipe-down after every use. For deep cleaning, once every one to two weeks covers most personal use cases.
For contact lens wearers and anyone with a history of conjunctivitis, eye styes, or sensitivity around the eyelid margin, err on the side of more frequent cleaning. Beautylish cites makeup artist Vincent’s recommendation: “If there’s any type of eye infection, replace the entire instrument.”
Around 38% of female consumers regularly use eyelash curlers, according to the Global Makeup Tools Market report (2024). That is a lot of tools going weeks or months without any sanitizing. Most hygiene issues come from inconsistency, not ignorance.
How to Sanitize Different Curler Types

Not all curlers respond the same way to alcohol and water. The method needs to adjust based on the materials involved.
Classic Manual Curlers
Most forgiving to sanitize. Metal frames from brands like Shiseido, Tweezerman, and Japonesque handle alcohol well. The full five-step process applies without modification.
Watch for rust on budget chrome-plated models. If the frame shows any pitting or orange discoloration, replace it. Structural integrity drops with corrosion, and metal particles near the eye are a real risk.
Heated Eyelash Curlers
Do not apply alcohol near heating elements or electrical contacts. Alcohol is flammable and can also damage the heating mechanism.
Safe approach for heated curlers:
- Power off and let cool completely before touching
- Wipe the rubber or silicone pad with a barely damp alcohol cloth only
- Clean the outer frame and handle with a dry or very lightly damp cloth
- Never submerge any part of the tool
Demand for heated curlers has increased by 42% in recent years, particularly in Asia-Pacific markets (Global Makeup Tools Market, 2024). That growth means a lot of people are sanitizing these tools incorrectly, or not at all.
Travel and Mini Curlers
Many travel curlers have fixed pads that cannot be removed. Wipe the pad surface directly with an alcohol-dampened swab. Get into the gap between the pad and the frame where mascara residue collects.
Storage hygiene matters more with travel tools. Tossing a curler loose in a makeup bag picks up bacteria from every other product it touches. A small zip pouch or hard case keeps it clean between uses.
Mistakes That Damage the Curler During Sanitizing
Most sanitizing damage happens in two minutes or less. A few habits that feel harmless are actually shortening your curler’s life or making it less safe to use.
A study published in the Journal of Applied Microbiology found that 79-90% of used cosmetic products carry bacterial contamination. The irony is that improper cleaning attempts often introduce new problems while trying to fix that one.
Using Too Much Liquid Around the Hinge
The hinge is the most vulnerable part.
Soaking the full curler or running it under tap water forces moisture into the joint mechanism, where it sits trapped and promotes rust. Chrome-plated budget curlers are especially prone to this.
- Use a damp swab, not a soaked cloth
- Never run the hinge under running water
- Pat the joint dry immediately with a lint-free cloth after any alcohol application
Ophthalmologists reported a 23% year-over-year rise in foreign-body corneal abrasions linked to corroded curlers, according to the American Academy of Ophthalmology (2024). Rust does not just ruin the tool. It creates real risk near the eye.
Skipping the Drying Step
Reassembling while still wet traps moisture against the metal frame and accelerates oxidation. This is the most common mistake people skip because it feels like an unnecessary wait.
Let the frame air-dry for at least 30 to 60 seconds after alcohol application. The pad needs the same. Reinserting a damp pad against metal starts the same corrosion cycle you were trying to prevent.
Using Harsh Chemicals on the Rubber Pad
Acetone, bleach, and hydrogen peroxide all degrade rubber and silicone faster than normal use would.
What happens with wrong products:
- Acetone: Strips elasticity, causes cracking within weeks
- Bleach: Degrades both the rubber and the metal frame’s protective coating
- 99% isopropyl alcohol: Evaporates too fast to disinfect properly, and repeated use dries out rubber pads faster than 70%
Stick to 70% isopropyl alcohol on pads. It disinfects without the degradation.
Replacing the Rubber Pad After Sanitizing

Sanitizing extends pad life. It does not replace the need to swap the pad out entirely.
At some point, no amount of cleaning recovers a pad that has physically broken down. Knowing when that line is crossed matters more than the replacement process itself.
Signs the Pad Needs Replacing
According to Seki Edge and multiple brand recommendations, replacing pads every 2-3 months for daily users keeps both hygiene and curl performance consistent.
But the real signal is physical condition, not the calendar:
- A visible groove or crease pressed into the surface
- Flat spots where the rubber has compressed permanently
- Surface cracks or splits, even small ones
- Discoloration that does not lift after cleaning
- Lashes sticking during use, or curls that crimp instead of curve
A creased pad is the most serious issue. That groove gives the metal upper arm a point of contact with lashes, which can break or cut them. Project Vanity’s testing documented cases where worn pads on cheap curlers led to lashes being cut at the root.
How to Seat a New Pad Correctly
Brand-specific fit matters. Surratt pads only fit Surratt curlers. Shiseido pads fit Shiseido 213. Universal silicone pads (available at Ulta, Sephora, and Amazon) work with most standard curlers including Tweezerman and Japonesque.
Slide or press the new pad into the channel, starting from one end and working across evenly. Do not force it from the center. Press the full length of the pad down until it sits flush with no air gaps at either end.
Test before using on lashes. Close the curler a few times and check that the pad stays in place and does not shift sideways. Misaligned pads produce uneven curl and can pinch the eyelid.
| Brand | Pad Type | Replacement Interval | Replacement Source |
|---|---|---|---|
| Shiseido 213 | Rubber | Every 3 months | Brand website, Sephora |
| Shu Uemura | Silicone | Every 3 months (daily use) | Brand website; sold separately |
| Kevyn Aucoin | Silicone (red) | Every 6 months | Included with curler; limited retail |
| Tweezerman | Rubber / silicone | Every 3–6 months | Ulta, Sephora, drugstores |
Storing a Sanitized Eyelash Curler

A sanitized curler stored poorly will recontaminate within hours. Storage is the last step, but it determines whether the cleaning was worth doing.
A Journal of Applied Microbiology study found 93% of beauty blenders had never been cleaned, and contamination spread directly from storage conditions. The same principle applies to any beauty tool stored loose in a makeup bag.
Where Not to Store It
The bathroom is the worst choice. Humidity from showers and sinks creates the exact environment where bacteria and rust thrive.
Loose in a makeup bag is the second-worst option. Every time the bag gets handled, the curler picks up bacteria from lipstick caps, mascara tubes, and whatever else it touches. That is a contamination cycle that starts before you even use it.
Best Storage Options
Professional makeup artists, including those trained through programs at institutions like the Online Makeup Academy, are taught to store sanitized metal tools in closed, labeled containers away from used tools.
For personal use, three options work well:
- Hard case or clam shell: Keeps the curler protected from impact and isolated from other products
- Open acrylic stand on a vanity: Promotes airflow, prevents moisture buildup, and keeps the tool accessible without contact contamination
- Zippered fabric pouch dedicated to the curler only: Good for travel; wash the pouch with the same regularity as the tool
Keep the storage spot away from direct sunlight and heat sources. Prolonged heat exposure softens rubber pads and weakens hinge tension over time.
Storage for Professional and Travel Kits
If you work on multiple people, the storage rules get stricter. Used and sanitized tools should never share the same pouch or case.
Cosmetology standards outlined by institutions like TENAJ Salon Institute require sanitized metal tools to be kept in closed, labeled containers separate from used equipment. That same approach applies in a personal travel kit if you are sharing tools or working in variable environments.
For travel, a dedicated hard-sided case prevents the curler from being crushed or contaminated by other items. Makeup artist Brande Bytheway noted that travel storage, specifically how loosely a curler gets tossed around in a kit bag, directly affects hinge alignment and long-term curl performance.
FAQ on How To Sanitize Eyelash Curler
What is the best way to sanitize an eyelash curler?
Remove the rubber pad first. Wipe the metal frame and hinge with a cotton swab dampened in 70% isopropyl alcohol, then dab both sides of the pad separately. Let everything air-dry fully before reassembling. Takes under two minutes.
How often should I sanitize my eyelash curler?
Wipe it down with an alcohol pad after every use. Do a deeper clean, including the hinge, once a week. If you have had a stye or eye infection, sanitize immediately and replace the rubber pad before using it again.
Can I use 91% or 99% isopropyl alcohol instead of 70%?
Not ideal. Higher concentrations evaporate too fast to kill bacteria effectively and degrade rubber pads more quickly. The CDC recommends 60-90% alcohol for surface disinfection. Stick with 70% isopropyl alcohol for both better results and longer pad life.
Can I sanitize a heated eyelash curler the same way?
No. Keep alcohol away from heating elements and electrical contacts. Power it off, let it cool completely, then lightly dab only the silicone pad with a barely damp alcohol cloth. Never submerge any part of a heated curler.
Does sanitizing an eyelash curler prevent eye infections?
Yes, consistently. A 2023 survey found 92% of used curlers tested positive for culturable bacteria. Regular sanitizing removes mascara residue and reduces bacterial load, lowering the risk of conjunctivitis, styes, and eyelid margin irritation significantly.
How do I clean the rubber pad without damaging it?
Remove it from the curler first. Dab both sides with 70% isopropyl alcohol using a cotton swab. Do not soak it. Soaking degrades rubber elasticity and shortens pad life. Air-dry for at least 60 seconds before reinserting.
When should I replace the rubber pad instead of sanitizing it?
Replace it when you see visible creases, flat spots, cracks, or discoloration that does not clean off. A creased pad can crimp or cut lashes. Most brands recommend replacing every three months with daily use regardless of visible condition.
Can I sanitize my eyelash curler with makeup wipes?
Makeup wipes remove surface residue but do not sanitize. They lack the alcohol concentration needed to reduce bacterial load on metal tools. Use them as a quick pre-clean step only, followed by isopropyl alcohol for actual disinfection.
Is it safe to share an eyelash curler between people?
Only if you fully sanitize it between uses and replace the rubber pad. Sharing without sanitizing transfers bacteria directly to the eyelid margin. Professional makeup artists sanitize curlers between every client and change pads far more frequently than personal users.
Can I sanitize my eyelash curler with water and soap alone?
Soap and water remove visible buildup but do not kill bacteria reliably on metal tools. Use mild soap as a first step to clean mascara residue, then follow with 70% isopropyl alcohol to actually sanitize the frame and pad.
Conclusion
This conclusion is for an article on how to sanitize an eyelash curler, and the core takeaway is straightforward: a clean curler is a safer curler.
Regular disinfection with 70% isopropyl alcohol, proper hinge cleaning, and timely rubber pad replacement are the three habits that actually protect your eye health.
Mascara residue and sebum buildup do not just affect curl performance. They create conditions where bacteria thrive near the eyelid margin.
Whether you use a Shiseido, Tweezerman, or heated curler, the beauty tool hygiene routine is the same: wipe down after each use, deep clean weekly, and swap the silicone or rubber pad every three months.
Consistent curler maintenance takes less time than dealing with a stye.

She started writing on the site after fielding the same questions from clients and friends often enough to just write the answers down: which red won't turn orange on a warm undertone, how to keep lipstick from feathering into fine lines, why a "12-hour" formula rarely survives dinner.
Every review on the site follows the same rule she uses with paying clients: wear it first, then decide if it's worth recommending.
- How to Choose Setting Powder for Your Skin Type - August 1, 2026
- How Long Does Eyeliner Last Before It Expires? - July 28, 2026
- What Is Contour and How Do You Apply It? - July 25, 2026


