

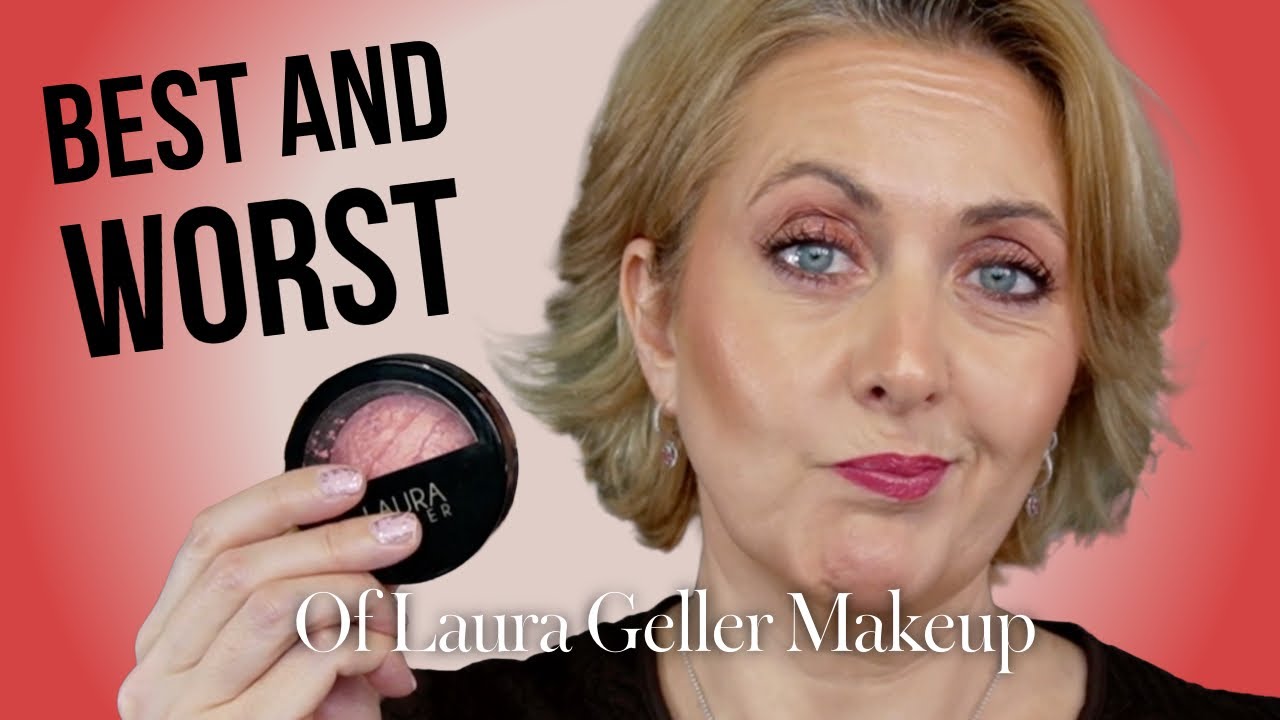
Baked makeup looks simple until you actually try it.
Knowing how to apply Laura Geller makeup correctly makes the difference between a patchy powder finish and that signature skin-like glow the brand is known for. The formulas are forgiving, but the technique is specific.
This guide covers the full application process, from Spackle primer through baked foundation, blush, highlighter, and eye products, including the brush types, layering order, and common mistakes that affect the final result.
No filler. Just the steps that actually work.
What Laura Geller Makeup Is

Laura Geller Beauty is a New York-based brand founded in 1997 by makeup artist Laura Geller. Its first product, a face contouring kit launched on QVC, sold out within minutes.
The brand is best known for two things: baked makeup formulas and Spackle primer. Both changed how people think about powder foundation routines and complexion prep.
The Baked Formula Difference
Baked on terracotta tiles in Italy, the products aren’t pressed or milled like standard powders. The wet mixture is poured, slow-dried, and fired. This gives the finish a different quality: more translucent, more skin-like, with pigment that lifts rather than sits.
It’s a big reason why the baked Balance-n-Brighten Color Correcting Foundation became the number one foundation on Amazon in 2023, according to Laura Geller Beauty’s own year-end report.
Coverage behaves differently with baked texture. A dry brush gives a light, sheer wash. A damp brush picks up more pigment and builds toward medium coverage. Most liquid foundations don’t give you that kind of range from one product.
Who the Brand Is For
Since 2021, Laura Geller Beauty has exclusively featured models over 40 in its marketing. That’s not just a brand decision. The formulas are built for skin that needs glow, not matte coverage. Heavy powders sit in lines. Baked formulas don’t.
Mintel’s 2023 mature beauty report found that 40% of makeup users over 40 describe their application skills as “basic.” Laura Geller’s products are built around that reality. Fewer steps, forgiving finishes, and products that blend without requiring a lot of technique.
The brand is now part of the AS Beauty portfolio alongside other female-founded lines.
| Product Category | Key Product | Formula Type |
|---|---|---|
| Foundation | Balance-n-Brighten | Baked powder, marbled |
| Primer | Spackle Under Make-Up Primer | Lightweight liquid/gel |
| Blush | Blush-n-Brighten | Baked powder, buildable |
| Highlighter | Baked Gelato Swirl | Baked shimmer powder |
Tools You Need Before Starting

Using the wrong tools with baked formulas is one of the most common reasons people say the products don’t work for them. The texture is different from pressed powder. It needs the right pressure and the right bristle type.
Brushes for Baked Products
Flat kabuki brush: Best for full coverage application. The dense, flat head picks up more product and presses it into skin evenly.
Fluffy dome brush: Better for a light, diffused finish. Less product pickup, more blending.
Natural vs. synthetic bristles: Natural bristles pick up baked powder more effectively. Synthetic brushes work better with creams and liquids. For baked foundation, go natural if you can.
A damp makeup sponge also works well for the Balance-n-Brighten, especially if you want a slightly more blended, skin-like result. Just press rather than drag.
What to Skip
Powder puffs trap too much product and tend to cake the formula. Flat synthetic foundation brushes used with baked powder often pick up almost nothing. And very stiff brushes can disrupt the marbled color pattern in the pan, mudding the shades together before they even hit your face.
Keep a separate brush for blush and a clean one for highlighter. Cross-contamination between warm and cool baked pigments changes the result.
How to Apply Spackle Primer

Spackle is one of the original makeup primers on the market. Laura Geller launched it before most brands were making dedicated primers, and the formula has been refined several times since.
Skip it and the baked formula will behave differently. Without a primer base, baked powder grips unevenly, especially on dry or textured skin.
Spackle Variants
Original Spackle (Under Make-Up Primer): Lightweight, slightly filling, works for most skin types.
Spackle Tinted: Adds a hint of color correction. Good if you have mild redness or want to even tone before foundation.
Spackle Hydrating: Built for drier skin. Adds a layer of moisture that keeps baked powder from looking dusty or sitting in fine lines.
Application Steps
- Use a pea-sized amount for the full face
- Press into skin with fingertips rather than rubbing
- Focus on the T-zone and any dry patches
- Wait 60 to 90 seconds before applying foundation
The wait time matters. Applying baked powder immediately over wet primer means the product sinks in rather than sitting on top, and your coverage ends up patchy.
Makeup artists working on mature skin consistently flag primer as the step most people skip and most people regret skipping. Veterans in the field note that without primer, mature or drier skin can literally absorb foundation, leaving a dry and uneven finish, according to coverage in SHEfinds.
How to Apply Baked Balance-n-Brighten Foundation

Balance-n-Brighten is the core product. Get this step right and everything else lands better.
The marbled design in the pan matters. Each color stripe corrects a different thing: pale tones add brightness, deeper tones absorb into skin more naturally, and the coral or peach shades correct blue-grey undertones. Pick up across all the stripes together.
Dry vs. Wet Brush Application
The two methods produce completely different results from the same product.
| Method | Result | Best For |
|---|---|---|
| Dry flat kabuki | Light, sheer coverage with natural glow | Everyday wear, daytime looks |
| Damp sponge | Medium coverage, more blended finish | Evening, more coverage needed |
| Damp brush | Intensified color pickup, fuller finish | Special occasions, photography |
Buffing in circular motions builds coverage gradually. That’s the point. Start light and add. Trying to go full coverage on the first pass usually ends up too heavy and patchy.
Choosing the Right Shade
Baked formulas oxidize slightly on the skin, usually going one to two shades warmer within the first 10 to 15 minutes. Test on the jawline and let it sit before committing to a shade.
Key tip: If you’re between shades, go lighter. The warmth will come. A shade that reads too light in the pan often looks perfect after oxidation.
The inner wrist test that many brands recommend doesn’t work well here. Jawline only.
How to Apply Laura Geller Blush-n-Brighten

Blush-n-Brighten uses the same baked format as the foundation. That means the same rules apply: pick up across the marbled shades, use a light hand, and build up.
A medium-sized fluffy blush brush works better here than a dense kabuki. You want diffusion, not concentration.
Placement by Face Shape
Most people apply blush on different face shapes by instinct, which is fine until the placement is off and the blush makes the face look wider or flatter than it should.
Round faces: Keep blush higher on the cheekbone, blending toward the temples. Avoid the apples entirely.
Oval faces: Standard apple-to-temple sweep works. The most forgiving face shape for blush placement.
Square faces: Blend up toward the hairline from mid-cheek. Keeps the angles softer.
Heart faces: Light application on the apples, heavier toward the temples to balance a narrower chin.
Layering Over Foundation
Baked blush sits differently over baked foundation than over liquid base. There’s less grab, which means the product blends more easily but also moves more. Build in thin layers, waiting a few seconds between passes.
Fallout is minimal with baked powder, but tapping the brush before application helps. Especially over a luminous foundation base, excess product can look muddy rather than glowy.
How to Apply Baked Highlighters and Gilded Honey Products

This is where people overdo it. Baked foundation already has glow built in. Adding highlight on top should feel like a small upgrade, not a second product fighting for attention.
The Baked Gelato Swirl Illuminating Powder and the Gilded Honey range are both designed to layer over the baked base. They were made to work together. Which also means they can easily become too much if you’re not careful.
Application and Placement
Brush application: Use a small tapered or fan brush. Pick up lightly and tap off excess. Apply to the tops of cheekbones, bridge of the nose, and cupid’s bow only.
Finger application: More product pickup, more intensity. Good for editorial looks or nights out. Too much for daytime.
The classic three-point placement: tops of cheekbones, bridge of nose, cupid’s bow. That’s it for daytime. For evening you can add the brow bone and inner corner of the eye.
Avoiding Overload
Already using Balance-n-Brighten? The luminous base finish counts as part of your highlight. You don’t need as much on top as you would with a matte or satin foundation.
A good test: step back from the mirror and look at your face from a normal distance. If the highlight reads from two feet away as highlight and not as natural skin luminosity, it’s too much for daytime wear.
The Gilded Honey products lean warm and golden. Pair them with the warmer shades in Balance-n-Brighten for a cohesive finish. Mixing a warm-toned baked highlighter with a cooler-toned foundation base makes the glow look disconnected from the skin rather than part of it.
Eye Makeup Application with Laura Geller Products

The eye products in the Laura Geller line are built around the same baked-formula logic as the face products. Layerable, forgiving, and designed to work with skin rather than sit on top of it.
Getting the eye look right starts with applying eyeshadow in the right order. Primer first, then base shade, then depth, then any shimmer or liner. Skipping steps here shows.
Baked Eyeshadow Technique
Dry application gives a sheer wash of color. Good for daytime. A wet brush, or one misted with setting spray before picking up product, pushes the pigment into an intense, foil-like finish.
Most people don’t realize how much range a single baked shadow has. The same pan can read as barely-there with a light fluffy brush or fully saturated with a damp flat shader.
Blending order matters:
- Apply the lightest shade across the lid and brow bone first
- Build a transition shade into the crease with a fluffy brush
- Add depth to the outer corner last
- Blend between each step before adding more product
Baked Eye Rimmer Application
The Baked Eye Rimmer is a pencil liner with a baked-powder-style finish. It’s softer than a standard kohl pencil and easier to smudge into a diffused line.
Apply directly to the upper or lower lash line, then use a flat liner brush or fingertip to smudge outward immediately. Wait more than 30 seconds and it’s much harder to blend.
For a tighter line, skip the smudging and just press the pencil directly against the root of the lashes. Works well as a waterline liner too, which standard baked products can’t do.
Liner and Mascara Finishing Steps
Laura Geller’s gel and pencil liner formulas need a sharp tip for precision. If the point has rounded off even slightly, the line gets thick and uncontrolled fast.
Mascara goes on last. For mature skin or anyone concerned about under-eye transfer, applying mascara after all eye powder products are set reduces the chance of fallout mixing with wet mascara and smudging.
One thing most people skip: curling lashes before mascara, not after. Curling over dried mascara can snap lashes.
Setting and Finishing the Look
Baked formulas have a built-in luminous finish. The goal at the setting stage isn’t to flatten that glow. It’s to lock the product layering in place without dulling it.
The global setting spray market hit $966.4 million in 2023, growing at 7.6% annually according to Grand View Research, which tells you how many people have learned that setting spray is not optional.
Setting Spray vs. Heavy Powder

Over-powdering is one of the most common finishing mistakes. Around 54% of makeup users apply too much setting powder, according to a 2024 makeup application survey, which is the exact opposite of what baked formulas need.
A light dusting on the T-zone is fine. But loading powder over a baked luminous base cancels out the glow finish entirely and can leave the look flat and dry. Not the point.
Setting spray is almost always the better choice here. Hold the bottle 8 to 10 inches from the face, mist in an X-and-T pattern, and let it dry without touching. High-quality sprays can extend wear by up to 16 hours, according to StansOut Beauty testing data.
Touch-Up Approach Throughout the Day
Baked products touch up cleanly. Pick up a small amount on a clean brush, tap off the excess, and press lightly onto the area that needs refreshing.
Avoid rubbing or buffing during touch-ups. The existing product has already bonded to the skin. Rubbing disturbs the layer rather than adding to it.
- Blotting papers before any powder touch-up
- Baked foundation brush, not a sponge, for spot coverage
- One light pass of setting spray after any touch-up to re-meld layers
Final Blending Pass
Before calling the look done, step back and check for edges. The most common place for a hard line to appear with baked products is the hairline and along the jaw.
A clean, dry fluffy brush swept lightly across both areas blends out any stark boundaries without disturbing the coverage underneath.
Check in natural light. Bathroom lighting hides a lot of things that become obvious outside. What looks blended under warm indoor lighting can show obvious lines in daylight.
Common Application Mistakes with Laura Geller Products
Most issues people run into with this line come down to the same few habits that work fine with other formulas but backfire with baked texture.
A 2024 study in the International Journal of Cosmetic Science found that 78% of makeup users make 3 to 5 basic application errors that cut wear time by 40 to 60%, with wrong brush technique and skipped primer among the top causes.
Too Much Product at Once
Baked formula is more pigmented than it looks in the pan. The marbled swirls are concentration zones, not decoration.
People who use baked products like pressed powder (heavy, sweeping strokes across the whole pan) end up with too much product on the brush, and too much on the face. The result is either patchy or muddy.
Fix: Light circular taps to pick up product, then tap the brush handle before applying. Build in two to three light passes rather than one heavy one.
Wrong Brush Pressure
Pressing too hard collapses the baked texture and pushes pigment into one spot instead of distributing it. The finish looks blotchy and uneven.
You want the brush to barely kiss the skin on the first pass. It’s a technique that takes a few tries to calibrate, but once you feel the difference, it’s obvious.
Light pressure, more passes. That’s the whole technique in four words.
Skipping Primer and Its Effect on Wear
Without Spackle, the baked powder has nothing to grip. It sits on the surface of skin, shifts through the day, and by midday looks patchy or faded.
SHEfinds coverage of professional MUAs describes this clearly: without primer, mature or drier skin can literally absorb foundation, leaving a dry, uneven finish. The same applies to baked powder. The Spackle formula was specifically designed to create the right grip for Laura Geller’s baked products, not just any primer.
Overblending Shimmer Products
Baked highlighters and Blush-n-Brighten contain shimmer that diffuses unevenly when overworked. Blend too aggressively and the shimmer particles spread beyond the target area, creating an unintended glow across the whole face rather than a focused highlight.
Press, don’t sweep. Especially with the Gilded Honey range.
| Mistake | What Happens | Fix |
|---|---|---|
| Too much product pickup | Patchy, heavy finish | Tap brush handle before applying |
| Heavy brush pressure | Blotchy, uneven pigment | Light passes, build gradually |
| No primer | Fading, shifting coverage | Apply and wait 60–90 seconds |
| Overblending shimmer | Diffused glow, no focus point | Press, don’t sweep |
FAQ on How To Apply Laura Geller Makeup
Do I need to use Spackle primer before applying Laura Geller foundation?
Yes. Spackle Under Make-Up Primer creates the grip that baked powder needs to sit evenly. Without it, the Balance-n-Brighten shifts through the day and looks patchy by midday. Wait 60 to 90 seconds after applying before moving on.
What brush works best for the Baked Balance-n-Brighten foundation?
A flat kabuki brush with natural bristles picks up baked formula most effectively. A damp sponge also works for more coverage. Synthetic brushes and powder puffs tend to pick up too little product or apply it unevenly.
Should I apply the Baked Balance-n-Brighten with a wet or dry brush?
Dry gives a sheer, luminous finish. Wet intensifies coverage and pigment. Most people use dry for everyday wear and a damp brush for evenings or occasions where more coverage is needed.
How do I choose the right shade of Balance-n-Brighten for my skin tone?
Test on the jawline, not the wrist. Baked formulas oxidize slightly on skin, going one to two shades warmer after 10 to 15 minutes. If you are between shades, go lighter. The warmth develops on its own.
How do I apply Laura Geller Blush-n-Brighten without fallout?
Use a medium fluffy blush brush, tap off excess product before touching your face, and build in thin layers. Pressing too hard or loading the brush causes fallout. Two light passes always beats one heavy application.
Can I use Laura Geller baked eyeshadow wet and dry?
Yes. Dry application gives a soft wash of color. A brush misted with setting spray before picking up the baked eyeshadow delivers intense, foil-like pigment. The same pan produces two very different results depending on your brush prep.
How do I stop my Laura Geller makeup from looking cakey?
Use Spackle first, apply foundation in light passes, and avoid heavy setting powder over baked products. Setting spray works better here than powder. Overloading any single step is what creates a cakey finish, not the formula itself.
Where should I apply Laura Geller Baked Gelato Swirl highlighter?
Tops of cheekbones, bridge of the nose, and cupid’s bow for daytime. Add the brow bone and inner corner of the eye for evening. Keep placement tight. The baked foundation already adds glow, so less highlighter is needed than with matte bases.
How do I apply the Laura Geller Baked Eye Rimmer without it smudging?
Smudge it immediately after application while it is still soft. Use a flat liner brush or fingertip and blend within 30 seconds. After that the formula sets. For a clean line, press directly against the lash root and skip blending entirely.
Does Laura Geller makeup work for mature or aging skin?
Yes, and it was built for it. Baked formulas sit on skin rather than settling into lines. The buildable coverage foundation and luminous finish work well for mature skin where heavy matte products typically emphasize texture and dryness.
Conclusion
This conclusion is for an article presenting how to apply Laura Geller makeup as a full routine, from primer to setting spray, not just a single product tip.
The baked formula layering technique rewards patience. Light brush pressure, the right tool for each step, and a proper Spackle base make the difference between a finish that lasts and one that fades before lunch.
The Blush-n-Brighten placement, wet versus dry eyeshadow application, and knowing when to skip heavy powder are small adjustments that change the result noticeably.
Get those right, and the buildable coverage and luminous skin finish the brand is known for actually deliver.

She started writing on the site after fielding the same questions from clients and friends often enough to just write the answers down: which red won't turn orange on a warm undertone, how to keep lipstick from feathering into fine lines, why a "12-hour" formula rarely survives dinner.
Every review on the site follows the same rule she uses with paying clients: wear it first, then decide if it's worth recommending.
- How to Choose Setting Powder for Your Skin Type - August 1, 2026
- How Long Does Eyeliner Last Before It Expires? - July 28, 2026
- What Is Contour and How Do You Apply It? - July 25, 2026


