

Summarize this article with:
Cream blush is one of those products that looks effortless on everyone else and inexplicably patchy on you. Sound familiar?
The formula is rich, the color payoff is real, and the dewy finish is genuinely hard to replicate with powder. But the blending technique, placement, and layering order all matter more than most guides admit.
Knowing how to apply cream blush correctly changes the result completely. This guide covers everything from tool selection and face shape placement to skin type adjustments and making the color actually last.
No filler. Just what works.
What Is Cream Blush

Cream blush is a pigmented, emollient-based cheek product that melts into the skin rather than sitting on top of it. The formula relies on oils and waxes to carry color, which is what gives it that soft, skin-like finish powder simply can’t replicate.
The global blush cream market was valued at USD 1.2 billion in 2024 and is projected to reach USD 2.5 billion by 2033, growing at a CAGR of 9.0% (Verified Market Reports). That growth is being driven largely by demand for natural, dewy-finish products.
In 2024, 80% of cream blush launches globally included vegan claims (Market Reports World). Clean formulations have gone from a niche request to a baseline expectation.
Cream Blush vs. Powder and Liquid Blush

The texture difference matters more than most people realize. Each format behaves differently on skin and works better under specific conditions.
| Format | Texture | Finish | Best For |
|---|---|---|---|
| Cream blush | Rich, emollient | Dewy, satin, natural | Dry, mature, normal skin |
| Powder blush | Dry, pressed or loose | Matte to satin | Oily, combination skin |
| Liquid blush | Water- or gel-based | Sheer, buildable | All skin types, high pigment |
Cream blush formulas are rich in emollients that make for an effortless application. The creamy texture glides across skin and melts into the complexion for a natural flushed finish (makeup artist Violette Serrat, via TODAY).
Liquid blush runs thinner and more pigmented. A single dot covers both cheeks. Cream blush is thicker, more forgiving, and easier to build gradually without going overboard.
Finish Types to Know
Dewy: The most common cream blush finish. Reflects light softly and reads as healthy, hydrated skin.
Satin: Sits between dewy and matte. Works well on combination skin because it doesn’t amplify oil.
Natural/skin-like: Sheer color payoff that mimics what your skin does when you exercise or step into cold air. This is the “no-makeup makeup” finish most people are after.
Who Cream Blush Works Best For
Dry skin and cream blush are a natural match. The emollient base adds a layer of moisture while depositing color, so the finish looks fresh instead of flaky.
Mature skin also responds well. Powder can settle into fine lines and emphasize texture. Cream melts over them. That said, the formula needs to be lightweight, not overly thick or greasy.
Oily skin can work with cream blush too, with some adjustments covered later. The assumption that cream blush is off-limits for oily skin is worth revisiting.
Tools for Applying Cream Blush

The tool you use changes the finish. Not dramatically, but enough to matter. Fingers, sponges, and brushes each interact with the formula differently, and knowing when to use each one saves a lot of guesswork.
Fingers
Body heat warms the product on contact, which helps it melt into skin faster and blend more cleanly than almost any tool.
This is the best option for a natural, flushed look. The warmth of your fingers helps the product melt into your complexion, making blending easier (e.l.f. Cosmetics). Good for a quick application and minimal-makeup days.
Downside: Less control over placement. If you go slightly too heavy, you’ll need a sponge to diffuse the edges.
Makeup Sponge
A damp Beautyblender or similar sponge gives you a sheerer, more diffused finish than fingers. The dampness dilutes the product slightly, which is actually useful when you want soft color payoff.
Makeup artist Laura Richelle notes that a damp sponge ensures a soft, even finish (IPSY). It’s also good for blending over uneven skin texture where fingers might drag.
Best use case: Blending cream blush over a full-coverage foundation base without disturbing the underneath layers.
Dense or Fluffy Brush
Dense brush: More control, more pigment deposit. Makeup artist Rohani recommends pressing a dense brush into the skin for a dewy, second-skin effect (IPSY).
Fluffy brush: Diffuses color over a wider area. Better for a soft, swept-on flush rather than a concentrated pop of color.
Charlotte Tilbury’s team notes that applying with fingers allows the formula to melt into skin, while a brush gives more precise placement control.
When to Skip the Brush
Brushes can drag across dry patches, especially if the skin isn’t well prepped. If your skin has visible flakiness or texture, fingers or a damp sponge will handle the application more cleanly.
Same goes for very textured skin. The pressing motion of fingers or a sponge works better than the sweeping motion of a brush, which can catch on uneven surfaces and make blending harder.
Where to Place Cream Blush on the Face
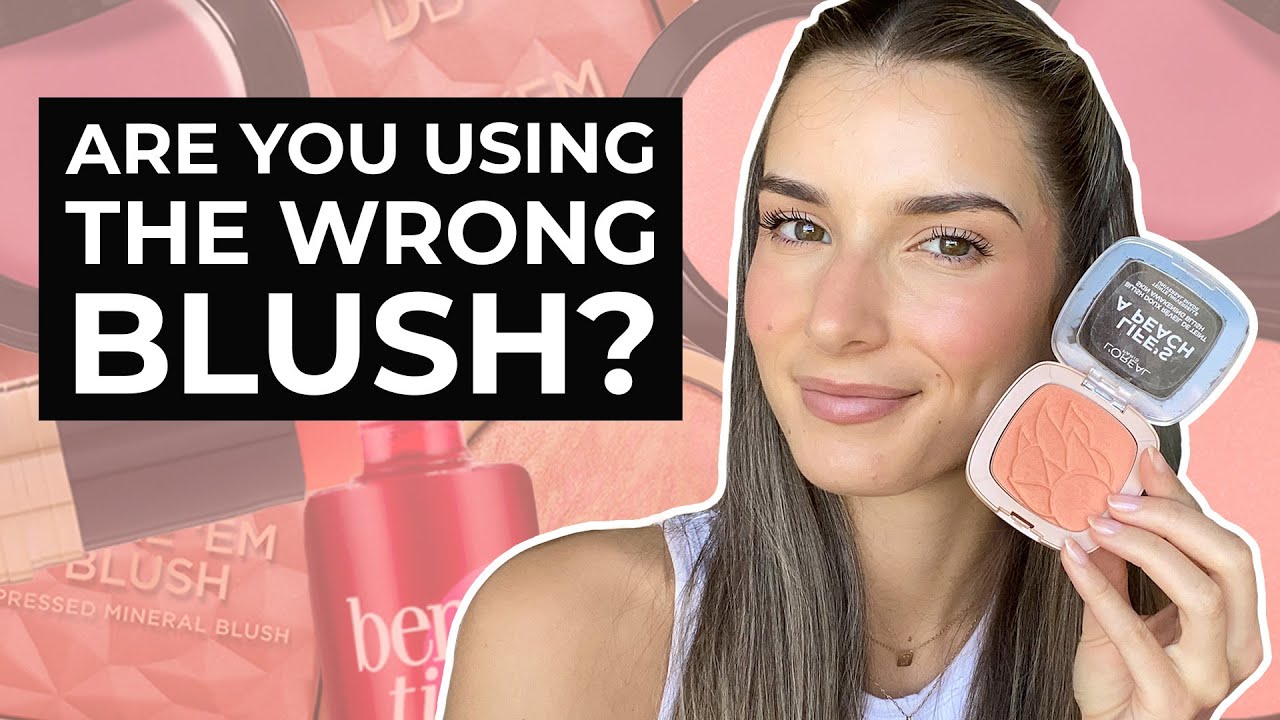
Placement determines whether blush reads as natural color or as something that was clearly applied. Most mistakes come down to putting it in the wrong spot for the look you’re going for.
The two-finger rule is a solid starting point. Hold two fingers alongside your nose. Blush placement should start just past those fingers (IPSY). This keeps color away from the center of the face, where it can make features look heavier.
Placement for a Natural Flush
Apply to the apples of the cheeks. These are the rounded parts that lift when you smile.
Tap color onto the apple and blend upward and outward toward the temples. Don’t stop at the cheek. Letting the color fade naturally into the hairline is what makes it look like it’s coming from your skin rather than sitting on it.
Brands like Rare Beauty and e.l.f. Cosmetics both recommend this upward sweep for achieving a realistic, lit-from-within flush.
Placement for a Sculpted Look
Apply higher on the cheekbones, closer to the temple. This placement creates a lifted effect and adds definition without the sharpness of contour.
The “draping” technique, which made a major comeback in 2024, takes this further. Color is swept from the temples down toward the cheekbones, following the bone structure. It reads as sculpted but still soft.
| Face Shape | Placement | Effect |
|---|---|---|
| Round | High on cheekbones, angled up | Lengthens, adds definition |
| Oval | Apples, blended toward temples | Balanced, natural flush |
| Heart | Lower on cheeks, closer to apples | Softens wider forehead |
| Square | Outer cheekbones, blended upward | Softens angular jawline |
For more detail on adjusting blush placement by face shape, check out this guide on applying blush on different face shapes.
How to Apply Cream Blush Step by Step

The actual application process is straightforward, but the order of steps and the amount of product used makes a bigger difference than most guides acknowledge. Too much too fast is the most common issue, and it’s also the hardest to fix once it happens.
Skin Prep
Moisturizer first, always. Cream blush needs something to grip and blend into. Applying it over dry, unprepared skin makes blending harder and color uneven.
Primer is optional but useful. A hydrating primer extends wear and creates a smooth base. Skip the powder primer before cream blush. Powder underneath creates texture that the cream formula will grab onto, making blending patchy.
e.l.f. Cosmetics notes that applying cream blush works best on a fresh, dewy base. Applying face powder before cream blush can create unwanted texture.
Product Amount and First Application
Start with less product than you think you need. A pea-sized amount applied with fingers, or a light swipe onto a brush, is enough for the first pass.
Tap it onto the placement zone (apples or cheekbones depending on your look). Don’t swipe or drag. Tapping presses the product into the skin rather than moving it around the surface.
Build in thin layers. One layer, assess, then add more if needed. Going back in with a second layer is easy. Removing too much product mid-look is not.
Blending Technique
Blend in circular motions or upward strokes, depending on your tool. The key is working the edges outward so there’s no visible line where the blush ends.
If using fingers, the warmth will do most of the work. If using a brush, use the outer edge to feather out any hard lines. A common mistake is stopping blending too early, right at the edge of the color deposit. Keep going until the color fully fades into bare skin.
Building Intensity
Once the first layer is blended, check the color in natural light if possible. Artificial lighting, especially warm bathroom lighting, makes blush look less pigmented than it actually is.
If you want more, add a second small layer directly on top of the first. The formula will pick up and blend with itself. Avoid adding product to unblended edges since it creates a ring of color rather than a smooth gradient.
How to Layer Cream Blush with Other Products

Where cream blush fits in your routine isn’t fixed. Both approaches, before and after foundation, work fine. The results are just different, and knowing what each method does helps you choose the right one for the finish you’re after.
Cream Blush Before Foundation
Applying blush directly to moisturized or primed skin and then going over it with a sheer foundation or skin tint creates a flush that looks like it’s under the skin. More realistic. More “your face but better.”
This works best with lightweight foundations. A full-coverage formula on top will cover the blush almost completely, which defeats the point. For a sheer, natural finish, this ordering makes sense.
Cream Blush After Foundation
The more common approach. You apply foundation first, then add cream blush on top. This gives you more control over placement and lets you see exactly where the color lands.
Works well with: Most foundations, skin tints, and BB/CC creams, as long as the base is still slightly tacky when you apply.
Avoid: Applying cream blush over a fully set, powdered foundation. The cream formula won’t blend into a powdered surface cleanly and may pill or sit unevenly on top.
Layering Cream on Cream
Cream contour plus cream blush is a great combination. Apply contour first, blend it out, then add blush. The two formulas blend together at the edges naturally, which creates a more cohesive cheek look than trying to layer cream over powder.
For a full cream-based routine, the general order is: primer, foundation, concealer, cream contour, cream blush, cream highlight, then setting powder only where needed. If you want more detail on building this kind of routine, using cream contour as a base layer is worth understanding first.
Setting Cream Blush with Powder
Setting powder over cream blush locks in the color and extends wear, but it also changes the finish. A translucent powder tones down the dewy effect. That can be intentional (for oily skin) or a trade-off worth avoiding (for dry skin going for maximum glow).
If you want the dewy finish but also need the wear time, a light dusting of translucent powder directly on the blush, followed by a setting spray, gives you both. The spray reactivates the dewy look after the powder has done its job of setting the formula. Check the guide on applying setting powder for more detail on technique.
A popular technique is layering a matching powder blush over the cream version. This gives extended wear without losing natural-looking color payoff.
Cream Blush on Different Skin Types

The formula stays the same, but the application technique shifts depending on how your skin behaves. Getting this right is the difference between blush that looks like it belongs on your face and blush that just sits on top of it.
Dry Skin
Cream blush is ideal for dry skin. The emollient base adds hydration while depositing color, and the dewy finish reads as healthy rather than flat.
- Apply over a hydrating moisturizer and dewy primer
- Use fingers or a damp sponge, not a dry brush
- Skip setting powder or use only the lightest possible layer
- Avoid formulas with alcohol, which can deepen dryness
Products enriched with hyaluronic acid, jojoba oil, or shea butter work especially well here. They nourish skin during application rather than just sitting on the surface.
Oily Skin
Oily skin doesn’t have to avoid cream blush entirely. The key is choosing a lightweight, water-based formula rather than a thick, oil-heavy one.
Set underneath: Apply a mattifying primer before blush in oily zones. This gives the cream formula something to grip.
Set on top: A light translucent powder over the finished blush cuts shine and extends wear without completely flattening the color. For detailed technique, the guide on applying translucent powder covers the right amount to use.
Applying blush higher on the cheekbones, away from oilier zones near the nose, also helps with longevity.
Mature Skin
Cream blush and mature skin are a genuinely good match. Powder can settle into fine lines and make texture more visible. Cream melts over them. The finish looks fresher and more natural at any age.
Use a brush rather than heavy finger pressure. Dragging the skin during application can temporarily emphasize lines. Light, tapping motions with a soft brush or a damp sponge keep the application gentle.
Avoid formulas that are very thick or waxy. These can sit on top of skin rather than blending in, which looks heavy. A lightweight, satin-finish cream blush with some slip to it blends most cleanly on mature skin.
Combination Skin
Apply cream blush only to drier cheek zones and avoid the T-zone. You can also layer a thin powder blush over the cream in oilier areas to control shine while keeping the finish on dry areas dewy.
In colder months when combination skin skews drier, cream blush alone works fine. In summer when oil production increases, adding a powder blush on top extends wear significantly. Adjust the technique by season rather than committing to one fixed approach.
Common Cream Blush Mistakes

Most cream blush problems come down to three things: too much product, wrong placement, and applying it over an incompatible base. All three are fixable.
Applying Too Much Product at Once
Cream blush is more pigmented than it looks in the pot. A pea-sized amount is genuinely enough for both cheeks on the first pass.
The fix: Start on the back of your hand, not directly on your face. Pick up a small amount with your brush or finger, assess the color on your hand, then apply.
Go-To Skincare notes that cream blush types run the risk of setting fast and becoming stubbornly difficult to blend, so working quickly on one cheek at a time prevents uneven application.
Wrong Placement for Face Shape
Applying blush too low drags the face down. Applying it too close to the nose makes features look heavier. Both are extremely common.
Placing color too low creates an aging effect. The fix is blending upward from the apples toward the temples, following the natural lift of the cheekbone (Jil Goorman Beauty, 2024).
Quick reference by goal:
- Natural flush: apples, blended upward
- Lifted look: high on cheekbones, toward temples
- Avoid: below the apples, close to nose
Applying Over a Powdered Base
This one trips people up constantly. Cream blush applied over a fully powdered face grabs onto the powder, creates patchiness, and is almost impossible to blend cleanly.
Go-To Skincare confirms: applying cream over powder causes the formula to drag, pile, and look blotchy rather than natural. Apply cream products before setting with powder, not after.
Correct order: foundation, cream blush, then selective powder only where needed.
Not Blending the Edges
Most people stop blending too early. The color deposit looks blended in the center but has a visible ring where it ends. This is what makes blush look “applied” rather than natural.
Kryolan’s professional guidance notes that brushes which are too small create visible texture when attempting to blend. A medium, slightly tapered brush with soft bristles handles edge blending best.
Keep blending well past where you think you need to. The goal is a full fade into bare skin with no defined edge.
Using the Wrong Tool for the Formula
A dry, stiff brush on a rich cream formula drags skin and deposits product unevenly. A heavy finger application on thin, delicate skin can place too much product in one spot without giving you time to diffuse it.
| Formula Type | Best Tool | Avoid |
|---|---|---|
| Rich, thick cream | Fingers or damp sponge | Dry stiff brush |
| Lightweight cream | Dense brush or fingers | Overly fluffy brush |
| Cream stick | Fingers, blend immediately | Waiting too long to blend |
Patrick Ta’s professional team recommends using a dense brush to press cream pigment into skin for a seamless blend, rather than sweeping it across the surface.
Skipping Skin Prep
Cream blush on dry, unprepped skin looks patchy within an hour. The formula needs something to grip and blend into.
Cleanse, moisturize, and apply primer before any cream product. L’Oreal Paris confirms that even the best blush formula won’t perform well on unprepared skin. Skipping prep is one of the most preventable application mistakes.
How to Make Cream Blush Last Longer

Wear time is the main reason people abandon cream blush for powder. It doesn’t have to be. The right layering and setting sequence makes a real difference.
Blush fades from a combination of skin contact (touching your face, holding a phone), sweat, and humidity. Cream formulas are more prone to this than powder because they interact with skin oils (Milk Makeup Director of Artistry Sara Wren).
Primer as a Base
Gripping primer is the single most effective step for extending cream blush wear. A tacky, gripping formula gives the cream something to lock into rather than sitting on the surface of skin.
Makeup artist Caroline Thunstedt (via IPSY) confirms that applying blush after a great primer always extends wear, especially in warmer months when sweat and humidity accelerate fading.
For oily skin, a mattifying primer in cheek zones works best. For dry skin, a hydrating primer keeps the emollient formula from moving around on a parched surface.
Setting Powder Over Cream
A light dusting of translucent powder directly over blended cream blush locks in the pigment and cuts the rate of fading. This does tone down the dewy finish slightly.
For detailed technique on the right amount to use, the guide on applying setting spray covers how to layer spray and powder together without flattening the finish.
The “sandwich” method works well: light translucent powder, then setting spray on top. The spray reactivates the glow after the powder has done its job of setting the formula.
Layering Powder Blush Over Cream
Makeup artist Caroline Thunstedt recommends using a creamy formula as the base layer, then going over it with a matching powder blush on the high points of the cheeks. This gives extended wear without completely changing the finish.
The two formulas bind to each other rather than sitting independently on skin. Color lasts noticeably longer compared to either formula used alone.
Key detail: match the powder blush shade as closely as possible to the cream underneath. A mismatch in tone will look patchy as the top layer fades.
Touch-Up Methods During the Day
Cream blush is harder to touch up than powder. You can’t just dust more on top mid-day without risking patchiness over skin that’s already produced oil.
- Blot first with a tissue or blotting paper to remove excess oil
- Dust translucent powder lightly over the cheek area
- Then add a small amount of powder blush on top to refresh color
Trying to apply cream directly over oily mid-day skin almost always looks streaky. The blot-and-powder step first makes the surface behave like a fresh base again, which is what makes the touch-up work.
FAQ on How To Apply Cream Blush
Do you apply cream blush before or after foundation?
After foundation, in most cases. Apply it while the base is still slightly tacky so the cream blends in cleanly.
Applying over a fully set, powdered foundation causes pilling and uneven blending.
What is the best tool for applying cream blush?
Fingers work well for a natural, flushed finish. Body heat melts the formula into skin quickly.
A dense brush gives more controlled pigment placement. A damp sponge sheers out color for a softer effect.
How much cream blush should I use?
Less than you think. A pea-sized amount covers both cheeks on the first pass.
Build in thin layers. Color payoff is easier to add than remove once it’s on skin.
Where exactly do you place cream blush on the face?
On the apples of the cheeks for a natural flush, blended upward toward the temples.
For a sculpted look, apply higher on the cheekbones. Avoid placing blush too close to the nose.
Can you use cream blush on oily skin?
Yes. Choose a lightweight, water-based formula and apply a mattifying primer first.
Set with translucent powder on top to reduce shine and extend wear time throughout the day.
How do you stop cream blush from looking patchy?
Prep skin with moisturizer before applying. Dry, unprepped skin is the main cause of uneven blending.
Also avoid applying cream blush over a fully powdered base, which causes dragging and patchiness.
How do you make cream blush last longer?
Start with a gripping primer. After blending blush, dust translucent powder on top, then finish with setting spray.
Layering a matching powder blush over cream blush also extends wear noticeably.
Is cream blush good for mature skin?
Yes. Cream formulas melt over fine lines rather than settling into them the way powder does.
Use a soft brush or damp sponge with light tapping motions. Avoid dragging, which can temporarily emphasize texture.
Can you apply cream blush with your fingers?
Absolutely. Fingers are actually one of the best tools for cream blush application.
The warmth from your fingertips helps the emollient formula melt into skin faster and blend more naturally.
What is the difference between cream blush and powder blush?
Cream blush sinks into skin for a dewy, natural finish. Powder blush sits on top and gives a more matte result.
Cream suits dry and mature skin. Powder works better for oily or combination skin types.
Conclusion
This conclusion is for an article presenting how to apply cream blush in a way that actually holds up across skin types, face shapes, and full makeup routines.
The formula rewards preparation. Good skin prep, the right tool, and correct product order matter more than the blush itself.
Blush placement shifts the entire result. High on the cheekbones reads sculpted. On the apples, blended upward, reads fresh and natural.
Dry skin, oily skin, mature skin – each needs a slightly different approach, but none of them are incompatible with cream blush.
Set it with translucent powder, finish with setting spray, and the color payoff lasts. It takes one or two tries to get the blending technique right. After that, it becomes second nature.

- What Is Skin Tint and Why Everyone Is Obsessed - July 11, 2026
- What Is Foundation and How Do You Choose One? - July 6, 2026
- How to Make Blush Last Longer - July 3, 2026


