

That crumbling tip is not your fault. Most people have no idea how to sharpen a NYX Jumbo Eye Pencil correctly because this chunky, wax-based cosmetic crayon behaves nothing like a standard eyeliner.
The wrong sharpener size, a warm formula, too much pressure. Any one of these kills the tip before you even get started.
This guide covers everything: the right jumbo sharpener size, the freezer trick that prevents breakage, how to handle matte versus glitter finishes, and what to do when the tip keeps snapping.
By the end, sharpening this pencil will take two minutes, not ten.
What the NYX Jumbo Eye Pencil Is

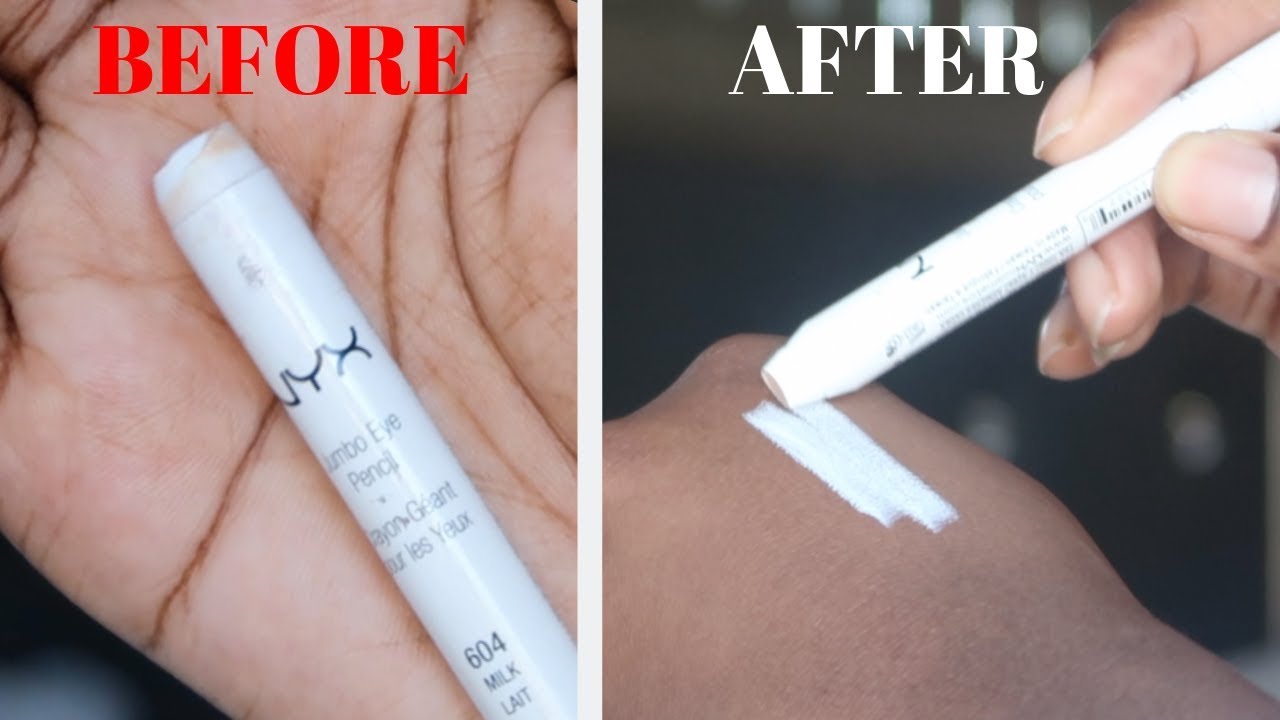
The NYX Professional Makeup Jumbo Eye Pencil is not a regular eyeliner. It is a thick, wax-heavy crayon-style pencil built to work three ways: as an eyeshadow, an eyeliner, and an eye primer.
That multi-use format comes with a trade-off. The formula is soft. Very soft. And that softness is exactly what makes sharpening it tricky if you go in without the right setup.
The Formula That Makes It Different
Wax-heavy base: The pencil is built on candelilla wax, microcrystalline wax, carnauba wax, and beeswax. Multiple wax types stacked together create a creamy, blendable texture.
That combination of waxes gives you the buttery glide that the pencil is known for. It also means the formula behaves more like a cosmetic crayon than a traditional eyeliner pencil.
At room temperature, especially in warm environments, this formula softens fast. That matters a lot when you try to sharpen it.
Why This Format Confuses First-Time Buyers
A lot of people assume the pencil twists up. It does not. The barrel is fixed plastic, and the only way to access fresh product is to sharpen it down.
NYX confirms this directly: the Jumbo Eye Pencil does not retract and is not retractable. You sharpen it, plastic casing and all, and the shavings come off with each turn.
Knowing this upfront saves you from trying to force the base, push the product up, or worse, chipping at the tip with your fingers.
The Right Sharpener Size for NYX Jumbo Eye Pencil

Wrong sharpener size is the number one reason the tip breaks. Standard eyeliner sharpeners are designed for slim pencils, roughly 8mm in diameter. The NYX Jumbo sits around 10 to 12mm. That gap matters.
If you force a jumbo pencil into a standard hole, the barrel jams before the blade reaches the product evenly. The tip cracks instead of shaving cleanly.
What Size You Actually Need
Jumbo or large-barrel opening is what you are looking for. Most dual-hole cosmetic sharpeners cover both sizes, one slot for slim liners and one for chunky pencils.
A sharpener with two holes is honestly just the smarter purchase if you use any mix of standard and jumbo pencils. One tool handles everything.
| Pencil Type | Approx. Diameter | Sharpener Needed |
|---|---|---|
| Standard eyeliner / lip liner | ~8 mm | Standard hole |
| NYX Jumbo Eye Pencil | ~10–12 mm | Jumbo hole |
| Oversized eye crayons | 12 mm+ | Jumbo or XL hole |
Sharpeners That Fit
The NYX Professional Makeup 2-in-1 Dual Sharpener is the obvious first choice. It has a high-quality steel blade and a built-in shavings collector, and it is made to fit both jumbo and standard NYX pencils.
Outside of NYX’s own tool, the Sephora Collection dual sharpener and the KVD Beauty large sharpener both work. The Benefit Cosmetics sharpener fits well too. Budget option: the Wet n Wild dual sharpener has a large hole and costs around $2 to $3.
One thing to avoid: electric sharpeners. They are too fast and aggressive for a soft wax formula and will shred the tip instead of shaving it cleanly.
How to Sharpen NYX Jumbo Eye Pencil Without Breaking It

The process is straightforward once you know what the formula needs. Temperature, angle, and pressure are the three things that determine whether you get a clean tip or a crumbled mess.
Chill the Pencil First
This is the step most people skip, and it makes the biggest difference. Put the pencil in the freezer for about 10 minutes before sharpening.
The wax formula firms up in the cold. A firmer pencil tip moves against the blade cleanly instead of dragging, smearing, or breaking off.
Community advice from both Beautylish forums and Sephora Beauty Insider consistently points to this trick as the single most reliable fix for tip breakage. MasterClass’s eyeliner sharpening guidance recommends refrigerating pencils 10 to 15 minutes before sharpening soft formulas.
Pro note: Freezer is fine for 10 minutes. Fridge works too, but takes longer (15 to 20 minutes). Either way, let it chill before you touch the sharpener.
Angle and Pressure Technique
Insert the pencil nearly horizontal into the jumbo hole, keeping the angle low. A steep angle forces uneven pressure on one side of the tip and causes cracking.
Short, slow rotations. One full rotation, then stop and check the tip. Repeat only if needed.
MasterClass advises rotating the sharpener around the pencil rather than the pencil inside the sharpener. This is especially useful for very soft formulas because it keeps the pressure more consistent and controlled.
Do not push the pencil forward into the blade as you rotate. Let the sharpener do the work. Added pressure is how tips snap.
How Sharp Is Sharp Enough
Aim for a short, rounded point rather than a fine needle tip. A needle-fine point on a wax-based pencil will break the moment it touches skin.
For liner work: a slightly pointed tip with a clean edge is enough. For shadow or primer application: the blunt, freshly sharpened surface works perfectly without any extra sharpening.
Stop before you think you need to. Oversharpening wastes product fast, especially with formulas this soft.
Best Sharpeners for NYX Jumbo Eye Pencil

A dull blade or wrong-size sharpener ruins tips, wastes product, and makes the whole process frustrating. These are the tools worth using.
Top Picks
NYX Professional Makeup 2-in-1 Sharpener is the safest choice. Purpose-built to fit NYX pencils, steel blade, built-in shavings catcher. Runs $5 to $8 at most retailers.
Urban Decay Grindhouse Double-Barrel Sharpener is another well-regarded option among heavy pencil users. It fits jumbo sizes and comes with a small cleaning tool to clear the barrel between uses.
Sephora Collection Pencil Sharpener (dual hole) is a clean, no-fuss option for around $6. No enclosed shavings catcher, which actually makes it easier to keep clean.
| Sharpener | Fits Jumbo | Blade Type | Approx. Price |
|---|---|---|---|
| NYX 2-in-1 Dual Sharpener | Yes | Steel | ~$4–5 |
| Urban Decay Grindhouse | Yes | Steel (carbon-infused) | ~$10–12 |
| Sephora Collection Dual | Yes | Steel | ~$6 |
| Wet n Wild Dual Sharpener | Yes | Steel | ~$1–3 |
MasterClass recommends looking specifically for stainless steel blades in cosmetic sharpeners. Steel stays sharper longer and does not rust the way standard blades can. A dull blade is the main cause of tip tearing and crumbling on soft formulas.
What to Do When the Tip Keeps Breaking

Consistent tip breakage is almost always one of four things. None of them require buying a new pencil.
Diagnosing the Problem
Pencil too warm: The most common cause. Return it to the freezer for 10 minutes and try again.
Blade is dull: A worn blade drags instead of cuts. Wipe the blade with a cotton swab dipped in rubbing alcohol after every few uses. If it is still tearing rather than shaving, replace the sharpener.
Wrong hole size: If the pencil wobbles inside the sharpener, the opening is too large. If you have to force it in, the opening is too small. Both cause uneven sharpening and breakage.
Too much pressure or speed: Pressing forward while rotating, or spinning fast, are both habits that snap soft tips. Slow and light is always the right move here.
When the Tip Breaks Off Inside the Sharpener
This happens. Do not keep rotating when you feel resistance. Stop, pull the pencil out, and clear the shavings from the barrel before reinserting.
Sephora Beauty Insider community members note that packed shavings left inside the barrel act as a block, causing the next tip to hit a wall of old product instead of a clean blade path.
Clear the sharpener, chill the pencil again, and try with one slow rotation at a time.
Sharpening Different NYX Jumbo Eye Pencil Finishes
Not all NYX Jumbo shades behave the same way. The finish affects formula softness, and formula softness affects how carefully you need to sharpen.
Matte Shades
Matte formulas tend to be the firmest of the three finish types. Less added shimmer material means a more stable wax structure.
Standard chill-and-sharpen approach works well here. One or two slow rotations, low angle, done.
Shimmer Shades
Shimmer shades are slightly softer than matte. The mica particles that create the shimmer effect are dispersed throughout the wax, and this slightly changes the texture of the formula under the blade.
- Chill time matters more here (go for the full 10 minutes)
- Use lighter pressure than you would with matte shades
- Stop at a short, blunt point rather than trying for precision
Glitter Shades
Glitter formulas are the most fragile. The polyethylene terephthalate particles that create the glitter effect are mixed into a softer base, and the tip crumbles more easily under blade pressure.
Best approach for glitter shades: freezer for 10 to 15 minutes, one very slow half-rotation, check tip. Repeat only if absolutely necessary. A slightly rounded glitter tip still applies color evenly and causes far less product waste than over-sharpening.
If you are using a glitter shade primarily as a lid wash or eyeshadow crayon, skipping the sharpen entirely and using the blunt tip is a perfectly reasonable call. The approach you take with eye makeup overall can shift based on whether precision or coverage is the goal.
Keeping the Sharpener and Pencil in Good Condition

A clean sharpener and a properly stored pencil work together. Let one slip and the other stops performing well.
Jean Coutu beauty guidance notes that pencil liners last around 12 months when sharpened regularly and the sharpener is kept clean just as often. Ignore either, and that shelf life drops fast.
Cleaning the Sharpener Blade
After every 2 to 3 uses: tap out the shavings over a bin, then wipe the blade with a dry tissue to remove loose wax buildup.
For a deeper clean, dip a cotton swab in rubbing alcohol and run it along the inside of the blade compartment. MasterClass and Beautylish both point to this as the standard method used by working makeup artists.
Let the sharpener dry fully before using it again. Trapping moisture in an enclosed metal blade causes rust, which dulls the cutting edge faster than any amount of normal use.
Storing the Pencil After Sharpening
Cap it immediately. The wax formula picks up room temperature fast, and an uncapped freshly sharpened tip softens within minutes in a warm bathroom.
Storage options ranked by effectiveness:
- Upright in a cool drawer (cap on, away from direct sunlight)
- Fridge side shelf in a small cup (makeup blogger Karen at Makeup and Beauty Blog has done this for years with eye and lip liners)
- Cool, dry makeup bag, away from heat sources
Cosmetics storage guidance from IBA Cosmetics recommends keeping wax-based pencils between 60 and 75 degrees Fahrenheit. Above 80 degrees, most wax formulas begin to soften structurally, not just at the tip.
When to Replace the Sharpener
A blade that tears the product rather than cutting it cleanly is past its useful life.
Other signs: the tip comes out jagged even after chilling the pencil, you feel resistance mid-rotation, or the blade has visible discoloration. Beautylish’s expert, makeup artist Rebecca Restrepo of Elizabeth Arden, notes a well-maintained personal sharpener lasts roughly a year with regular cleaning.
Replacement sharpeners for the NYX Jumbo run $5 to $14. Not worth nursing a dull blade past its useful life when the cost of wasted product from broken tips adds up fast.
Common Mistakes When Sharpening NYX Jumbo Eye Pencil
Most sharpening problems come down to the same handful of errors. All of them are avoidable.
| Mistake | What Happens | Fix |
|---|---|---|
| Skipping the chill step | Tip crumbles or smears | Freezer, 10–15 min |
| Wrong sharpener size | Pencil jams, tip snaps | Use jumbo hole only |
| Too much pressure | Formula breaks off in chunks | Light rotation, no pushing |
| Over-sharpening | Wasted product, weak tip | Stop at a short blunt point |
| Dirty blade | Dragging, uneven shavings | Clean after every 2–3 uses |
Skipping the Temperature Prep
This is the mistake that causes the most wasted product. A warm pencil tip meets a blade and collapses instead of shaving.
Amazon buyer Q&A for the NYX Jumbo consistently lists freezing the pencil as the single most effective fix for tip breakage. It works because the wax firms up and cuts cleanly instead of dragging.
Rule of thumb: if the ambient temperature is above 72 degrees Fahrenheit, always chill before sharpening. No exceptions for the glitter or shimmer finishes.
Forcing a Fine Point on a Soft Formula
A needle tip on a wax-based eye pencil is not realistic. The formula is too soft to hold it.
Aiming for a precise needle point on a product like the NYX Jumbo results in repeated breakage, wasted sharpening attempts, and a lot of frustration. A short, slightly rounded tip delivers clean eyeliner lines and smooth shadow application without the crumbling.
If you need a very fine liner point for precise eyeliner application, a different product type will serve you better. The NYX Jumbo is built for blending and coverage, not ultra-precise lines.
Using a Dirty or Packed Sharpener
Packed shavings inside the barrel are one of the most overlooked causes of tip breakage.
When the shavings compartment fills up, the pencil tip hits a wall of compacted old product before it reaches the blade. The result looks like the tip “exploded” inside the sharpener. It did not break spontaneously. It jammed.
Empty the sharpener every two to three uses. Wipe the blade with rubbing alcohol weekly if you use the pencil regularly. This one habit fixes most repeat sharpening problems, according to Beautypied’s sharpening guide for the NYX Jumbo specifically.
Sharpening in Warm Environments
Bathroom counters near hot showers, bags left in cars, or desks near windows in summer all create conditions that soften the pencil before you even start.
The wax formula in the NYX Jumbo responds to ambient heat, not just direct handling. Keeping the pencil warm all day and then trying to sharpen it at room temperature is functionally the same as skipping the chill step entirely.
If your usual sharpening spot runs warm, keep the pencil in a cool spot between uses. The difference in how cleanly it sharpens is significant.
FAQ on How To Sharpen NYX Jumbo Eye Pencil
Does the NYX Jumbo Eye Pencil need a special sharpener?
Yes. The pencil barrel is too wide for a standard eyeliner sharpener. You need a jumbo-hole cosmetic sharpener. The NYX Professional Makeup 2-in-1 Dual Sharpener is purpose-built for it, but any large-barrel cosmetic sharpener with a steel blade works.
Why does the tip keep breaking when I sharpen it?
The wax-based formula is soft at room temperature. The tip crumbles under blade pressure instead of shaving cleanly. Chill the pencil in the freezer for 10 minutes before sharpening. That firms the formula and prevents breakage almost entirely.
Can I sharpen the NYX Jumbo Eye Pencil if it has a plastic barrel?
Yes. The plastic casing sharpens along with the product inside. It shaves off like pencil shavings. Many buyers assume it twists up. It does not. A jumbo cosmetic sharpener handles the full plastic barrel without any issues.
How sharp should the tip actually be?
Aim for a short, slightly rounded point, not a fine needle tip. The soft wax formula cannot hold a needle point. A clean, blunt tip still gives you precise liner application and applies shadow or primer coverage smoothly.
Does the finish type affect how I sharpen it?
Yes. Matte shades are firmest and easiest to sharpen. Shimmer shades are softer. Glitter finishes are the most fragile and need the full freezer chill plus the lightest possible rotation pressure. One slow half-turn, then check the tip.
How do I stop wasting so much product when sharpening?
Two things cause product waste: skipping the chill step and over-sharpening. Freeze the pencil first, then use one slow rotation at a time. Stop as soon as the tip looks clean. Short bursts beat continuous spinning every time.
Can I use a regular school or office pencil sharpener?
No. Standard sharpeners are designed for hard graphite. They are too aggressive for soft cosmetic formulas and the blade angle is wrong for wax-based pencils. Using one will tear the tip, crack the barrel, and waste a significant amount of product.
How often should I clean my pencil sharpener?
Wipe the blade with a dry tissue after every 2 to 3 uses. For a deeper clean, use a cotton swab dipped in rubbing alcohol once a week. Packed shavings and waxy buildup dull the blade and cause tip jamming.
What is the best way to store the pencil after sharpening?
Cap it immediately after sharpening. Store in a cool, dry spot away from heat and sunlight. A cool drawer or fridge shelf works best. Wax formulas soften fast in warm environments, which makes the next sharpening session harder.
Is the NYX Jumbo Eye Pencil worth sharpening or should I depot it?
Both are valid. Sharpening is faster and keeps the pencil portable. Depoting into a small jar gives you brush access and less product waste over time. For everyday NYX Jumbo Eye Pencil use as a liner or primer, sharpening is the more practical option.
Conclusion
This conclusion is for an article presenting how to sharpen NYX jumbo eye pencil without the guesswork that ruins tips and wastes product.
The fixes are simple. A large-barrel cosmetic sharpener, 10 minutes in the freezer, light rotation pressure, and a clean blade cover almost every sharpening problem this pencil throws at you.
Match the sharpener hole to the pencil barrel diameter. Adjust your technique based on whether you are working with a matte, shimmer, or glitter finish.
Keep the sharpener blade clean, store the pencil capped in a cool spot, and you will stop fighting the formula every time you need a fresh tip.
Sharp pencil. Clean lines. Less waste. That is the whole method.

She started writing on the site after fielding the same questions from clients and friends often enough to just write the answers down: which red won't turn orange on a warm undertone, how to keep lipstick from feathering into fine lines, why a "12-hour" formula rarely survives dinner.
Every review on the site follows the same rule she uses with paying clients: wear it first, then decide if it's worth recommending.
- How to Choose Setting Powder for Your Skin Type - August 1, 2026
- How Long Does Eyeliner Last Before It Expires? - July 28, 2026
- What Is Contour and How Do You Apply It? - July 25, 2026


